In this article, you will learn about drawing in Excel. More specifically, you will learn about the basics, drawing flow charts, and free-form drawings. You can use the Shapes feature inside the Insert tab to draw in Excel. Although Excel is not designed as a graphic design application, you can do basic drawings with it. You can also draw freehand in Excel using the Draw tab.
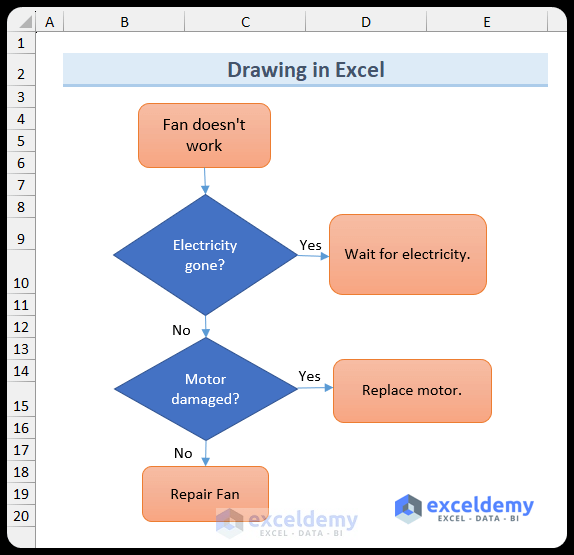
You can use the flowchart to show the decision points and visualize various processes. This provides a sequence of events, which aids in understanding a process more efficiently.
Download the Practice Workbook
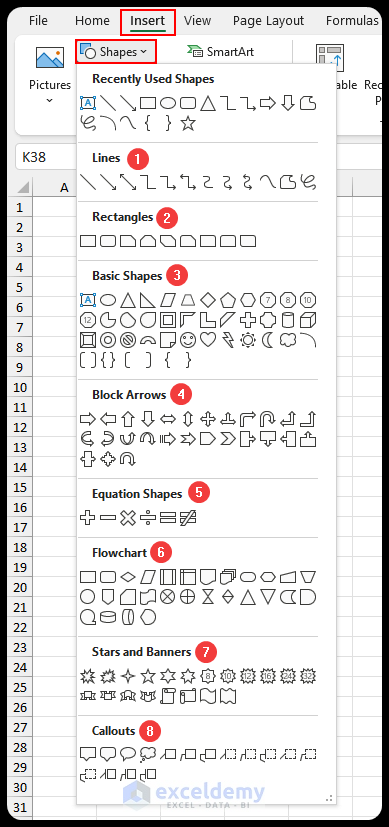
List of Basic Shapes of Drawing Tools in Excel
- Lines: Used to connect different parts of a drawing.
- Rectangles: Usually shows the main process field.
- Basic Shapes: Used for decision-making illustration.
- Block Arrows: Shows the direction for processes.
- Equation Shapes: Shows the mathematical equation.
- Flow Chart: This is inserted to show a process from start to finish.
- Stars and Banners: Decorative items.
- Callouts: Used for notes and comments.
How to Insert a Basic Shape Drawing in Excel
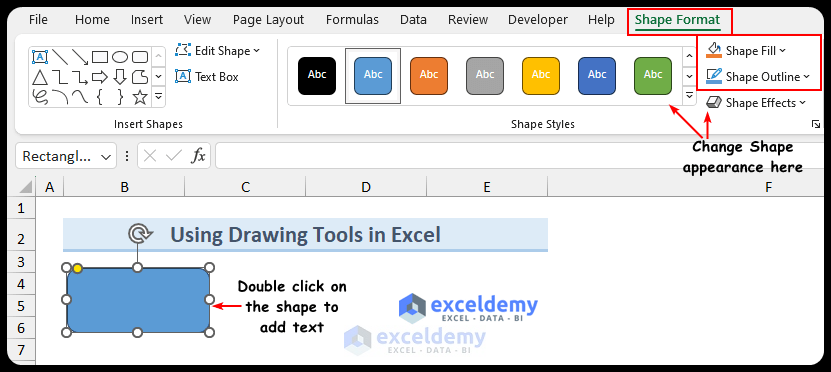
- Select Rectangle: Rounded Corners from the Insert tab. You will find it in the Shapes of the Illustrations group.

- Click and drag the mouse around the sheet, then release to draw a rectangle surrounding the selected area. You can select different colors from the Shape Format tab.
How to Use Drawing Tools to Draw Flowcharts in Excel
- Insert the rectangle with rounded corners. We are adding the flow chart below it.
- Select Line Arrow and draw in the worksheet from the rectangle down.
![]()
- Here’s the start of the flowchart.
![]()
- Repeat for other boxes while connecting them with the lines. You can use different types of boxes.

Free Form Drawing in Excel
How to Enable the Draw Tab in Excel
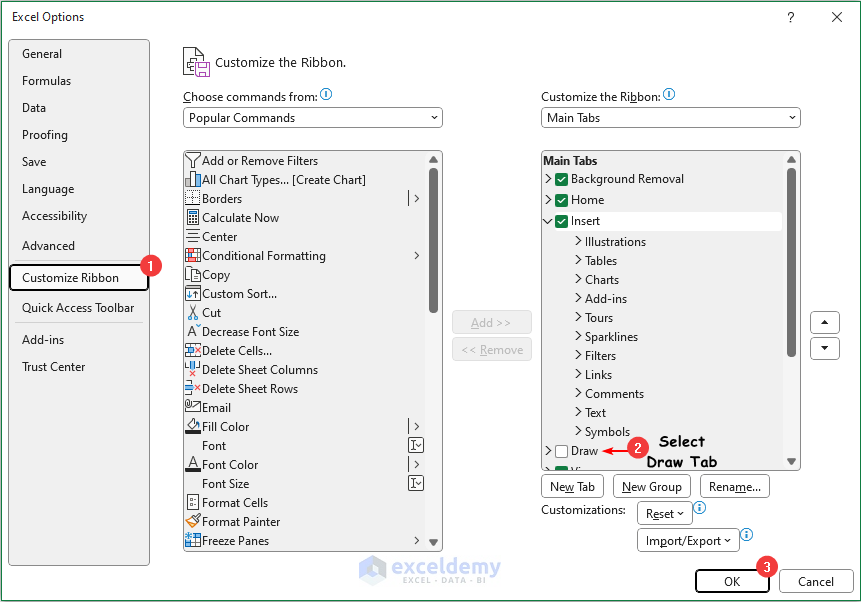
- Go to File, select Excel Options, and choose Customize Ribbon.
- Select Draw from the Main Tabs section and press OK.
Read More: How to Use Drawing Tools in Excel
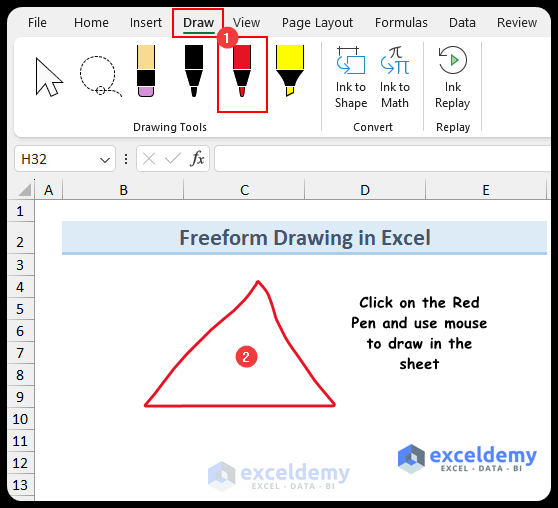
How to Draw a Free-Form Drawing in Excel
- From the Draw tab, select the red pen and draw on the spreadsheet.
- You can convert this into a shape. Click on the drawing and select the Ink to Shape option.
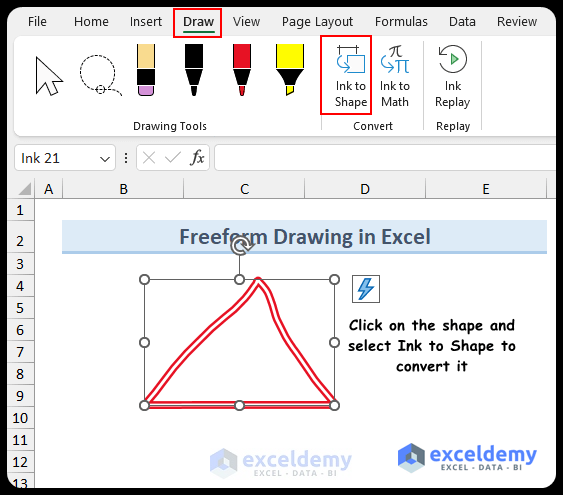
- The freehand drawing will be turned into a shape based on Excel’s closest approximation of your drawing.
- Alternatively, there are two freeform shapes at the end of the Lines shape, which you can use for freehand drawing in Excel.

Read More: How to Remove Drawing Tools in Excel
Things to Remember
- You can make your charts more informative using the drawing feature in Excel.
- You can layer one shape over another and control the order using the Selection Pane feature under the Arrange group of the Insert tab.
- Always keep the shapes close to activating the connecting points.
- Although there is no limit on the maximum number of shapes in Excel, you should not use them unnecessarily to keep the Excel file size smaller.
Frequently Asked Questions
Does Excel have Smart Art?
Yes, Excel has a Smart Art feature. In the Insert tab, you will find the Smart Art feature under the Illustration group.
Is it possible to rotate, move, or resize a drawing object in Excel?
- Rotate: If you select any drawing object, you will see a rotate icon at the top. To rotate it, click and hold and move it in the desired direction.
- Move: Select the shape and hover the mouse pointer to the object. Then, the mouse cursor will change. Now, drag to move the object.
- Resize: After selecting the drawing object, you will see small rounded shapes around it. Hover the mouse pointer over this, and the mouse pointer will change. Then drag it to resize the object. Additionally, you can hold the Shift button and resize it to keep the aspect ratio constant.
Is there a way to group multiple objects in Excel?
You can select multiple drawing objects and right-click to bring up the context menu. After that, select Group.
Drawing in Excel: Knowledge Hub
<< Go Back to Learn Excel
Get FREE Advanced Excel Exercises with Solutions!
