Excel is a versatile software with many features. One of the most used features is generating graphs with it and then showing the data related to arrow signs or lines. Lines are also used to separate portions or point at something. In this tutorial, we will learn how to draw lines in Excel and modify them.
How to Draw Lines in Excel (2 Easy Methods)
We can draw lines in Excel in two different methods using the Ribbon. One is using the Draw tab which is by default the drawing option in Excel. Another one is using the Insert tab. Both these tabs are in the Ribbon. But in terms of usage, there are differences in these methods. Both methods are described below with proper steps.
Before we start these methods, we need to make sure both the Insert and Draw tab are available in our Ribbon. If you do not see both of these tabs, simply follow these steps.
Steps:
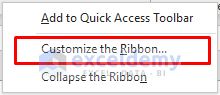
- At first, right-click anywhere on the Ribbon and select Customize the Ribbon.
- Next, tick on Draw and Insert, then press OK.

1. Using Draw Tab
We can use our cursor to draw on the screen by the Draw option in Excel. The Draw option enables us to draw various types of lines in Excel. We can also turn them into fine ideal shapes through this method. The steps are below.
Steps:
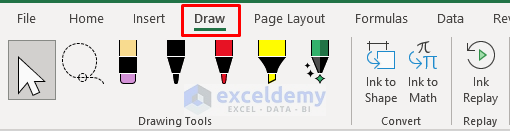
- Firstly, we will select the Draw tab in the Ribbon.
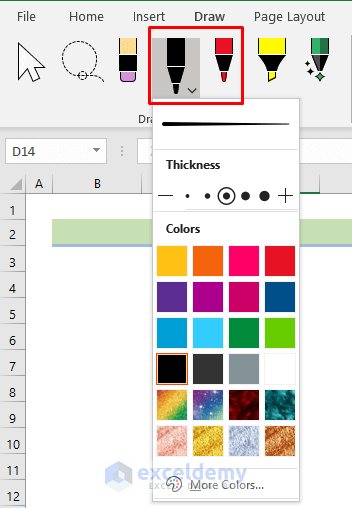
- Secondly, we will use pens or highlighters to draw lines or shapes. We will change the pen color and size by clicking on the pens from the Pens section, and there we will find a downward arrow. Then clicking the downward arrow, we can select the thickness and colors. We can also customize colors with the More Colors option.
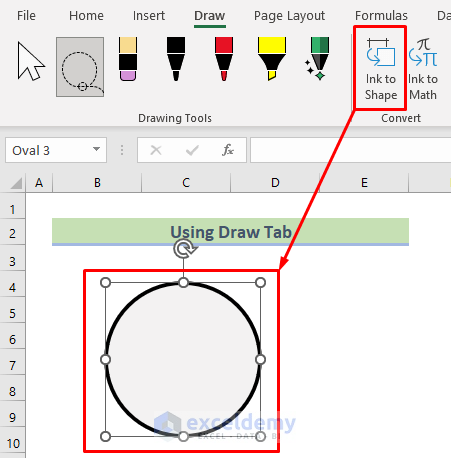
- Thirdly we will draw a shape close to what we intend to draw. In our case, we want to draw a circle.

- Next, we will click on Lasso Select from the Ribbon and select our shape.
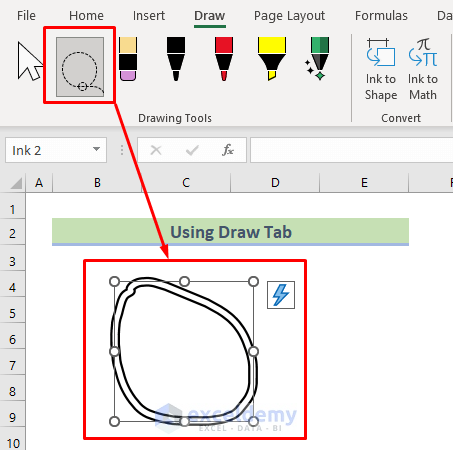
- Finally, we will click on Ink to Shape in the Convert section of the tab. This will give us a fine-shaped circle.
We can also have different shapes like the below image.

Read More: How to Draw a Floor Plan in Excel
2. Use of Illustrations
Sometimes we just need an arrow, curved line, or simple shapes to draw lines in Excel. In these cases, we will follow this method. The steps of this method are below.
Steps:
- First, we will open the Excel worksheet and click on the Insert tab in the Ribbon.
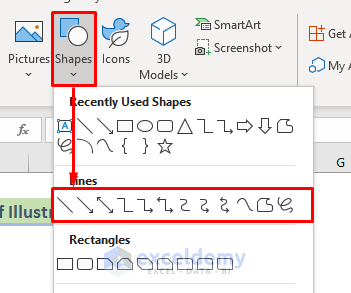
- Second, we will select the Shapes option from the Illustrations section.

- Third, we will choose any of the 12 lines from the Lines portion based on our preferences.

- In the end, we will point anywhere we want to start the line and hold and drag the cursor up to the length of the line.

- Also, a tab called Shape Format will appear in the Ribbon. Then we can select predefined line shape styles and edit other properties.
Read More: How to Remove Unwanted Objects in Excel
Types of Lines in Excel
While selecting lines in the illustration section, we can have multiple options. Different line types are predefined there. The drawing rules are the same for all the line types. Here we will discuss all the line types with appropriate visualization.
1. Straight Lines
The first to third option is the simple straight line with or without arrow/arrows. Choosing it will give us a straight line in Excel.
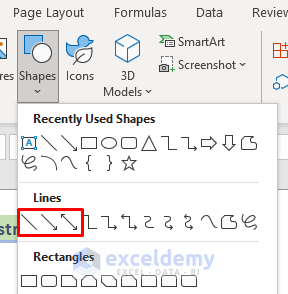
We have to select the starting and ending point and it’ll be inserted automatically or we can hold a point and drag it up to the length we want manually. We can also use the unidirectional arrow or bidirectional arrow line from this category.
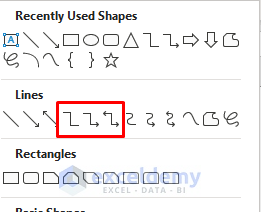
2. Elbow Connector
The fourth to sixth option is the elbow connector with or without arrow/arrows.
3. Curved Connector
The curved connector is the curved version of the elbow connector.
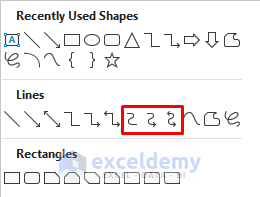
Here are samples of the curved connector. It also comes with unidirectional or bidirectional arrow options.
4. Free Curve
The free curve represents a pen-type tool that enables us to create curves by setting up points one by one.
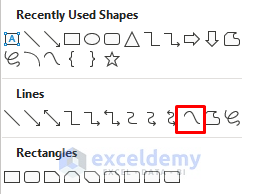
Again, after all the points are set, we will press Esc to exit the mode. It’ll give us our expected curve.
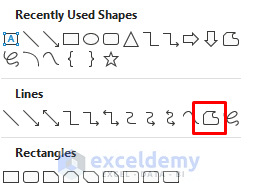
5. Shape
The shape tool is used for creating shapes that contain solid coloring. It may be of any shape. Here the catch is, that we need to intersect the first and last line to make a solid shape.
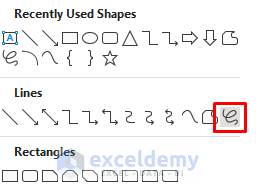
6. Scribble
Scribble is a free pen tool. As a result, it’ll create any line that is drawn in the Excel workbook.
Modifying Lines in Excel
We can modify lines or shapes in different ways. here are the descriptions of them.
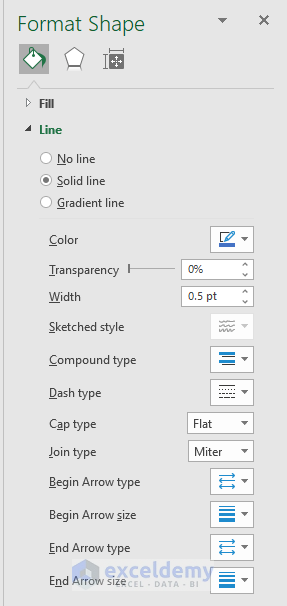
1. Using Format Shapes Panel
We can change the properties of our line/curve/shape using this feature. We can trigger the panel by selecting the line, curve, or shape, right-clicking on it, and then selecting Format shape from the bottom of the context menu.

As a result, in the Format Shape panel, there are multiple options and features that we can select to modify the curve. Also, we can give arrows for lines/curves on both ends. Moreover, we can change the line/curve thickness, change the color, and many more.
2. Arranging Lines
If we need to draw multiple shapes in Excel, we can use the Arrange option. When we select any shapes, the Shape Format will automatically appear in the Ribbon.
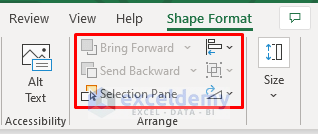
There are several options in the Arrange section which are described below.
Bring Forward: If we click on this option, we will get a downward arrow. By selecting it, we will get two options. If we select the Bring Forward option, then it will bring the selected object one step closer to the front. If we select the Bring to the Front option, then it will bring the selected object directly to the front of all other objects.
Send Backward: If we want to send any object backward, then we will use this option. By selecting it, we get two options. One is the Send Backward option which sends the selected object one step backward and another is Send to Back which sends the selected object directly to the back.
Selection Pane: This section opens a panel to the right where we can select any shapes we want to hide separately. Furthermore, we have the option to hide or show all objects.
Align: To perfectly align multiple shapes, we can use the Align option to align the shapes to left/center/right/top/middle/bottom based on our preferences. As a result, we can also distribute the shapes horizontally or vertically.
Rotate: We can rotate the shapes by selecting this. Again, the downward arrow will bring us many options to rotate right or left 90 degrees or flip horizontally or vertically.
Group: To join objects together to move and format them as a single object, we can use this option.
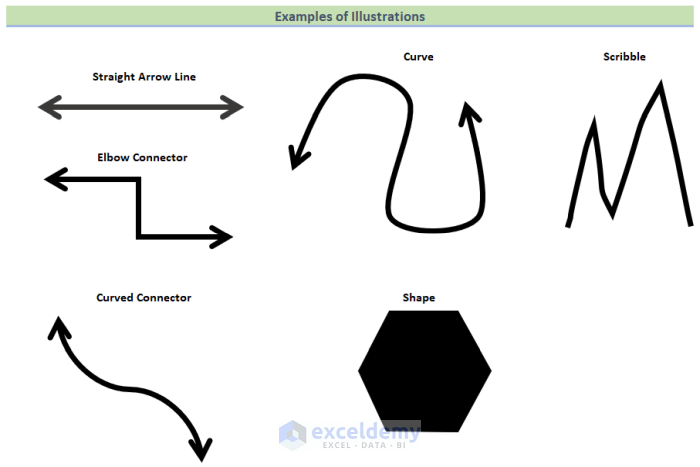
Examples of Illustrations
Here are examples of all 6 types of shapes that we can create using the Illustration option.
Things to Remember
- We can not use Ink to shape features for Illustrations.
- For Scribble and Curve, we just need to select or deploy the points and a curve will be generated through those points.
- The Draw tab is usually absent in the Ribbon for most of the cases. Enable it first following the given procedure.
- The entire demonstration was done using Microsoft Excel 365. So the interface may vary for other versions.
Download Practice Workbook
You can download the practice workbook from here.
Conclusion
If you’re still having trouble how to draw lines in Excel with any of these methods, let us know in the comments. Our team is ready to answer all of your questions. For any excel related problems, you can visit our website Exceldemy for all types of excel related problem solutions.
Related Article
- How to Draw Engineering Drawing in Excel
- How to Draw to Scale in Excel
- How to Make Fishbone Diagram in Excel
- How to Make Sankey Diagram in Excel
- How to Draw Isometric Drawing in Excel
<< Go Back to Drawing in Excel | Learn Excel
Get FREE Advanced Excel Exercises with Solutions!
