We’ll draw a simple floor plan to scale.
Method 1 – Using Border Options to Draw to Scale in Excel
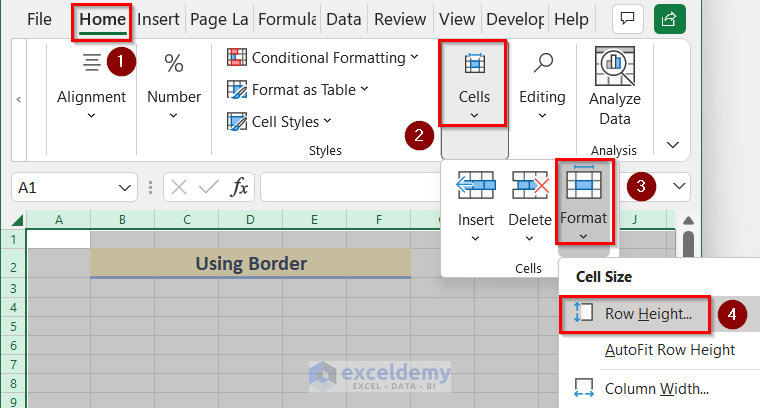
Step 1 – Setting Up Row Height and Column Width
- Click on the Box in the left corner to select all the Rows and Columns of the Excel Worksheet.

- Go to the Home tab and click on Cells.
- Click on Format and select Row Height.
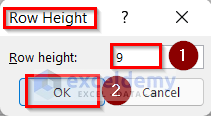
- The Row Height box will appear.
- Insert 9 as the Row Height.
- Click on OK.
- Click on Format and select Column Width.
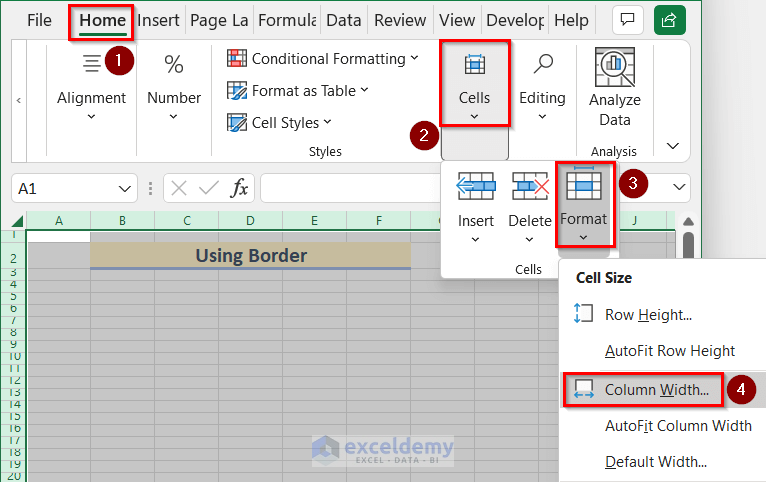
- The Column Width box will appear.
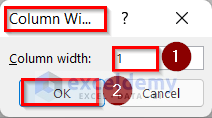
- Insert 1 as Column Width.
- Click on OK.
Step 2 – Drawing Walls to Scale Using Borders in Excel
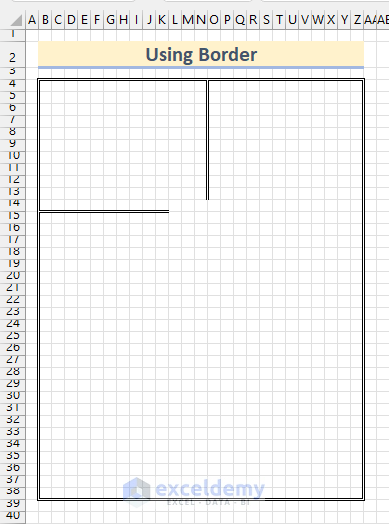
We will draw a Floor Plan of 25 by 35 ft using Borders in Excel.
- Select the range B4:Z38.
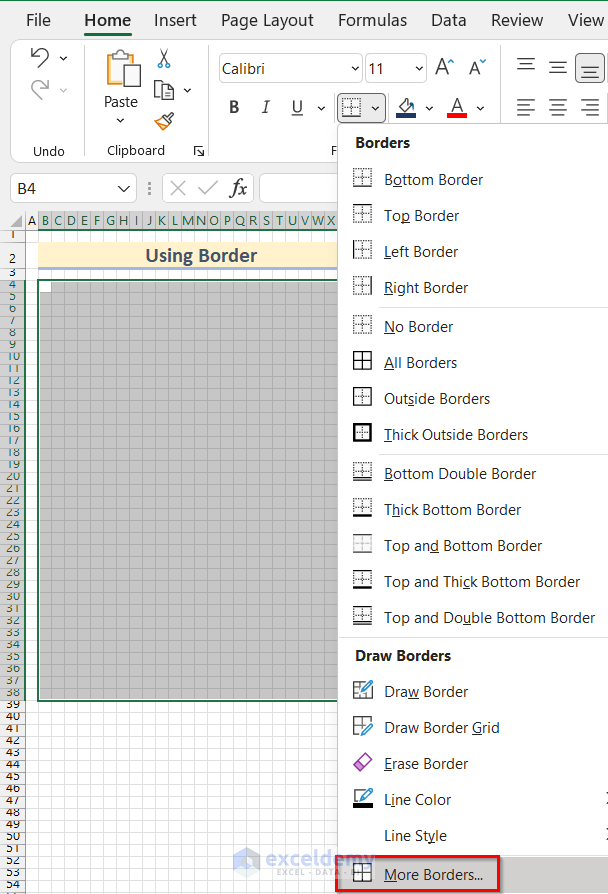
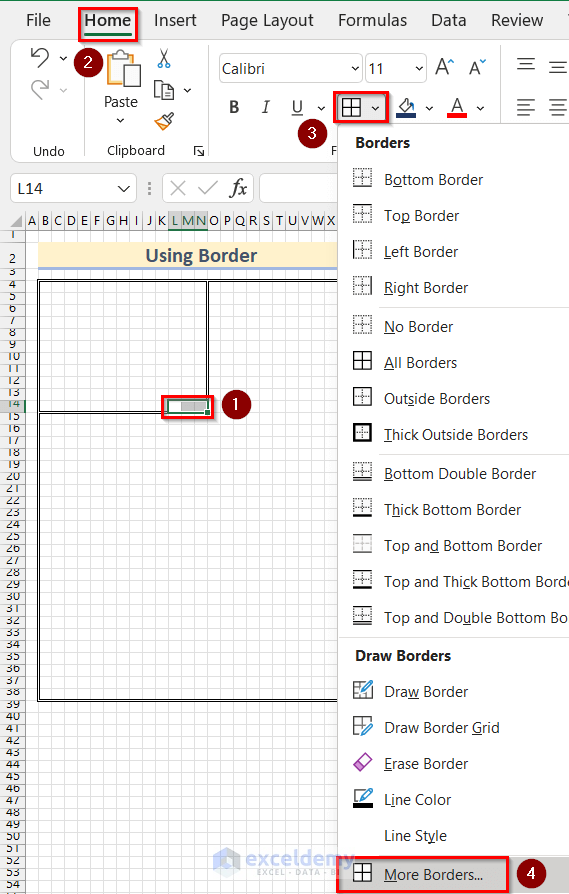
- Go to the Home tab and click on Borders.
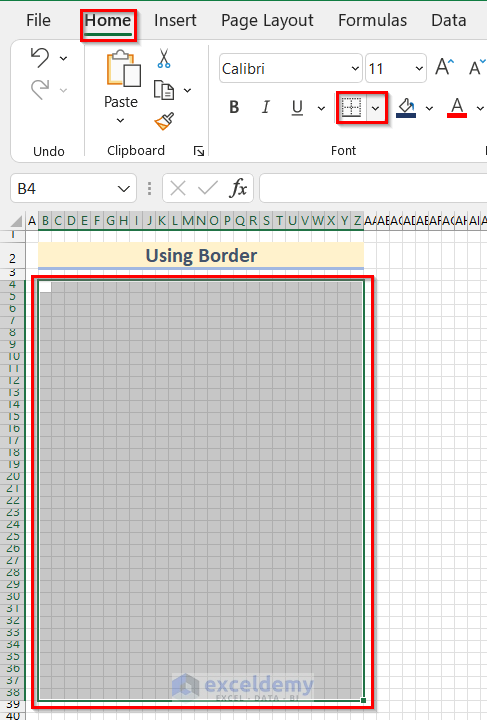
- Select More Borders.
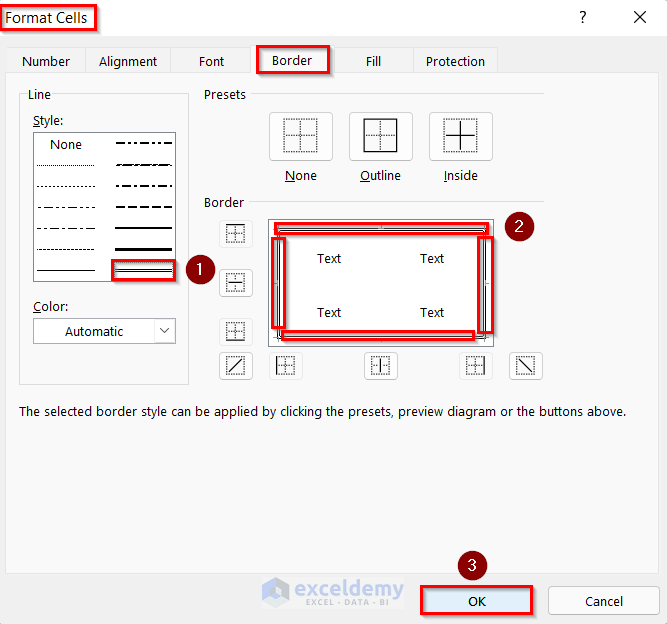
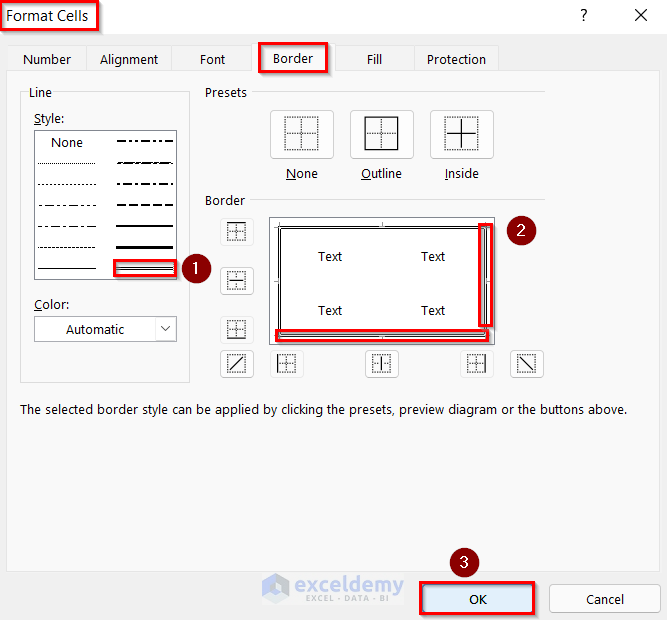
- The Format Cells box will open.
- From the Border tab in Style options, choose any Border. We will select the Double-line style.
- Add this Border to the Bottom, Top, Left, and Right of the Cell range.
- Click on OK.
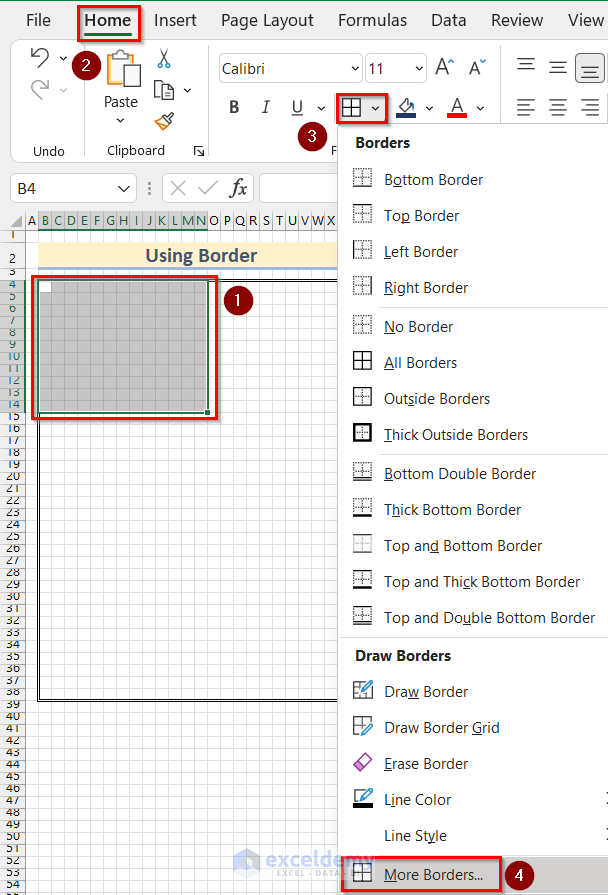
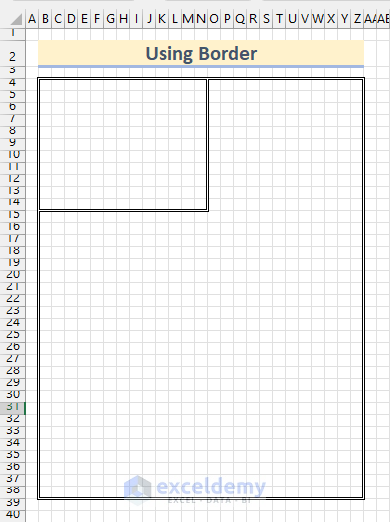
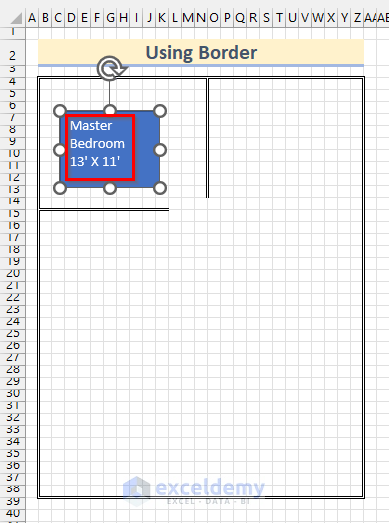
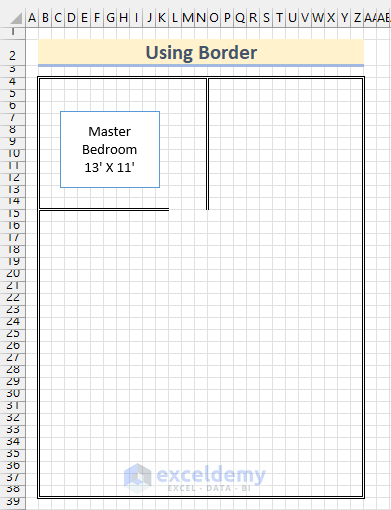
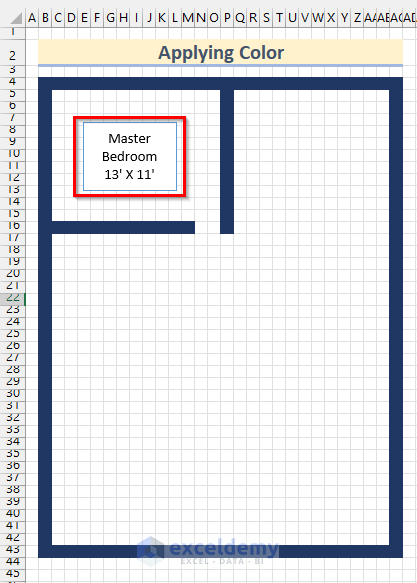
- You will get the External Wall of the Floor Plan.

- Select the cell range B4:N14.
- Go to the Home tab and click on Borders.
- Select More Borders.
- The Format Cells box will appear.
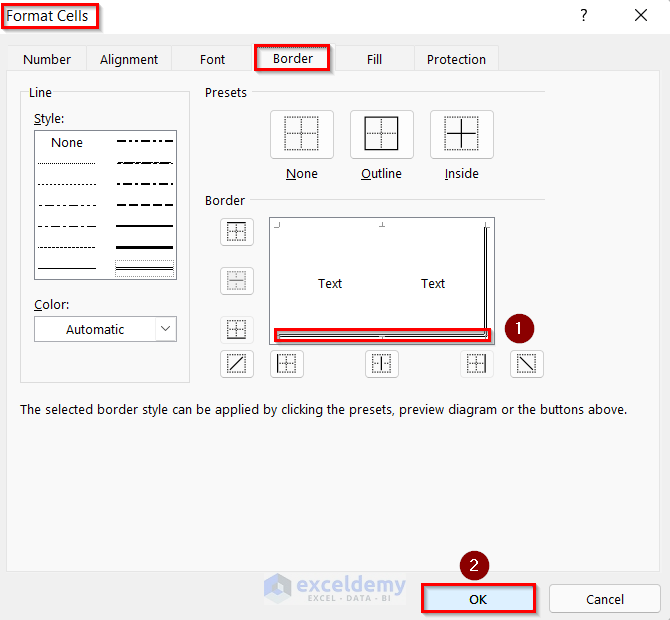
- From the Border tab in Style options, choose any Border. We will select the Double-line style.
- Add this Border to the Bottom and Right of the Cell range.
- Click on OK.
- You will get the walls of a room of 13’ by 11’ in scale.
- To create a gap for the door, select cell range L14:N14.
- Go to the Home tab, click on Borders, and select More Borders.
- The Format Cells box will open again.
- From the Border tab, unselect the Border from the Bottom.
- Click on OK.
- This creates a gap in the wall.
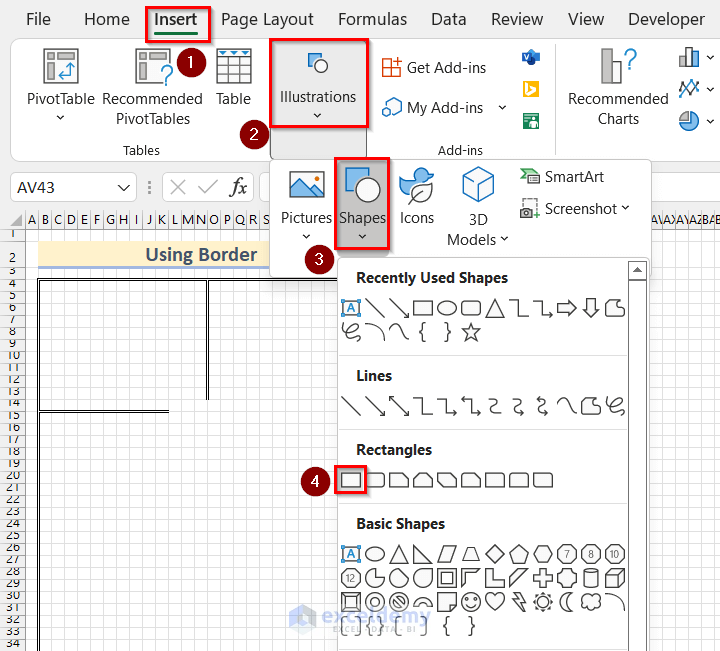
Step 3 – Using Rectangles for Text in the Drawing
- Go to the Insert tab and click on Illustrations.
- Click on Shapes and select Rectangle.
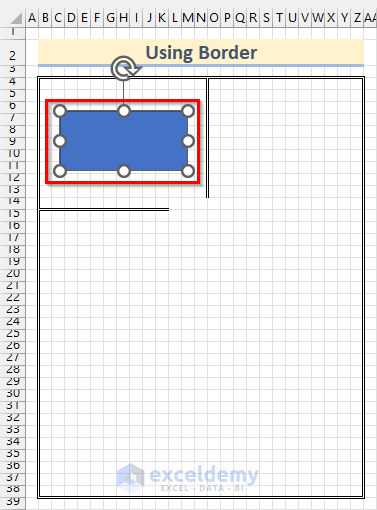
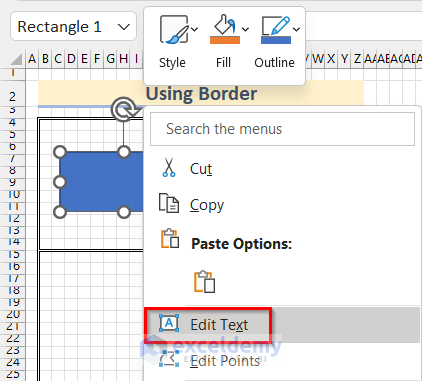
- Insert a Rectangle and right-click on it.
- Select Edit Text.
- Type any description you want to add in the Rectangle. We will type Master Bedroom 13’ X 11’.
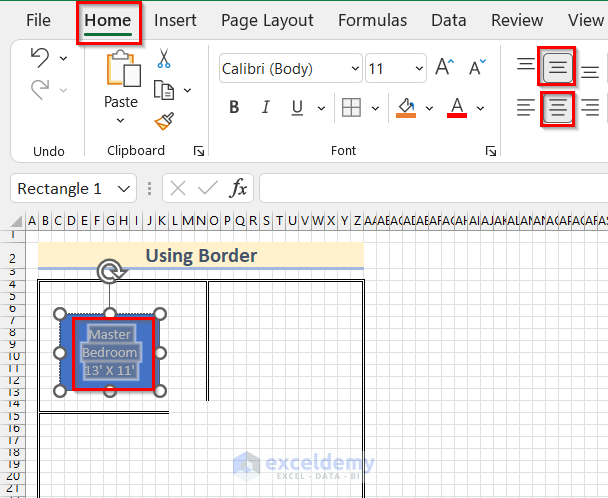
- Select the Text.
- Go to the Home tab and select Middle and Center Alignment.
- Select the Rectangle.
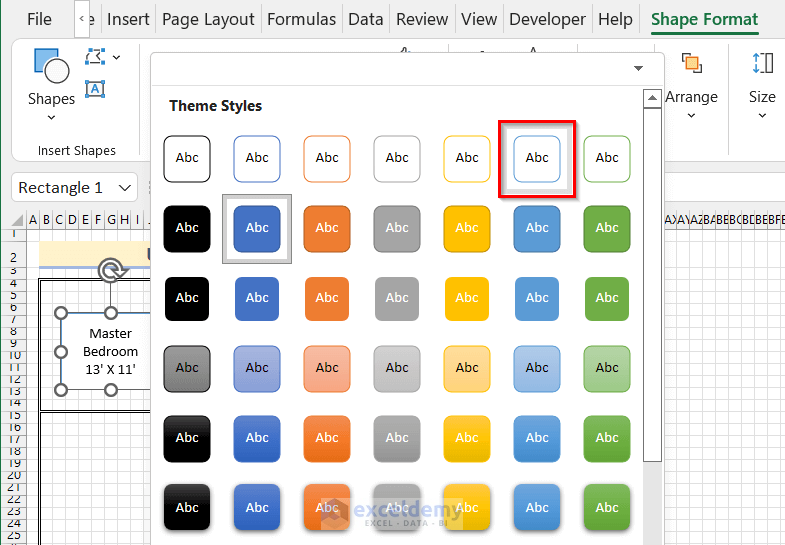
- Go to the Shape Format tab and click on Theme Styles.
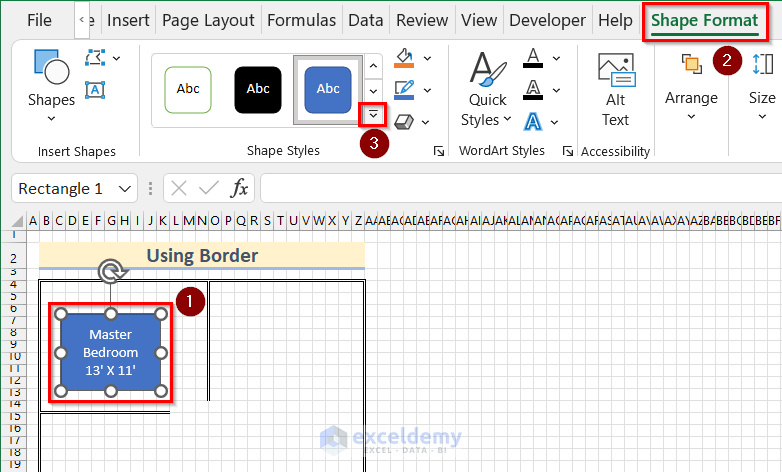
- Select any Theme Style. We selected Colored Outline – Blue, Accent 5.
- You will get a room drawn in scale with a description in a Rectangle.
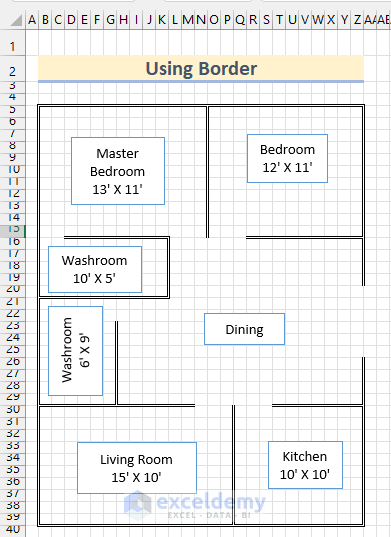
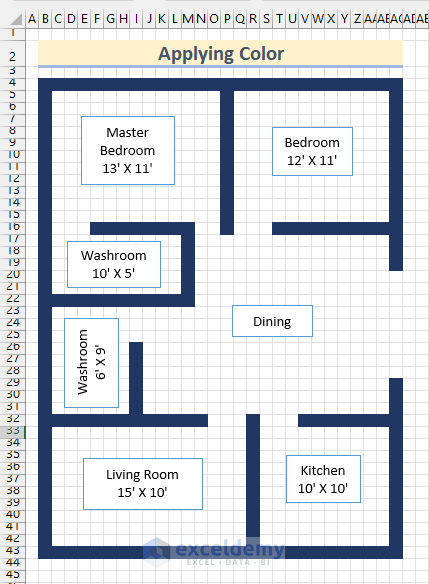
- Draw other rooms in scale and add descriptions to the rooms.
Read More: How to Draw Shapes in Excel
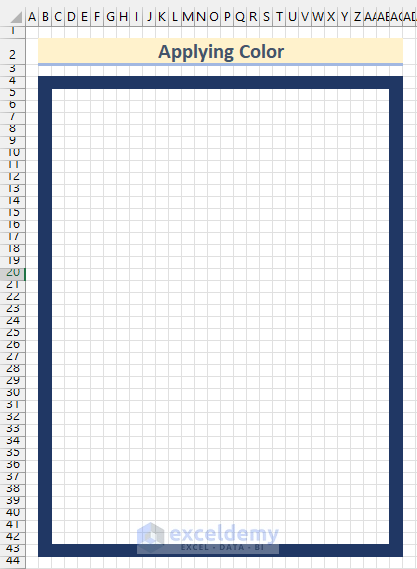
Method 2 – Applying Fill Color to Draw to Scale in Excel
We will use a scale of 1 square unit (Cell) equivalent to 1 square foot. We will use walls of 1ft width and add color to them.
Steps:
- Set up the Row Height and Column Width of the cells following the same steps shown in Method 1.
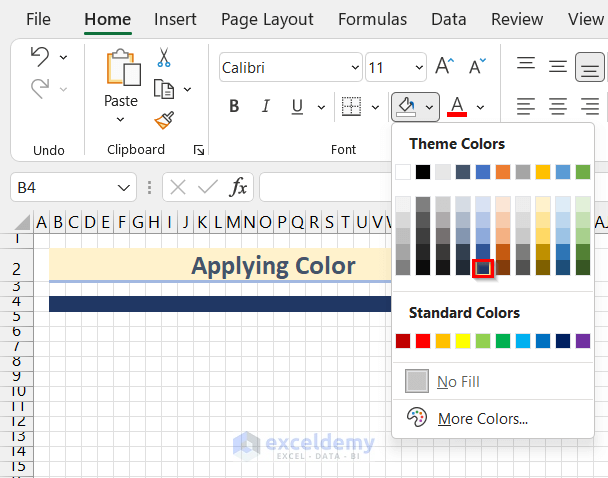
- Select the cell range B4:AC4.
- Go to the Home tab and click on Fill Color.
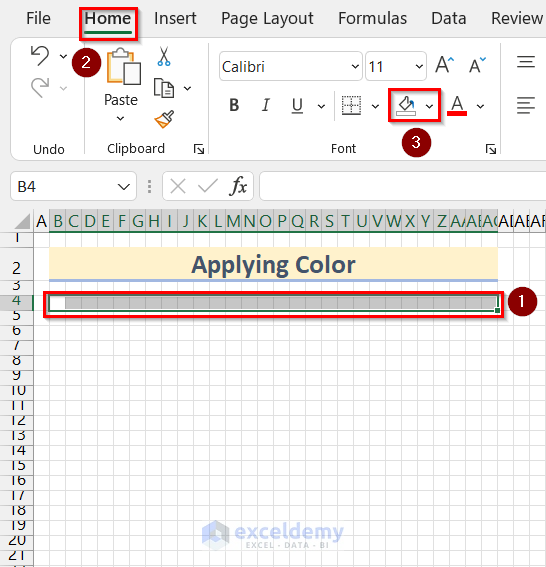
- Select any Fill Color. We will select Blue, Accent 1, Darker 50%.
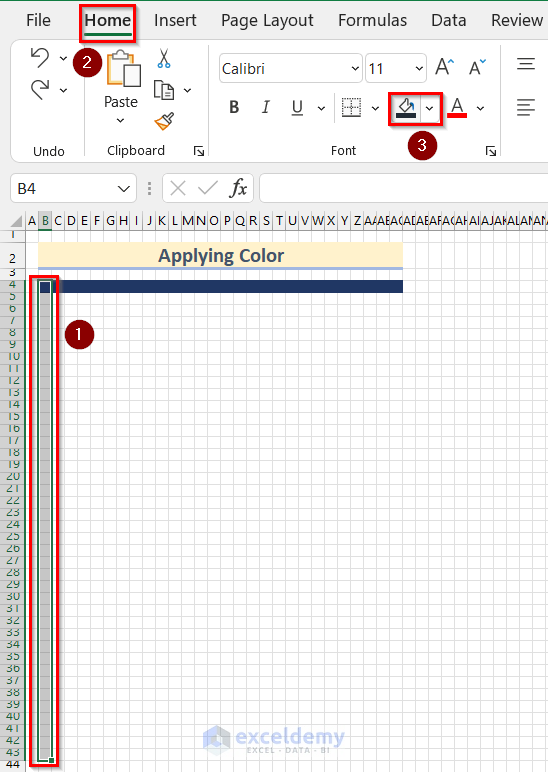
- Select the range B4:B43.
- Go to the Home tab and click on Fill Color.
- This will automatically select the Fill Color we selected previously.
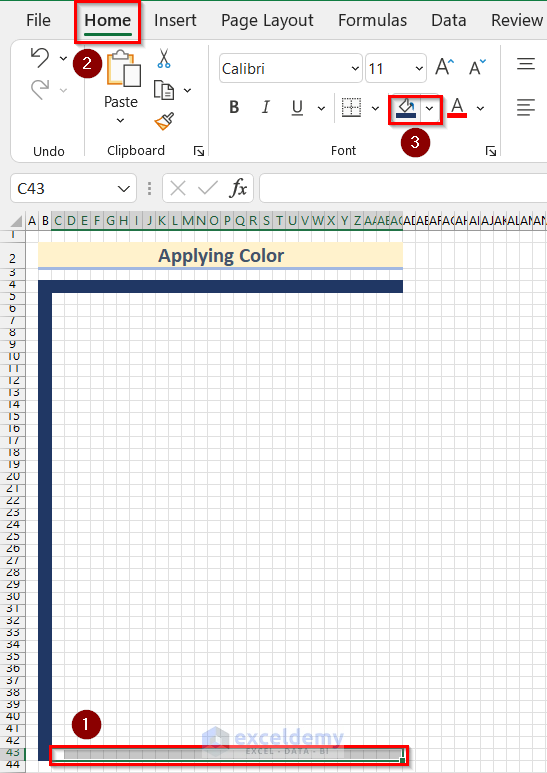
- Select the range C43:AC43.
- Go to the Home tab and click on Fill Color.
- Select the range AC5:AC42 and use Fill Color.
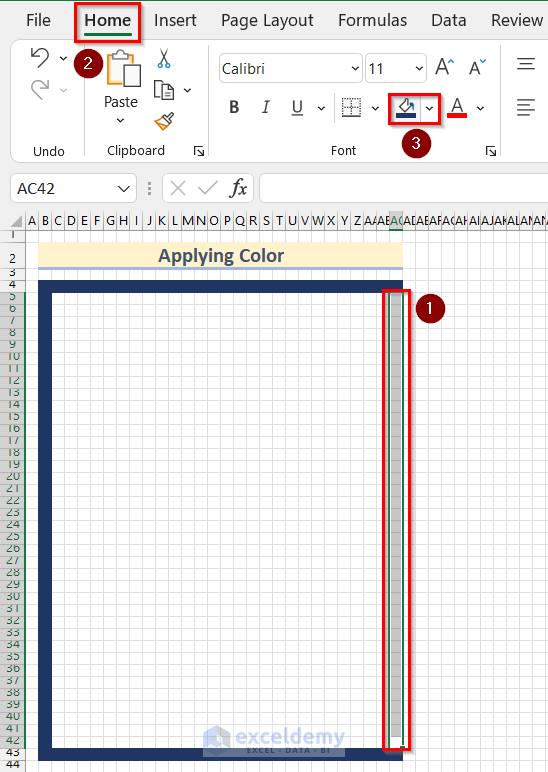
- You will get the External Wall of the Floor Plan.
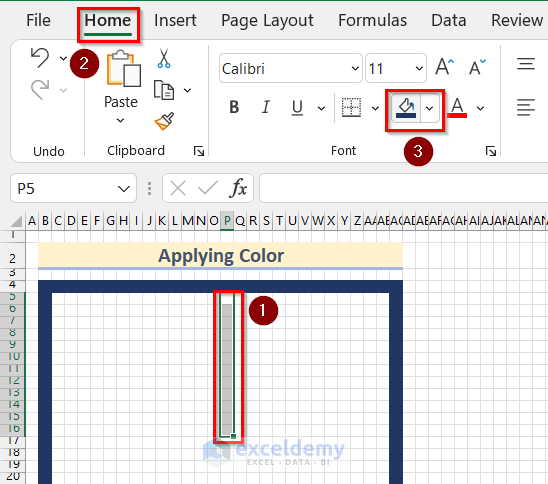
- Select the cell range P5:P16.
- Go to the Home tab and click on Fill Color.
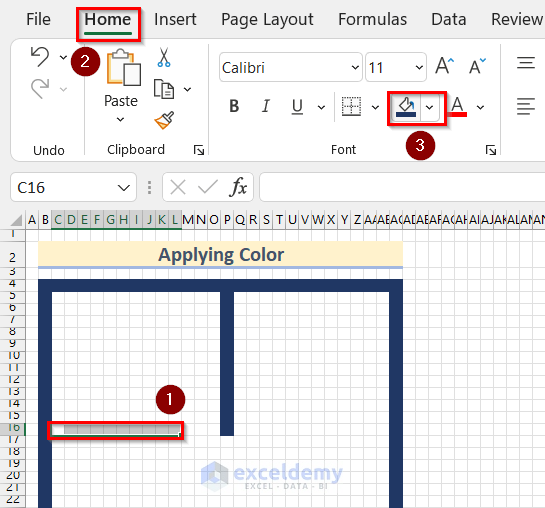
- Use Fill Color on the range C16:L16.
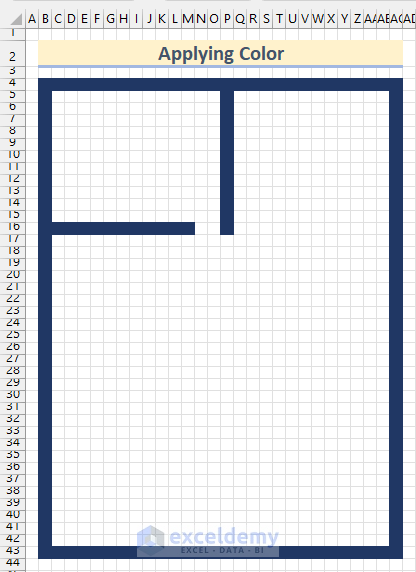
- You will get the walls of a room of 13’ by 11’ in scale.
- Insert a Rectangle and add text to it following the same steps shown in Method 1.
- You will get a room drawn in scale with a description in a Rectangle.
- Draw other rooms in scale and add descriptions to the rooms.
Read More: How to Make Fishbone Diagram in Excel
Practice Section
You can use a blank spreadsheet to practice.
Download the Practice Workbook
Related Articles
- How to Make Sankey Diagram in Excel
- How to Draw Isometric Drawing in Excel
- How to Remove Unwanted Objects in Excel
- How to Draw Engineering Drawing in Excel
- How to Draw Lines in Excel
<< Go Back to Drawing in Excel | Learn Excel
Get FREE Advanced Excel Exercises with Solutions!
