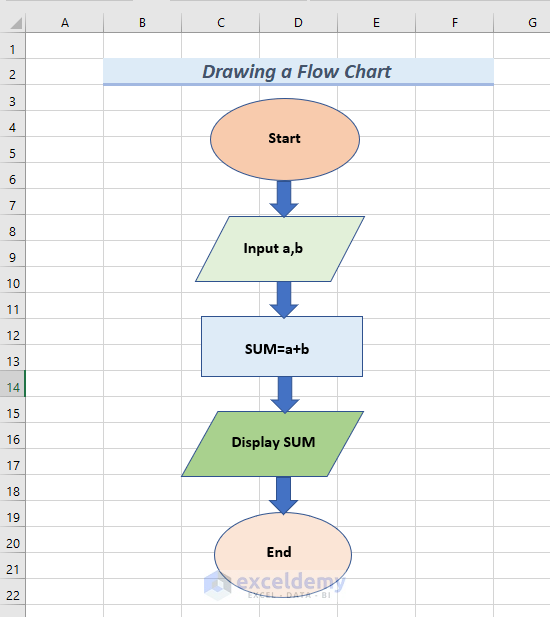
Example 1 – Drawing a Flow Chart in Excel
Let’s say we have two variables, a and b. We want to show the sum of these two variables in a flow chart.
Step 1 – Inserting an Oval Shape
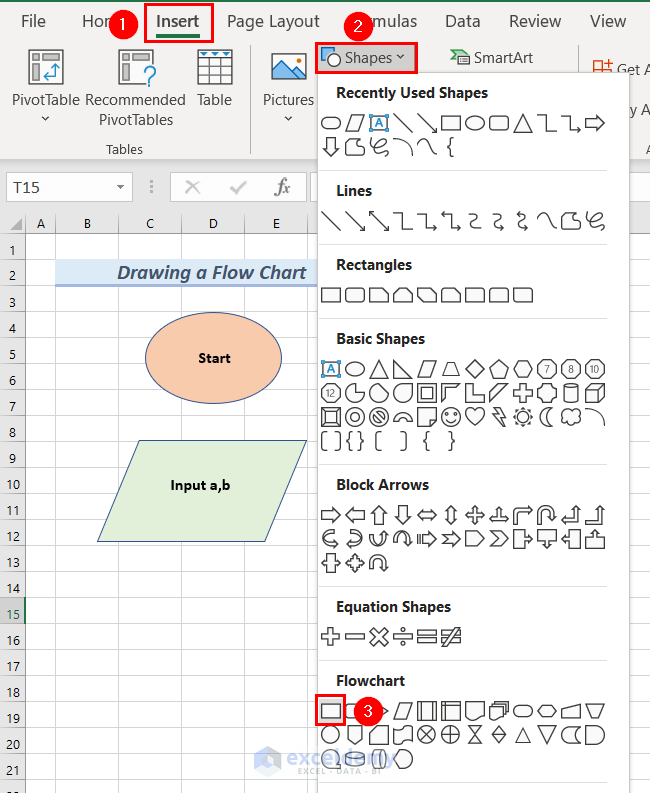
- Go to the Insert tab and click on Shapes.
- Select an Oval shape
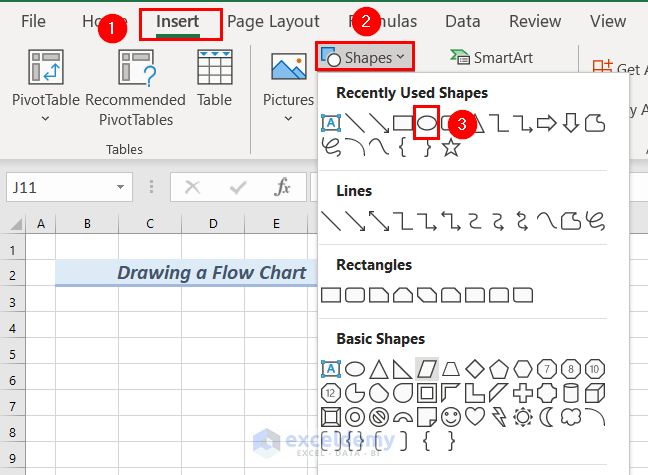
- Draw an Oval shape at the top of the worksheet under the heading. It will be the start of the flow chart.
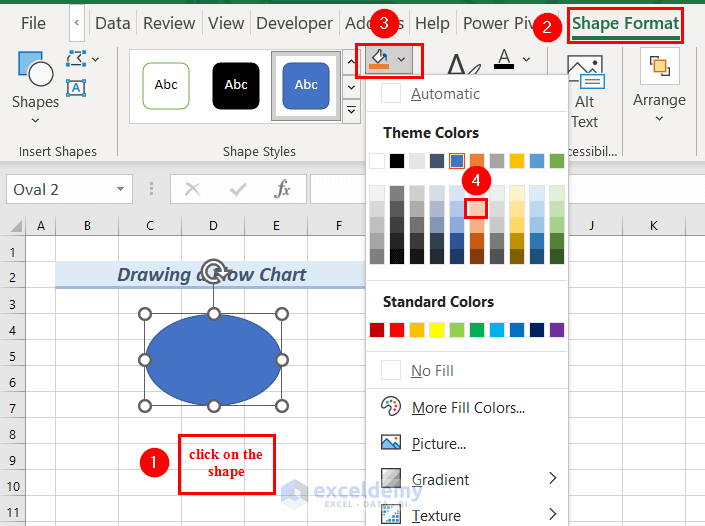
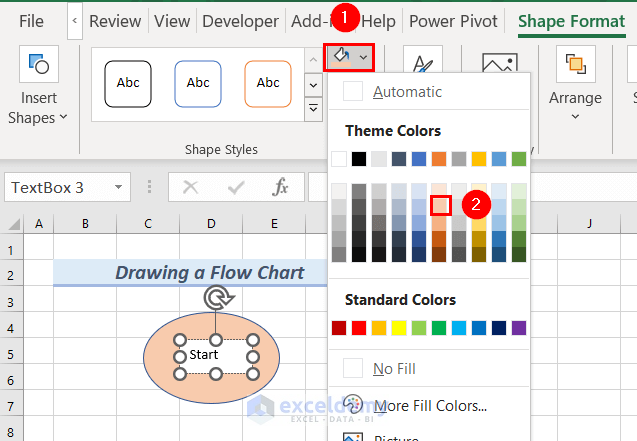
Step 2 – Formatting Oval Shape
- Click on the Oval shape and go to the Shape Format tab.
- Click on Shape Fill.
- Select a color.
- We selected Orange, Accent 2, and Lighter 60% as the Oval color. You can select any color that looks presentable.
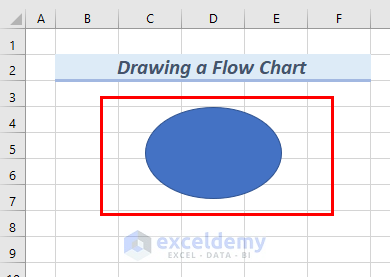
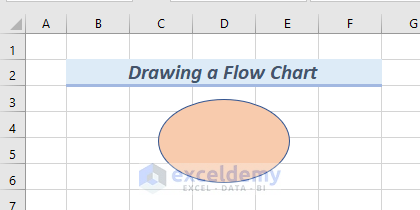
Here’s the Oval shape with color.
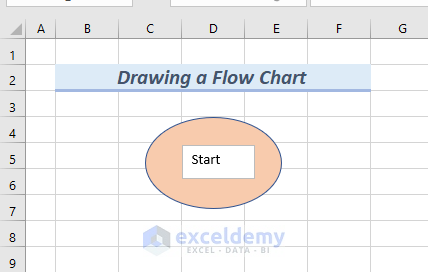
Step 3 – Inserting Text to the Oval
- Go to the Insert tab.
- From the Text group, select Text Box.
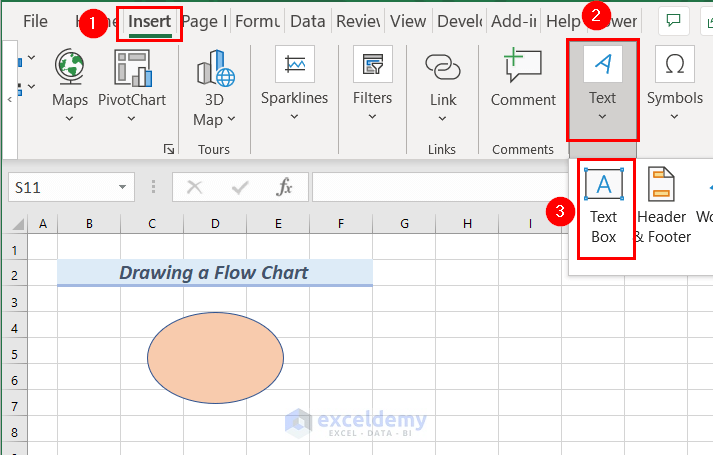
- Insert the Text Box in the Oval shape.
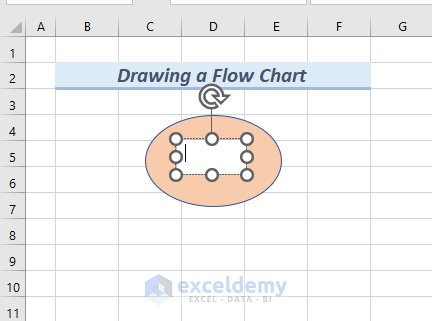
- Type Start in the Text Box.
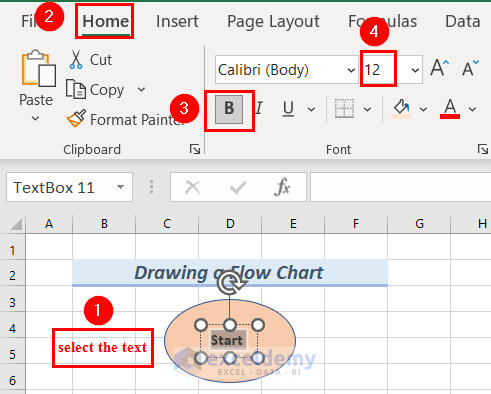
Step 4 – Formatting the Text
- Click on the text and go to the Shape Format tab.
- From Shape Outline, select No Outline.
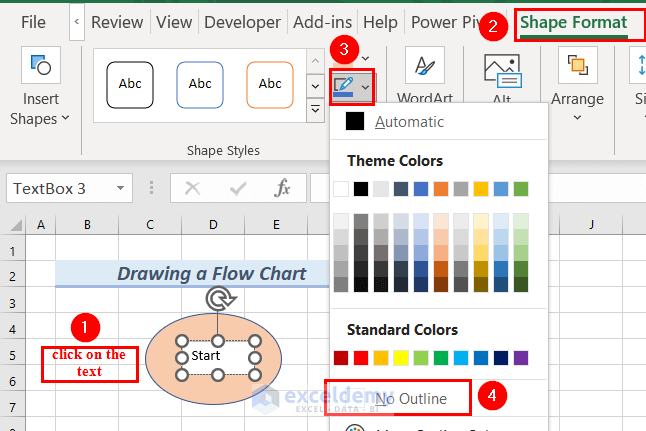
- From Shape Fill, select the same color for the text as the one for the shape.
- We selected Orange, Accent 2, and Lighter 60% as our text colors.
The oval shape with the text looks more presentable.

- Select the text and go to the Home tab.
- From the Font group, select Bold and select Font Size as 12.
Here’s the result.

Step 5 – Adding a Rhombus Shape below the Oval
- Go to the Insert tab and click on Shapes.
- Select a Rhombus shape.
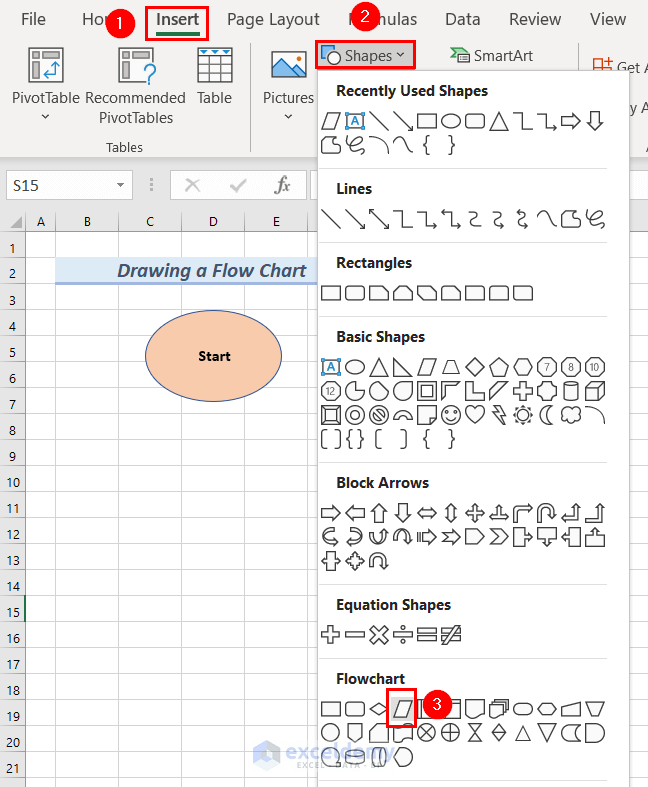
- Draw the rhombus below the oval shape.
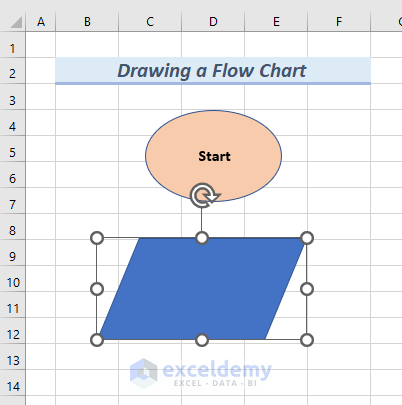
- Format the rhombus by following Step 2. We selected Green, Accent 6, and Lighter 80% as our rhombus color.
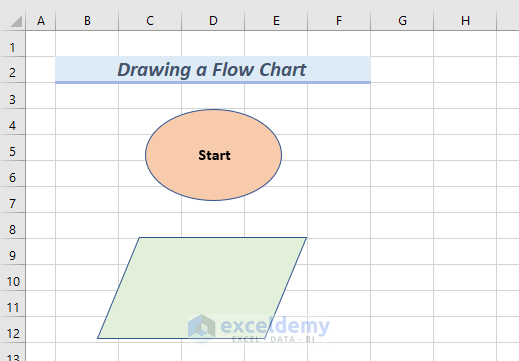
- Insert text in the rhombus.
- We followed Step 3 to insert text and Step 4 to format text. We select Green, Accent 6, and Lighter 80% as our Text Box colors.
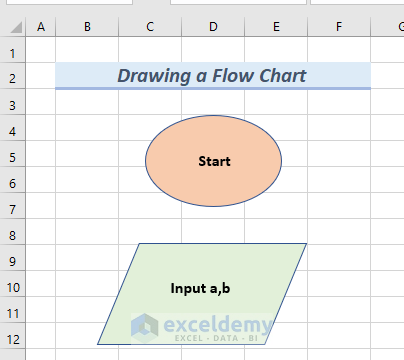
- In the rhombus, we typed Input a,b in the Text Box.
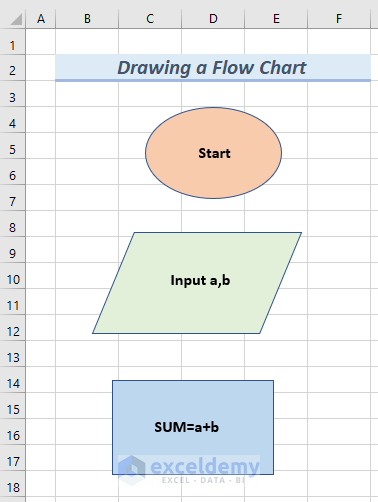
Step 6 – Drawing a Rectangle below the Rhombus
- Go to the Insert tab and click on Shapes.
- Select a Rectangle shape.
- Draw the rectangle below the rhombus shape.
- Format the rectangle by following Step 2. We selected Blue, Accent 5, and Lighter 80% as our rhombus color.
- Insert text in the rhombus.
- We followed Step 3 to insert text and Step 4 to format text. We will select Blue, Accent 5, and Lighter 80% as our Text Box colors.
- In the rectangle, we typed SUM=a+b in the Text Box.
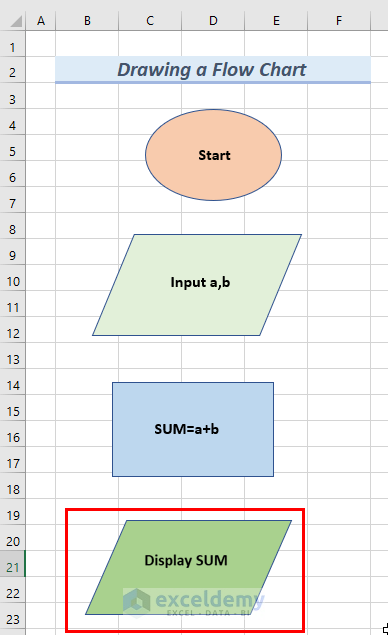
Step 7 – Inserting a Rhombus Shape below the Rectangle
- Follow Step 5 to insert a rhombus below the rectangle.
- We formatted the rhombus by following Step 2. We selected Green, Accent 6, and Lighter 40% as our rhombus color.
- Insert text in the rhombus.
- We followed Step 3 to insert text and Step 4 to format the text. We will select Green, Accent 6, and Lighter 40% as our Text Box colors.
- In the rhombus, we typed Display SUM in the Text Box.
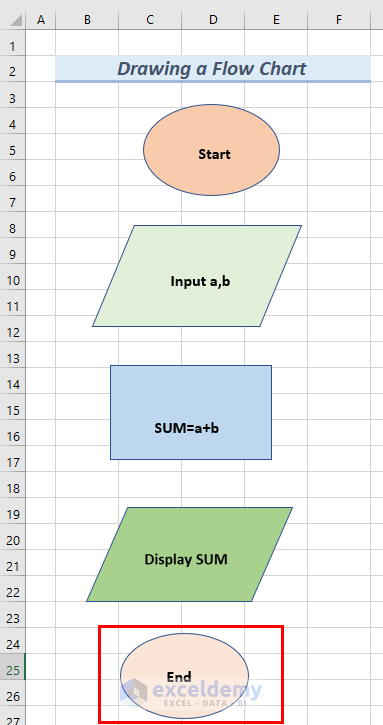
Step 8 – Adding an Oval below the Rhombus
- Add another oval and format it.
- Here, we selected Orange, Accent 2, and Lighter 80% as our rhombus color.
- Insert text in the oval.
- We selected Orange, Accent 2, and Lighter 80% as our Text Box colors.
- We typed End in the Text Box.
Step 9 – Inserting a Block Arrow
- Go to the Insert tab and click on Shapes.
- Select a Downward Block Arrow shape.
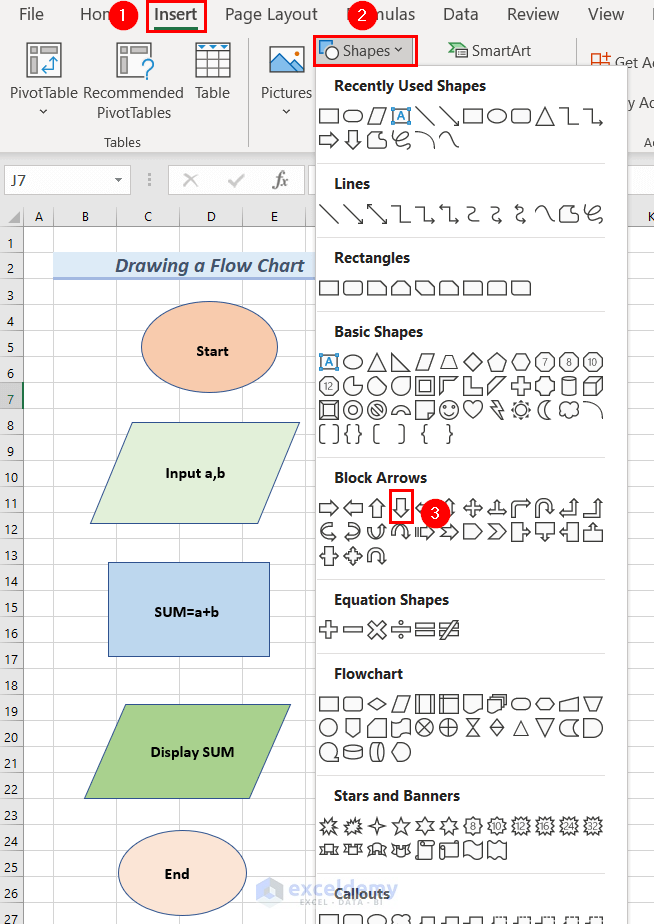
- Draw a downward arrow between the starting oval and the rhombus below it.
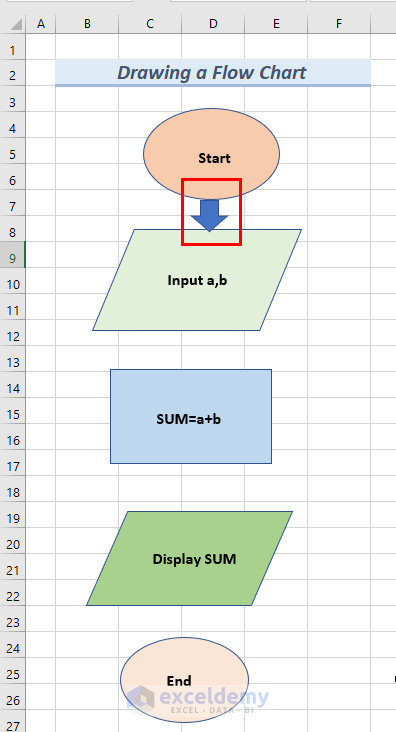
- Repeat to draw an arrow between every shape to connect them.
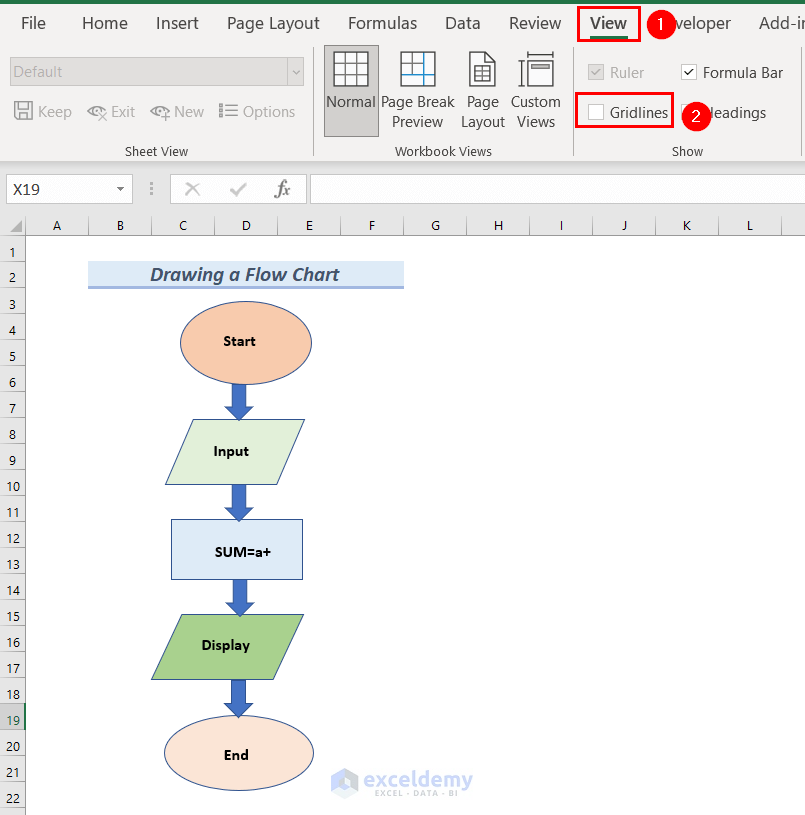
Step 10 – Removing Gridlines
- Go to the View tab.
- From the Show group, unmark Gridlines.
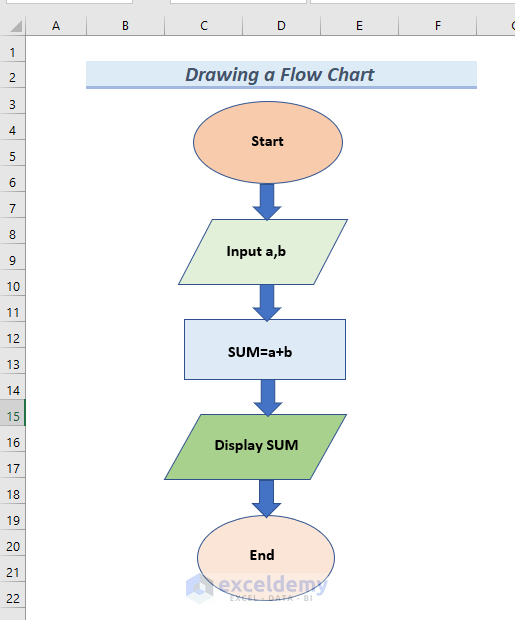
Here’s the resulting chart.
Read More: How to Draw Shapes in Excel
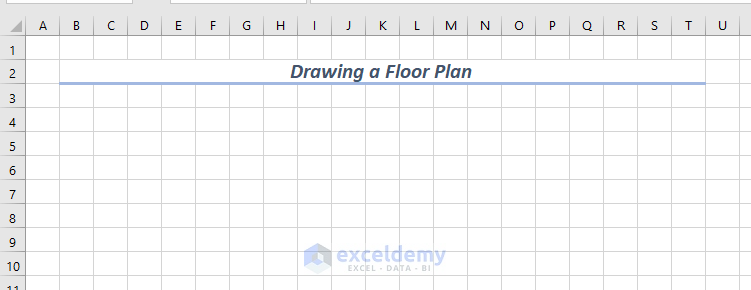
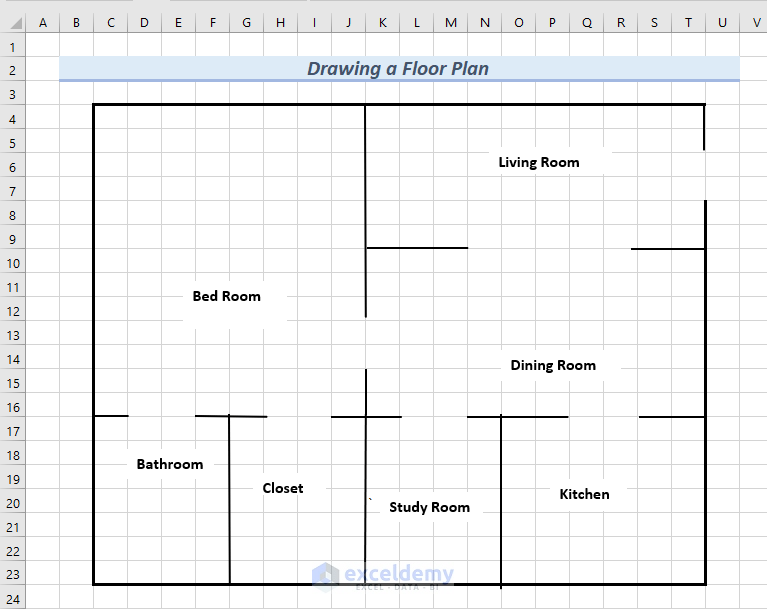
Example 2 – Drawing a Floor Plan in Excel
We have an apartment area of 360 sq feet. This apartment has a living room, one bedroom including a bathroom and closet, a dining room, one study room, and one kitchen.
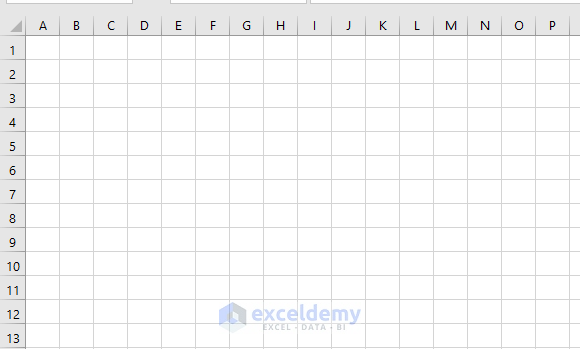
Step 1 – Preparing the Worksheet
- Set a constant row height for the cells.
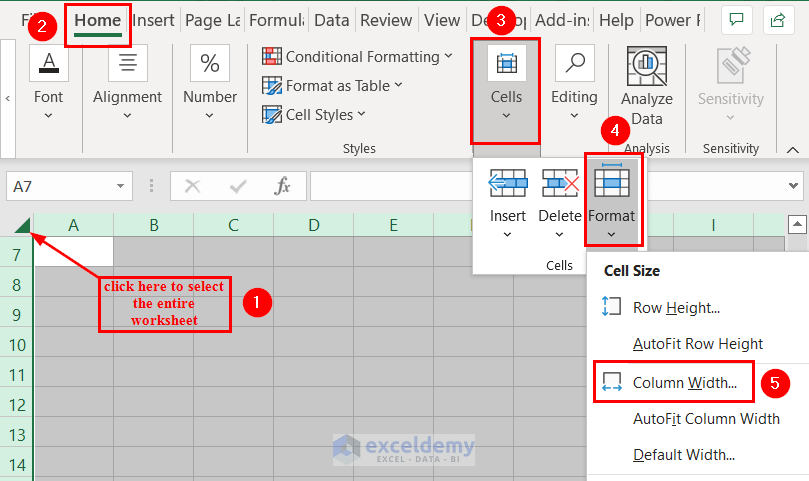
- Click on the green color arrow button which is at the top-left corner of the rows and columns of the Excel sheet.
This will select the entire worksheet.
- Go to the Home tab.
- From the Cells group, select Format.
- Select Row Height.
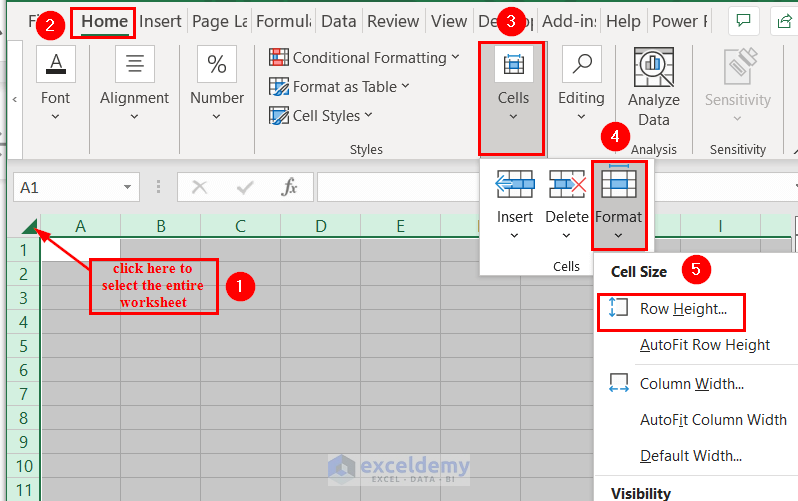
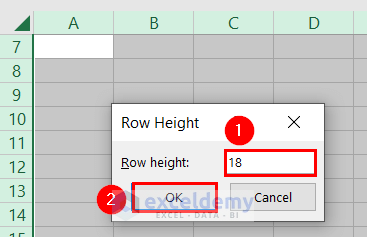
A Row Height dialog box will appear.
- Set the row height as 18. You can set any row height that you think looks presentable.
- Click OK.
- Select the entire worksheet again.
- Go to the Home tab.
- From the Cells group, select Format.
- Select Column Width.
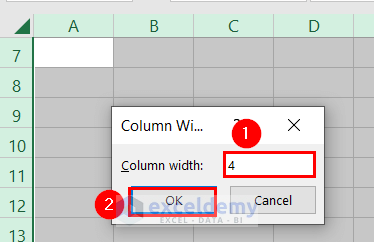
A Column Width dialog box will appear.
- We set the column width as 4.
- Click OK.
We consider one square cell as one square foot.
- Add a heading to the worksheet.
Step 2 – Drawing the Apartment Outline
- Select 18 rows and 20 columns.
- Go to the Home tab and, from the Font group, click on the drop-down arrow of the Border box.
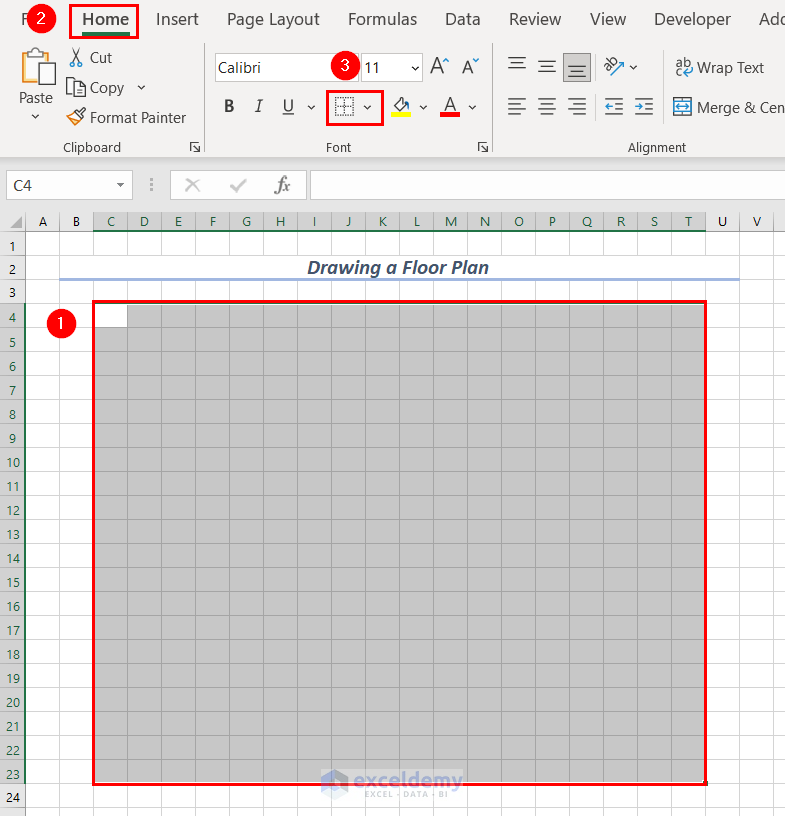
- Click on More Borders.
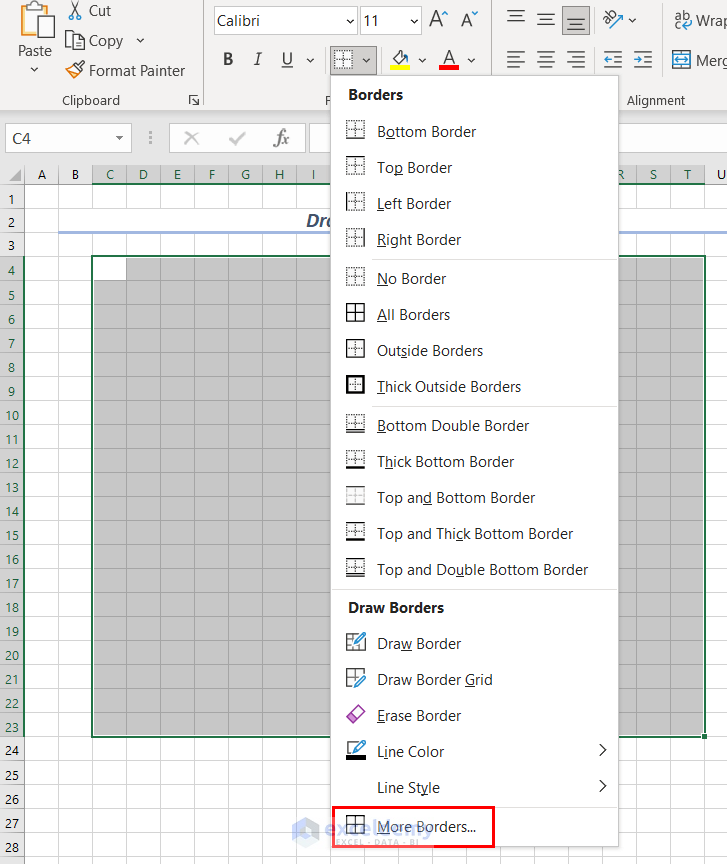
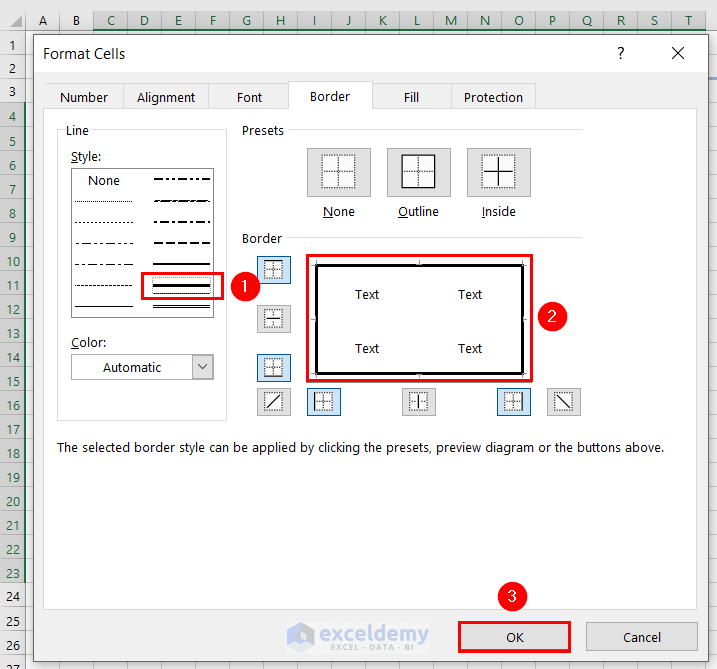
A Format Cells dialog box will appear. The Border group will be opened.
- From the Style, select a thick border marked with a red color box.
- In the Border box, marked with a red color box, click on the 4 sides to include borders all around.
In the Border box, you can see 4 thick borders.
- Click OK.
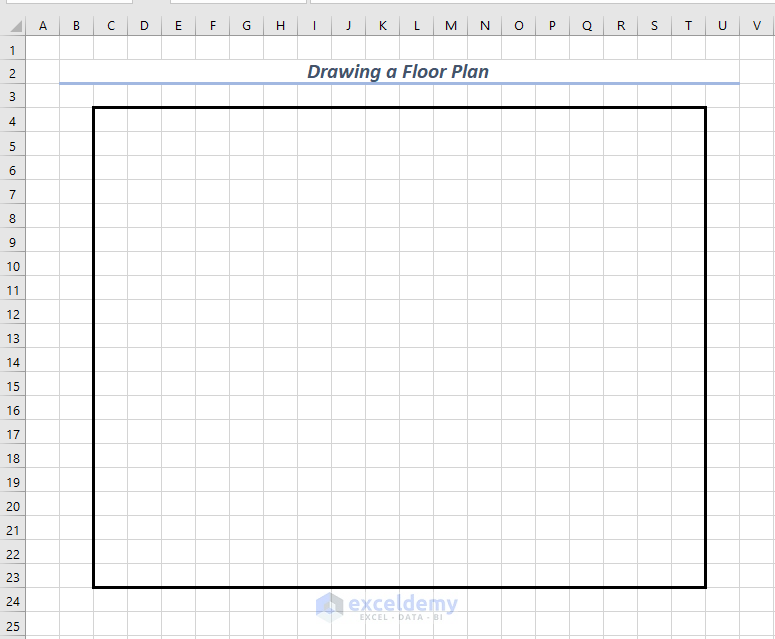
You can see the outline of the apartment.
Step 3 – Making the Front Door
- Select cells T5 and T6, as we want the door of the apartment at this position.
- Go to the Home tab.
- Click on the drop-down arrow of the Border box.
- Select No Border.
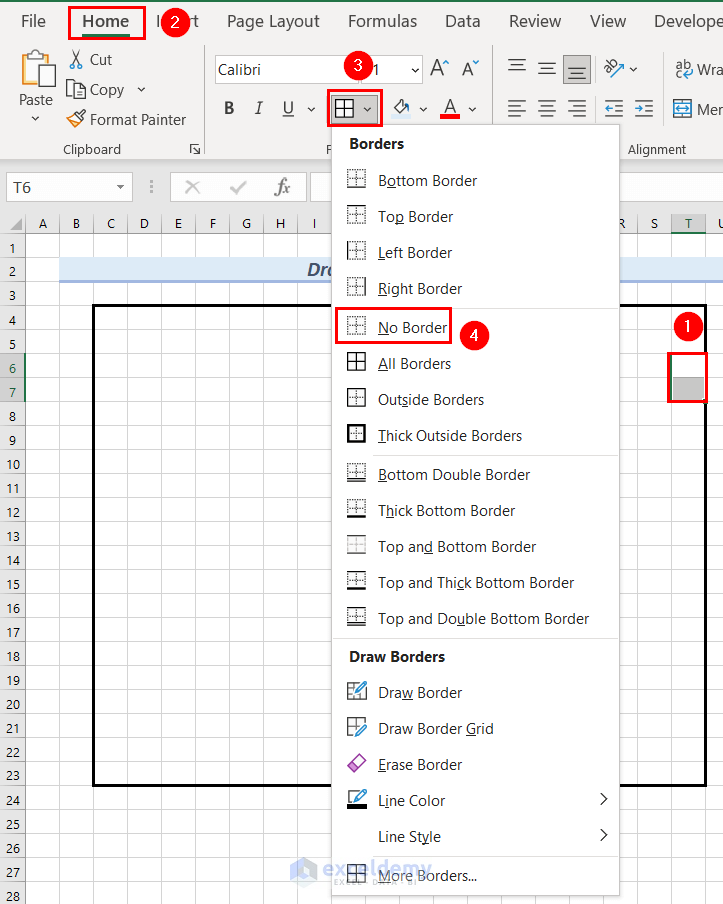
A line break has been created in the outline, which is the front door of the design.

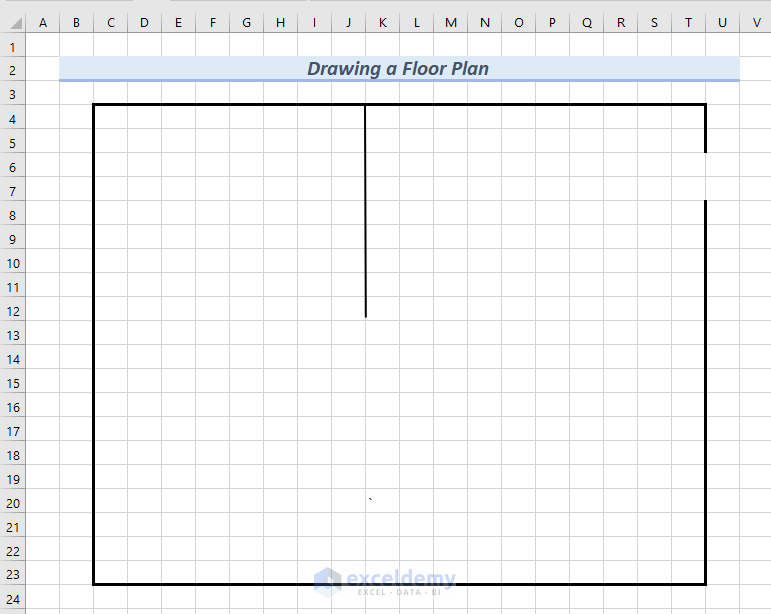
Step 4 – Line Drawing Rooms
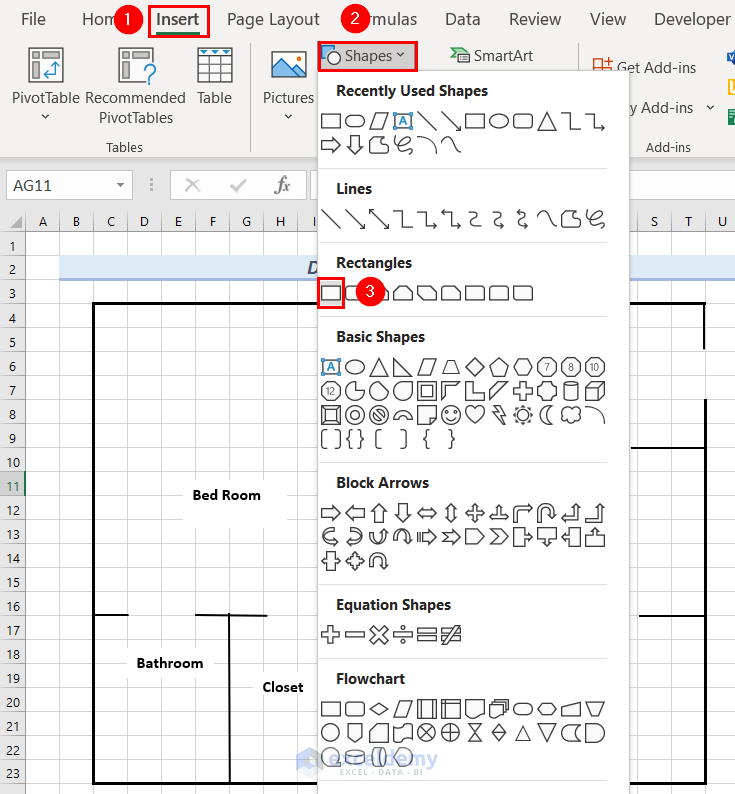
- Go to the Insert tab and click on Shapes.
- Select a Line shape.
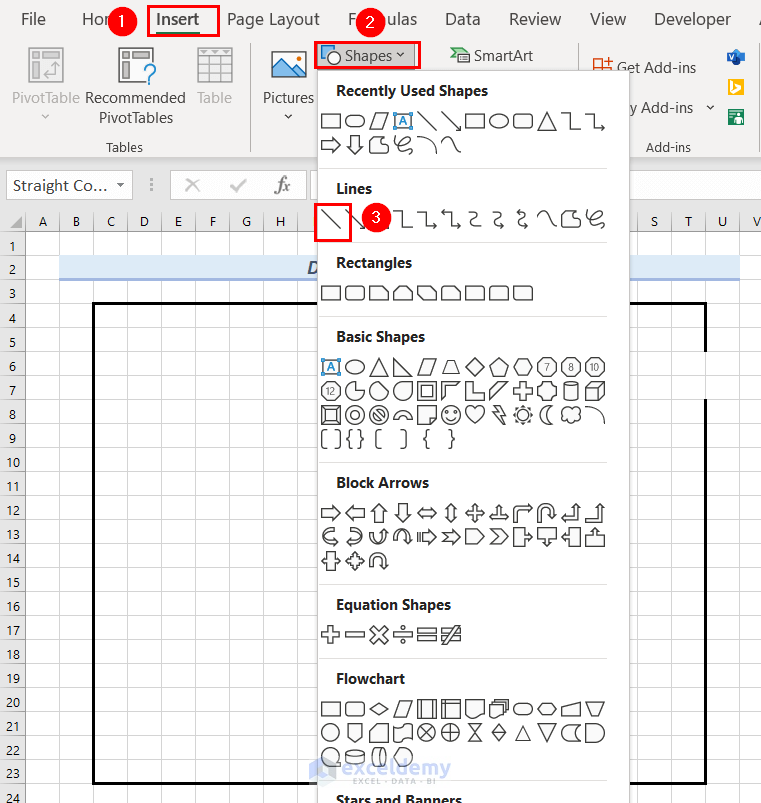
- Insert the line in the outline.
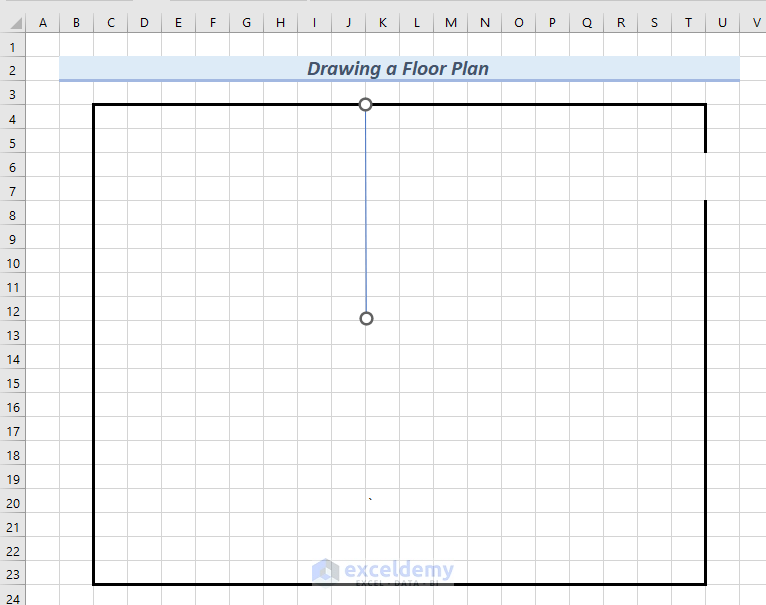
Step 5 – Formatting the Line
- Click on the Line shape and go to the Shape Format tab.
- From the Shape Styles group, click on the downward arrow, marked with a red color box to bring out more styles.
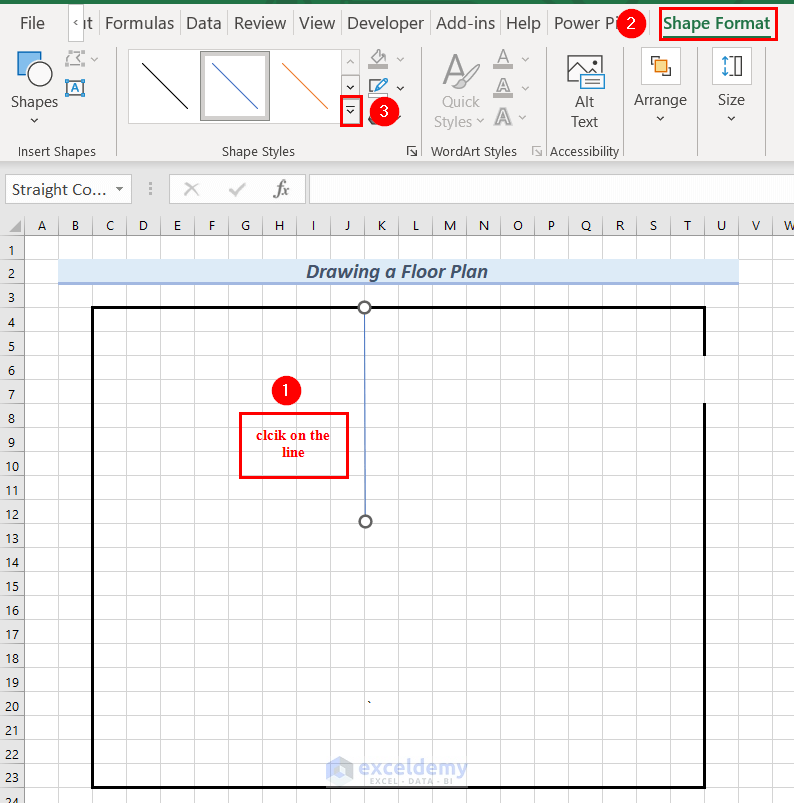
- Select a black thick line.
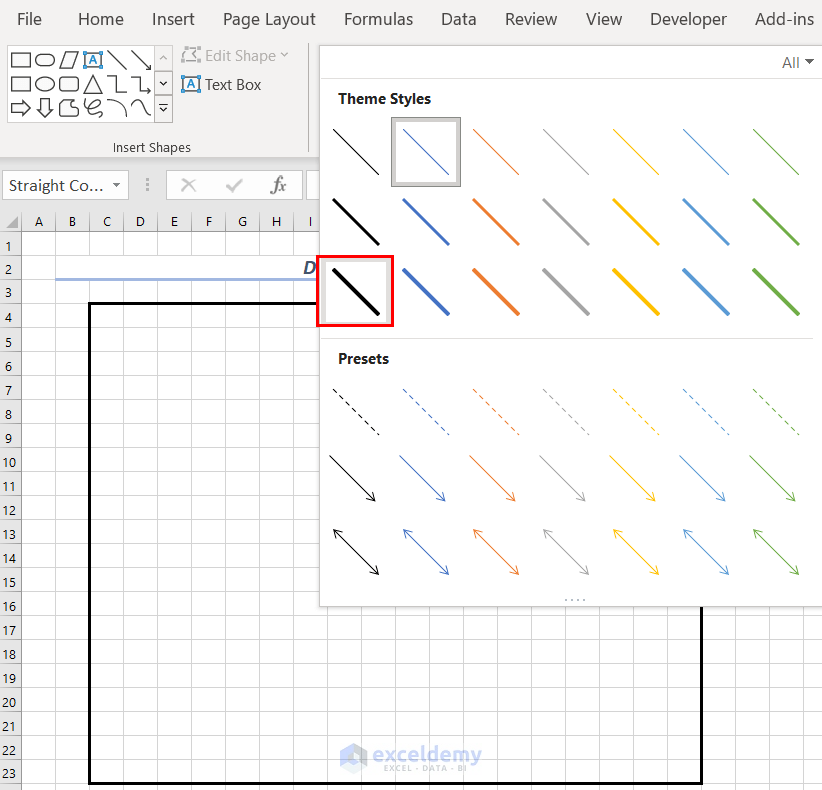
You can see a black thick line in the apartment outline.
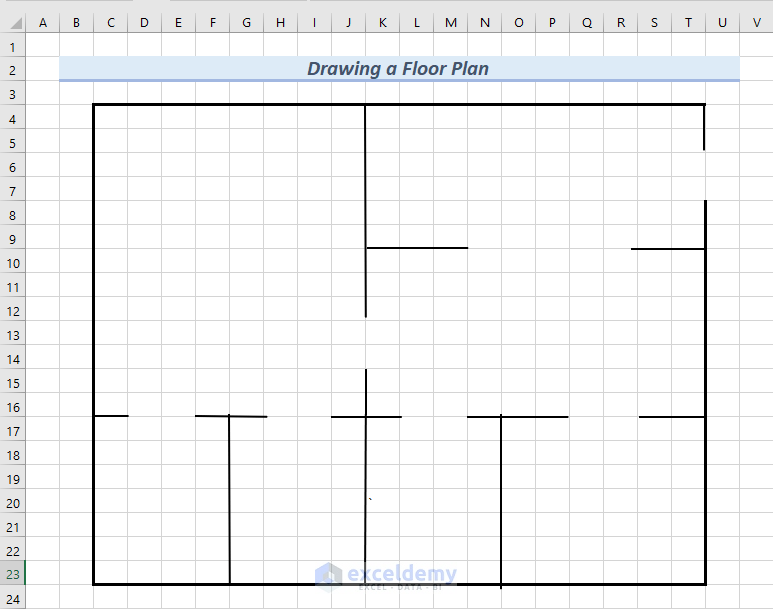
Step 6 – Drawing the Rooms
- Follow Step 4 to insert lines and draw rooms in the apartment using the line shape.
- Follow Step 5 to format the lines.
Step 7 – Adding Room Names
- Go to the Insert tab.
- From the Text group, select Text Box.

- Insert the Text Box in the bedroom and type Bedroom in it.
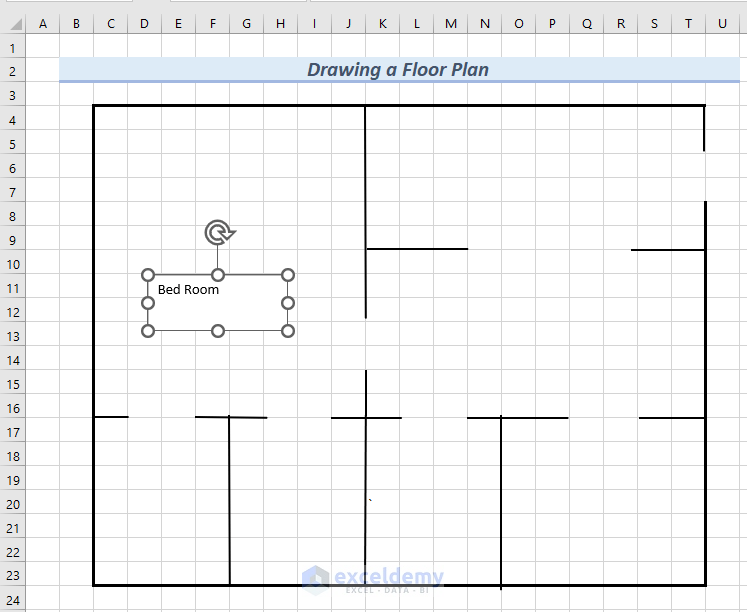
Step 8 – Formatting the Text Box
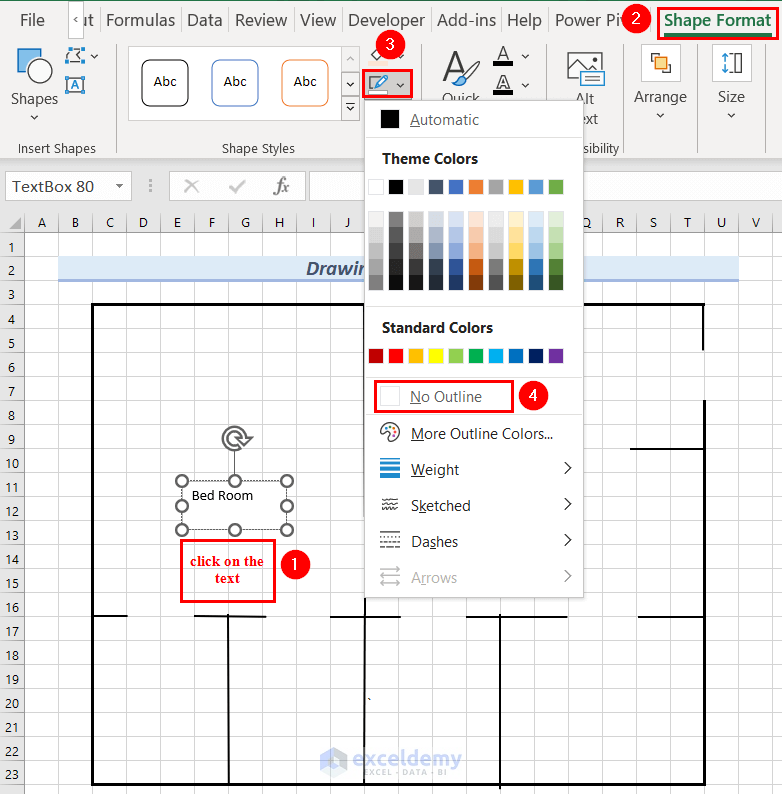
- Click on the text and go to the Shape Format tab.
- From Shape Outline, select No Outline.
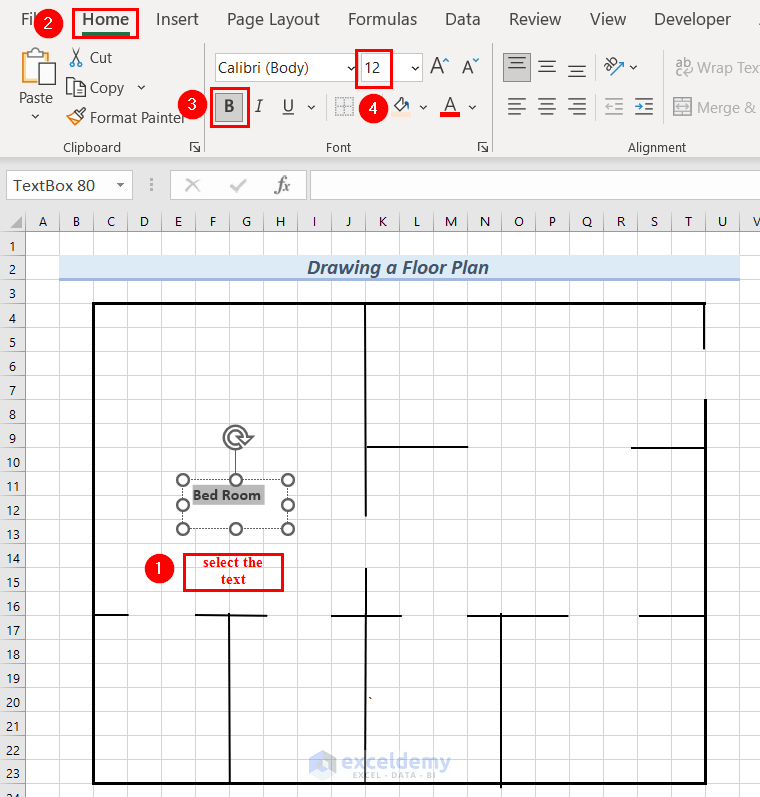
- Select the text and go to the Home tab.
- From the Font group, select Bold and select Font Size as 12.
- We inserted Text Boxes in every room and formatted them the same way.
Step 9 – Drawing the Equipment
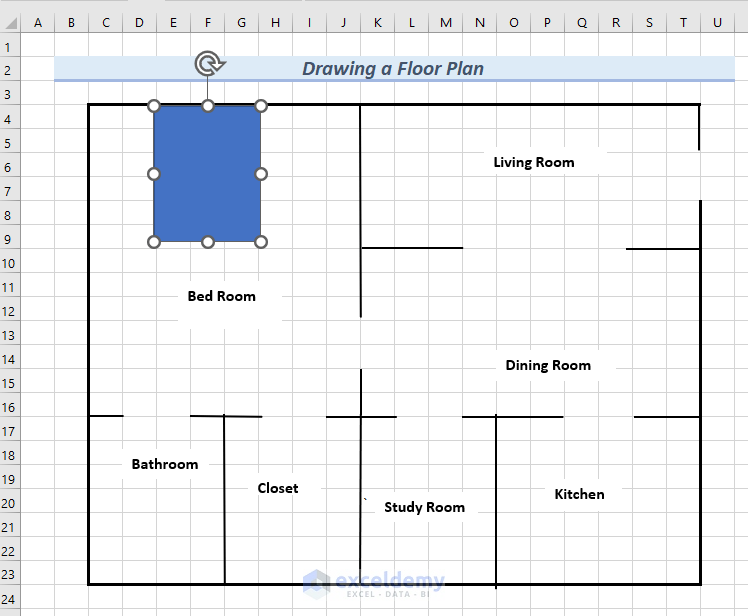
We will draw a bed in the bedroom.
- Go to the Insert tab and click on Shapes.
- Select a Rectangle shape.
- Draw a rectangle shape in the Bedroom.
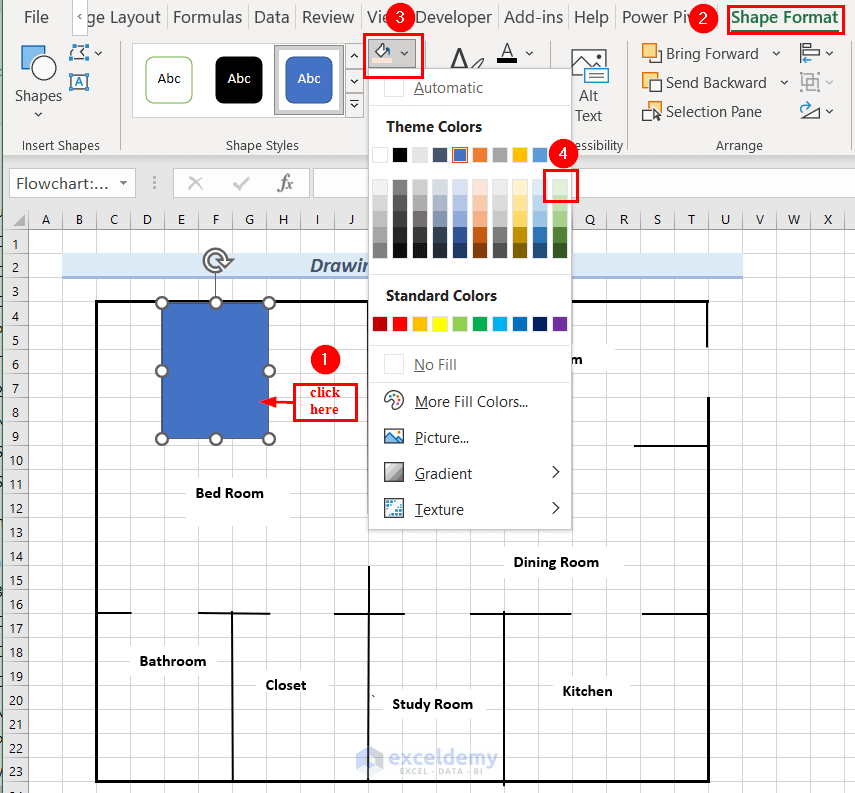
- Click on the rectangle shape and go to the Shape Format tab.
- Click on Shape Fill.
- Select a color. We selected Green, Accent 6, and Lighter 80% as the rectangle color. You can select any color that looks presentable.
- Go to Insert and Shapes.
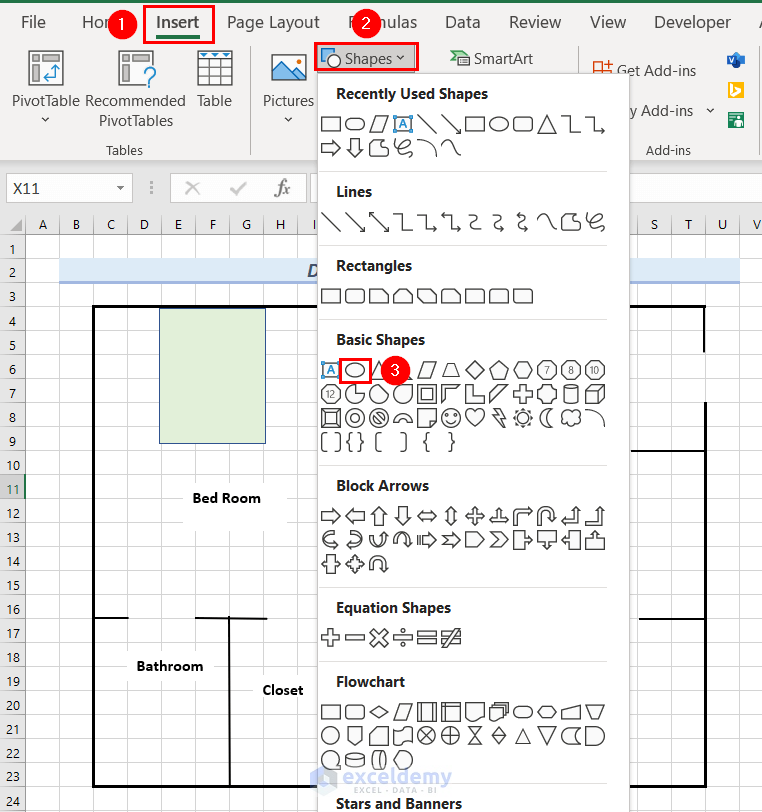
- Insert two Oval shapes to make 2 pillows.
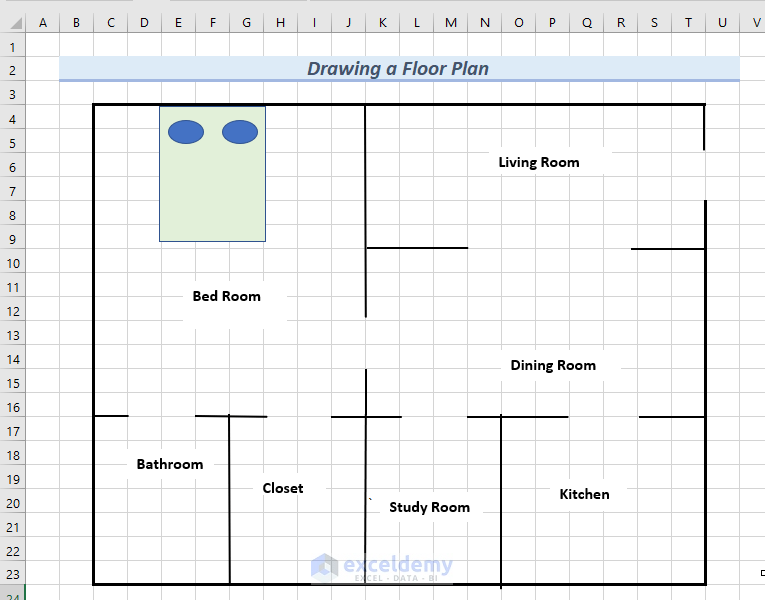
- We inserted different shapes in different rooms to make pieces of equipment for that room.
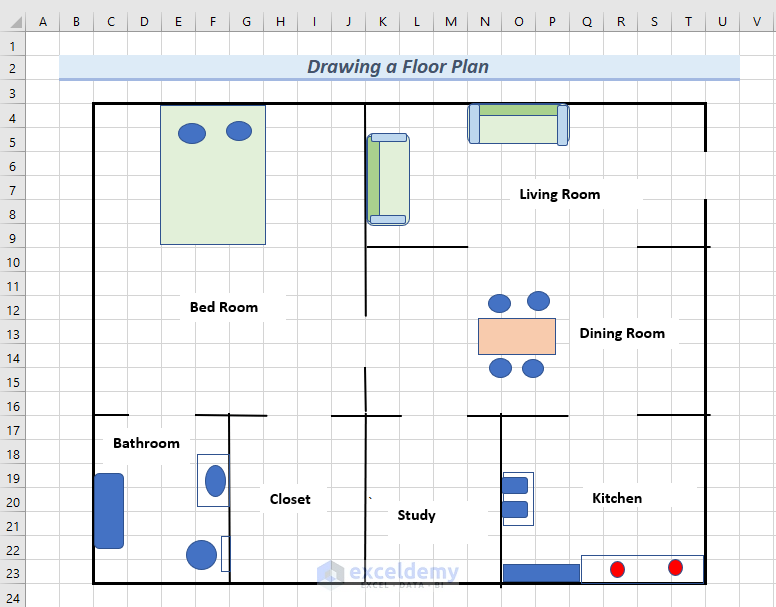
Step 10 – Removing Gridlines
- Follow Step 10 of Example 1 to remove the Gridlines from the worksheet.
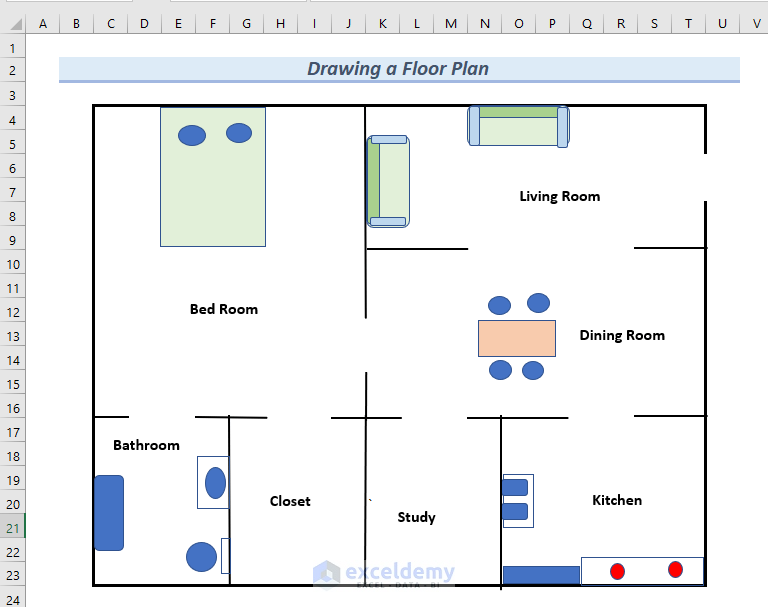
Read More: How to Draw a Floor Plan in Excel
Download the Practice Workbook
Related Articles
- How to Draw to Scale in Excel
- How to Make Fishbone Diagram in Excel
- How to Make Sankey Diagram in Excel
- How to Draw Isometric Drawing in Excel
- How to Draw Lines in Excel
- How to Remove Unwanted Objects in Excel
<< Go Back to Drawing in Excel | Learn Excel
Get FREE Advanced Excel Exercises with Solutions!
