Example 1 – Drawing Simple Shapes with VBA Code
We will design a rectangle, a cell-sized rectangle, and a cube.
Steps:
- Open your worksheet. Save the Excel file as an Excel Macro-Enabled Workbook (*xlsm).
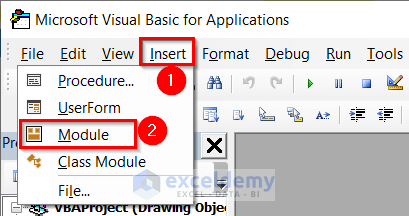
- Choose the Developer tab and select Visual Basic.

- From the Insert tab, select Module.
You have to write or paste the code into the Module.
Case 1.1 – Using VBA Code to Sketch a Rectangular Shape
- Insert the Code given below in a module.
Sub My_Rec()
Set myRec = Worksheets(1)
myRec.Shapes.AddShape msoShapeRectangle, 40, 60, 100, 50
End Sub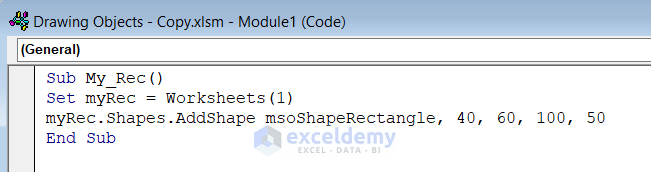
Code Breakdown
- We have created a Sub Procedure named My_Rec.
- We used the variable myRec.
- The AddShape function along with the msoShapeRectangle feature will create the rectangle shape.
- 40, and 60 denote the position of the shape. Additionally, 40 is the column reference and 60 is the row reference.
- 100 denotes the length of the rectangle, and 50 denotes the width of the rectangle.
- Save the code and go back to the Excel File.
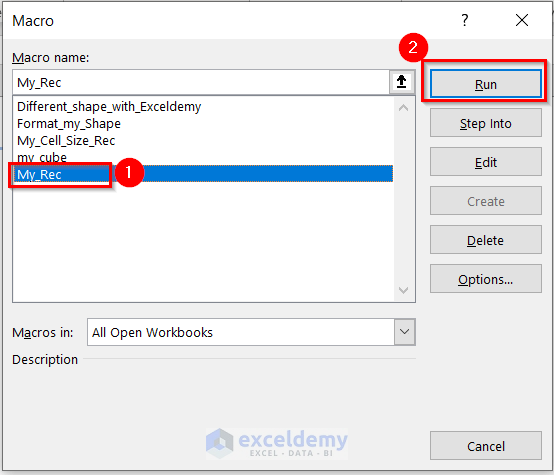
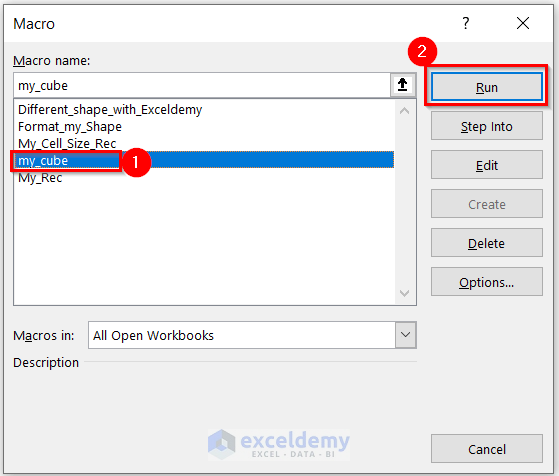
- From the Developer tab, select Macros.
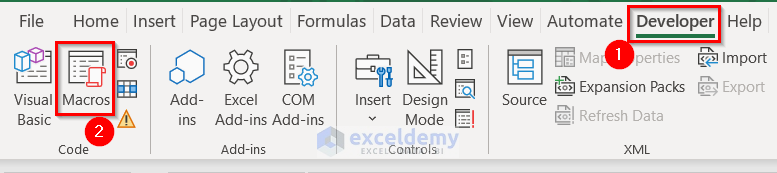
- Select Macro (My_Rec) and click on Run.
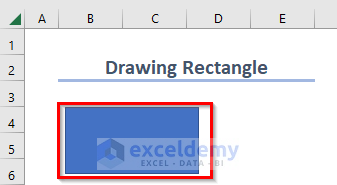
You will see the following shape.
Read More: How to Use Drawing Tools in Excel
Case 1.2 – Designing a Cell-Sized Rectangle with a Solid Color
Steps:
- Insert the Code given below in a module.
Sub My_Cell_Size_Rec()
ActiveSheet.Shapes.AddShape(msoShapeFlowchartProcess, 40, 60, 65, 20).Select
    Selection.ShapeRange.Fill.ForeColor.SchemeColor = 16
    Selection.ShapeRange.Fill.Solid
    Selection.ShapeRange.Fill.Visible = msoTrue
End Sub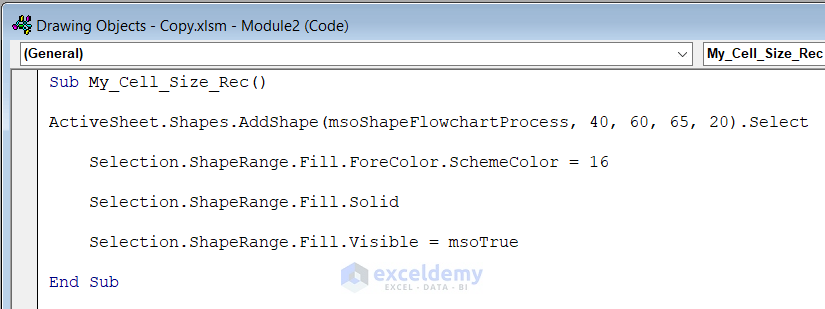
Code Breakdown
- We have created a Sub Procedure named My_Cell_Size_Rec.
- The AddShape function along with the msoShapeFlowchartProcess feature will create the rectangle shape.
- 40, and 60 denote the position of the shape. Additionally, 40 is the column reference and 60 is the row reference.
- 65 denotes the length of the rectangle, and 20 denotes the width of the rectangle.
- The color code 16 is for the fill color of the shape.
- Save the code and go back to the Excel File.
- From the Developer tab, select Macros.
- Select Macro (My_Cell_Size_Rec) and click on Run.

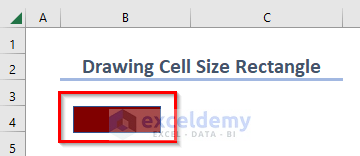
You will get the following rectangle.
Case 1.3 – Applying a VBA Code to Draw a Cube in Excel and Put in Text
Steps:
- Insert the Code given below in a module.
Sub my_cube()
Dim my_cube As Shapes
    Set my_cube = ActiveSheet.Shapes
With my_cube
    With .AddShape(msoShapeCube, 40, 60, 100, 90).TextFrame
        .Characters.Text = "Exceldemy"
        .HorizontalAlignment = xlHAlignCenter
        .VerticalAlignment = xlVAlignDistributed
    End With
End With
End Sub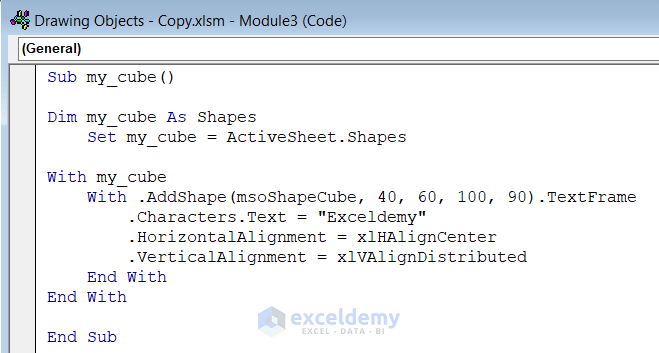
Code Breakdown
- We have created a Sub Procedure named my_cube.
- We declared a variable my_cube as Shapes.
- The AddShape function along with the msoShapeCube feature will create the cube shape.
- 40, and 60 denote the position of the shape. Additionally, 40 is the column reference and 60 is the row reference.
- 100 denotes the length and height of the cube, and 90 denotes the width of the cube.
- The Characters.Text property will put Exceldemy in the shape.
- Save the code and go back to the Excel File.
- From the Developer tab, select Macros.
- Select Macro (my_cube) and click on Run.
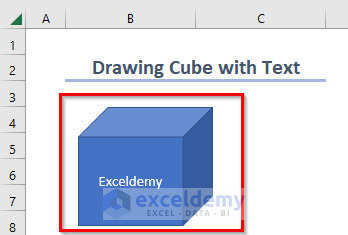
You will see the following cube.
Read More: How to Do Drawing in Excel Using VBA
Example 2 – Use of VBA Code to Design a Complex Shape with Texts in Excel
Steps:
- Insert the Code given below in a module.
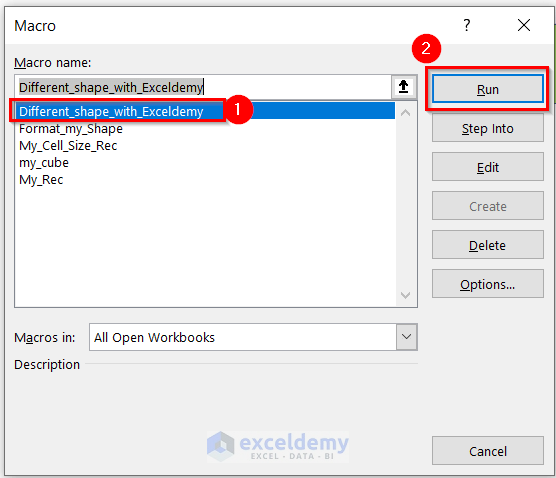
Sub Different_shape_with_Exceldemy()
    Dim my_int, my_intgr           As Integer
    Dim my_x, my_y, my_z, my_sng, my_size        As Single
    Dim my_shape          As Shape
    Dim my_difined_text       As String
    Dim start_frm_left, start_cell_top  As Single
    start_frm_left = ActiveCell.Left
    start_cell_top = ActiveCell.Top
    my_difined_text = "Hi Exceldemy"
    my_sng = 12
    my_intgr = Len(my_difined_text)
    my_size = Application.InchesToPoints(1)
    For my_int = 1 To my_intgr
        If Mid(my_difined_text, my_int, 1) <> " " Then
            my_x = my_sng * my_int / my_intgr
            my_x = Application.InchesToPoints(my_x)
            my_y = Application.InchesToPoints(my_z)
            If my_int Mod 2 = 1 Then
                Set my_shape = ActiveSheet.Shapes.AddShape(msoShapeUpRibbon, start_frm_left + my_x, start_cell_top + my_y, my_size, my_size)
            Else
                Set my_shape = ActiveSheet.Shapes.AddShape(msoShapeDownRibbon, start_frm_left + my_x, start_cell_top + my_y, my_size, my_size)
            End If
            my_shape.Fill.ForeColor.RGB = RGB(chng_shape_clr(155, 200), chng_shape_clr(200, 255), chng_shape_clr)
            my_shape.Fill.Visible = msoTrue
            my_shape.TextFrame.Characters.Text = UCase(Mid(my_difined_text, my_int, 1))
            my_shape.TextFrame.Characters.Font.Size = 24
            my_shape.TextFrame.Characters.Font.Name = "Calibri"
            my_shape.TextFrame.Characters.Font.Bold = True
            my_shape.TextFrame.Characters.Font.Color = RGB(255, 0, 0)
            my_shape.TextFrame2.VerticalAnchor = msoAnchorMiddle
            my_shape.TextFrame2.TextRange.ParagraphFormat.Alignment = msoAlignCenter
        End If
    Next my_int
End Sub
Function chng_shape_clr(Optional lwr_bnd As Integer = 100, Optional upr_bnd As Integer = 255) As Integer
    chng_shape_clr = Int((upr_bnd - lwr_bnd + 1) * Rnd + lwr_bnd)
End Function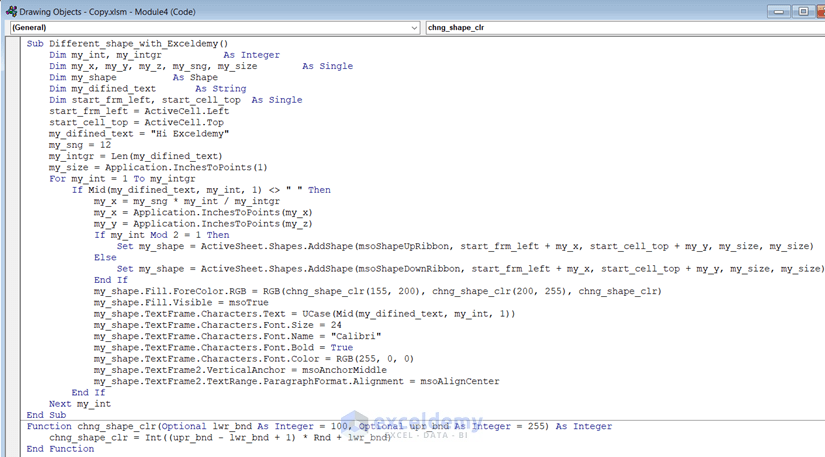
Code Breakdown
- We have created a Sub Procedure named Different_shape_with_Exceldemy.
- We declared some variables my_int, my_intgr as Integers; my_x, my_y, my_z, my_sng, my_size, start_frm_left, start_cell_top as Singles; my_shape as Shape; my_difined_text as Strings.
- You can insert a new text by changing the my_difined_text variable.
- You have to identify the total space for the text in the variable my_sng.
- The AddShape function along with the msoShapeUpRibbon, and msoShapeDownRibbon features will create that complex shape.
- We used some properties for the text on the shape.
- We used a function named chng_shape_clr for changing the shape colors.
- Save the code and go back to the Excel File.
- From the Developer tab, select Macros.
- Select Macro (Different_shape_with_Exceldemy) and click on Run.
You will see the following shape with a defined text on it.

Read More: Drawing Decision Trees in Excel
Using VBA Code for Formatting Objects in Excel
Steps:
- Insert the Code given below in a module.
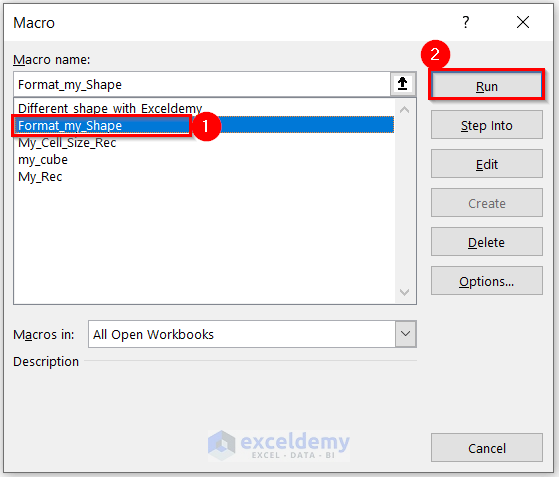
Sub Format_my_Shape()
Dim my_shape As Shape
Worksheets(5).Shapes(1).Fill.ForeColor.RGB = RGB(192, 32, 255)
For Each my_shape In ActiveSheet.Shapes
my_shape.Flip msoFlipHorizontal
Next
End Sub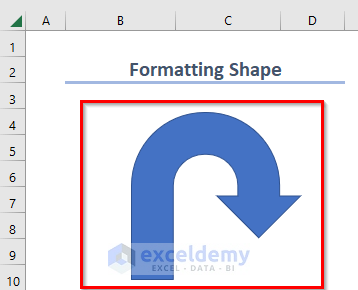
Code Breakdown
- We have created a Sub Procedure named Format_my_Shape.
- We declared a variable my_shape as Shapes.
- The Worksheets (5) will call the 5-number worksheet. So, you must identify the proper worksheet number where the shape is.
- We used an RGB color code for the filling of the shape.
- The For Each Next loop will call the shape again and flip the shape.
- Save the code, then go back to the Excel File.
- From the Developer tab, select Macros.
- Select Macro (Format_my_Shape) and click on Run.
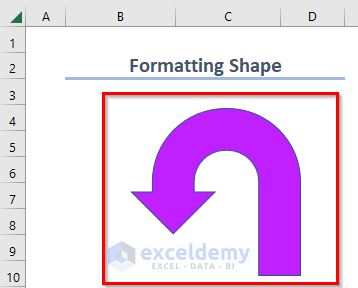
You will get the following formatted shape.
Read More: How to Create Drawing Register in Excel
Practice Section
You can practice the explained examples by yourself through the download file.
Download the Practice Workbook
Related Articles
<< Go Back to Drawing in Excel | Learn Excel
Get FREE Advanced Excel Exercises with Solutions!
