Wonder how to make a 3D drawing in Excel? You are in the right place! In this article, I have discussed how to construct a 3-dimensional drawing in Microsoft Excel. So, stay with us all through the article and leave us feedback in the comment box.
How to Do 3D Drawing in Excel (3 Examples)
So, we will see 3 examples of 3D drawings in Excel: creating an arbitrary 3D object, creating a regular shaped 3D object, i.e. a spherical cube, and using built-in 3D models of Excel (animated or still image).
Example 1: Create an Arbitrary 3D Object
There are no rigid rules to make a random 3D object in Excel. So, here we are giving just a demo, from which you will get an idea of that.
⦿ Steps:
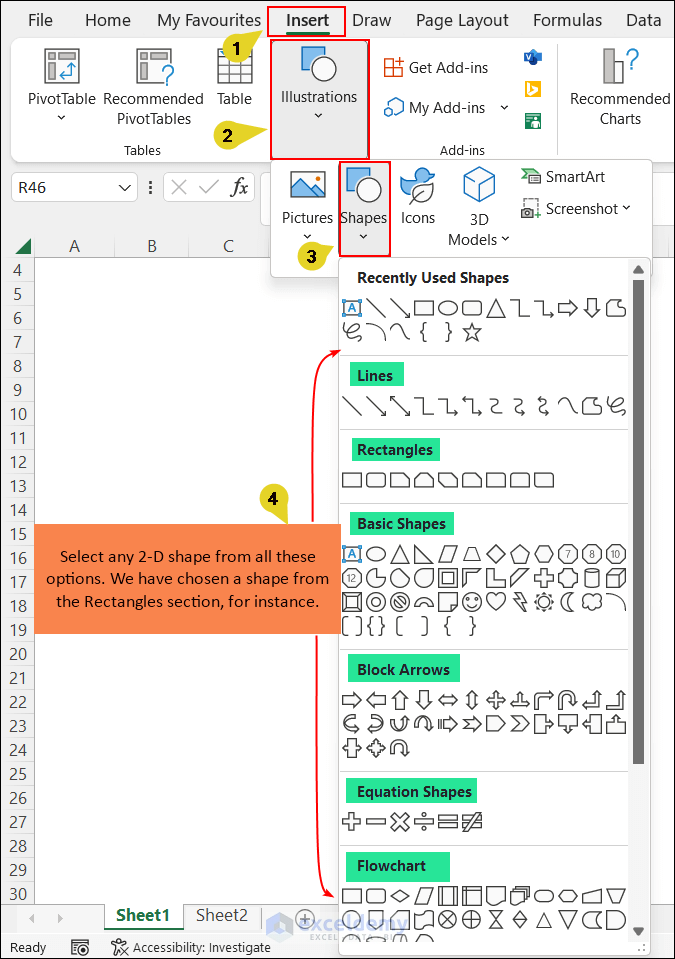
- First off, go to the Insert tab and click on Illustrations.
- Then click on Shapes and choose a suitable 2D shape.
Here, I have chosen a rectangle, for instance.
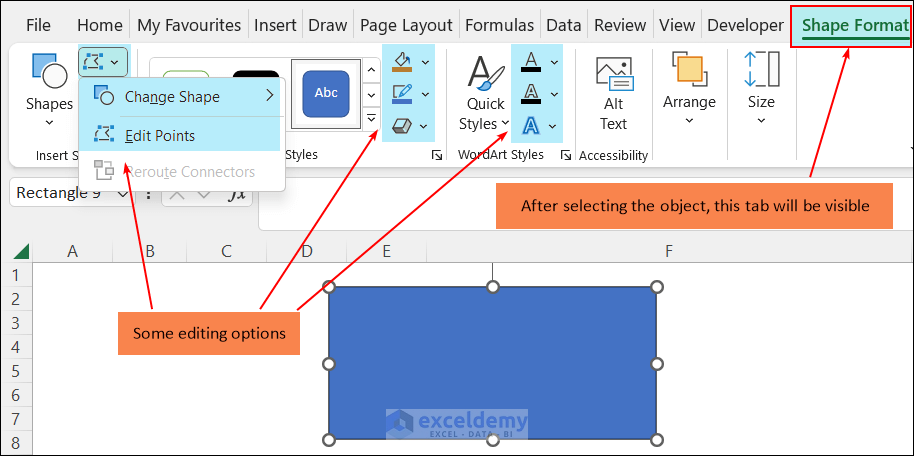
- Draw the shape with mouse drag. You have some editing options for this shape in Excel. You can edit the shape controlling the points, you can change the color inside, etc.
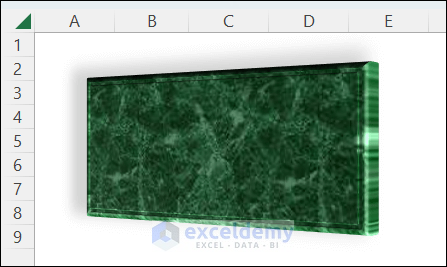
- Now, select the rectangle and go to the Shape Fill.
- Then select the Texture option and select the Green Marble option.
These two steps are optional. You can avoid them if you wish.

- Now, select Shape and go to Shape Effects. You will see all the options in the below image.

- You can use a preset shape format and apply it to your object.

- In that case, you will get an object like the following image. (Preset 12 is selected)
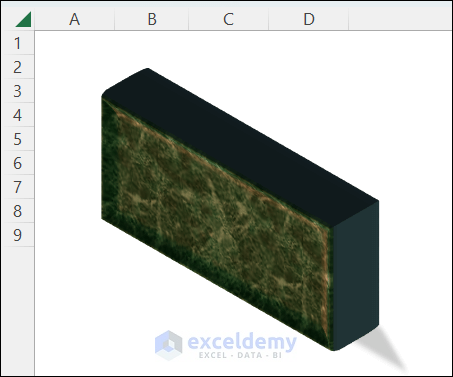
- Or, you can apply your own formats. For example, I have applied Perspective: Lower Right from the Shadow option, Soft Round from the Bevel option, and Parallel Isometric: Left Down from the 3D Rotation option.
- As a result, the following 3D-like object appears in my Excel. The shadow I have used makes it more like a 3D object.

- You can add more formatting to the object. For that, choose the object and right-click on your mouse.
- Select the Format Picture command.

- Then the following window will appear.
- In this window, look at the options: Top bevel, Bottom bevel, Depth, Contour, Material, Lighting, etc. Control the shape of your 3D objects by inputting suitable values in these boxes.

- Finally, here is our output!
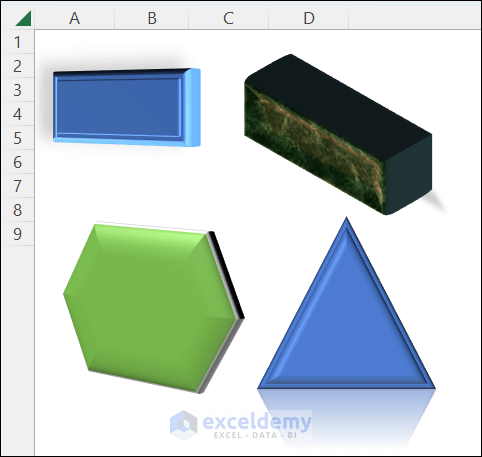
- Here are some more examples of 3D objects made by using this workaround in Excel.
Read More: Drawing Decision Trees in Excel
Example 2: Draw a 3D Spherical Cube in Excel
Now, let’s be more specific. How will you draw a regular 3D object in Excel? In this example, I will show how to draw a cubed sphere.
⦿ Steps:
- First of all, select an Oval shape from the Baic Shapes section of the Shapes option of the Insert tab’s Illustrations group.

- You can control the size of the shape (height and width) in the Size group.

- Now, go to the Format Shape window (we have shown the process in Example 1), and select the Round bevel in the Top bevel, and Bottom bevel options.

- After that, input 110 as the Width and Height of the Top and Bottom bevel options. You can keep the Depth value 0.

- Now, after applying the following formats, the sphere will look like the following image.
- Shadow: Perspective (Below)
- 3D Rotation: Perspective (Contrasting Left)

Read More: How to Create Drawing Register in Excel
Example 3: Insert Built-in 3D Models of Excel (with or without Animation)
In the last example, I will show how to utilize the built-in 3D models of Excel. This option is available in Excel 365, Excel 2021, Excel 2019, and Excel 2016.
To manually create animation in Excel, have a look at the following article: Excel VBA to Apply 3D Animation
⦿ Steps:
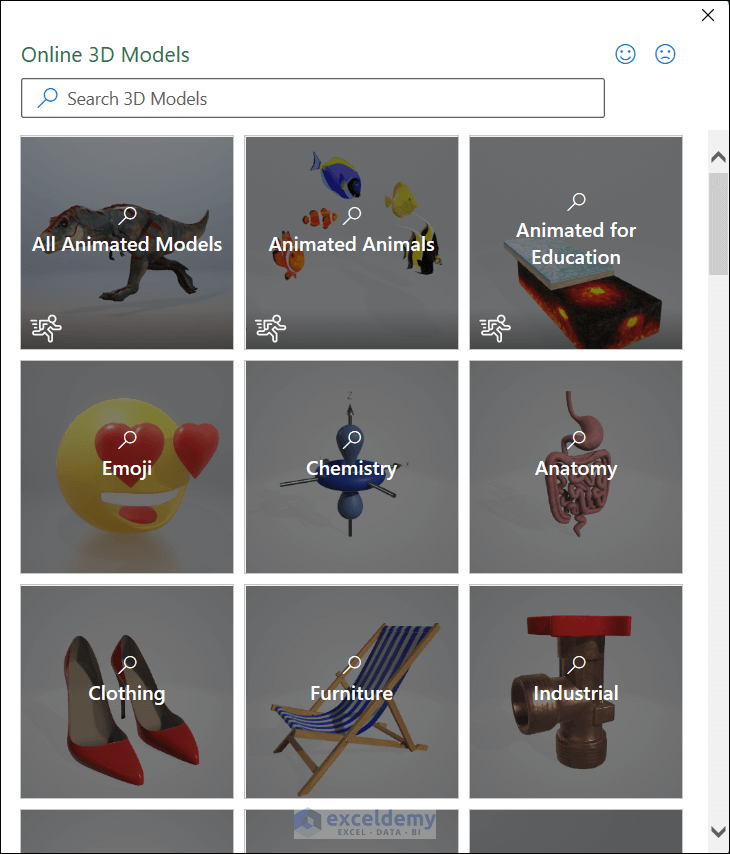
- To get them, go to the Insert tab, then from the Illustrations group, click on the 3D Models command and select Stock 3D Models.

- After that, the following Online 3D Models will appear. Keep your Internet connection on.
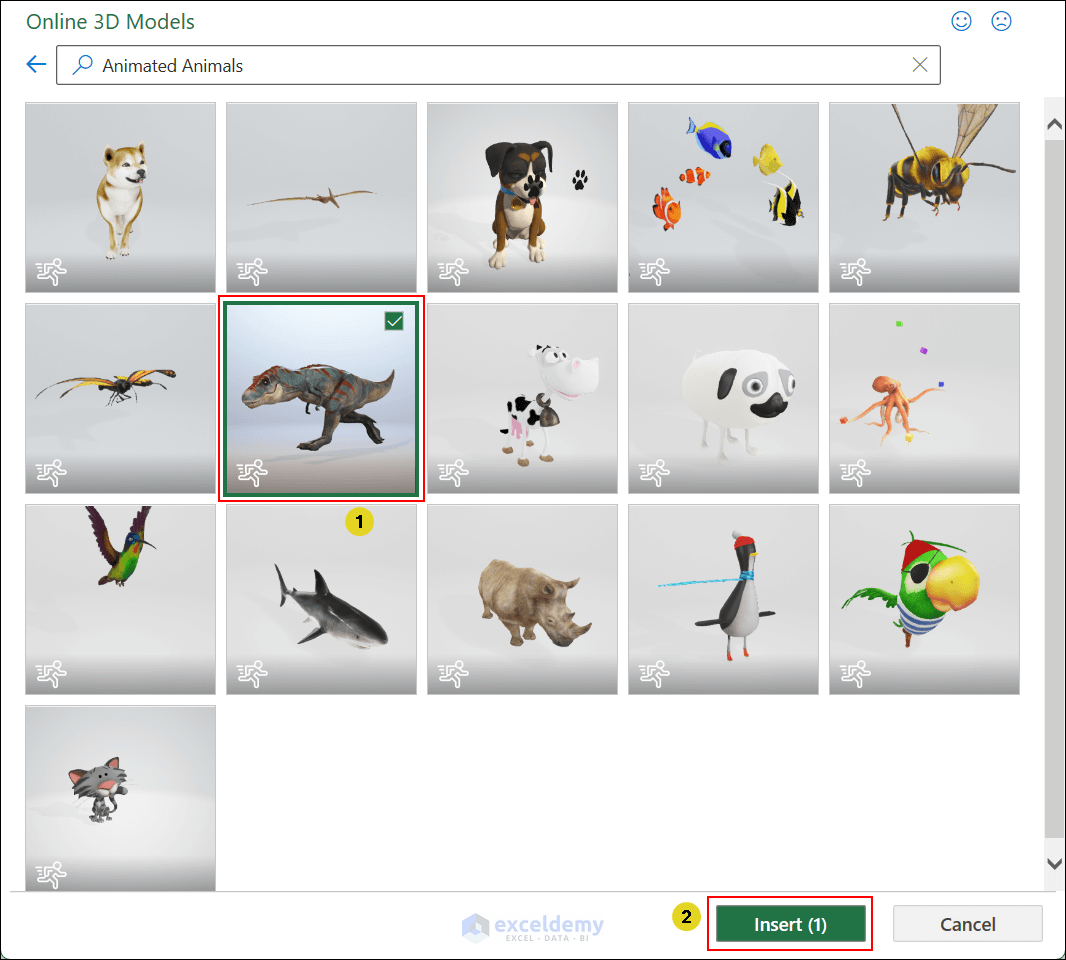
- For instance, I have chosen the Animated Animals option here.
- Select any option available here.
- Then press the Insert button.
- The following window will appear for a moment.

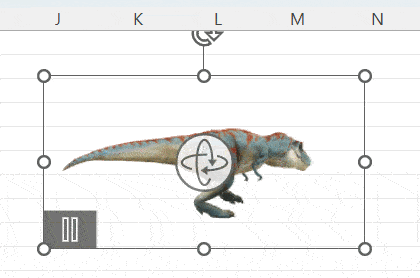
- After that, the selected 3D object will be visible.
- You can rotate the model 360 degrees.
Read More: How to Do Drawing in Excel Using VBA
Download Practice Workbook
You can utilize the workbook below for practice. All of the examples from this article are included here. You can use the raw data to execute the operations.
Conclusion
So, I hope the examples of 3D drawing in Excel we have shown here will be useful for you. If you have any thoughts on these, please share them with us. Also, don’t hesitate to ask any questions, the comment box is open for any queries. You are also cordially invited to our website to learn more articles on Excel. Happy Excelling!
Related Articles
- How to Draw Pictures in Excel
- How to Perform Drawing of Objects with VBA in Excel
- How to Use Drawing Tools in Excel
- How to Remove Drawing Tools in Excel
<< Go Back to Drawing in Excel | Learn Excel
Get FREE Advanced Excel Exercises with Solutions!
