Drawing pictures or shapes can help an individual to enhance the appearance of his presentation. Excel offers various options to draw pictures or anything according to a person’s needs. In this article, we will walk you through three easy ways to draw pictures in Excel.
In this article, we will demonstrate three easy ways to draw pictures in Excel. Here’s an overview of drawing a picture in Excel.

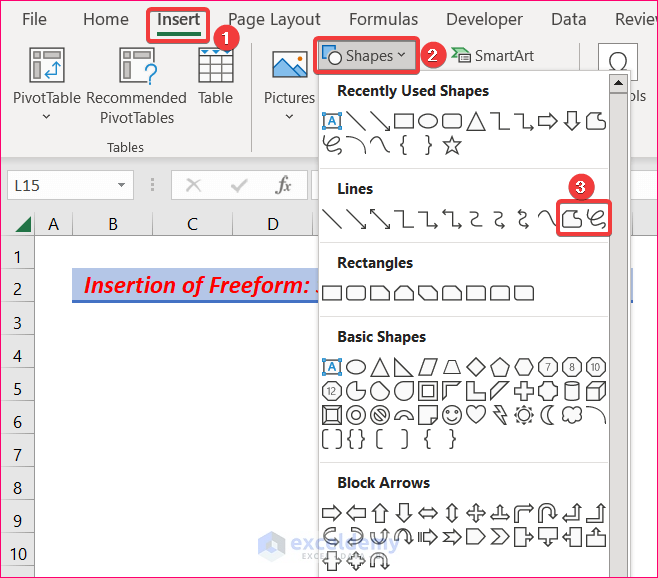
1. Inserting Freeform: Scribble and Freeform: Shape Options for Freehand Drawing
In this method, we will use the Freeform: Scribble and Freeform: Shape options for freehand drawing in Excel. Follow these steps to learn how to use these options.
Steps:
- First of all, click on the Insert tab and go to,
Insert → Illustrations → Shapes
- Then select the Freeform: Scribble or Freeform: Shape option.
- Using the Freeform: Scribble option, you can draw anything you want with your cursor.
- Once the drawing is complete, right-click on the drawing and select Edit Points.

- As a result, several points will be visible on the drawing.
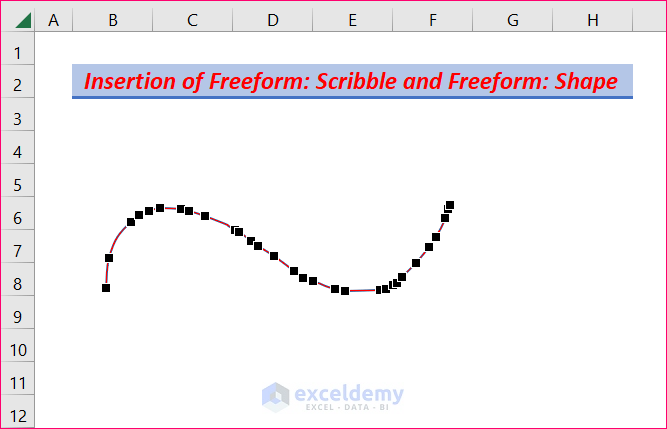
- Now right-click on any of the points and different editing options will appear.
- You can use these options to Add Points, Delete Points, Close Paths, etc.

- Additionally, you can drag any point to modify the shape of the drawing.

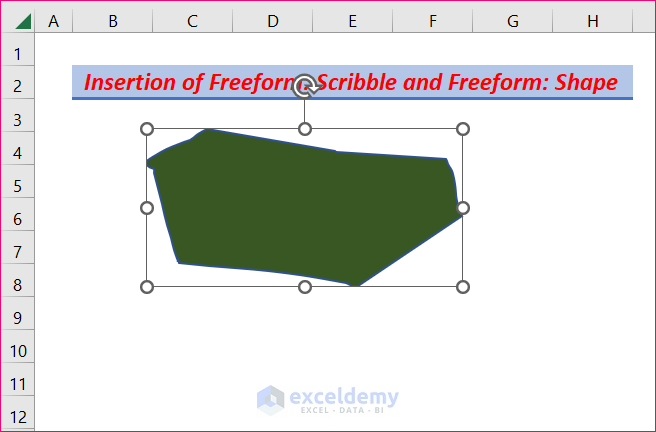
- Similarly, you can have a freehand drawn shape using the Freeform: Shape option.
- After the drawing is done, right-click on it and select the Fill option.

- Then choose a color to fill the shape.

- Finally, press Enter and the shape will be filled with your chosen color.
Read More: How to Do Drawing in Excel Using VBA
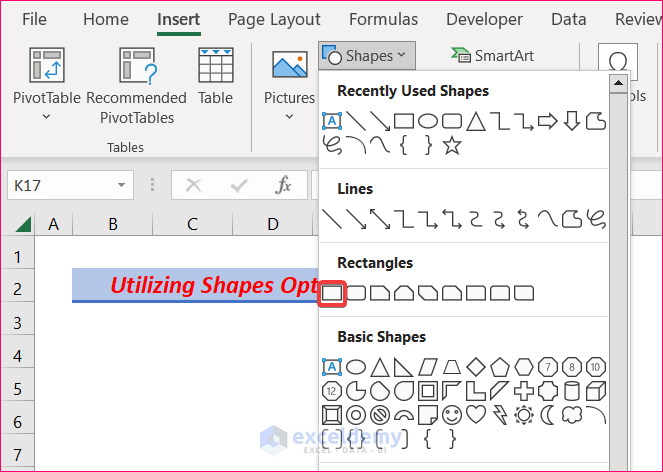
2. Utilizing the Shapes Option to Draw Pictures in Excel
In this method, we will the Shapes option for drawing pictures in Excel. The steps to use it are discussed in the following section.
Steps:
- First, click on the Insert tab and go to,
Insert → Illustrations → Shapes
- Now you will have a lot of shapes to choose from. For example, Rectangles, Basic Shapes, Flowcharts, etc.

- Now let’s draw a rectangle. To do it, choose any of the shapes from Rectangles.
- Next, drag your cursor to draw the shape.

- Once you stop dragging, the shape will be formed. You can edit the shapes any way you want like the previous method.

Read More: How to Create Drawing Register in Excel
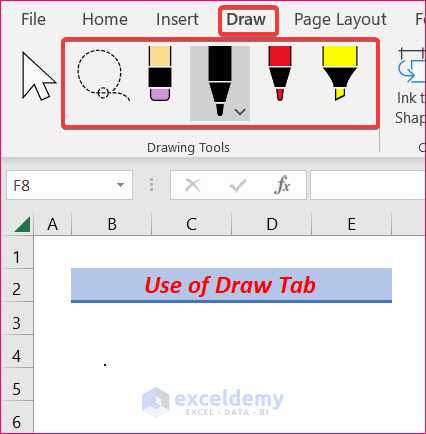
3. Using Draw Tab to Draw Pictures in Excel
Now we will use the Draw tab for drawing pictures in Excel. The B tab contains a few tools that can help with drawing various shapes. Read the following steps to learn how to use it.
Steps:
- First of all, we need to enable the Draw tab. To do it, click on the arrow button above Page Layout.
- Next, select More Commands.

- Then click on Customize Ribbon and check the box of Draw.

- Hence, the Draw tab is enabled. Click on the Draw tab to find the necessary Drawing Tools.
- After that, let’s draw a freehand-drawn shape and convert it into a regular shape.
- To do it, select Pen: Black from the Draw tab.
- Then draw your desired shape freehand.

- Now to turn it into a regular shape, select the Lasso Select option and then click on your drawn shape.
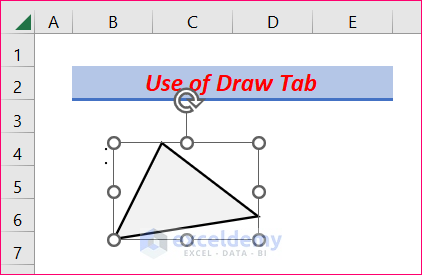
- After that, click on Ink to Shape.
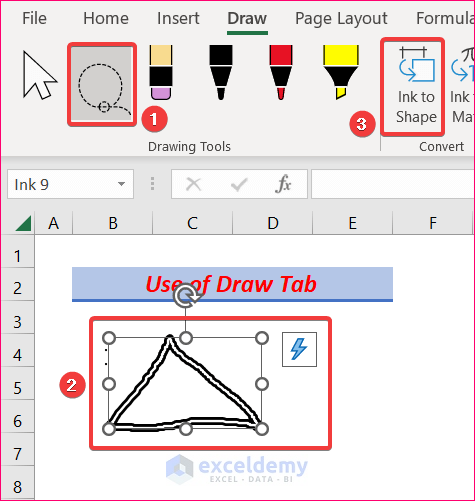
- Consequently, the drawing will turn into a regular shape.
- Drawing tools can help to create flowcharts for various purposes.
- After finishing the drawing, group them together to prevent their dispersion.
Read More: How to Remove Drawing Tools in Excel
Download Practice Workbook
Download this practice workbook to exercise while you are reading this article.
Conclusion
Thanks for making it this far. I hope you find this article useful. Now you know three easy ways to draw pictures in Excel. Please let us know if you have any further queries, and feel free to give us any recommendations in the comment section below.
Related Articles
- How to Perform Drawing of Objects with VBA in Excel
- Drawing Decision Trees in Excel
- How to Do 3D Drawing in Excel
<< Go Back to Drawing in Excel | Learn Excel
Get FREE Advanced Excel Exercises with Solutions!
