Need to learn how to insert the current date and time in cell A1? Sometimes we want to enter the latest time when an employee arrives at his workplace, or when a file was last edited. If you are looking for such unique kinds of tricks, you’ve come to the right place. Here, we will take you through 6 easy and convenient methods of inserting the current date and time in cell A1 in Excel.
How to Insert the Current Date and Time in Cell A1: 6 Methods
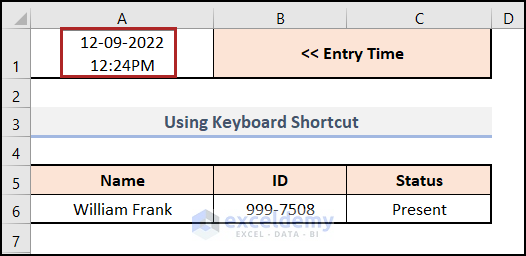
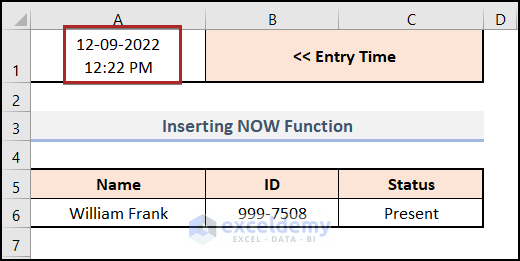
For clarification, we have an Employee Timesheet in our hands. The dataset contains the Name, ID, and Status of William Frank.
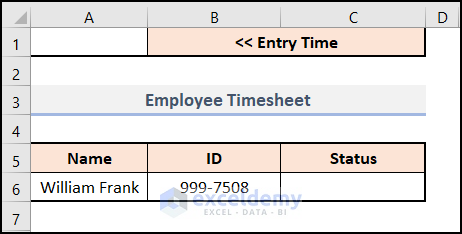
Now, we’ll insert the Entry Time of this employee in cell A1 using various methods. So let’s explore them one by one.
Here, we have used Microsoft Excel 365 version, you may use any other version according to your convenience.
1. Using Keyboard Shortcut
In the first method, we will show you how to insert the current date and time in Excel using the keyboard shortcut. Follow the steps given below to do it on your own dataset.
📌 Steps:
- At the very beginning, select cell A1.
- Then, press CTRL + ; on the keyboard. (It returns the current date)
- After that, press the SPACE key.
- Later, press CTRL+SHIFT+; on your keyboard (It returns the current time).
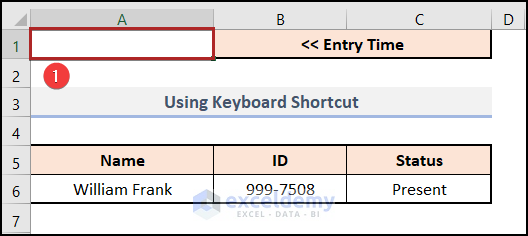
At this moment, the selected cell displays the current date and time in one line.

But it will be more tempting if the date and time remain on different lines. To do this, we’ve to format the cell. So, follow the steps below.
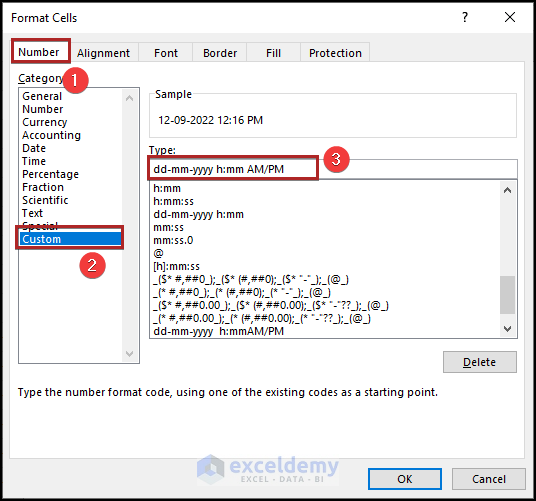
- First of all, press CTRL + 1 on the keyboard.
- Immediately, the Format Cells dialog box opens.
- Then, go to the Number tab.
- After that, select Custom as Category.
- Next, write down dd-mm-yyyy h:mm AM/PM in the Type box.
- Now, remove the space between yyyy and h.
- Later, hold the ALT key and type 0010 on the num pad.
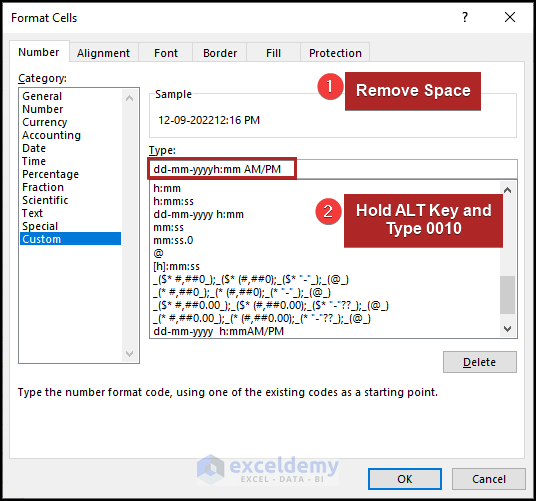
After typing 0010, the time part looks to disappear in the Type box. But it’s actually in the second line now.
- Then, proceed to the Alignment tab.
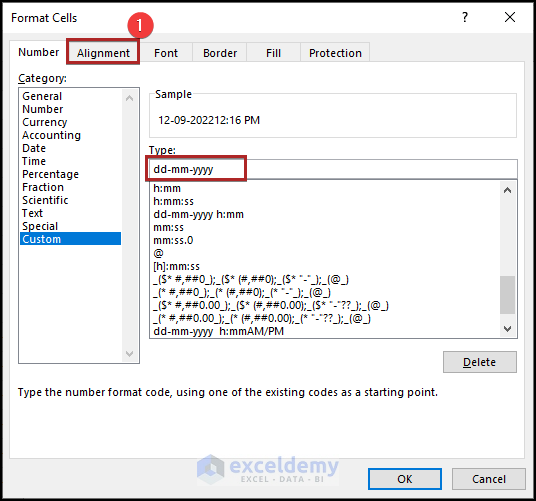
- In the Alignment tab, check the box of Wrap text under the Text control section.
- Finally, click OK.

Presently, the date and time in cell A1 looks like in the image below.
Read More: How to Insert Current Date and Time in Excel
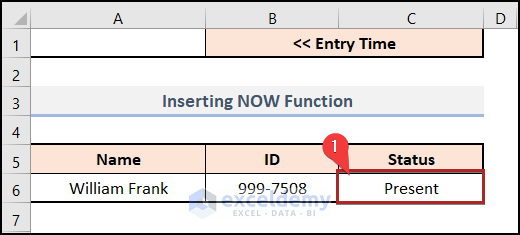
2. Inserting NOW Function
In this method, we’ll use the NOW function to get the current date and time. It’s so simple & easy, just follow along.
📌 Steps:
- At first, write down Present as the Status in cell C6.
- Then, go to cell A1 and write down the following formula.
=NOW()
NOW function returns with the current date and time formatted as a date and time.
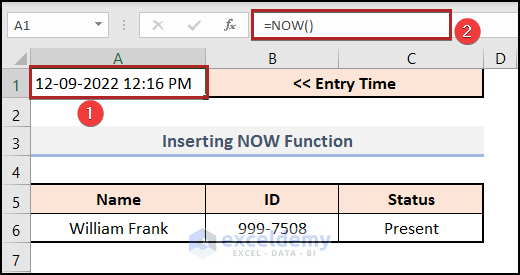
- Later, format the cell to show the result in our desired format just like Method 1.
Read More: How to Combine Date and Time in One Cell in Excel
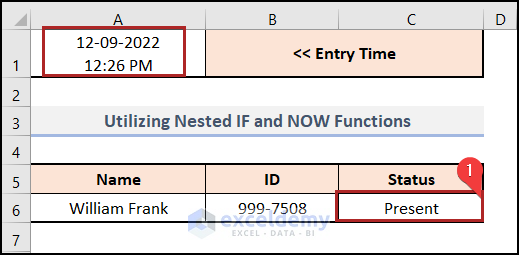
3. Utilizing Nested IF and NOW Functions
In this method, we will use the nested IF and NOW functions to enter the date and time in Excel. The nested IF function is used to check multiple conditions in Excel and the NOW function returns the current date and time.
📌 Steps:
Before going any further, we’ve to enable the iterative calculation feature in Excel. So, follow the steps below.
- Firstly, go to the File tab.
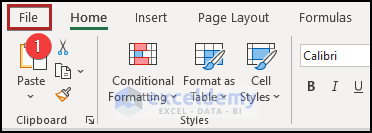
- Secondly, select Options from the menu.

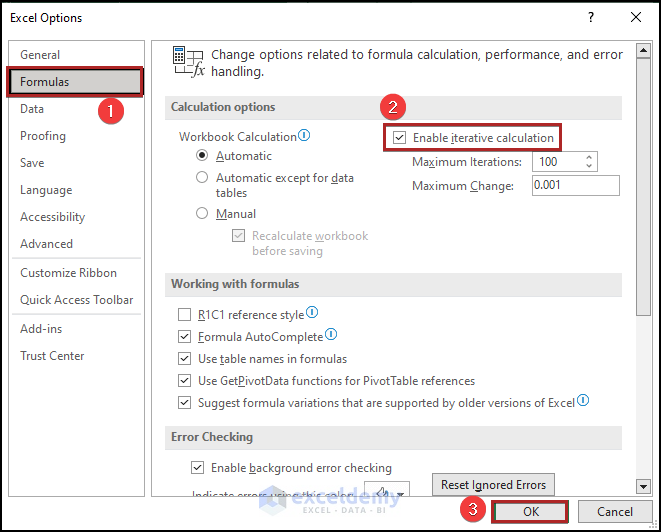
- Instantly, the Excel Options window appears.
- Here, jump to the Formulas tab.
- In the Calculation options section, tick the box of Enable iterative calculation.
- Lastly, click OK.
Now, we can apply our formula to the sheet.
- Initially, select cell A1 and type the formula below.
=IF(C6<>"",IF(A1<>"",A1,NOW()),"")
Here, in the IF function, first, we checked if cell C6 is not equal to blank then another IF function will execute, or else it will return a blank. The second IF function will check if cell A1 is not equal to blank. If the value is TRUE then it will return cell A1 or else it will execute the NOW function.
- Correspondingly, press ENTER.
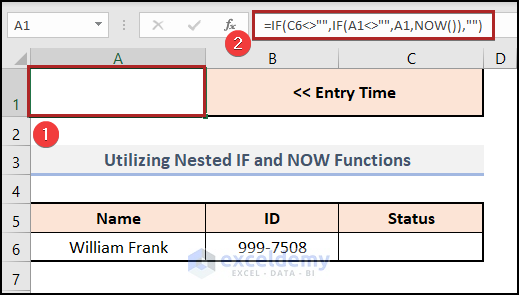
From the picture above, we can see that the formula returns blank in cell A1 as there is no value in cell C6. So, let’s check if the formula works when there’s a value in cell C6.
- Currently, write down Present in cell C6 and press ENTER.
Suddenly, the current date and time will be shown in cell A1.
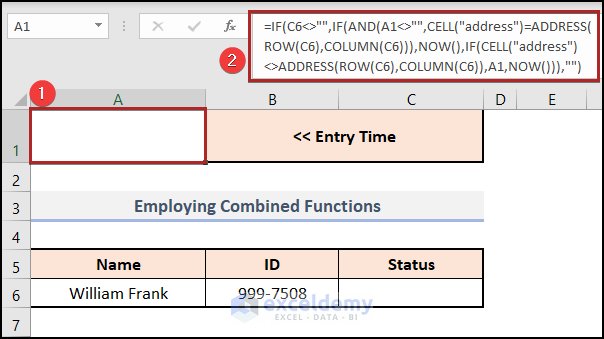
4. Employing Combined Functions
Now, we will show how you can insert time in Excel with updates using the ADDRESS, CELL, COLUMN, IF, NOW, and ROW functions. Please go through the steps to do it on your own dataset.
📌 Steps:
- Primarily, select cell A1 and enter the following formula into that cell.
=IF(C6<>"",IF(AND(A1<>"",CELL("address")=ADDRESS(ROW(C6),COLUMN(C6))),NOW(),IF(CELL("address")<>ADDRESS(ROW(C6),COLUMN(C6)),A1,NOW())),"")
- ROW(C6)→ The ROW function returns the row number of a specific cell.
- Output: 6
- COLUMN(C6)→ The COLUMN function returns the column number of a specific cell.
- Output: 3
- ADDRESS(ROW(C6),COLUMN(C6))→ The ADDRESS function returns the address of the given Cell.
- ADDRESS(6,3)→ turns into
- Output: $C$6
- ADDRESS(6,3)→ turns into
- CELL(“address”)=ADDRESS(ROW(C6),COLUMN(C6))→ The CELL function returns information of a specific given Cell.
- CELL(“address”)=ADDRESS(6,3))→ turns into
- Output: FALSE
- CELL(“address”)=ADDRESS(6,3))→ turns into
- CELL(“address”)<>ADDRESS(ROW(C6),COLUMN(C6))→ turns into
- Output: TRUE
- AND(A1<>””,CELL(“address”)=ADDRESS(ROW(C6),COLUMN(C6)))→ The CELL function returns information of a specific given Cell.
- AND(A1<>””,{FALSE})→ turns into
- Output: FALSE
- AND(A1<>””,{FALSE})→ turns into
- IF(CELL(“address”)<>ADDRESS(ROW(C6),COLUMN(C6)),A1,NOW())),→ The IF function returns a value if the condition is TRUE and returns a different value if it is FALSE.
- IF({TRUE},A1,NOW())→ turns into
- Output: 44816.522597
- IF({TRUE},A1,NOW())→ turns into
- IF(AND(A1<>””,CELL(“address”)=ADDRESS(ROW(C6),COLUMN(C6))),NOW(),IF(CELL(“address”)<>ADDRESS(ROW(C6),COLUMN(C6)),A1,NOW())),””)→ turns into
- IF(C6<>””,44816.522597,””))→ turns into
- Output: 44816.522597
- IF(C6<>””,44816.522597,””))→ turns into
- After that, press the ENTER key.
- As soon as we write something in cell C6, the current date and time get visible in cell A1.

The difference between this method and the previous one is that when we changed the value of cell C6 the date and time in cell A1 didn’t get updated in Method 3. But, in our present method, it gets updated every time we change the content in cell C6.
- So, change the content of cell C6 to P.
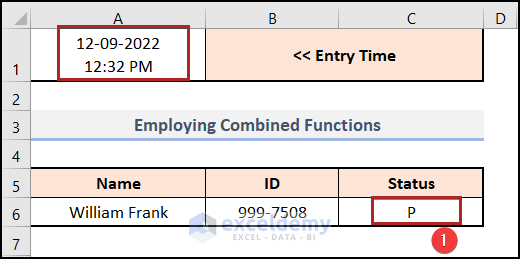
Now, it shows us the current updated time.
5. Applying VBA Code
Have you ever thought of automating the same boring and repetitive steps in Excel?
Think no more, because VBA has you covered. In fact, you can automate the prior method entirely with the help of VBA. Let’s see it in action.
- In the beginning, go to the Developer tab.
- Here, select Visual Basic on the Code group.
- Alternatively, press ALT + F11 to replicate the task.

Instantly, the Microsoft Visual Basic for Applications window pops up.
- Then, double-click on the respective sheet VBA to open the code module.

- In the code module, write down the following code.
Private Sub Worksheet_Change(ByVal Status As Range)
If Status.Column = 3 And Status.Value <> "" Then
Application.EnableEvents = False
Status.Offset(-5, -2) = Format(Now(), "dd-mm-yyyy hh:mm AM/PM")
Application.EnableEvents = True
End If
End Sub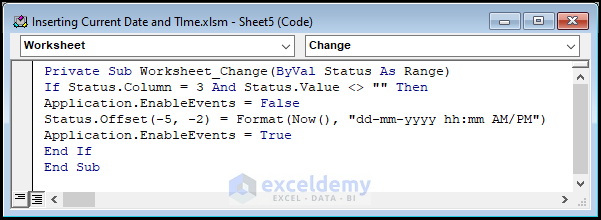
- To create the Private Sub, firstly select the Worksheet instead of General and Change as a Declaration. Whenever any changes occur in that worksheet code will run by itself.
- Then, we used the IF function where we checked if the Status range is not equal to blank using the Value method and also if the column number is 3 using the Column method.
- Now, we set the Application.EnableEvents as False.
- After that, we set the offset (-5,-2) to insert the date and time in by offsetting 5 rows up and 2 columns left.
- Here, the Now function will give the recent time and the format will be as dd-mm-yyyy hh:mm AM/PM if the value is TRUE.
- Consequently, we set Application.EnableEvents as True.
- Lastly, terminate the sub-procedure with End Sub.
- Then, return to the worksheet.
- And, write down Present in the Status column.
- Automatically, we can see the date and time in cell A1.

Read More: How to Auto Update Current Time in Excel
6. Implementing User-Defined Function
Additionally, we can also insert the present date and time in Excel automatically by applying a user-defined function. Let’s explore the method step by step.
📌 Steps:
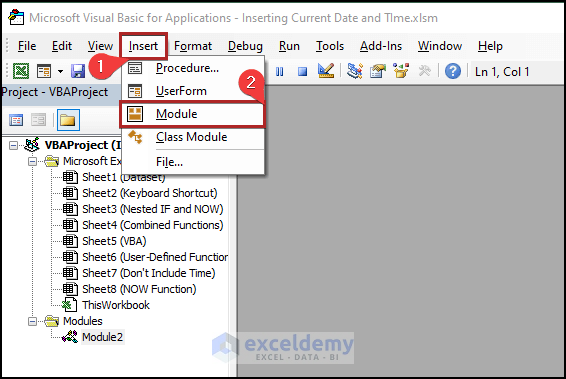
- First, open the Microsoft Visual Basic for Applications window like before.
- Secondly, move to the Insert tab.
- Later, select Module from the options.
- In the code module, paste the following code.
Function Insert_Current_Date_Time(Status As Range)
If Status.Value <> "" Then
Insert_Current_Date_Time = Format(Now, "dd-mm-yyyy hh:mm AM/PM")
Else
Insert_Current_Date_Time = ""
End If
End Function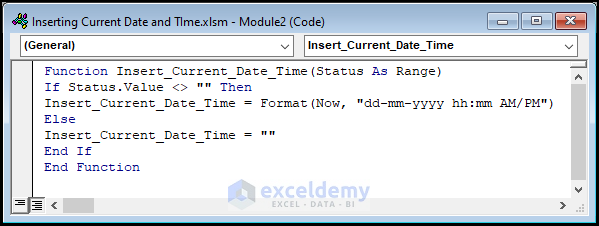
- Firstly, we created a Function named Insert_Current_Date_Time and set Status as Range.
- Then, we used the If statement where we checked if the Status range is not equal to blank using the Value method.
- After that, we set Insert_Current_Date_Time equal to the value of the Now function and format the cell as dd-mm-yyyy hh:mm AM/PM if the value is TRUE.
- Otherwise, it will be blank.
- At this time, return to the worksheet.
- Then, select cell C1 and start to write the name of the function.
- Just after writing =in the function will be visible.
- Next, select the function by pressing the TAB key on the keyboard.

- After that, give cell C6 as the reference range of the function and press ENTER.
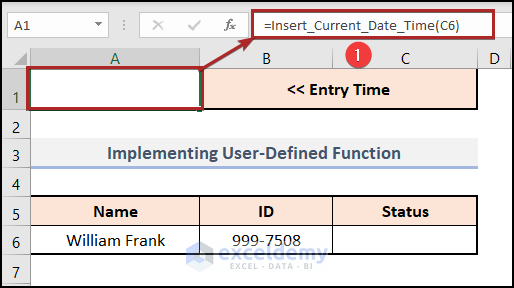
But, cell A1 is still blank because cell C6 is empty also.
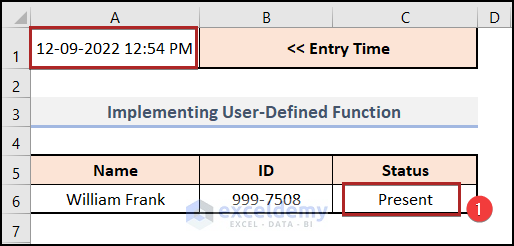
- Presently, write down Present in cell C6 and get the current date and time in cell A1 instantly.
Insert the Current Date and Time in Cell A1 But Do Not Include the Current Time
Here, we’ll insert the current date and time in cell A1 by not including the current time. Actually, it’s asking to enter the current date only. To do this like us, follow the steps below.
📌 Steps:
- At first, select cell A1 and put the following formula into that cell.
=TODAY()
The TODAY function returns the current date formatted as a date.
- Then, hit the ENTER button.
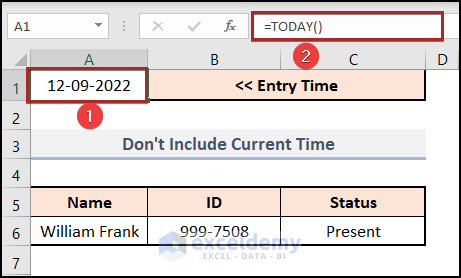
Simply, the current date is present before us.
Read More: Excel Current Time Formula
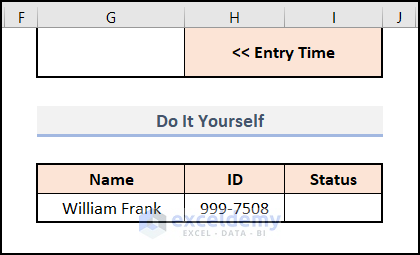
Practice Section
For doing practice by yourself we have provided a Practice section like below in each sheet on the right side. Please do it by yourself.
You may download the following Excel workbook for better understanding and practice yourself.
Conclusion
This article provides easy and brief solutions to insert the current date and time in cell A1 in Excel. Don’t forget to download the Practice file. Thank you for reading this article, we hope this was helpful. Please let us know in the comment section if you have any queries or suggestions.
Related Articles
- How to Insert Timestamp in Excel When Cell Changes
- How to Insert Excel Timestamp When Cell Changes Without VBA
- How to Add Date and Time in Excel When Printing
- How to Insert Last Modified Date and Time in Excel Cell
<< Go Back to Timestamp | Date-Time in Excel | Learn Excel
Get FREE Advanced Excel Exercises with Solutions!

Very useful