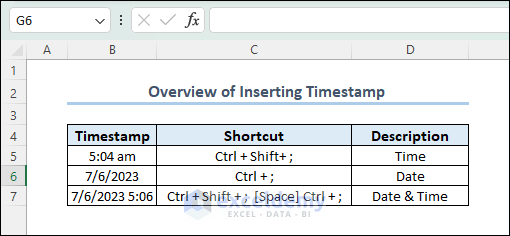
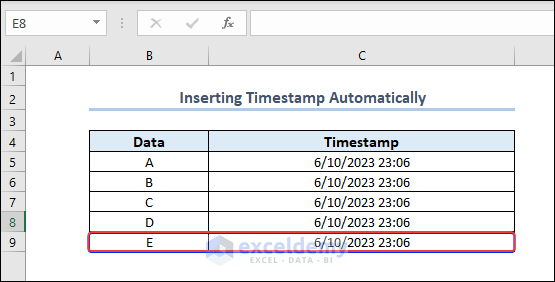
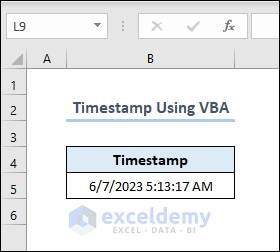
n the picture below, we have demonstrated an example of inserting a timestamp in Excel.
Download the Practice Workbook
How to Insert a Timestamp in Excel?
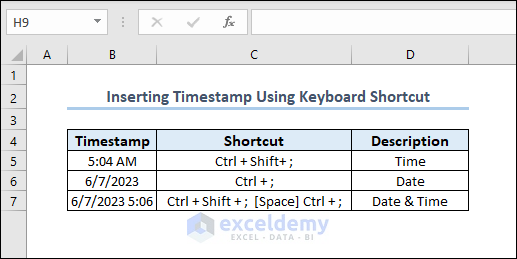
Method 1 – Using Keyboard Shortcuts to Insert Timestamps
- If you want to insert only the time, use the following keys:
Ctrl + Shift + ;
- For a date, use the following:
Ctrl + ;
- For a complete date and time, use the following shortcut:
Ctrl + Shift + ; [Space] Ctrl + ;
What Are the Advantages and Disadvantages of This Method? Here is the overview of using the NOW function. Why Should You Use This Method?
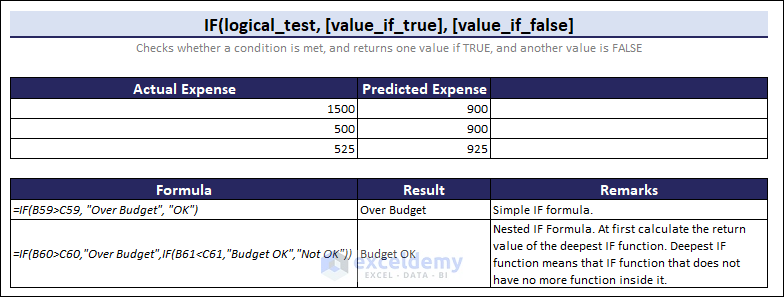
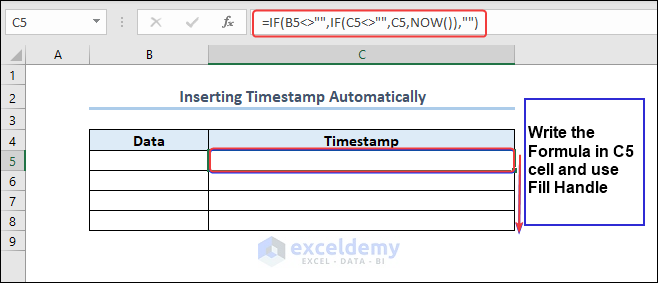
Here’s a brief review of the IF function which we’ll use below. The formula checks if the B5 cell is not empty. If the B5 cell is not empty, it checks if the C5 cell is not empty. If the C5 cell is not empty, it returns the value of C5. When the C5 cell is empty, it returns the current date and time. And when the B5 cell is empty, it returns an empty string. What Are the Advantages and Disadvantages of This Method?
Code Explanation » Sub TimeStamp() This line starts the definition of the VBA subroutine called “TimeStamp”. » Dim s As Date This line declares a variable named “s” of the Date data type. However, the variable “s” is not used in the code and can be removed. » With Selection This line starts a “With” statement, which allows performing a series of actions on a specific object (in this case, the selected range). » .Value = Now This line assigns the current date and time to the “Value” property of the selected range. The “Now” function returns the current date and time. » .NumberFormat = “m/d/yyyy h:mm:ss AM/PM” This line sets the number format of the selected range to display the timestamp in the format of “m/d/yyyy h:mm:ss AM/PM”. This format represents the month, day, year, hour (in 12-hour format), minute, second, and AM/PM indicator.
Why Should You Use This Method?
Code Explanation » Function Time_Stamp(Reference As Range) This line declares a VBA function named “Time_Stamp” that takes a single argument called “Reference,” which is expected to be of type “Range.” The purpose of this function is to return a timestamp value. » If Reference.Value <> “” Then This line checks if the value of the referenced cell (specified by the “Reference” argument) is not empty. The comparison <> checks for inequality. » Time_Stamp = Format(Now, “dd-mm-yyyy hh:mm:ss”) If the referenced cell is not empty, this line assigns a formatted timestamp string to the function’s return value. The Now function is used to retrieve the current date and time, and the Format function is used to format it as “dd-mm-yyyy hh:mm:ss.” » Else Time_Stamp = “” In the “else” part, this line assigns an empty string to the function’s return value.
What Are the Advantages and Disadvantages of This Method?
Read More: How to Insert Current Date and Time in Excel We’ll use the INT function to get a semi-random value from time.
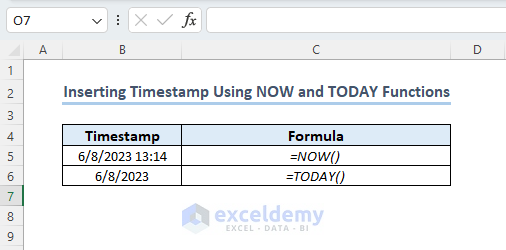
Method 2 – Using NOW and TODAY Functions to Insert Timestamps
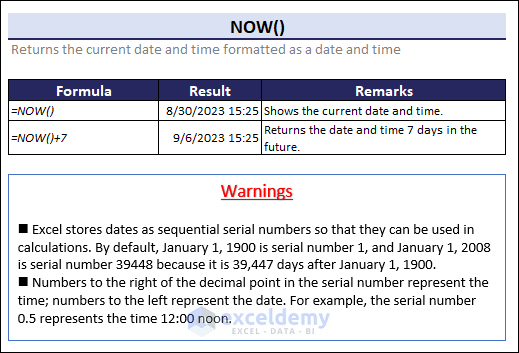
=NOW()
=TODAY()
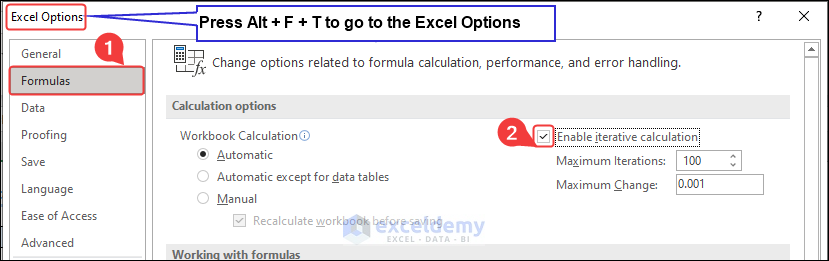
Method 3 – Inserting Timestamps Automatically by Applying Circular References
=IF(B5<>"",IF(C5<>"",C5,NOW()),"")

Method 4 – Inserting Current Time with VBA
Sub TimeStamp()
Dim s As Date
With Selection
.Value = Now
.NumberFormat = "m/d/yyyy h:mm:ss AM/PM"
End With
End Sub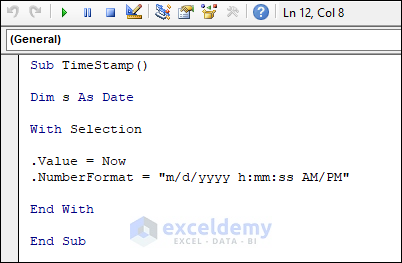
Method 5 – Creating a User-Defined Function to Insert a Timestamp
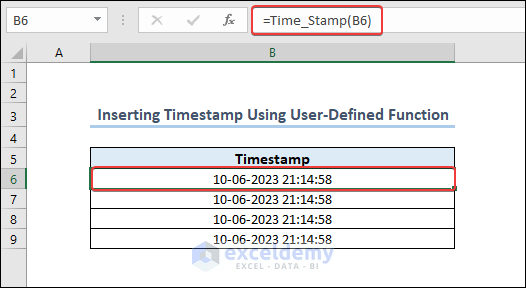
Function Time_Stamp(Reference As Range) As String
    If Reference.Value <> "" Then
        Time_Stamp = Format(Now(), "dd-mm-yyyy hh:mm:ss")
    Else
        Time_Stamp = ""
    End If
End Function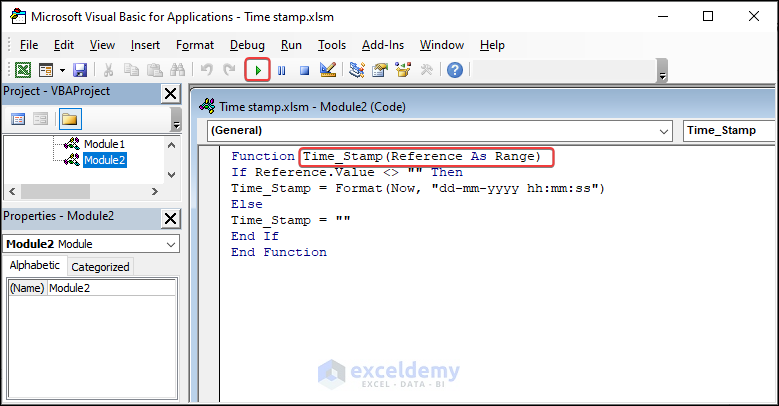
How to Use a Timestamp in Excel?
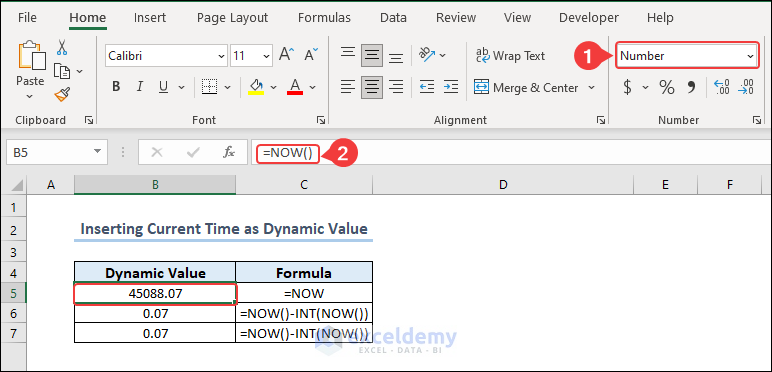
Case 1 – Inserting the Current Time as a Dynamic Value
=NOW()
- You get the dynamic value according to the timestamp.
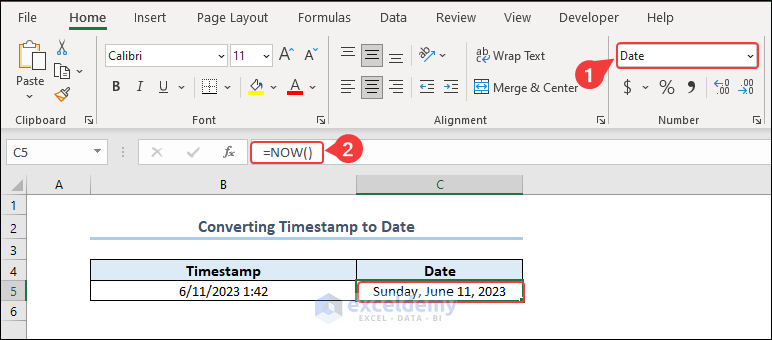
Case 2 – Converting a Timestamp to a Date
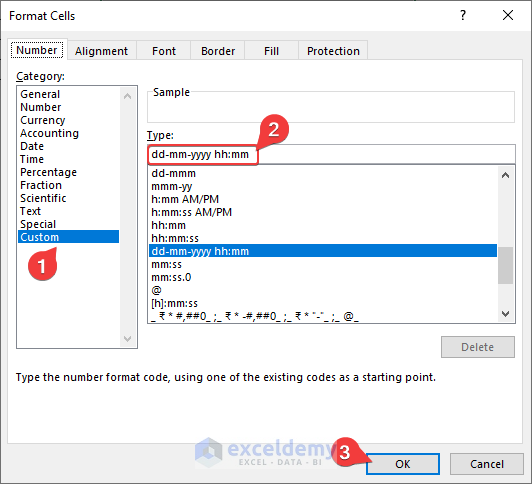
Change the format of C5 cell to Date after using the function.
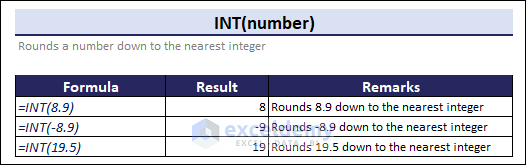
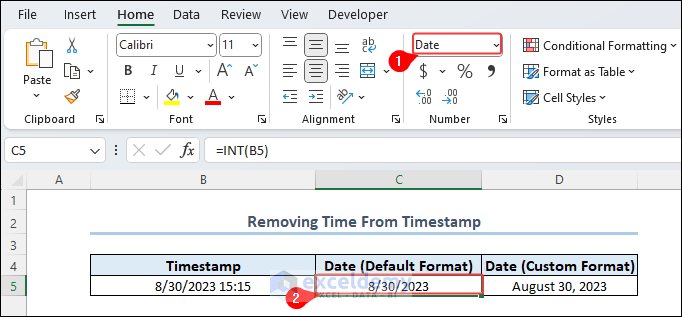
Case 3 – Removing the Time from a Timestamp
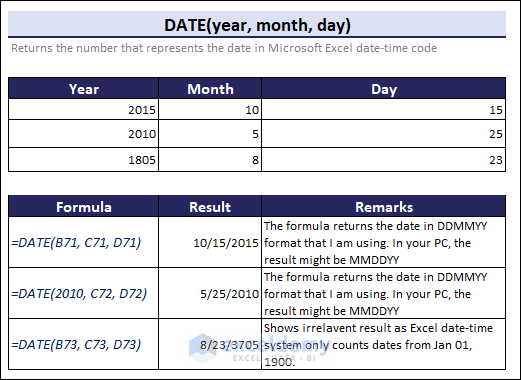
Use INT and DATE functions to remove time from timestamp. We will give a brief overview of the DATE function.
- Format the C5 cell into Date format.
- Use the following formula in C5.
=INT(B5)
- Use the following formula in the D5 cell after formatting the cell as Date.
=DATE(YEAR(B5),MONTH(B5),DAY(B5))
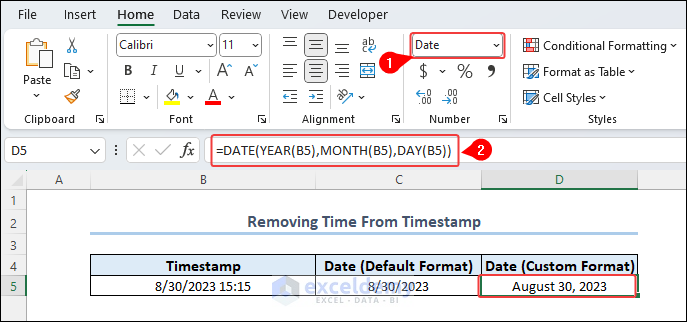
Formula Explanation The formula =DATE(YEAR(B5), MONTH(B5), DAY(B5)) is used to construct a new date by extracting the year, month, and day components from an existing date in cell B5. Let’s break it down: The DATE function takes these extracted year, month, and day values as arguments and constructs a new date using them. The resulting date will have the same year, month, and day as the original date in cell B5.
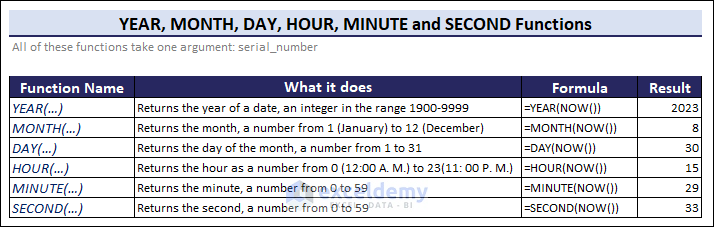
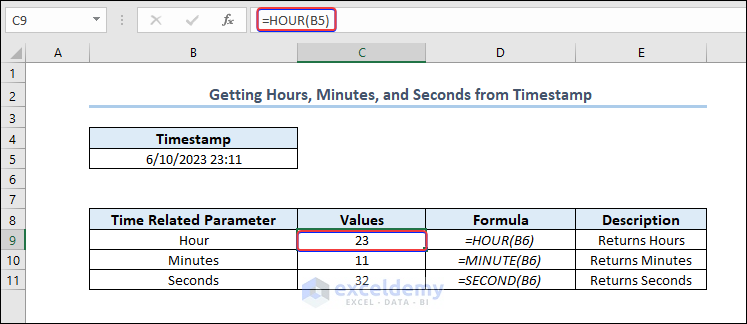
Case 4 – Getting Hours, Minutes, and Seconds from a Timestamp in Excel
Here is a brief overview of time functions in Excel.
- Here are the functions that will separate the hour, minute, or seconds part of the timestamp from cell B5.
=HOUR(B5)
=MINUTE(B5)
=SECOND(B5)
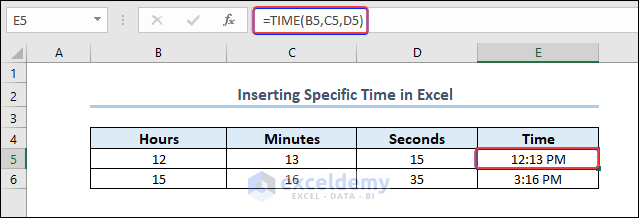
Case 5 – Inserting a Specific Time in Excel
We will use the TIME function in Excel to insert a specific time in Excel.
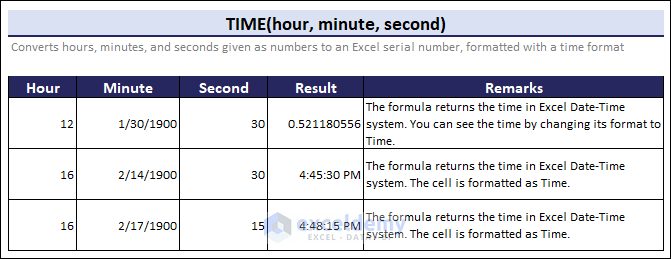
- Use tjhe following formula to turn the values into time:
=Time(B5,C5,D5)
- The formula will return time accordingly.
Read More: How to Insert Last Modified Date and Time in Excel Cell
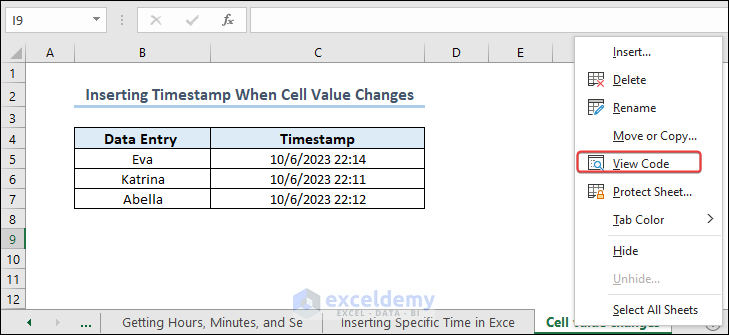
Case 6 – Inserting a Timestamp in Excel When Cell Changes
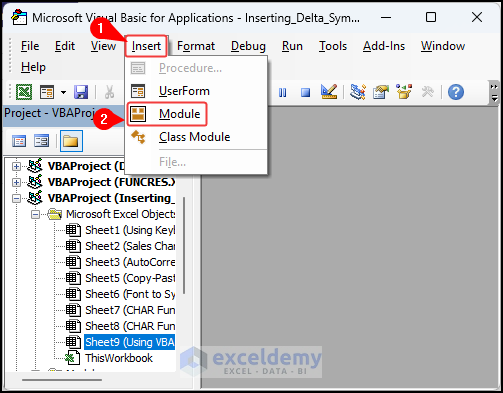
- Right-click on the worksheet and select View code.
- Insert the code given below and press Run.
Private Sub Worksheet_Change(ByVal Target As Range)
    Dim CellCol As Integer, TimeCol As Integer, Row As Integer, Col As Integer
    Dim DpRng As Range, Rng As Range
    Dim Timestamp As String
    CellCol = 2
    TimeCol = 3
    Row = Target.Row
    Col = Target.Column
    If Row <= 4 Then Exit Sub
    Timestamp = Format(Now, "DD-MM-YYYY HH:MM:SS AM/PM")
    If Target.Text <> "" Then
        If Col = CellCol Then
            Cells(Row, TimeCol) = Timestamp
        Else
            On Error Resume Next
            Set DpRng = Target.Dependents
            For Each Rng In DpRng
                If Rng.Column = CellCol Then
                    Cells(Rng.Row, TimeCol) = Timestamp
                End If
            Next Rng
            On Error GoTo 0
        End If
End If 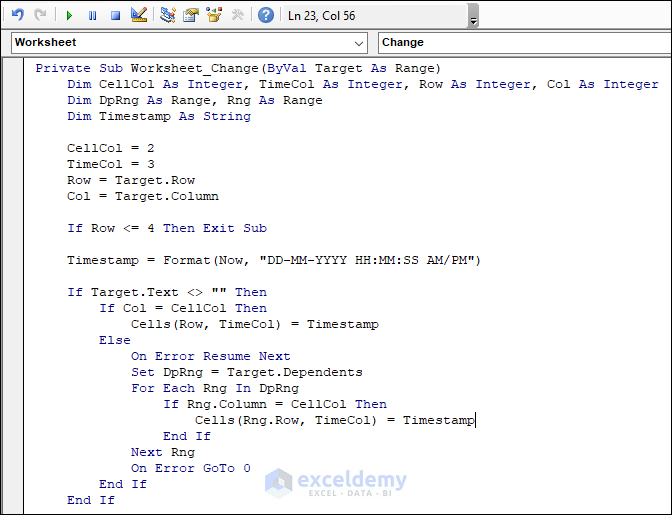
Code Explanation » Private Sub Worksheet_Change(ByVal Target As Range) Dim CellCol As Integer, TimeCol As Integer, Row As Integer, Col As Integer Dim DpRng As Range, Rng As Range Dim Timestamp As String We used these lines to declare variables to use in the code. CellCol represents the column number where the change is being detected, TimeCol represents the column number where the timestamp will be recorded, Row represents the row number where the change occurs, Col represents the column number where the change occurs, DpRng is a Range object used to store the dependents of the changed cell, Rng is used to iterate through the dependents, and Timestamp is a string variable that will store the current timestamp. » CellCol = 2 TimeCol = 3 Row = Target.Row Col = Target.Column These lines assign values to the variables. CellCol is set to 2, representing column 2 (B). TimeCol is set to 3, representing column 3 (C). The row is set to the row number of the changed cell, and Col is set to the column number of the changed cell. » If Row <= 4 Then Exit Sub This line checks if the change occurs in row 4 or earlier. If it does, the code exits the subroutine using Exit Sub. This is done to ignore any changes that occur in the first 4 rows of the worksheet. » Timestamp = Format(Now, “DD-MM-YYYY HH:MM:SS AM/PM”) This line assigns the current date and time to the Timestamp variable. The Format function is used to format the date and time in the desired format. » If Target.Text <> “” Then This line checks if the changed cell is not empty. It ensures that the code proceeds only if there is text in the changed cell. » If Col = CellCol Then Cells(Row, TimeCol) = Timestamp If the changed cell is not empty and the column of the changed cell (Col) is equal to CelllCol(which was set to 2), then it sets the value in the cell at the same row but in the TimeCol (which was set to 3) to the generated timestamp. » Else On Error Resume Next Set DpRng = Target.Dependents For Each Rng In DpRng If Rng.Column = CellCol Then Cells(Rng.Row, TimeCol) = Timestamp End If Next Rng On Error GoTo 0 If the changed cell is not in column 2 cellcol, it temporarily turns on error handling to prevent any errors caused by dependencies, then it loops through the dependents of the changed cell (Target). If any dependent cell is in column 2, it sets the value in the corresponding row and column 3 (Timecol) to the timestamp. After the loop, it turns off error handling.
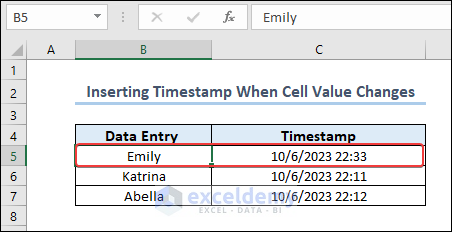
- If you change any Data Entry column, it will show the time in the Timestamp column.
Things to Remember
- Automatic Updates: Timestamps based on formulas like =NOW() or =TODAY() update automatically whenever the worksheet recalculates or when triggered by specific events. Keep in mind that if you want to freeze a timestamp, you need to convert it to a static value.
- Formatting Options: Excel provides various formatting options for timestamps. You can customize the date and time format using the built-in number formatting options or the TEXT function. Choose a format that best suits your needs and makes the timestamp easily readable.
- VBA Automation: If you require more advanced timestamp functionality or want to automate timestamp insertion based on specific events or conditions, you can use the VBA code. VBA allows customization and flexibility in determining when and where to insert timestamps.
- Time Zone Considerations: Excel does not have built-in functions to directly convert timestamps to different time zones. If you need to work with timestamps in different time zones, you may need to use VBA code or external tools to handle the conversion accurately.
- Consistency and Accuracy: Ensure that you insert timestamps consistently and accurately. Double-check formulas, VBA code, or macros to verify that you correctly calculated and inserted the timestamps in the desired cells or ranges.
Frequently Asked Questions
Can we freeze a timestamp so that it doesn’t change automatically?
Yes, if you want to freeze a timestamp and prevent it from updating, you can convert the formula or value to a static value. Select the cell with the timestamp, copy it (Ctrl + C), then use “Paste Special” and select “Values” to paste it as a static value.
How can we insert a timestamp when a specific cell or range is modified?
You can achieve this using VBA code and the Worksheet_Change event. Write VBA code to check if the modified cell is the specific cell or within the specified range, and if so, insert the timestamp using the NOW() function or by assigning the current date and time to the cell.
Can we create a button or shortcut to insert a timestamp with one click?
Yes, you can create a button on the Excel toolbar or ribbon using the Developer tab. Assign a VBA macro to the button that inserts the timestamp using the desired method (e.g., NOW() function or VBA code).
Is it possible to display the timestamp in a specific time zone?
Excel does not have built-in functions to directly convert time zones. However, you can use VBA code or external tools to convert the timestamp to a different time zone based on your requirements.
Can we customize the timestamp update frequency in Excel?
Timestamps based on formulas like =NOW() update whenever the worksheet recalculates, which can be controlled through Excel settings. You can manually recalculate the worksheet or change the calculation mode to control the update frequency. VBA code can provide more control over the update frequency by triggering the timestamp insertion based on specific events or conditions.
Timestamp in Excel: Knowledge Hub
<< Go Back to Date-Time in Excel | Learn Excel
Get FREE Advanced Excel Exercises with Solutions!
