Method 1 – Keyboard Shortcuts to Enter Current Date & Time in Excel
Steps:
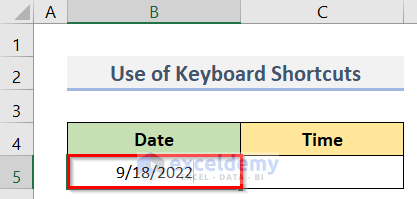
- Enter the date, and select cell B5.
- Hold the Ctrl (control) key on the keyboard.
- While holding down the Ctrl key, press the: (colon) key.
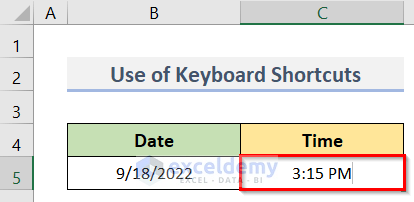
- We want to insert the time.
- Go to cell C5.
- Holding down the Ctrl & Shift key, press the ‘:’ key on the keyboard.
- See the Date & Time in cells B5 & C5 respectively.
Method 2 – Apply Excel TODAY Function to Insert Current Date
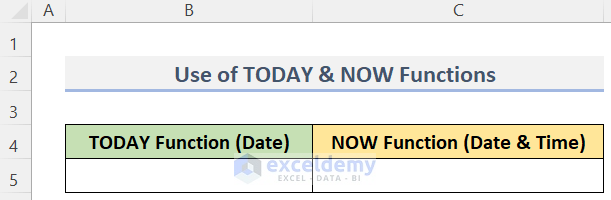
We have a dataset (B4:C5) in Excel. We will use the TODAY function in Excel to insert the current date in cell B5. The steps to do so are below.
Steps:
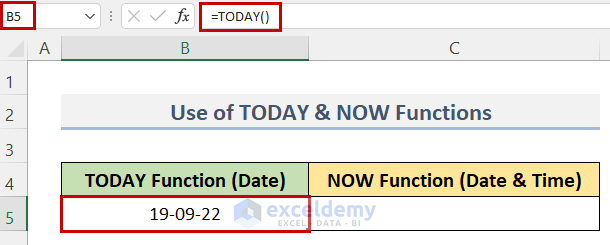
- Select cell B5.
- Insert the current date enter the following formula in cell B5:
=TODAY()- Press the Enter key.
- See the result in cell B5.
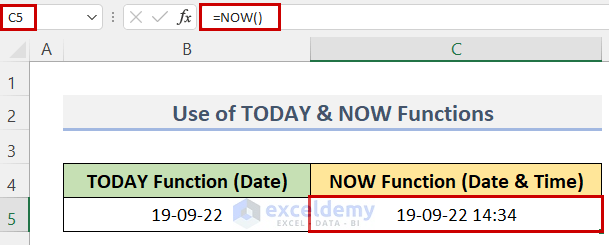
Method 3 – Insert Both Date & Time in Excel Using NOW Function
Use the NOW function to add both Date & Time in Excel. We will apply this function in cell C5 of the dataset (B4:C5) below. Follow the steps below.
Steps:
- Go to cell C5.
- Get the current date & time, type the formula in this cell (C5):
=NOW()- Press the Enter button to get the current date & time.
- See the result in cell C5.
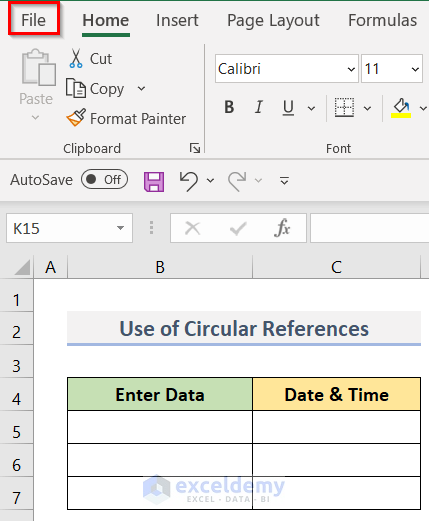
Method 4 – Automatically Enter Date & Time with Circular References Trick in Excel
Steps:
- Go to the File tab.
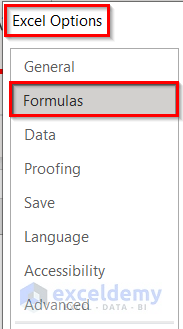
- Click on Options.

- The Excel Options window will appear.
- Select Formulas from the left sidebar of the window.
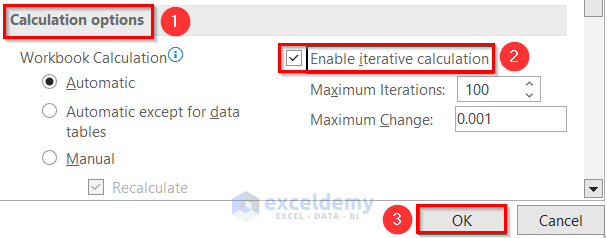
- Go to the Calculation options section.
- Put a tick mark in the Enable iterative calculation box.
- Click OK.
- Select cell C5.
- Apply the circular references trick, type the formula below with the IF function and the NOW function:
=IF(B5<>"",IF(C5<>"",C5,NOW()),"")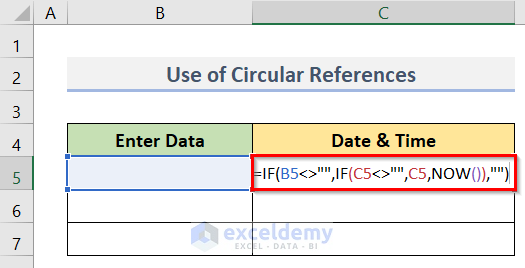
- Press the Enter key.
- Drag the fill handle to copy the formula to cell C7.
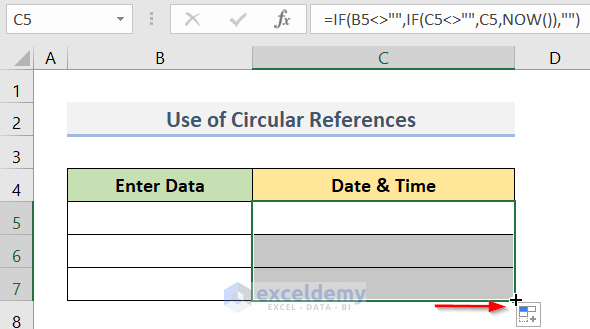
- Get the dates & times in the desired formatting; first, select the range B5:C7.
- Right-click on the selection.
- Click on Format Cells.
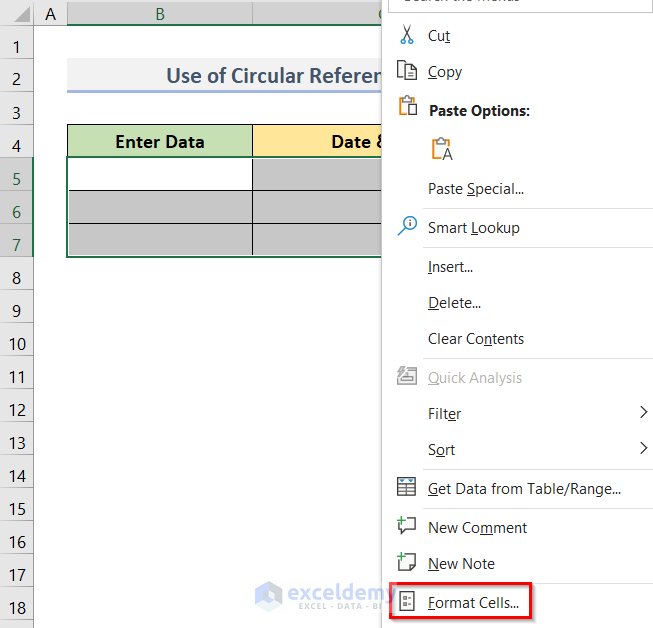
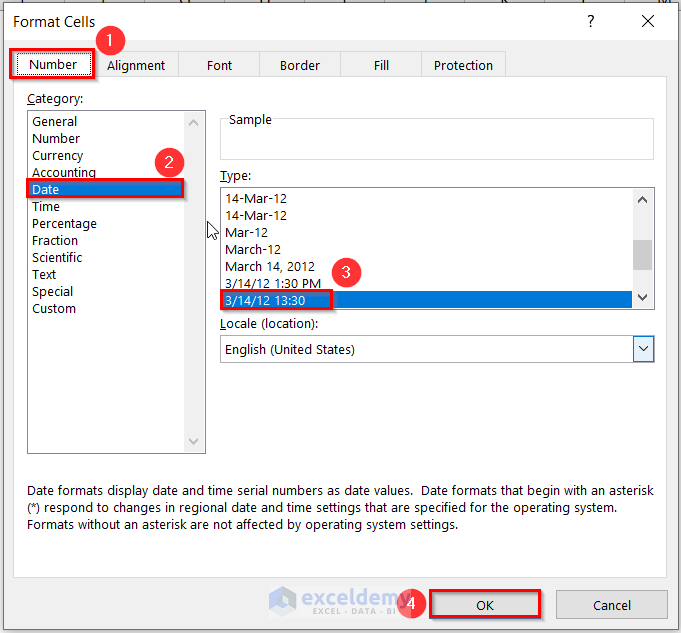
- The Format Cells dialog box will pop up.
- Go to the Number tab > Category > Date > Type > Select the type you want > OK.
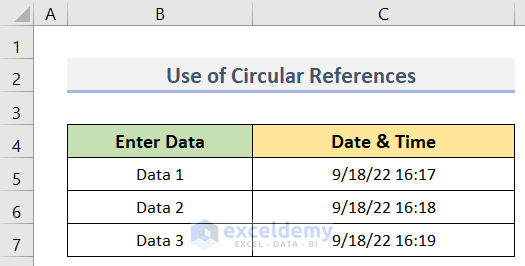
- Select cell B5 and enter any data (Data 1).

- After pressing the Enter key, you will find the corresponding current date & time in cell C5.

- When you input any data in cell B6, you will get the date & time of inserting the data.
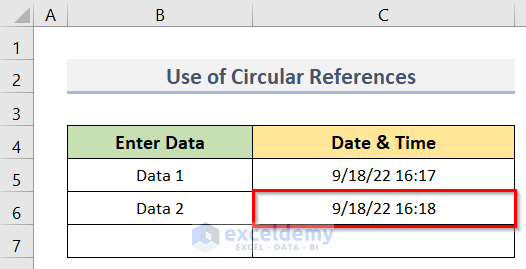
- You can enter the current dates & times by inserting any data using the circular references trick (see screenshot).
Method 5 – Excel VBA for Entering Date & Time Automatically
Steps:
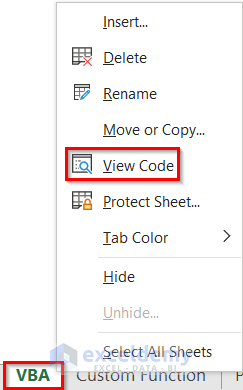
- Right-click on the desired worksheet tab (VBA) located in the bottom of the Excel sheet.
- Click View Code.
- The VBA code window will open.
- Enter the following VBA code in the window:
Private Sub Worksheet_Change(ByVal Target As Range)
Dim aInt As Integer
Dim aStr As String
Dim bStr As String
On Error Resume Next
aStr = "B"
abStr = "C"
If (Not Application.Intersect(Me.Range(aStr & ":" & aStr), Target) Is Nothing) Then
aInt = Target.Row
Me.Range(abStr & aInt) = Format(Now(), "mm/dd/yyyy hh:mm:ss")
End If
End Sub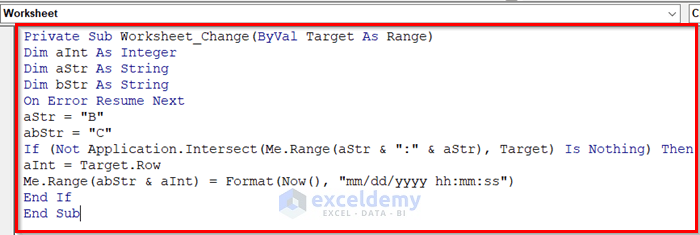
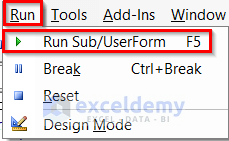
- Go to the Run tab and click on Run Sub/Userform.
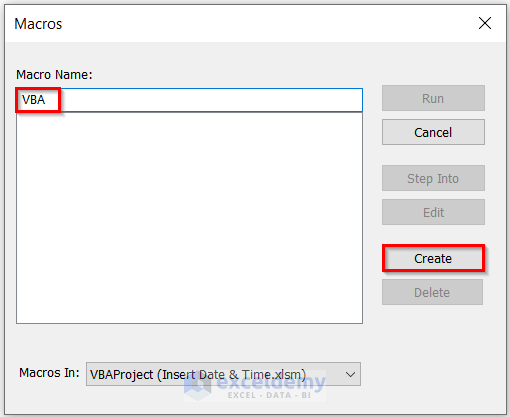
- A window named Macros will appear.
- Type any name (VBA) in the Macro Name box.
- Click Create.
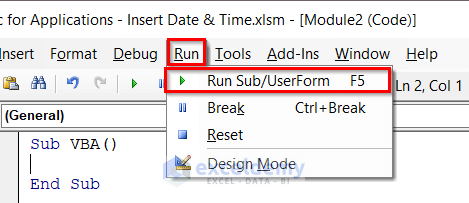
- Go to Run > Run Sub/UserForm.
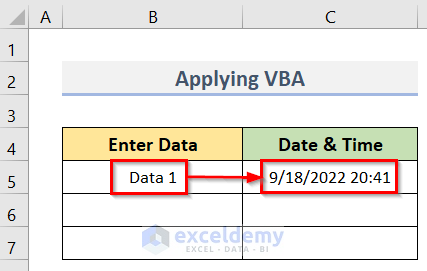
- Return to the worksheet (VBA) and select cell B5.
- After entering any data (Data 1) in cell B5, get the corresponding date & time in cell C5.
- You can enter the current dates & times in cells C6 & C7 by entering the data in cells B6 & B7 (see screenshot).
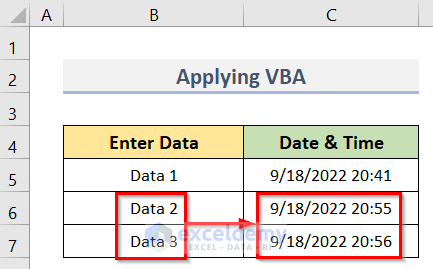
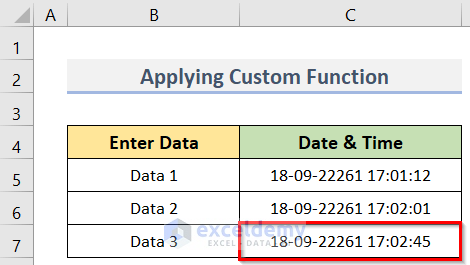
Method 6 – Enter Date & Time in Excel by Forming a Custom Function
Steps:
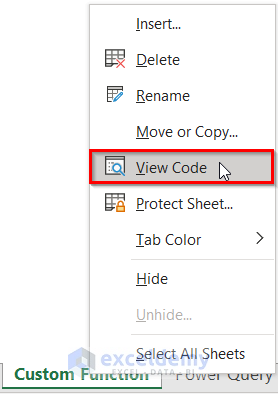
- Right-click on the sheet tab (Custom Function) > View Code.
- The VBA code window will open.
- Select the desired sheet for inserting the code.
- Right-click on the selected sheet (Sheet6) > Insert > Module.
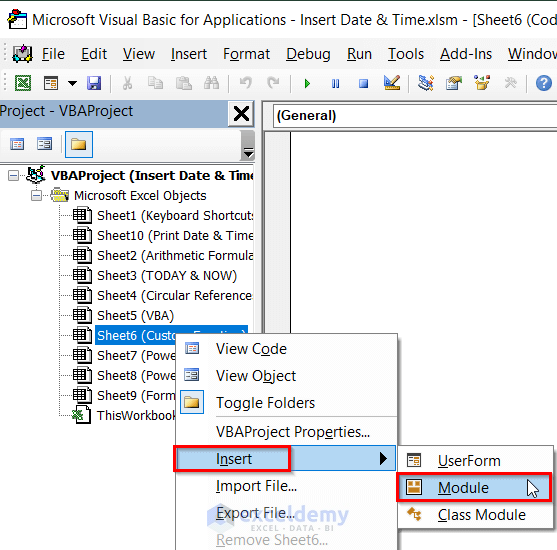
- Insert the following VBA code in the blank VBA code window.
Function Timestamp(Reference As Range)
If Reference.Value <> "" Then
Timestamp = Format(Now, "dd-mm-yyy hh:mm:ss")
Else
Timestamp = ""
End If
End Function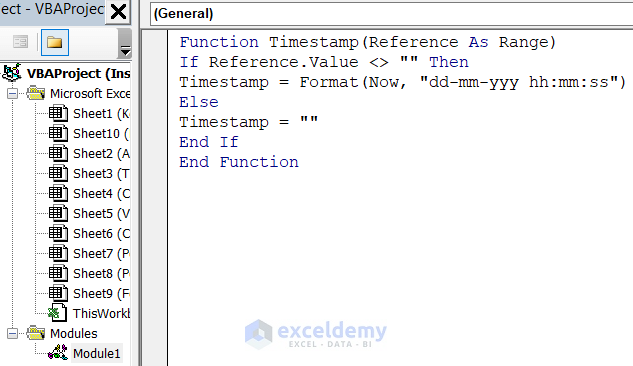
- Press Alt + F11 to return to the worksheet.
- Insert the custom function, select cell C5 > type the following formula:
=Timestamp(B5)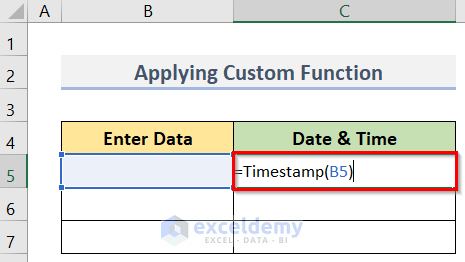
- Press Enter.
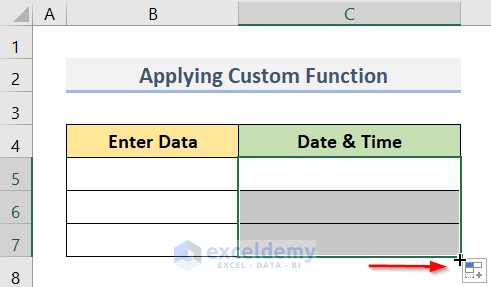
- Drag the fill handle to copy the formula to the desired cell (C7).
- Get the date & time, input any data (Data 1) in cell B5.
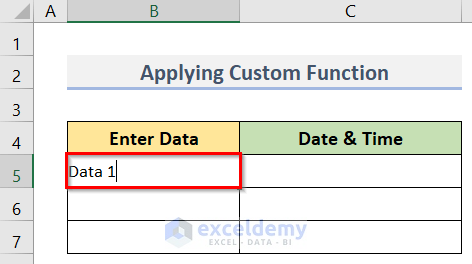
- After pressing the Enter key, you will find the date & time in cell C5.

- Get the date & time of cell C6 after entering the data in cell B6.
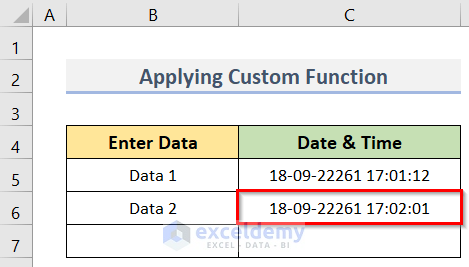
- Find the date & time in cell C7.
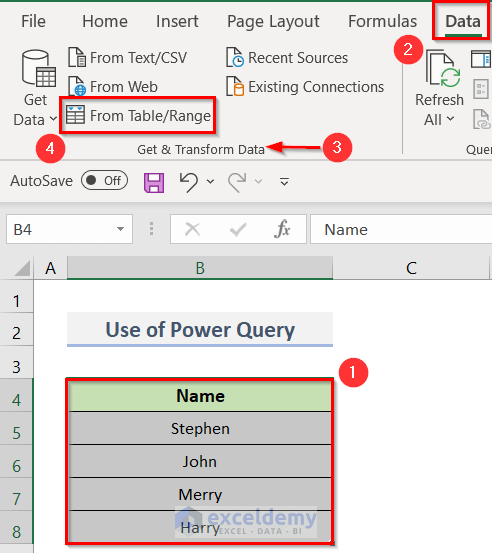
Method 7 – Get Date & Time Using Power Query Tool
Steps:
- Transform our dataset (B4:B8) into an Excel Table.
- Select the range B4:B8 > Data tab > Get & Transform Data group > From Table/Range.
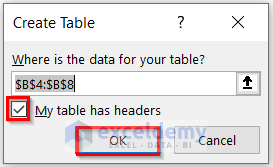
- Create Table window will pop up.
- Put a tick mark in the My table has headers box.
- Click OK.
- The Power Query sheet will appear.
- Add a new column for inserting the dates & times.
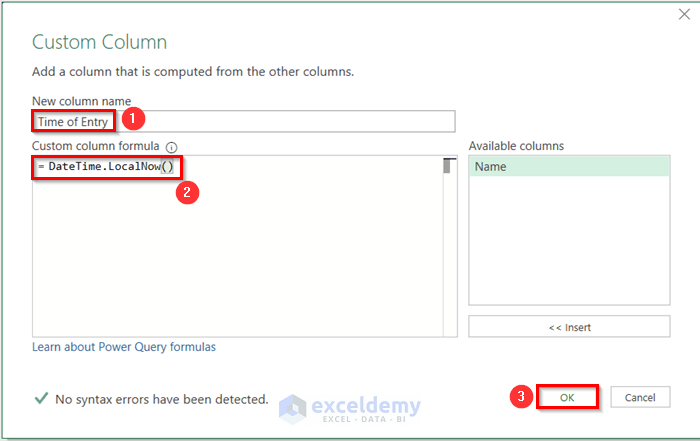
- Go to the Add Column tab > Custom Column.
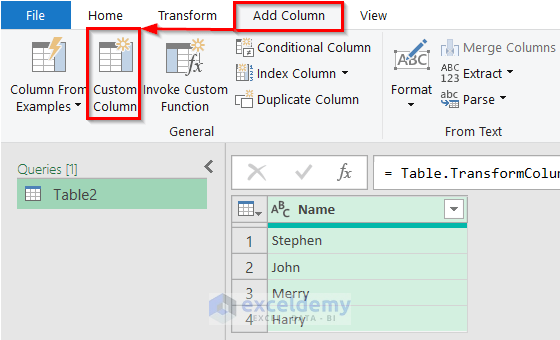
- The Custom Column window will appear.
- Select the box of the New column name and enter any name (Time of Entry) as you wish.
- Get the date & time, assign the following formula in the Custom column formula box:
= DateTime.LocalNow()- After inserting the formula, click OK.
- A new column named Time of Entry will be added beside the Name column with the entry dates & times for the students.
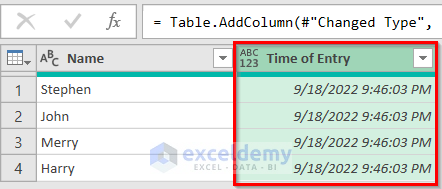
- You can extract the dates from this new added column.
- Select the Time of Entry column > Add Column tab > Date > Date Only.
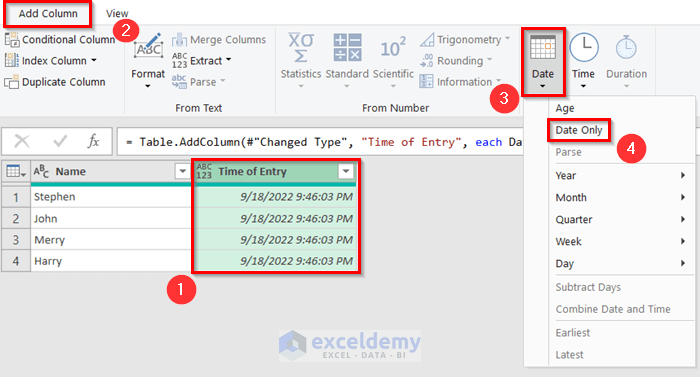
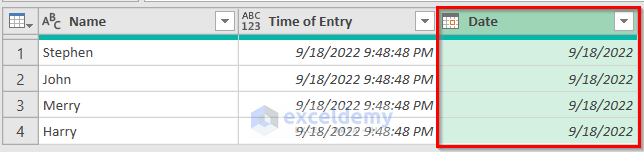
- A new column named Date will be added with the dates only.
- For extracting the times from the Time of Entry column, select the entire Time of Entry column > Add Column tab > Time > Time Only.
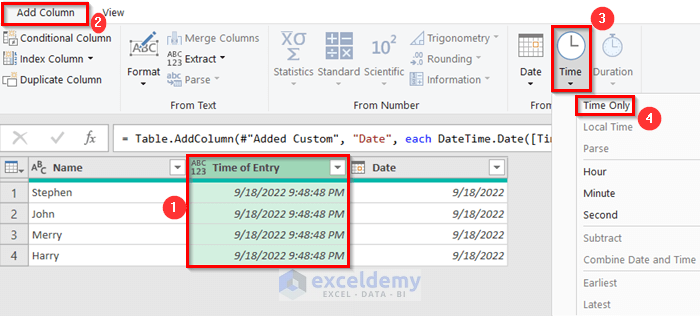
- A new column named Time will be added containing only the times.

Method 8 – Enter Date & Time in Excel with Power Pivot
Steps:
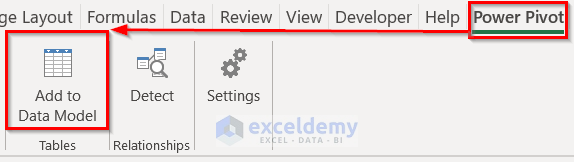
- Go to the Power Pivot tab.
- Click on Add to Data Model.
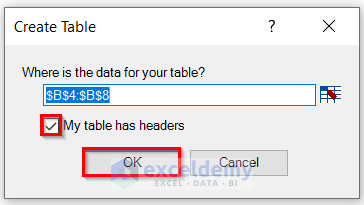
- Create Table window will appear.
- Check the My table has headers box.
- Click OK.
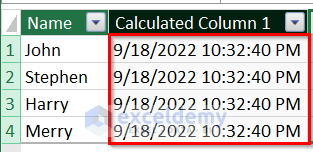
- Power Pivot for Excel sheet will open with a newly added column named Add Column.
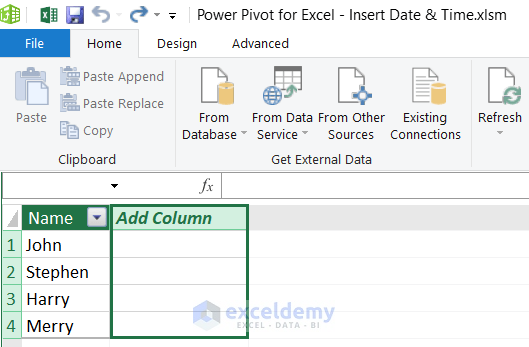
- Select the first cell of the Add to Column.
- Find the dates & times, type the formula below:
=NOW()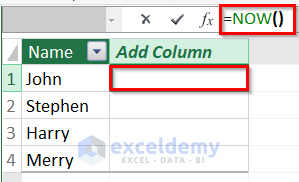
- Press the Enter key to get the dates & times.
- See the final result in the screenshot below.
Download Practice Workbook
Download the practice workbook from here.
Related Articles:
- Excel Current Time Formula
- How to Insert Last Modified Date and Time in Excel Cell
- How to Insert Timestamp in Excel When Cell Changes
<< Go Back to Timestamp | Date-Time in Excel | Learn Excel
Get FREE Advanced Excel Exercises with Solutions!
