A timestamp is a record of the time and date of a particular event or task. In this article, we will learn to insert an Excel timestamp when a cell changes without VBA.
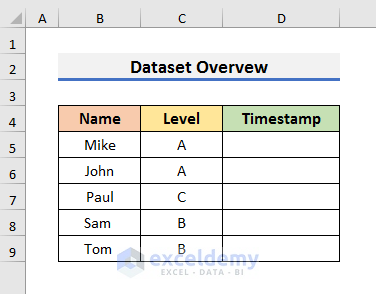
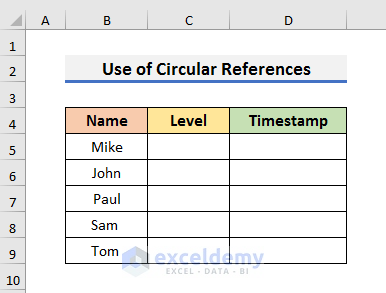
To explain the methods, we will use a dataset that contains information about the experience level of some employees. We will try to add a timestamp if someone changes the cell value of the Level column. For example, if someone types B in place of A in Cell C5, then a timestamp will be inserted in Cell D5.
Method 1 – Applying a Formula
We can construct a formula using a combination of the IF, AND & NOW functions to do the job. The IF function examines if a condition is met or not. The AND function returns TRUE if all conditions are met. And the NOW function returns the current date and time.
STEPS:
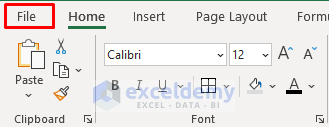
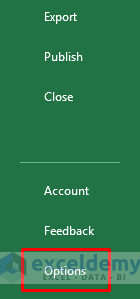
- Click on the File tab.
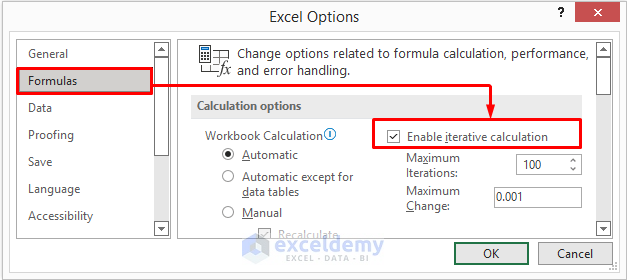
- Select Options, which will open the Excel Options window.

- Select Formulas in the Excel Options window.
- Check Enable iterative calculation and click OK to proceed.
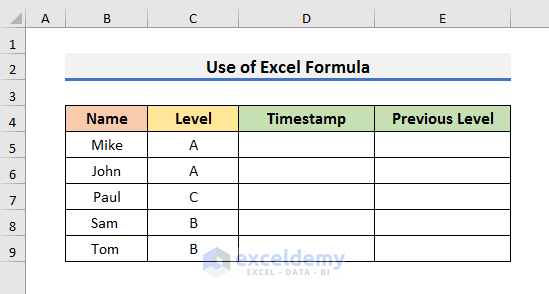
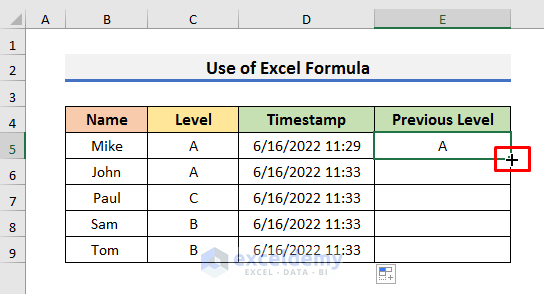
- Create a helper column in your dataset. We have named it Previous Level.
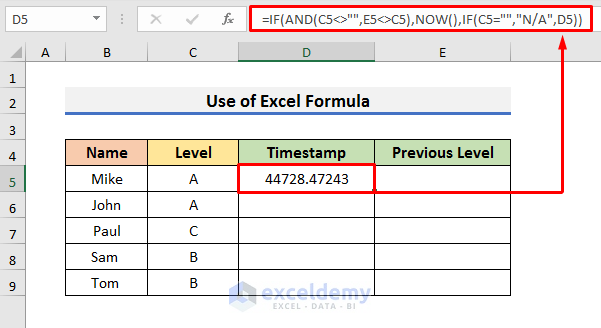
- Enter this formula in Cell D5:
=IF(AND(C5<>"",E5<>C5),NOW(),IF(C5="","N/A",D5))- Press Enter to see the result.
How Does the Formula Work?
Here, we have 3 arguments inside the IF function.
- AND(C5<>””,E5<>C5)
The first argument denotes logic. It states that Cell C5 must have the same value as Cell E5.
- NOW()
The second argument is the value that will be stored in Cell D5 if the condition is met. In this case, the NOW function, which will store the date and time.
- IF(C5=””,”N/A”,D5)
And the third argument says if Cell C5 is empty ‘N/A’ will be stored in Cell D5.
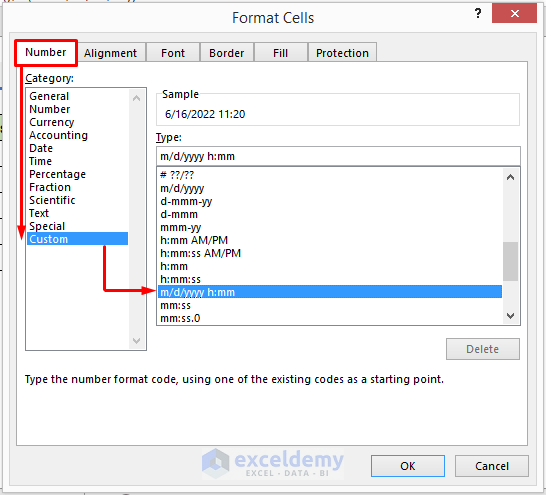
- Press Ctrl + 1 to open the Format Cells window.
- Select Number >> Custom.
- Select m/d/yyyy h:mm.
- Click OK to proceed.
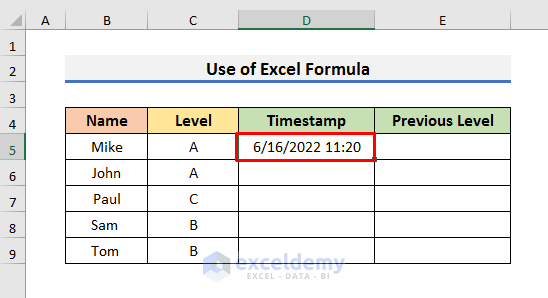
After applying the changes, you will see the timestamp correctly.
- Enter another formula in Cell E5:
=IF(C5="","",IF(OR(D5="",AND(ISNUMBER(E5),C5=E5)),E5,C5))- Press Enter to see the result.

Here, we have combined the IF, OR, AND and ISNUMBER functions. This formula stores the value of Cell C5 so that if we make any changes, it doesn’t apply those changes in other cells. If we don’t apply the formula, then the timestamp will be updated if you change anywhere in the sheet. To prevent that, we have applied this formula so that only the value of Cell C5 is updated.
- Use the Fill Handle in Column D.
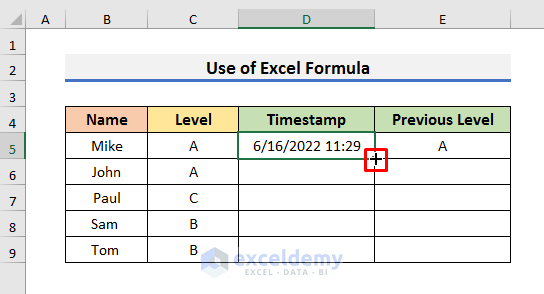
- Similarly, drag down the Fill Handle in Column E.
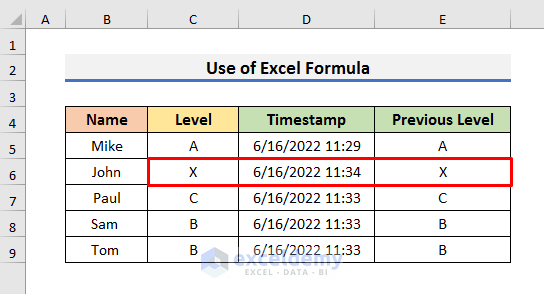
Now if you make any changes to the Level column, then the timestamp will be updated.
In our case, we changed the value of Cell C6 and the timestamp was updated.
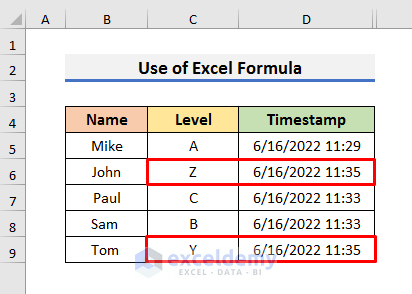
- You can hide the helper column to make the dataset look more understandable.
Read More: How to Insert Last Modified Date and Time in Excel Cell
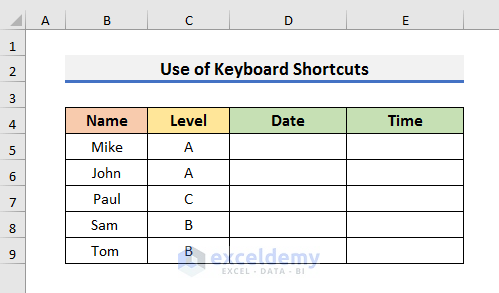
Method 2 – Using Keyboard Shortcuts
We can also use some keyboard shortcuts to insert a timestamp in Excel without VBA. Unfortunately, the dataset will not update automatically using this method. Updating will need to be done manually. But this process is very quick and easy to apply.
To explain the method, we will use two separate columns named Date and Time instead of Timestamp, for reasons which will shortly become apparent.
STEPS:
- Select Cell D5 and press Ctrl + : on the keyboard, which will insert the date in that particular cell.

- Select Cell E5 and press Ctrl + Shift + : on the keyboard to enter the time.
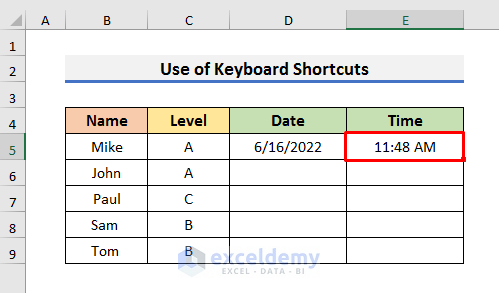
As we don’t have any shortcuts to enter the time and date together, we need to insert them in separate cells.
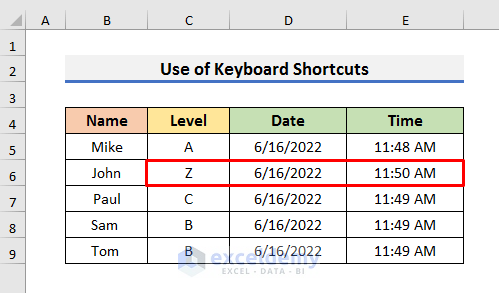
- Do the same for the rest of the dataset.
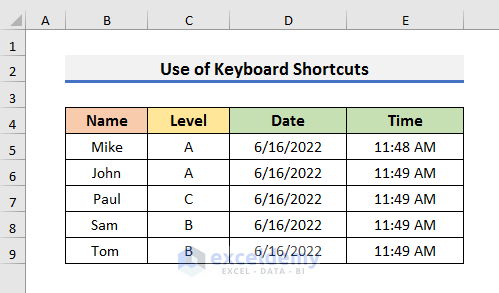
If you change a value, then you need to use the keyboard shortcuts each time to update the timestamp like in the picture below.
Method 3 – Using Excel Circular References
Circular reference means using the same cell in the formula where you are applying it. If, for example, you want to apply ‘=A4+A5+A6’ in Cell A6, then you are applying circular reference because the formula is using the value of Cell A6.
STEPS:
- Click on the File tab.

- Click on Options, which will open the Excel Options window.
- Select Formulas in the Excel Options window and check Enable iterative calculation.
- Click OK to proceed.

- NB – keep the Level column empty this time.
- Select Cell D5 and enter the formula:
=IF(C5<>"",IF(D5<>"",D5,NOW()),"")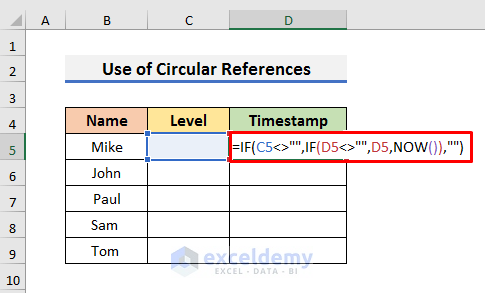
Here, the formula states that if Cell C5 is empty and we put a value in Cell C5, then, Cell D5 will store the timestamp. Unfortunately, it will not update automatically if you change the value later. If you want to update it, then you need to clear the contents of Cell C5 first, and then type the new value.
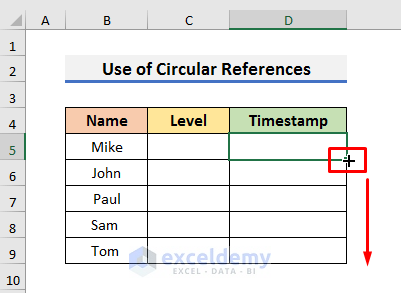
- After typing the formula, press Enter and drag down the Fill Handle.
You will not see any changes yet.
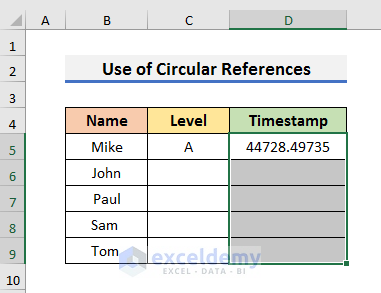
- Enter A in Cell C5 and you will see the timestamp in decimal form.
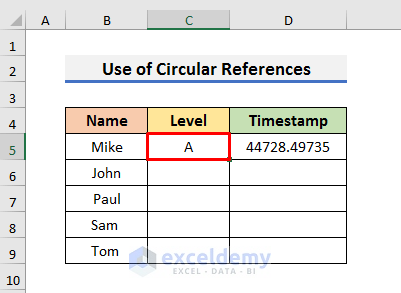
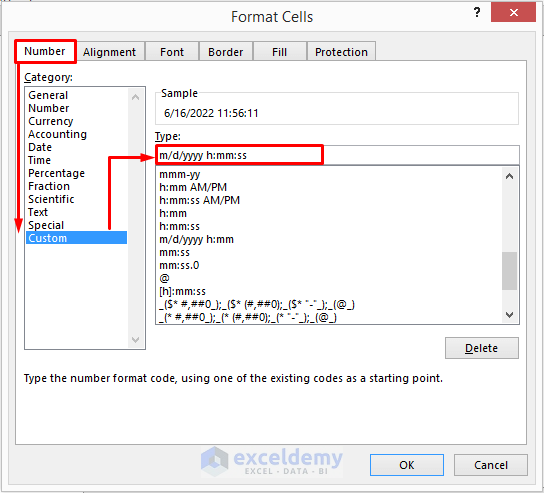
- In order to correct it, select the cells where you have applied the formula.
- Press Ctrl + 1 to open the Format Cells window.
- Select Number >> Custom and type m/d/yyyy h:mm:ss in the ‘Type’ field.
- Click OK.
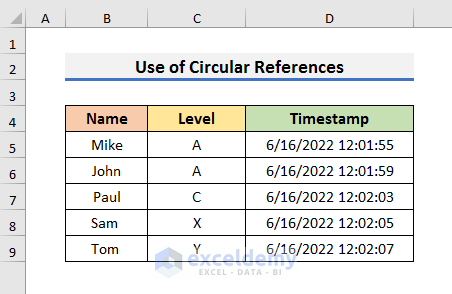
Now if you enter a value in the blank cells of the Level column, the timestamps will be updated automatically.
Download Practice Book
Related Articles
- How to Insert Current Date and Time in Excel
- How to Combine Date and Time in One Cell in Excel
- How to Auto Update Current Time in Excel
- Excel Current Time Formula
- How to Add Date and Time in Excel When Printing
- How to Enter Date and Time in Excel
<< Go Back to Timestamp | Date-Time in Excel | Learn Excel
Get FREE Advanced Excel Exercises with Solutions!

This is terrific. I’m doing exactly what I wanted to do without VBA. However using your method 1, when I establish a custom date format for the timestamp such as “mm-dd-yyyy hh:mm:ss AM/PM”, it displays as expected, but when I return and change the value in cell C5 (what you refer to as “Level”, the timestamp changes as it should except that the format has reverted to a similar but different custom format “mm/dd/yyyy, hh:mm:ss AM/PM”. This is not a show-stopper and I don’t believe it is related to your coding, but I am wondering why it will not retain my original custom format. Thanks for your infor related to changing a single timestamp without all the others changing.
Hello Tony Woods,
Thank you for sharing your query. I have tried to change values in the Level column and the timestamp changes according to the custom date format you shared. So it seems there is nothing wrong with your preferred custom format or the method that we described in the article. Therefore, I have come to the following solutions to your problem.
Solution 1: Change the Text format in the Timestamp column
For this, go to Data > Text to Column.
Then, in the second step, keep all the Delimiters unchecked.
Lastly, select Date as the Column Data Format > choose your preferred format from the drop-down list > press Finish.
Solution 2: Check settings in Formulas section
For this, go to File > Options and then check if this setting is active in your workbook.
Solution 3: Check settings in Proofing section
For this, go to go to File > Options and then check if the settings in the Proofing section are active in your workbook.
I hope the solutions will help you to work efficiently. Let us know your feedback.
Regards,
Guria,
Exceldemy
Hi GURIA,
Every time I saved the file timestamp changes.
What should I do?
Thank you.
Hello Mike,
Thanks for sharing your problem. It seems fine for me when I tried to save the excel file shared in this article. The timestamp does not change in my case. Therefore, I will suggest you go through the steps carefully, no matter which method you prefer. Also, please check if the Enable iterative calculation option in File > Options > Formulas section is turned on. If it still changes then try the VBA code shared in this article.
https://www.exceldemy.com/timestamp-in-excel-when-cell-changes/#2_Apply_VBA_Code_to_Insert_Timestamp_in_Excel_When_Cell_Changes
Let us know if you can solve the issue. Otherwise, please send us the excel file that you are working on at this address [email protected].
Regards,
Guria
ExcelDemy.