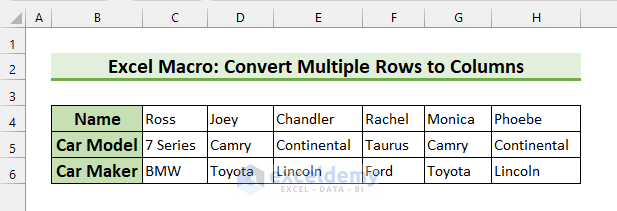
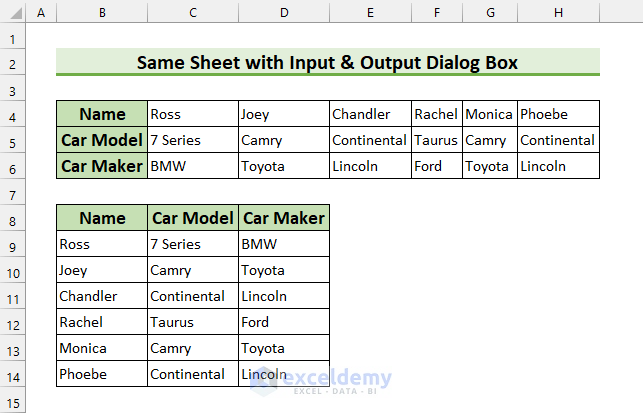
In this article, we’re going to show you 3 methods to convert multiple rows to columns in Excel Macro. For this purpose, we’ve taken a dataset with 3 rows: “Name”, “Car Model”, and “Car Maker”.
How to Convert Multiple Rows to Columns in Excel: 3 Practical Examples
You may convert multiple rows to columns in Excel by using default features. However, using Macro will add some customizable features.
1. Excel Macro to Convert Multiple Rows to Columns in the Same Sheet
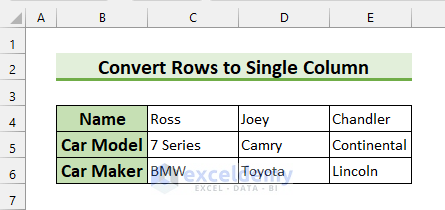
For the first method, we’re going to convert multiple rows to columns in the same sheet using Excel VBA. Moreover, this method will keep the format of the cells intact in our rows. We’ll ask the user to input the data range to convert, and then define the output location. Without further ado, let’s jump into the action.
- Firstly, from the Developer tab >>> select Visual Basic.

The Visual Basic window will appear.
- Finally, from Insert >>> select Module.
This will bring up the Module window.
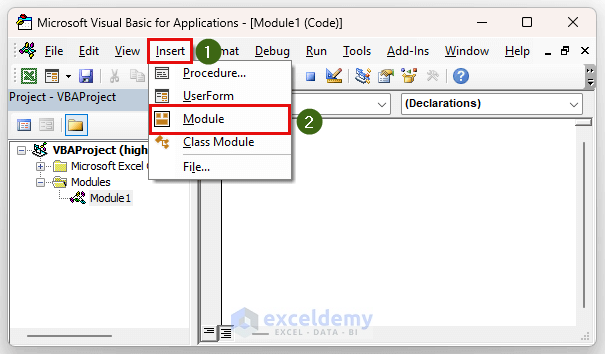
- Then, type the following code into the Module Window.
Sub ConvertRowsColumns()
    Dim cRange As Range
    Dim xRange As Range
    Set cRange = Application.InputBox(Prompt:="Please select the range to convert", Title:="Convert Rows to Columns", Type:=8)
    Set xRange = Application.InputBox(Prompt:="Select the cell where you want to start the conversion", Title:="Convert Rows to Columns", Type:=8)
    cRange.Copy
    xRange.Select
    Selection.PasteSpecial Paste:=xlPasteAll, SkipBlanks:=False, Transpose:=True
    Application.CutCopyMode = False
End Sub
VBA Code Breakdown
- Firstly, we’re calling our Sub Procedure ConvertRowsColumns.
- Secondly, we’re declaring two variables as Range types.
- Thirdly, We’re using the Application.InputBox inside the Set Statement for user input.
- Then, we’re copying our source using the Range.Copy method.
- After that, we’re defining the output destination using the Range.Select method.
- Then, we’re pasting the values and formats using the Range.PasteSpecial method.
- Moreover, we’re changing these properties –
- Paste:=xlPasteAll -> paste everything from the selection.
- SkipBlanks:=False -> we will not skip blank cells.
- Transpose:=True -> we’ll transpose the selected range.
- Finally, we’re setting the Application.CutCopyMode as False. This will cancel the cut and copy mode.

- After that, Save and close the Module.
Now, we’re going to bring up the Macros dialog box. To do that –
- From the Developer tab >>> select Macros.
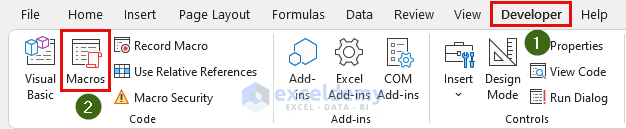
This will bring up the Macro dialog box.
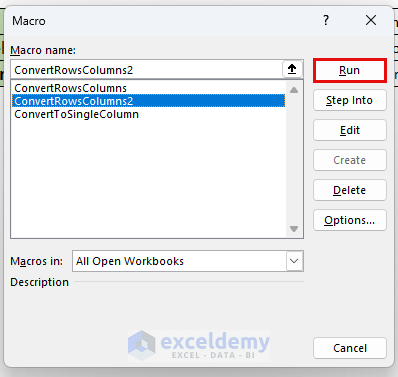
- Then, select “ConvertRowsColumns” and press Run.

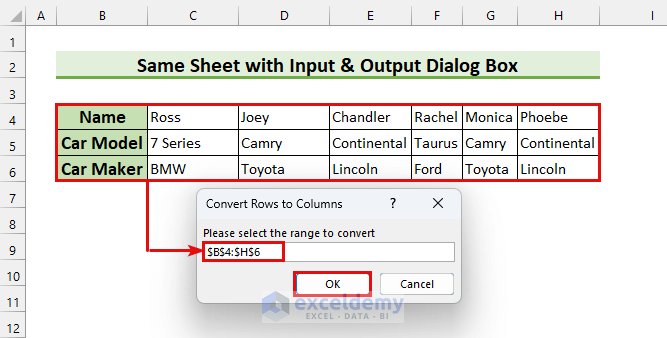
The input dialog box will appear.
- Then, select the cell range B4:H6.
- Press OK.
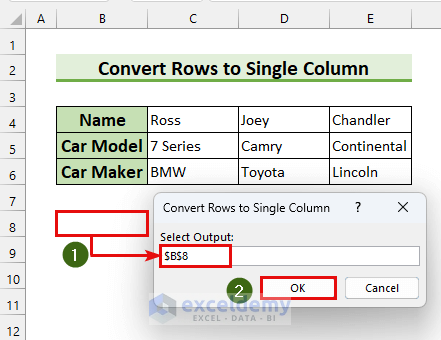
Now, we’ll need to select the output location.
- Select cell B8 as our starting point for the output.
- Finally, press OK.

Thus, we’ve converted multiple rows to columns in Excel.
Read More: VBA to Transpose Multiple Columns into Rows in Excel
2. Embed Macro to Convert Multiple Rows to Columns in Different Sheet
In this section, we’re going to use a For Next Loop to convert multiple rows to columns. If we use this method, we can’t keep the formatting as it is. In order to solve that, we’ll be using the Range.Borders property and Range.PasteSpecial method.
Steps:
- Firstly, bring up the module window and type the following code.
Sub ConvertRowsColumns2()
Dim OriginalSheet As Worksheet
Dim DestinationSheet As Worksheet
Dim cCol As Integer
Dim cRow As Integer
Set OriginalSheet = ThisWorkbook.Sheets("Source")
Set DestinationSheet = ThisWorkbook.Sheets("Destination")
DestinationSheet.Cells.ClearContents
OriginalSheet.Activate
cCol = WorksheetFunction.CountA(Range("B4:H4")) + 1
cRow = WorksheetFunction.CountA(Range("B4:B6")) + 3
For c = 1 To cCol
    For r = 3 To cRow
    DestinationSheet.Cells(c + 2, r - 2) = OriginalSheet.Cells(r, c)
    Next r
Next c
DestinationSheet.Activate
'We're gonna format the cells here
Worksheets("Destination").Range("B5:D10").Borders.LineStyle = xlContinuous
Worksheets("Source").Cells(4, 2).Copy
For x = 2 To 4
Worksheets("Destination").Cells(4, x).PasteSpecial Paste:=xlPasteFormats
Next x
Application.CutCopyMode = False
End Sub
VBA Code Breakdown
- Firstly, we’re calling our Sub Procedure ConvertRowsColumns2.
- Secondly, we’re declaring, two variables as Worksheet and another two variables as Integer types.
- Thirdly, we’re using the Set Statement to define our input and output Sheets.
- Then, we’re clearing our output Sheet using the ClearContents method.
- If we change our source dataset, then there will be no residue of the previous iteration on the output.
- After that, we’re activating our “Source” Worksheet using the Worksheet.Activate method.
- Then, we’re counting the number of columns and rows using the “cCol” and “cRow” variables.
- Then, we’re using the For Next Loop to input the values into the “Destination” Sheet.
- After that, we’re adding borders to the cells using the Borders.LineStyle property and keeping the formats as it is with the Range.PasteSpecial method.

- Secondly, Save and close this Module.
- Thirdly, bring up the Macro dialog box.
- Finally, select “ConvertRowsColumns2” and press Run.
By doing so, we’ll see the output in the “Destination” Sheet.

Read More: Excel VBA to Transpose Array
3. Excel Macro to Convert Multiple Rows to Single Column
For the last method, we’re going to convert multiple rows to a single column. We’ll keep the cell formats intact, and we’ll use InputBox for both input and output. Moreover, we’ve adjusted our dataset a little bit.
Steps:
- Firstly, bring up the Module window and type the following code.
Sub ConvertToSingleColumn()
Dim cRange1 As Range, cRange2 As Range, xRange As Range
Dim rNumber As Integer
xTitleId = "Convert Rows to Single Column"
Set cRange1 = Application.Selection
Set cRange1 = Application.InputBox("Source:", xTitleId, cRange1.Address, Type:=8)
Set cRange2 = Application.InputBox("Select Output:", xTitleId, Type:=8)
rNumber = 0
Application.ScreenUpdating = False
For Each xRange In cRange1.Rows
    xRange.Copy
    cRange2.Offset(rNumber, 0).PasteSpecial Paste:=xlPasteAll, Transpose:=True
    rNumber = rNumber + xRange.Columns.Count
Next
Application.CutCopyMode = False
Application.ScreenUpdating = True
End Sub
VBA Code Breakdown
- Firstly, we’re calling our Sub Procedure ConvertToSingleColumn.
- Secondly, we’re declaring three variables as Range types and one variable as Integer types.
- Thirdly, we’re using the Set Statement to define our cRange variables.
- Then, we’re setting the Application.ScreenUpdating property to False.
- After that, we’re using the For Next Loop to cycle through our input range.
- Finally, We’re using the WorksheetFunction.Transpose method for our main operation here

- Secondly, save and close this module.
- Thirdly, bring up the Macro dialog box.
- Finally, select “ConvertToSingleColumn” and press Run.

The input dialog box will appear.
- Then, select the cell range B4:E6.
- Press OK.

Now, we’ll need to select the output location.
- Select cell B8 as our starting point for the output.
- Finally, press OK.
In conclusion, we’ve shown you a method of converting multiple rows to a single column in Excel.

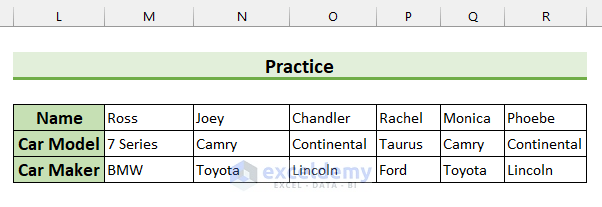
Practice Section
We’ve provided practice datasets for each method in the Excel file.
Download Practice Workbook
Conclusion
We’ve shown you 3 methods to convert multiple rows to columns in Excel Macro. If you face any problems, feel free to comment below. Thanks for reading, keep excelling!
Further Readings
- How to Paste Link and Transpose in Excel
- How to Move Data from Row to Column in Excel
- How to Change Vertical Column to Horizontal in Excel
- How to Flip Columns and Rows in Excel
- How to Flip Data from Horizontal to Vertical in Excel
- How to Transpose Multiple Columns to Rows in Excel
<< Go Back to Transpose Data in Excel | Learn Excel
Get FREE Advanced Excel Exercises with Solutions!
