Method 1 – Transpose Multiple Columns to Rows Using Paste Option
Step 1: Select the entire range that you want to transpose, right-click and. from the Context Menu, select Copy.
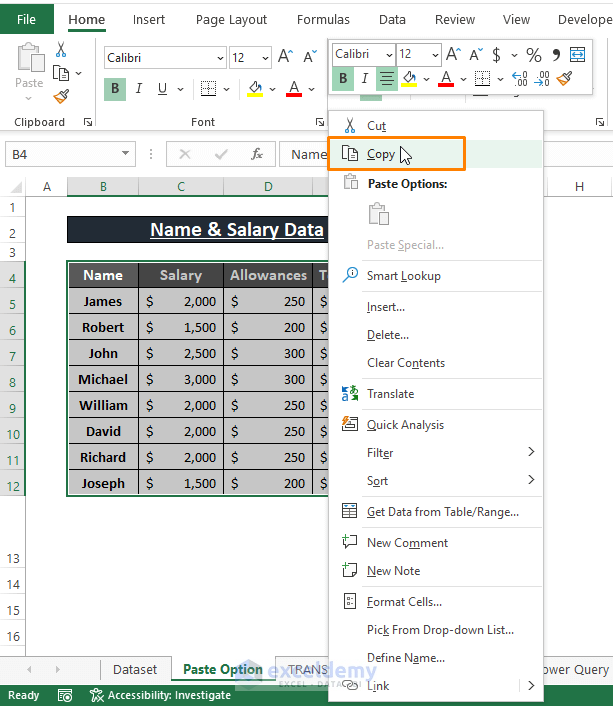
Step 2: Select the cell G4, right-Click and click on Transpose from the Paste Options.

The Keyboard Shortcut to open the Paste Special window is CTRL+ALT+V. Choose Transpose from the Paste Special options. Click on OK.

Executing the Transpose option from Context Menu or Paste Special transforms the selected columns into rows as shown in the following image.

Read More: How to Change Vertical Column to Horizontal in Excel
Method 2 – Transpose Columns to Rows Using TRANSPOSE Function
The TRANSPOSE function directly converts Columns to Rows and vice-versa. The syntax of the TRANSPOSE function is
TRANSPOSE (array)Step 1: Use the below formula in any adjacent cell (i.e., G4) to convert columns to rows.
=TRANSPOSE(B4:E12)B4:E12 is the array argument.
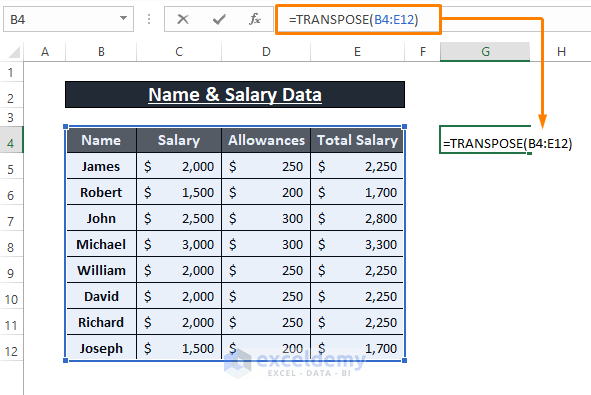
Step 2: Press ENTER. All the columns will be converted into rows.

When the dataset contains Blank Cells after transposing, insert 0’s in those blank cells. To avoid this, modify the TRANSPOSE function with the IF function to ignore blank cells. The formula is,
=TRANSPOSE(IF(B4:E12="","",B4:E12))Method 3 – INDIRECT Function to Convert Columns to Rows
If you want to establish links or fetch data from the existing range, we can use the INDIRECT function. The syntax of the INDIRECT function is
INDIRECT (ref_text, [a1])The statements define
ref_text; reference (as text).
a1; a boolean indication of A1 or R1C1 style cell reference. By default, it’s A1 style = TRUE. [Optional]
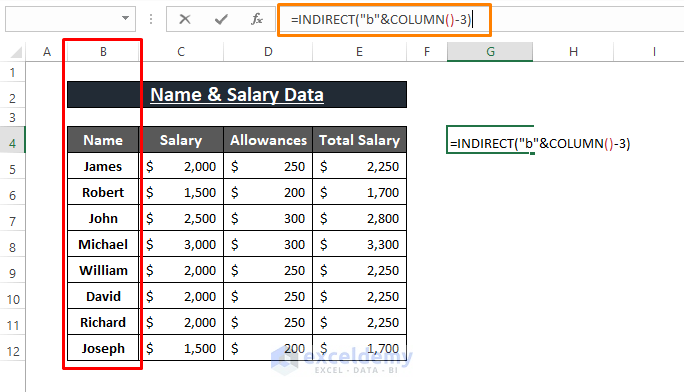
Step 1: Enter the following formula in G4.
=INDIRECT("b"&COLUMN()-3)The ret_text (i.e., “b”&COLUMN()-3) has 2 parts; The first one is the COLUMN function that passes the Column Number and the second one is the Column Name. The ref_text combines these two and constitutes a cell reference 3 less than the COLUMN function outcome. The final outcome becomes B(7-3) = B4. Therefore, B4 cell entry gets displayed in G4.
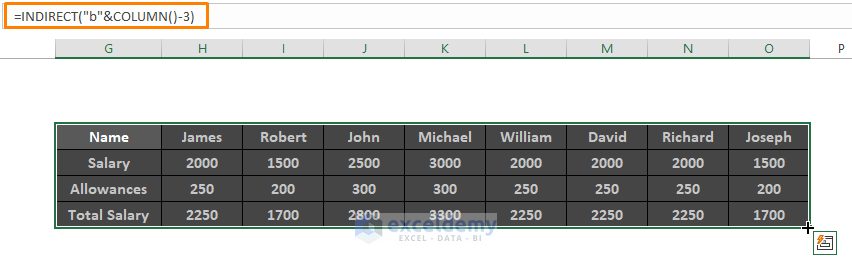
Step 2: Repeat Step 1 replacing the previous formula with the below formulas in G5, G6, and G7.
=INDIRECT("c"&COLUMN()-3)=INDIRECT("d"&COLUMN()-3)=INDIRECT("e"&COLUMN()-3)All these 3 formulas declare the same arguments as the previous formula does. It fetches the entries of their respective cells (i.e., G5=C4, G6=D4 and G7=E4).

Step 3: Use the Fill Handle to apply the formulas to the right side of the cells.
Read More: How to Convert Multiple Rows to Columns in Excel
Method 4 – Using INDEX Function to Transpose Columns to Rows
Similar to Method 3, the INDEX function brings data from a given position. The syntax of the INDEX function is
INDEX(array, row_num, [col_num])
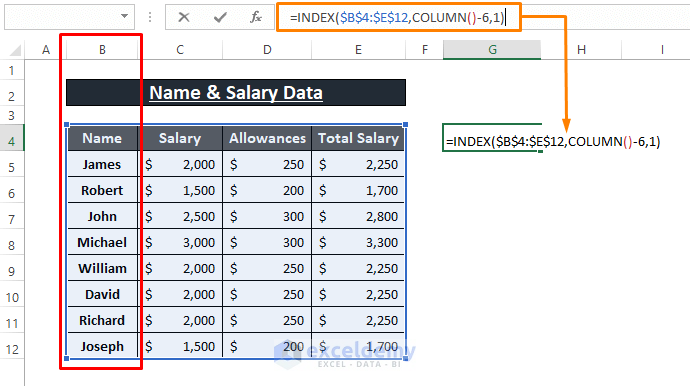
Step 1: Enter the below formula in any blank cell (G4).
=INDEX($B$4:$E$14,COLUMN()-6,1)$B$4:$E$14 refers to the array argument. The COLUMN function returns the column number where the formula is inserted (i.e., G4). COLUMN()-6 results (7-6) 1 as row_num for the array. 1 is also the col_num within the array.
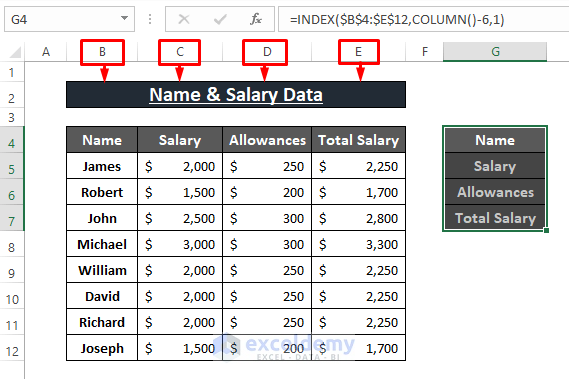
Step 2: Enter the following formula in cells G5, G6 and G7 respectively.
=INDEX($B$4:$E$14,COLUMN()-6,2)=INDEX($B$4:$E$14,COLUMN()-6,3)=INDEX($B$4:$E$14,COLUMN()-6,4)These formulas fetch entries from the same array, row 1 and column 2, 3 and 4 respectively. You can see that the resultant values depict the column headers as the formula fetches them.
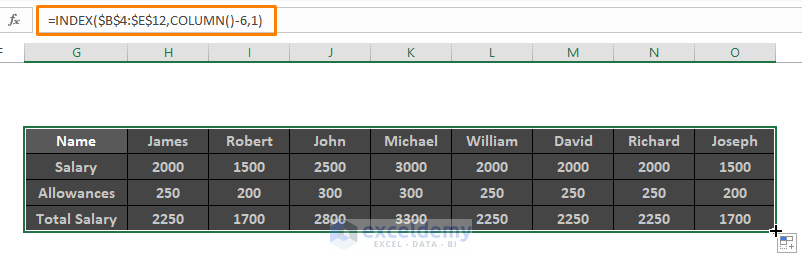
Step 3: Use the Fill Handle tool for the remaining cells.
Read More: How to Paste Link and Transpose in Excel
Method 5 – Transpose Multiple Columns to Rows Using Power Query
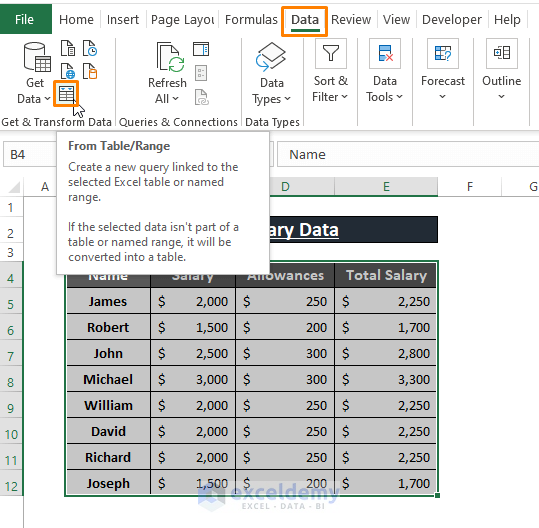
Step 1: Select the entire dataset. Go to Data > Click on From Table/Range (from Get & Transform Data section).
 Step 2: Excel tends to convert the entire dataset into a Table. The Create Table dialog box will pop up. Click on OK.

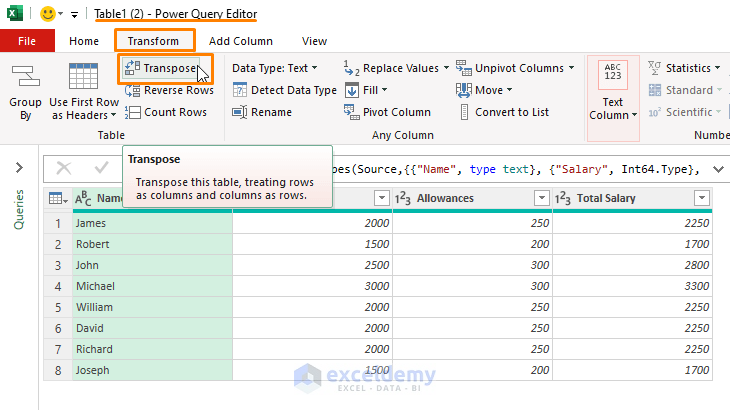
Step 3: In the Power Query Editor window,
➧ Choose the Transform section.
➧ Click on Transpose.
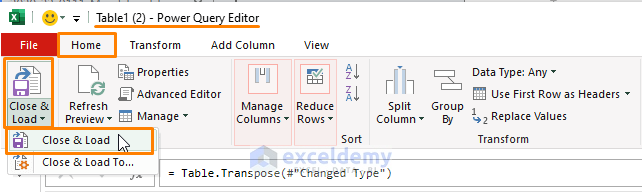
Step 4: To load the transposed data, go to Home > Click on Close & Load > Select Close & Load.
The selected columns will be converted to rows as shown in the following image.

Read More: How to Move Data from Row to Column in Excel
Method 6 – Transpose Multiple Columns to Rows Using VBA Macro
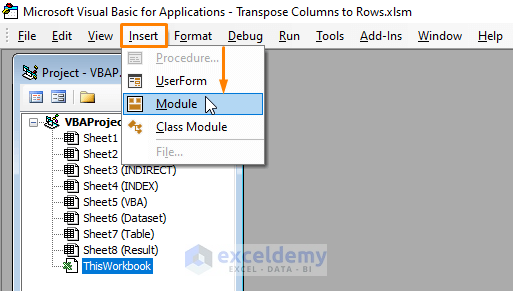
Step 1: Press ALT+F11 to open Microsoft Visual Basic. Select Insert (from the Toolbar) > Click on Module.
Step 2: Paste the following macro in the Module.
Sub ColumnToRowTransposing()
Dim wrkRng As Range
Dim trgtRng As Range
Set wrkRng = Application.InputBox(Prompt:="Provide the columns", Type:=8)
Set trgtRng = Application.InputBox(Prompt:="Select the destination cell", Type:=8)
wrkRng.Copy
trgtRng.Select
Selection.PasteSpecial Paste:=xlPasteAll, Operation:=xlNone, SkipBlanks:=False, Transpose:=True
Application.CutCopyMode = False
End Sub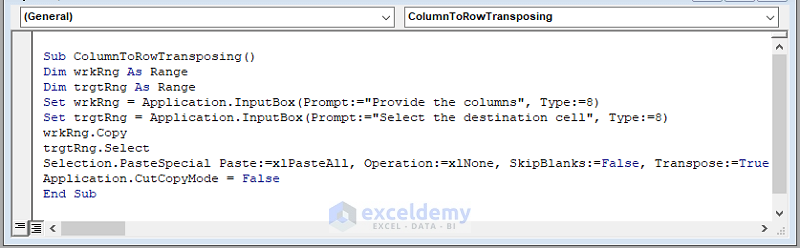
The macro begins its operation by taking the range to transpose and the cell to insert the transposed data using the VBA InputBox function. The Paste Special method pastes the entire range as transposed data in the given cell.
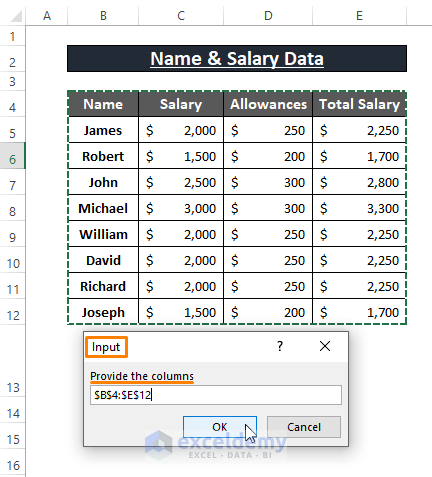
Step 3: Use the F5 key to run the macro. Select the range and click OK.
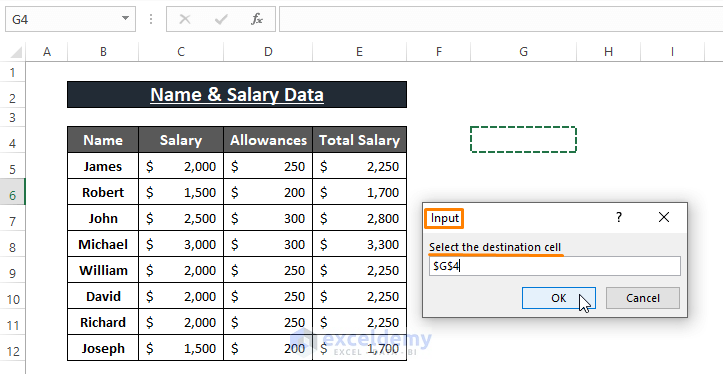
Step 4: In the 2nd Input Box, assign a cell. Click OK.
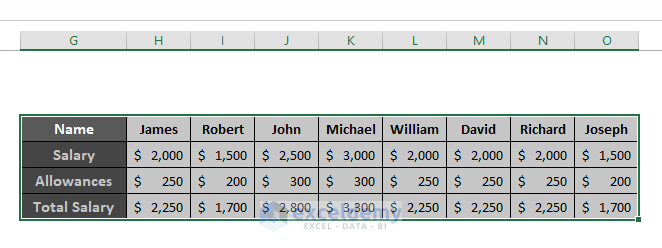
The entire columns in the dataset will be converted to rows.
VBA Macro removes blank cells with the SkipBlanks statement options in True and False. You can modify the macro according to your needs.
Read More: VBA to Transpose Multiple Columns into Rows in Excel
Download Excel Workbook
Related Articles
<< Go Back to Transpose Data in Excel | Learn Excel
Get FREE Advanced Excel Exercises with Solutions!
