Sometimes we need to re-organize columns into rows when working on a large dataset in Excel for better readability. Implementing VBA is the most effective, quickest, and safest method to run any operation in Excel. In this article, we will show you how to transpose multiple columns into rows in Excel with the VBA macro.
VBA to Transpose Multiple Columns into Rows in Excel: 2 Methods
In this section, we will show how to transpose multiple columns into multiple rows and multiple columns into a single row in Excel with VBA code.
The given dataset below we will be using throughout the whole article as examples.
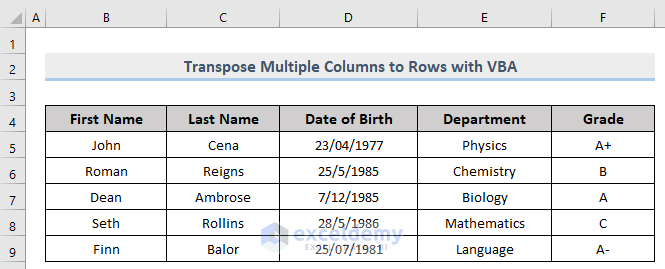
1. Embed VBA to Transpose Multiple Columns into Multiple Rows
The steps to transpose multiple columns into rows with VBA code are given below.
Steps:
- In the beginning, press Alt + F11 on your keyboard or go to the tab Developer -> Visual Basic to open Visual Basic Editor.
![]()
- In the pop-up code window, from the menu bar, click Insert -> Module.
![]()
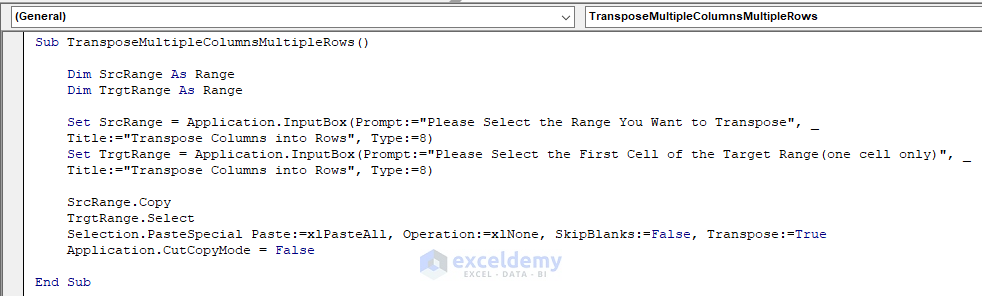
- Now, copy the following code and paste it into the code window.
Sub TransposeMultipleColumnsMultipleRows()
    Dim SrcRange As Range
    Dim TrgtRange As Range
    Set SrcRange = Application.InputBox(Prompt:="Please Select the Range You Want to Transpose", Title:="Transpose Columns into Rows", Type:=8)
    Set TrgtRange = Application.InputBox(Prompt:="Please Select the First Cell of the Target Range(one cell only)", Title:="Transpose Columns into Rows", Type:=8)
    SrcRange.Copy
    TrgtRange.Select
    Selection.PasteSpecial Paste:=xlPasteAll, Operation:=xlNone, SkipBlanks:=False, Transpose:=True
    Application.CutCopyMode = False
End Sub
Your code is now ready to run.
- Then, press F5 on your keyboard or from the menu bar select Run -> Run Sub/UserForm. You can also just click on the small Play icon in the sub-menu bar to run the macro.
![]()
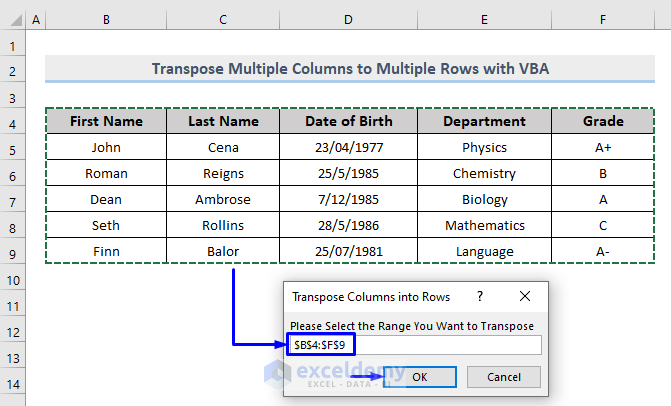
- This time, a pop-up input box will appear asking for the range to transpose.
- Select and drag the source range to transpose (in our case, it is range B4:F9).
- Next, click OK.
- Again, a second pop-up input box will appear and this time it will ask you for the destination range. You must select only one cell, don’t select a range of cells. This code will consider the selected cell as the first cell of the destination range and paste the columns starting from that cell (in our case, it is cell B11).
- Lastly, click OK.
![]()
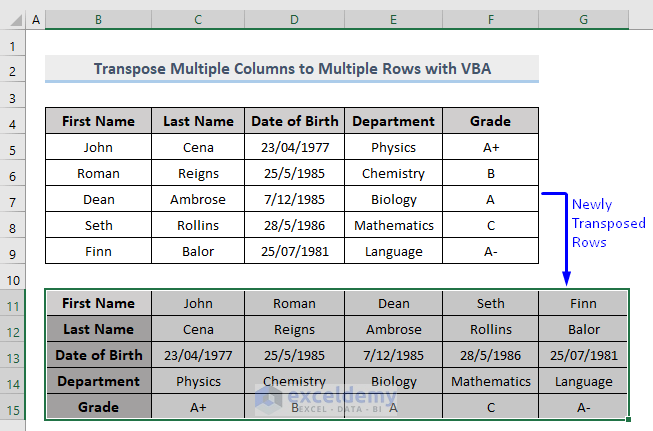
As a result, the multiple columns in your dataset will be now transposed into multiple rows in the new destination of your Excel spreadsheet.
Macro Code Breakdown
Dim SrcRange As Range
Dim TrgtRange As Range
Declaring two variables as Range type.
Set SrcRange = Application.InputBox(Prompt:="Please Select the Range You Want to Transpose", Title:="Transpose Columns into Rows", Type:=8)
Set TrgtRange = Application.InputBox(Prompt:="Please Select the First Cell of the Target Range(one cell only)", Title:="Transpose Columns into Rows", Type:=8)
Assigning the two declared variables to references. The user will select the references after executing the code. Also provided the Title and the Prompt message that the pop-up Input Box will hold.
SrcRange.CopyCopying the source range to transpose.
TrgtRange.SelectSelecting the target cell to paste the copied range.
Selection.PasteSpecial Paste:=xlPasteAll, Operation:=xlNone, SkipBlanks:=False, Transpose:=TrueProviding the type of Paste operation will occur:
- Paste:=xlPasteAll -> Everything will be pasted from the selection.
- Operation:=xlNone -> We are not performing any mathematical operation (such as add, subtract, divide, multiplication etc.), so the operation value will be None.
- SkipBlanks:=False -> As we are pasting everything so we won’t even skip blank cells.
- Transpose:=True -> To transpose the selected range.
Application.CutCopyMode = FalseCancelling the Cut or Copy mode and clearing the clipboard.
Read More: Excel Macro: Convert Multiple Rows to Columns
2. Implement Macro to Transpose Multiple Columns into Single Row
The steps to transpose multiple columns into single rows with VBA macro are given below.
Steps:
- Same way as before, open Visual Basic Editor from the Developer tab and insert a module in the code window.
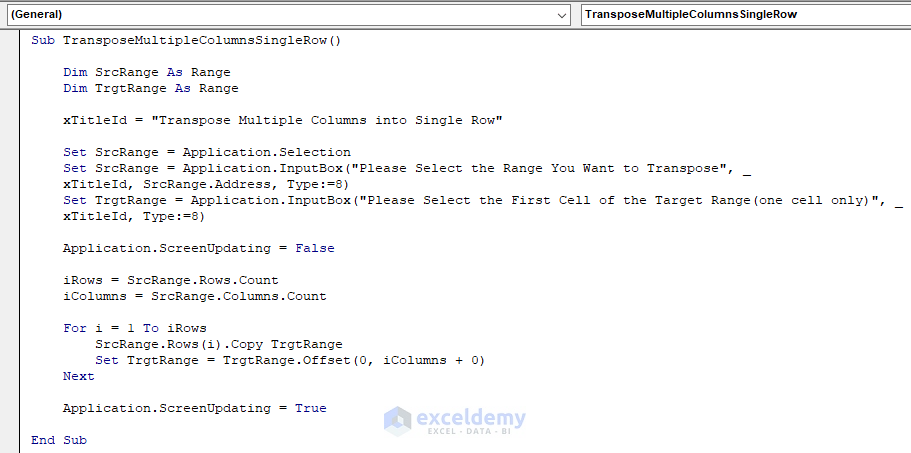
- In the code window, copy the following code and paste
Sub TransposeMultipleColumnsSingleRow()
    Dim SrcRange As Range
    Dim TrgtRange As Range
    xTitleId = "Transpose Multiple Columns into Single Row"
    Set SrcRange = Application.Selection
    Set SrcRange = Application.InputBox("Please Select the Range You Want to Transpose", xTitleId, SrcRange.Address, Type:=8)
    Set TrgtRange = Application.InputBox("Please Select the First Cell of the Target Range(one cell only)", xTitleId, Type:=8)
    Application.ScreenUpdating = False
    iRows = SrcRange.Rows.Count
    iColumns = SrcRange.Columns.Count
    For i = 1 To iRows
        SrcRange.Rows(i).Copy TrgtRange
        Set TrgtRange = TrgtRange.Offset(0, iColumns + 0)
    Next
    Application.ScreenUpdating = True
End Sub
Your code is now ready to run.
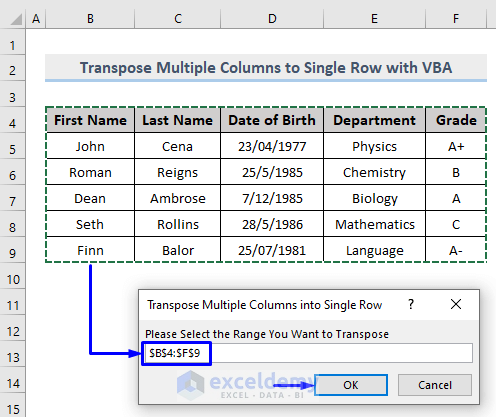
- Next, run the code as shown above and a pop-up input box will appear asking for the range to transpose.
- Select and drag the source range to transpose (in our case, it is range B4:F9).
- Next, click OK.
- Again, a second pop-up input box will appear and this time it will ask you for the destination range. You must select only one cell, don’t select a range of cells. This code will consider the selected cell as the first cell of the destination range and paste the columns starting from that cell (in our case, it is cell B11).
- Lastly, click OK.
![]()
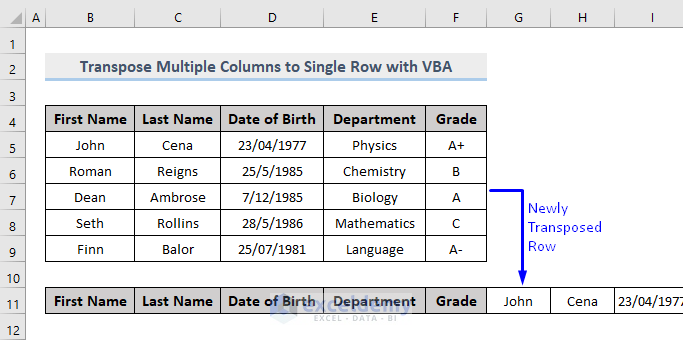
As a result, the multiple columns in your dataset will be now transposed into a single row in the new destination of your Excel spreadsheet.
VBA Code Breakdown
Dim SrcRange As Range
Dim TrgtRange As Range
Declaring two variables as Range type.
xTitleId = "Transpose Multiple Columns into Single Row"Providing the Title that the pop-up Input Box will hold while performing the operation.
Set SrcRange = Application.Selection
Set SrcRange = Application.InputBox("Please Select the Range You Want to Transpose", xTitleId, SrcRange.Address, Type:=8)
Set TrgtRange = Application.InputBox("Please Select the First Cell of the Target Range(one cell only)", xTitleId, Type:=8)
Assigning the two declared variables to references. The user will select the references after executing the code. Also passing the Title that was declared above.
Application.ScreenUpdating = FalseTurning off the screen updating option to speed up the macro.
iRows = SrcRange.Rows.Count
iColumns = SrcRange.Columns.Count
Counting the number of rows and columns of the dataset.
For i = 1 To iRows
    SrcRange.Rows(i).Copy TrgtRange
    Set TrgtRange = TrgtRange.Offset(0, iColumns + 0)
Next
Finally, run a loop that will scan through the range given, copy each value and paste them into new cells. The loop process will keep copying and pasting each value and increasing the column reference numbers. It means, every time it takes a value and pastes it one cell, next time while pasting the next value, it pastes it in the same row but in the next column.
Application.ScreenUpdating = TrueTurning on the screen updating option.
Read More: Excel VBA to Transpose Array
Download Workbook
You can download the free practice Excel workbook from here.
Conclusion
To conclude, this article showed you how to transpose multiple columns into rows in Excel with VBA. I hope this article has been very beneficial to you. Feel free to ask if you have any questions regarding the topic.
Related Articles
- How to Flip Columns and Rows in Excel
- How to Convert Multiple Rows to Columns in Excel
- How to Flip Data from Horizontal to Vertical in Excel
- How to Paste Link and Transpose in Excel
- How to Move Data from Row to Column in Excel
- How to Change Vertical Column to Horizontal in Excel
<< Go Back to Transpose Data in Excel | Learn Excel
Get FREE Advanced Excel Exercises with Solutions!
