Download Practice Workbook
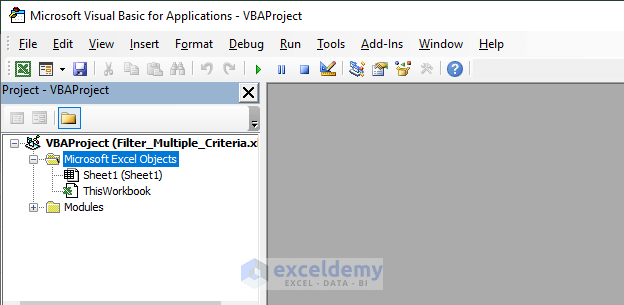
Step 1 – Opening the VBA Editor to Print in Excel
Press ALT+F11 to open the Visual Basic Editor.
Read More: How to Set Print Area in Excel (5 Methods)
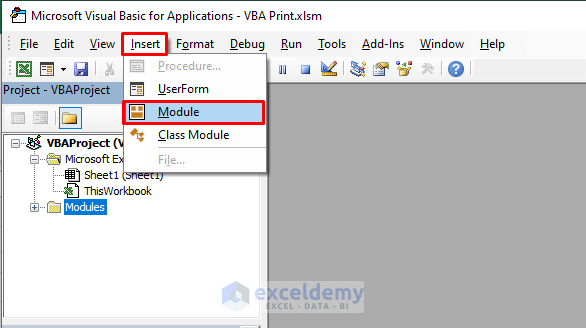
Step 2 – Inserting a New Module to Print in Excel
Go to the Insert option in the VBA toolbar. Click Insert > Module to open a new module.
Read More: How to Print Gridlines in Excel (2 Ways)
Step 3 – Entering the VBA Code to Print in Excel
A new module named Module1 will open. Enter the following VBA code.
⧭ VBA Code:
Sub VBA_Print()

ActiveWorkbook.ActiveSheet.PrintOut copies:=1

End Sub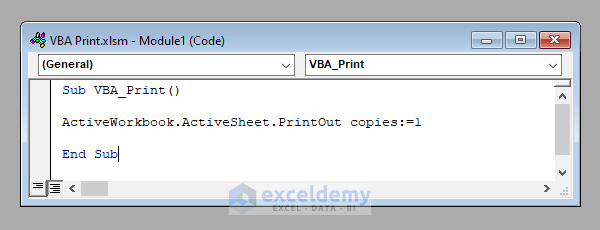
⧭ Notes:
- I want to print the active worksheet of my workbook. To print any other worksheet, enter the name of the worksheet directly in the code.
To print out the worksheet called Sheet1, use:
ActiveWorkbook.Worksheets(“Sheet1”).PrintOut copies:=1
- You can also print from a workbook that’s not active. To print out Sheet1 from a workbook called Workbook1, use:
Workbook(“Workbook1”).Worksheets(“Sheet1”).PrintOut copies:=1
- We are printing only one copy of the worksheet. If you want to print more than one copy, change the copies
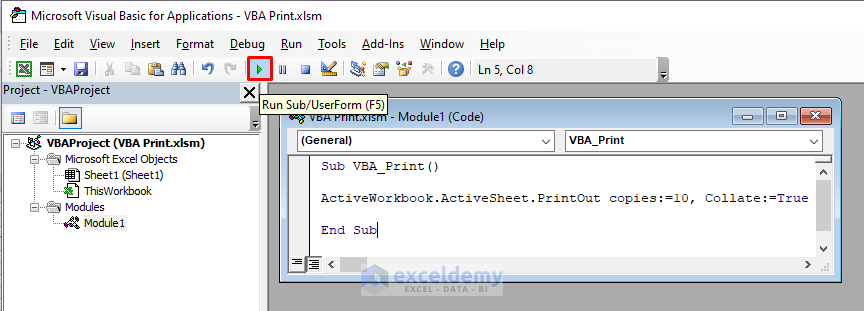
- To print multiple worksheets and collate them while printing, the PrintOut function of VBA has a property called Collate. Set it to be True.
ActiveWorkbook.ActiveSheet.PrintOut copies:=10, Collate:=True
Read More: Excel VBA: How to Set Print Area Dynamically (7 Ways)
Similar Readings
- Excel Button to Print Specific Sheets (With Easy Steps)
- How to Print Horizontally in Excel (4 Methods)
- Print Multiple Excel Sheets to Single PDF File with VBA (6 Criteria)
- How to Print Excel Sheet in A4 Size (4 Ways)
- Print Titles in Excel Is Disabled, How to Enable It?
Step 4 – Running the VBA Code to Print in Excel
Run the Macro by clicking the Run option in the VBA toolbar.
Read More: Excel VBA: Set Print Area for Multiple Ranges (5 Examples)
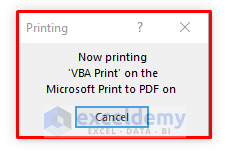
Step 5 – The Final Output: Print with VBA
The worksheet is printed and a window opens.
Read More: Excel VBA: Print Range of Cells (5 Easy Methods)
Things to Remember
We’ve used the PrintOut function of VBA. There’s another function in VBA called PrintPreview, that shows the preview of the data before printing.
The syntax of the PrintPreview function is the same as the PrintOut function, use PrintPrview in place of PrintOut.
ActiveWorkbook.ActiveSheet.PrintPreview
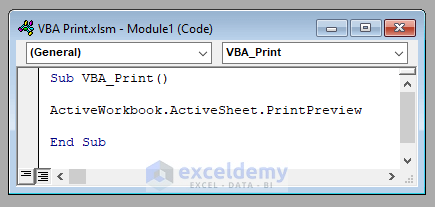
It’ll show the preview of your worksheet before printing.
Related Articles
- How to Print Excel Sheet with Table (4 Methods + Tricks)
- How to Remove Print Titles in Excel (3 Methods)
- VBA Code for Print Button in Excel (5 Examples)
- Set Print Titles in Excel (2 Methods)
- How to Not Print Empty Cells in Excel (3 Simple Methods)

