Method 1 – Print Only Table from an Excel Sheet
Our sample dataset is in the B4:I79 cell range.
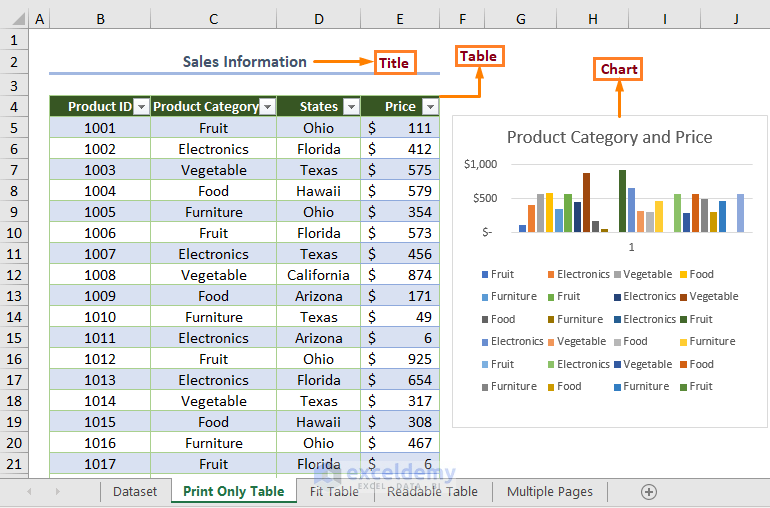
The worksheet has a chart, the table, and the title of the table. We want to print only the table.
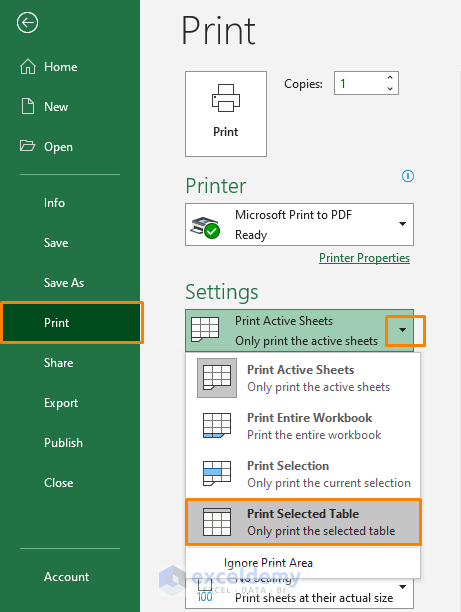
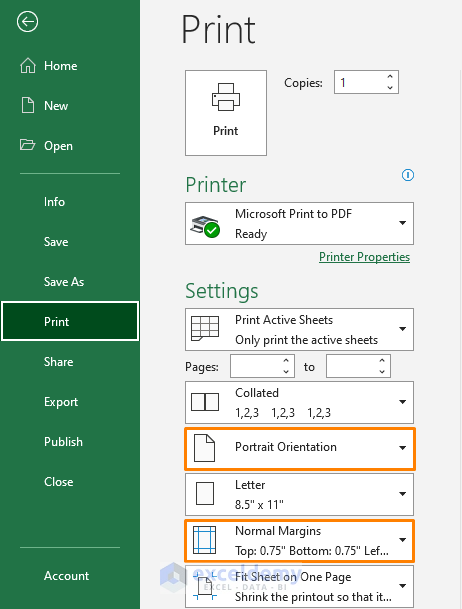
➤ Go to File > Print (or press CTRL + P) > Settings > Print Active Sheets and choose the Print Selected Table option from the drop-down.
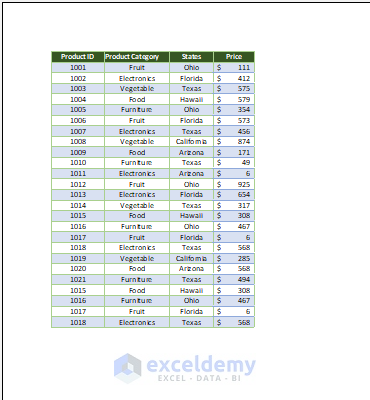
You will see the following in Print Preview.
Read More: How to Not Print Empty Cells in Excel
Method 2 – Tricks for Adjusting Sheet with Table to Print
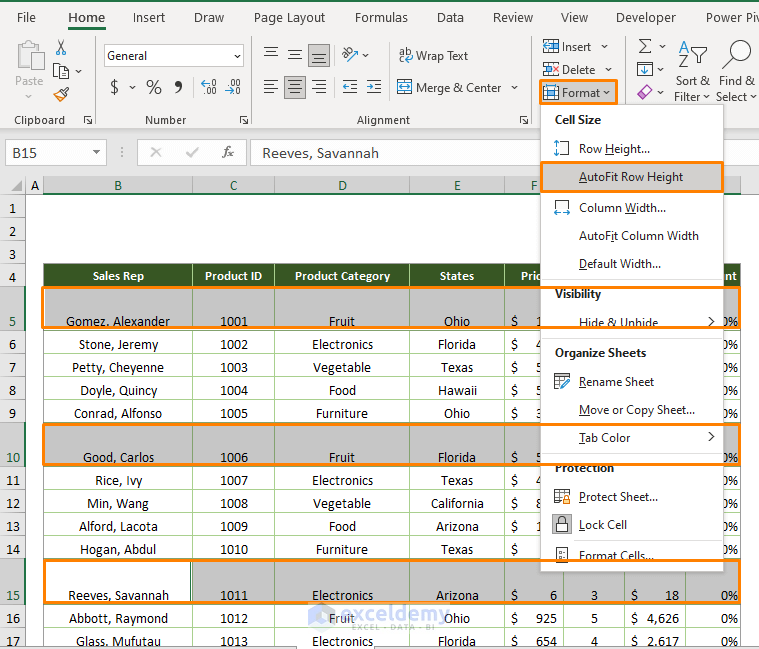
Trick 1 – Apply AutoFit Row Height to Reduce the Row Height
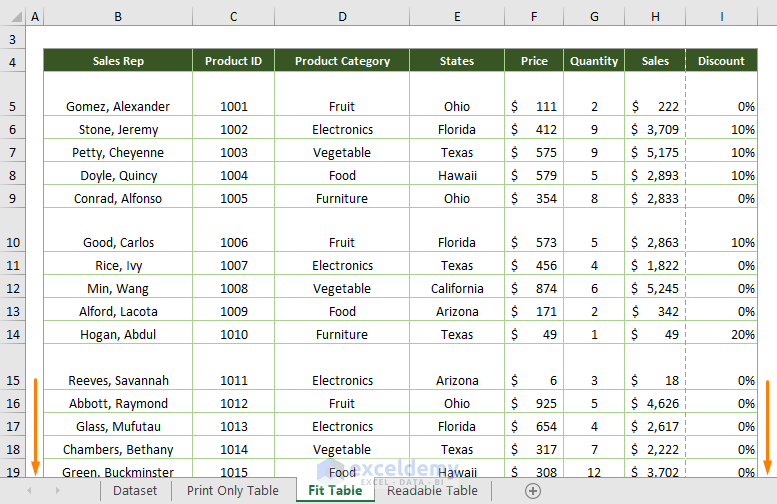
In the sample dataset, rows 5,10, and 15 have a different height from the rest of the rows.
➤ Reduce the row height using the AutoFit Row Height option from the Format feature in the Home tab. Before using the option, select the rows that you want to autofit.
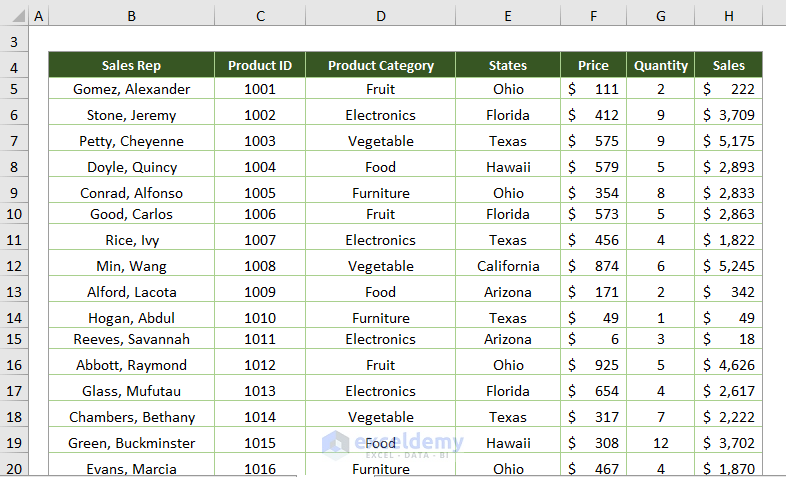
You will get the output with reduced row height.
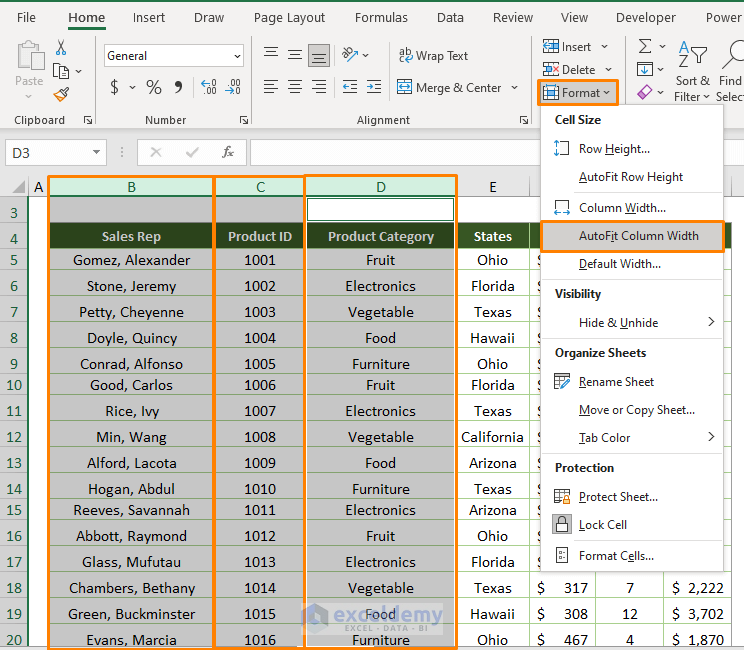
Trick 2 – Apply AutoFit Column Width to Reduce the Column Width
If the column width is larger, you can use the AutoFit Column Width option as shown in the following image.
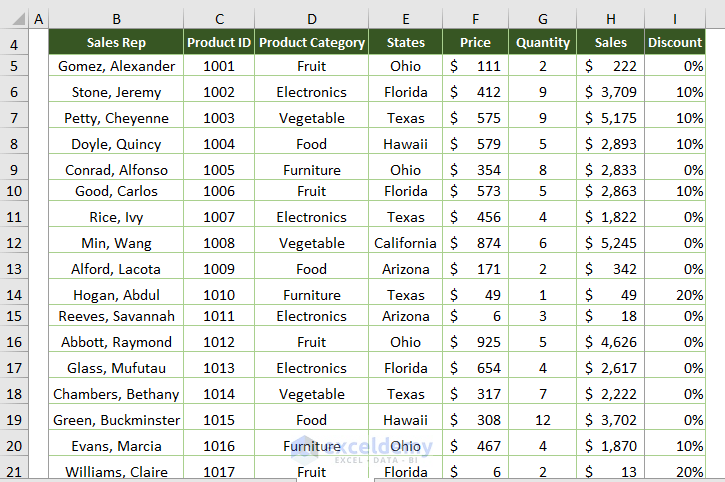
The output will look as follows.
Trick 3 – Adjust Page Orientation and Margins
If the number of columns is more, change the orientation of the page to Landscape for printing. If the dataset is larger, change the margins from print settings.
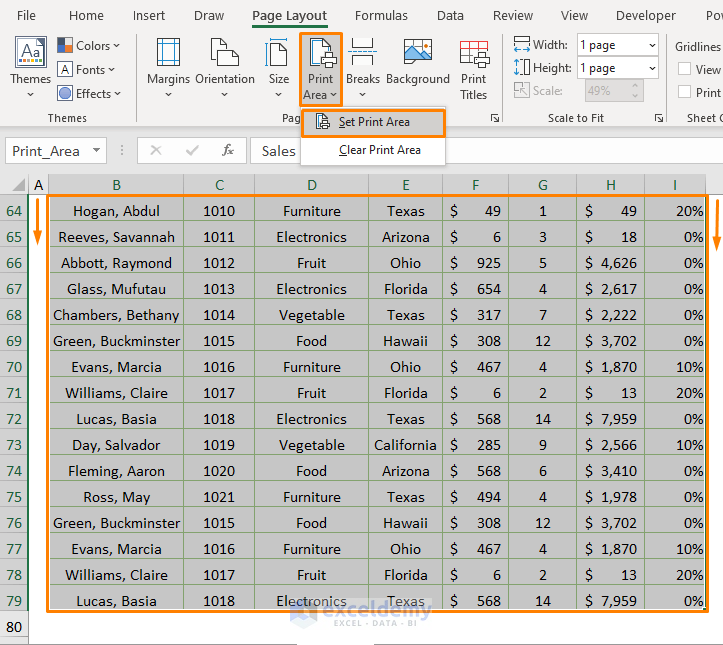
Trick 4 – Set Print Area
➤ Go to the Page Layout tab > Print Area > Set Print Area
Thus, you’ll all pages in the Print Preview section.
Trick 5 – Remove Any Missing Column
You may get single or multiple missing columns in the Print Preview.

To fix the issue:
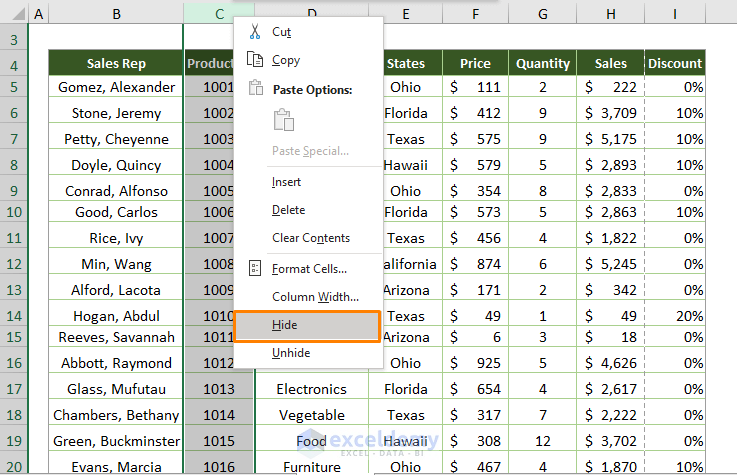
- Hide rows: Hide any unnecessary rows
- Adjusting scaling of the print settings: Change the scaling settings. For example, you may choose the Fit All Columns on One Page to display the all columns of the dataset.
Trick 6 – Reduce the Number of Unnecessary Pages
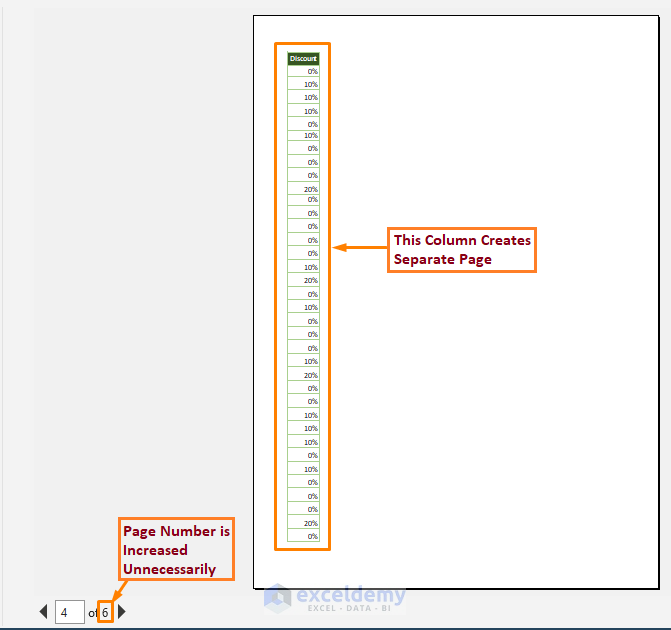
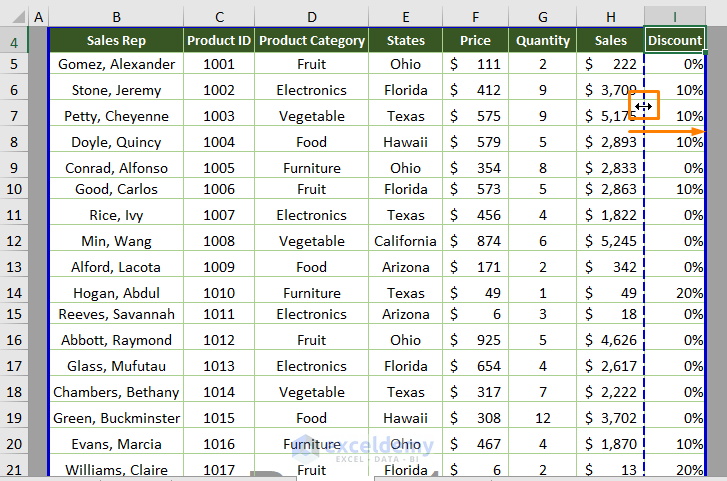
If you go to the Print Preview, you’ll find a missing column namely “Discount” that creates an unnecessary page. This increases the number of pages. That means, you are facing two issues (missing column and increased number of pages).
To fix the two issues:
Go to the View tab > Page Break Preview option.
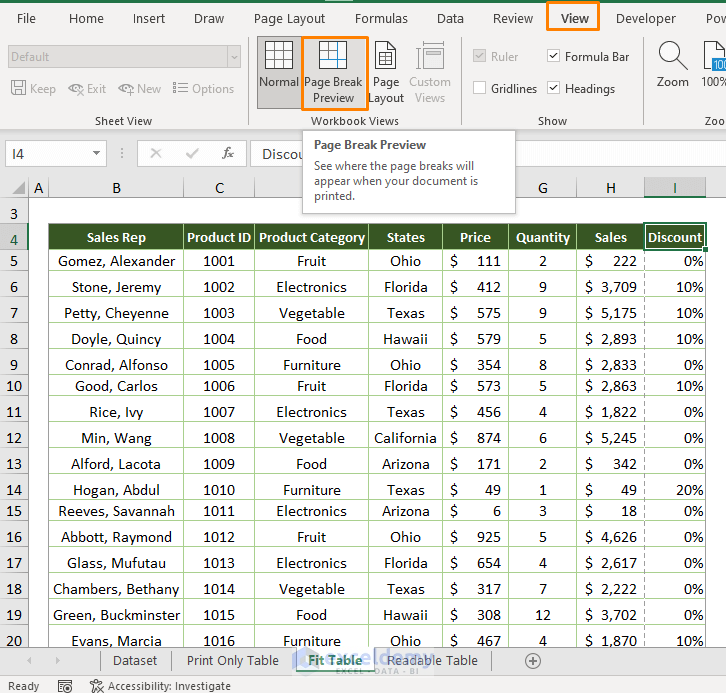
You’ll see the following preview.

➤ Place the cursor between the Sales and Discount columns(columns H and I). And drag the cursor to the right till the end of column I.
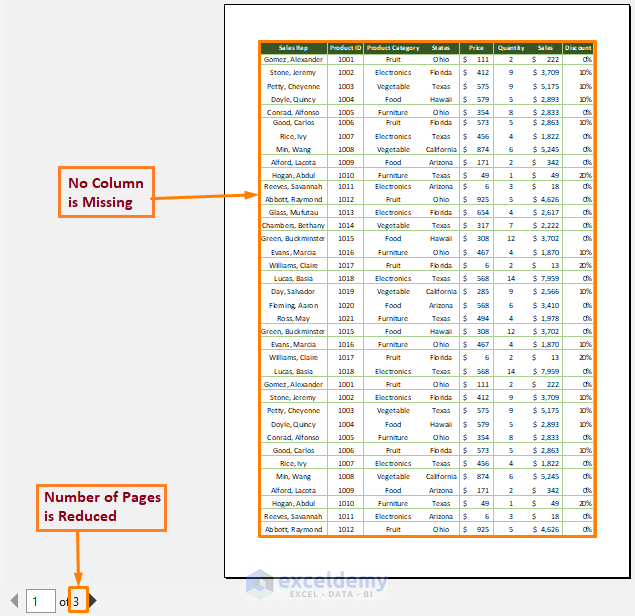
Go to the Print Preview. No column is missing and the number of pages is reduced.
Read More: How to Print Graph in Excel
Method 3 – Make Excel Table Readable While Printing
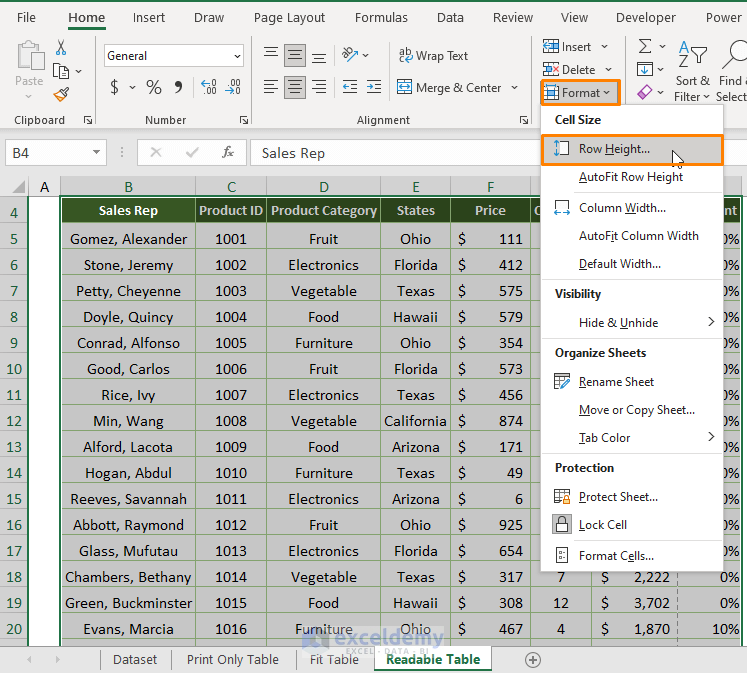
3.1. Increase the Row Height
If the row height is smaller, it may reduce the readability. Increase the row height (go to the Row Height option from the Format feature in the Home tab).
Input the row height (e.g. 50).
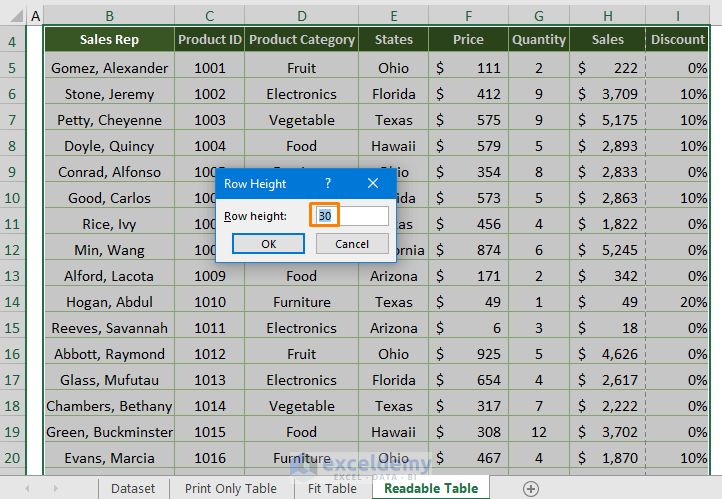
You will get the following output.
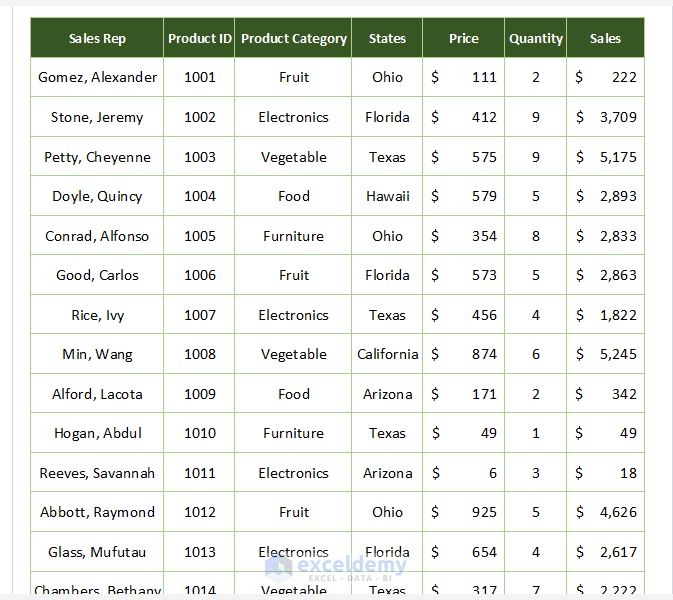
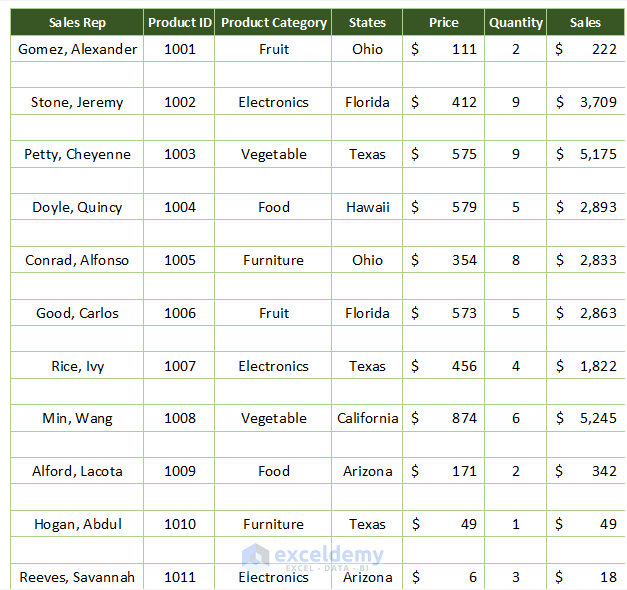
3.2. Insert Blank Rows
If your dataset is congested, you may insert an additional blank row between the existing two rows.
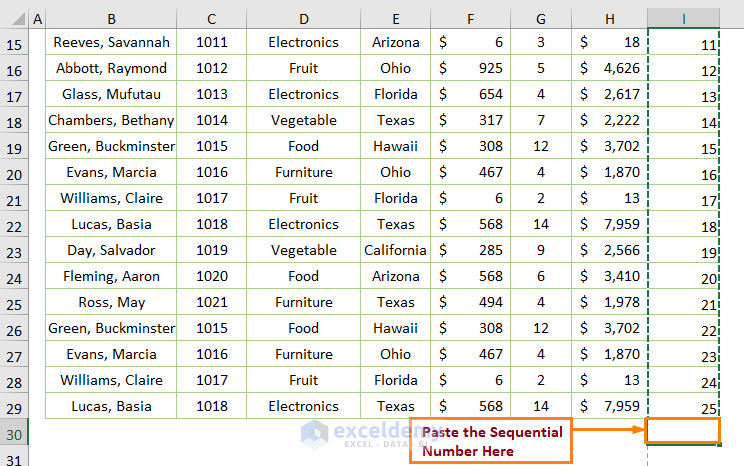
➤ Create a list of sequential numbers for a separate column namely Sort.
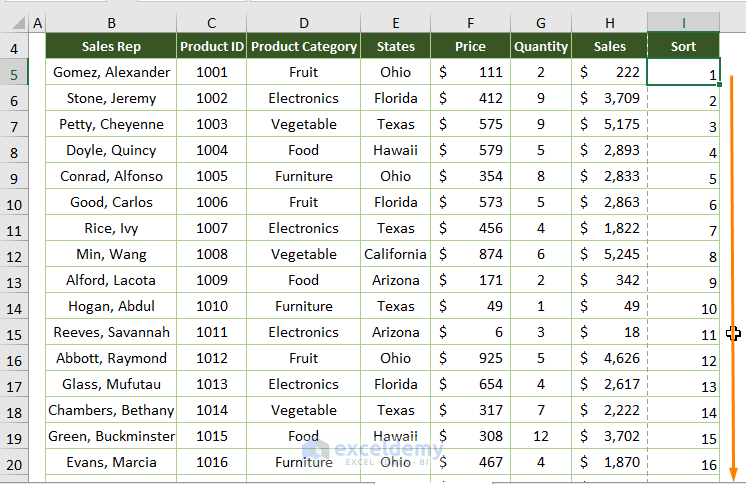
➤ Copy the list of numbers again (CTRL + C) and paste (CTRL + V) below the cells (e.g. I30 cell).
➤ Click on the Sort option in the Data tab. A dialog box appears. Select Sort from the drop-down list of the Sort by option.
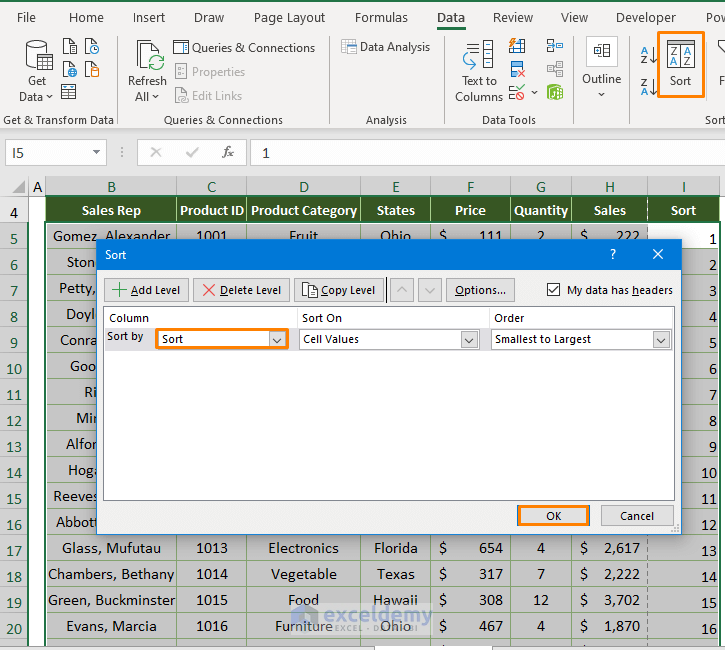
Press OK to get the following print preview.
Method 4 – Things to Add to Sheet When Print Table
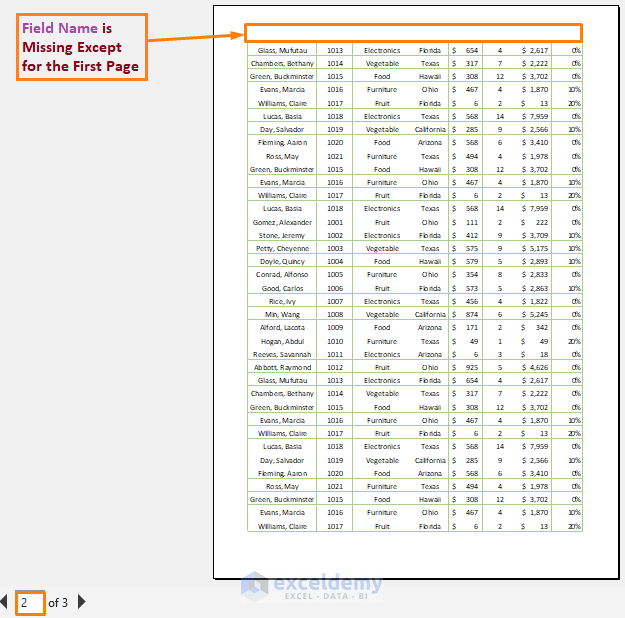
4.1. Common Fields for All Pages
While viewing the Print Preview, you might see that no field name or the column heading is available except for the first page.
➤ Go to the Page Layout tab > Print Titles option. In the Rows to repeat at top option, select row 4 ($4:$4)
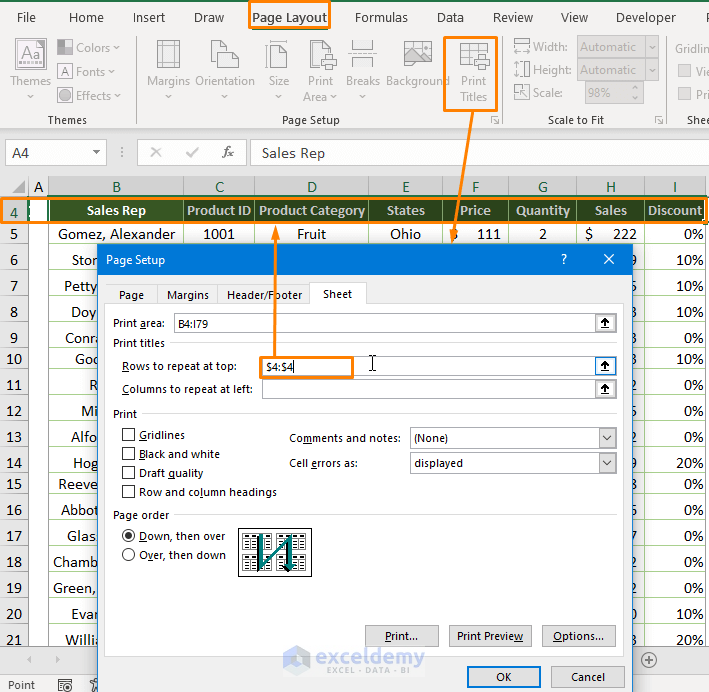
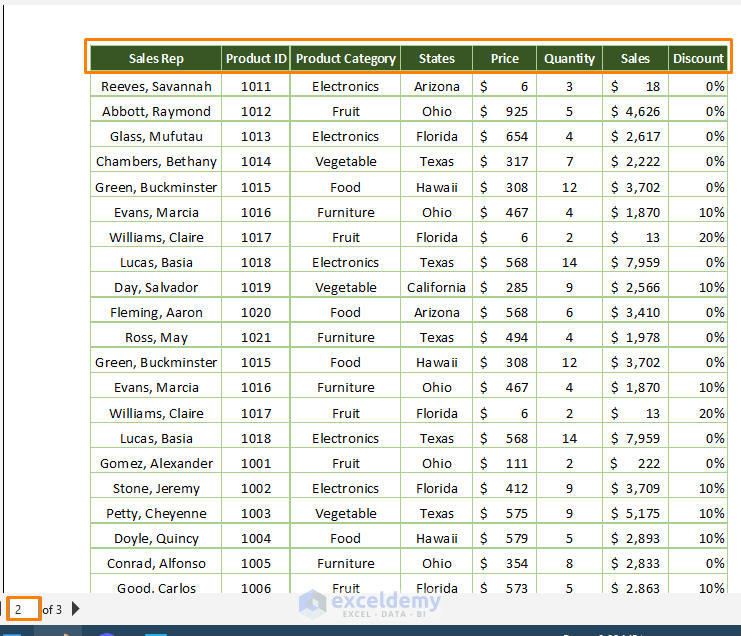
You’ll see the name of the fields for every page.
4.2. Common Header for All Pages
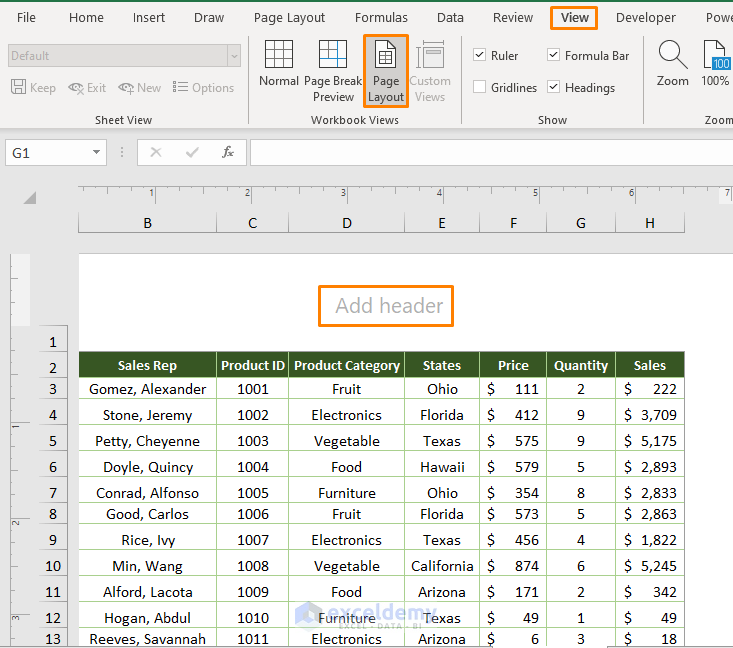
➤ To add headers, turn on the Page Layout view from the View tab and click on Add Header.
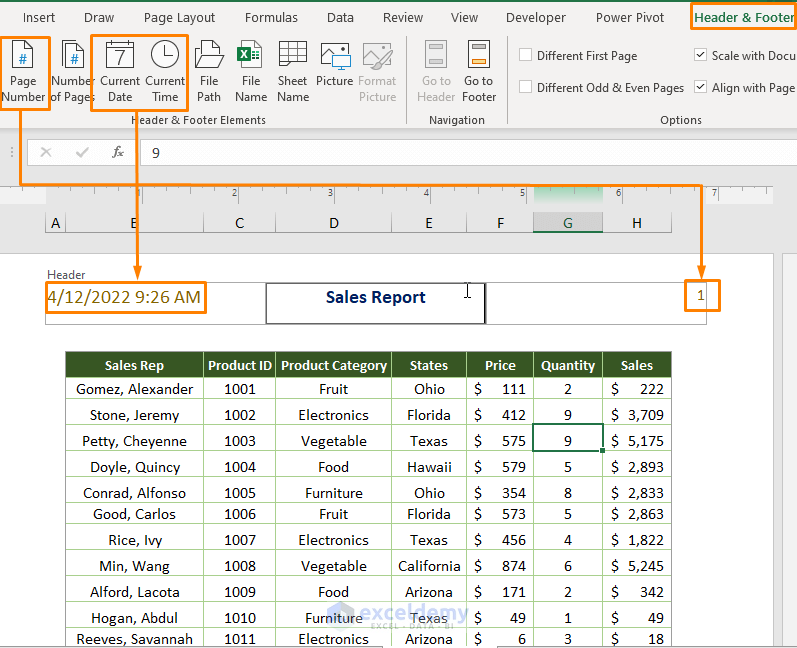
➤ Go to the Header & Footer tab and insert Current Date, Current Time and Page Number in the Header section from the Header & Footer Elements ribbon.
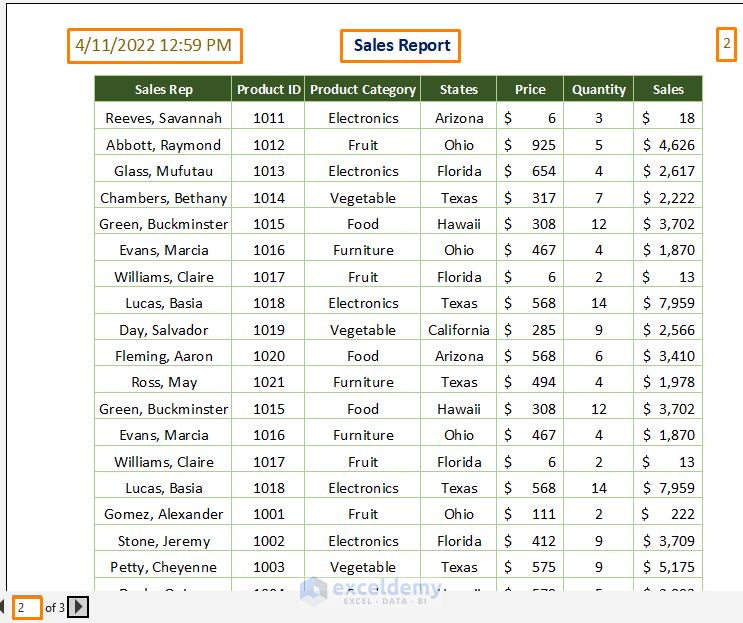
You’ll get the following output.
Download Practice Workbook
Related Articles
<< Go Back to Print in Excel | Learn Excel
Get FREE Advanced Excel Exercises with Solutions!
