When users have a larger dataset it’s convenient to print horizontally in Excel. Though Excel by default prints worksheets in Portrait Page Orientation. Printing horizontally won’t be an issue if Excel is able to automatically switch page orientations depending on the data or selection. But Excel can’t change page orientation on its own. As a result, it becomes vital to change the page orientation if users want a decent printout. Because Excel is designed to execute calculations in convenient ways not arranging page layout for better print view.
In this article, we demonstrate multiple ways to print worksheets horizontally in Excel.
As we mentioned earlier, there are several options to perform horizontally print for single or multiple worksheets. Use any one of the following methods to print horizontally in Excel.
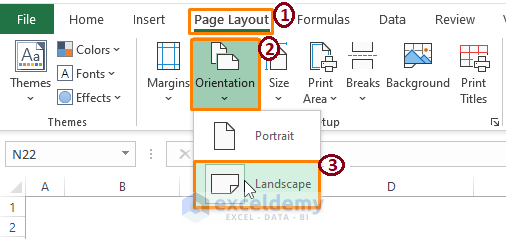
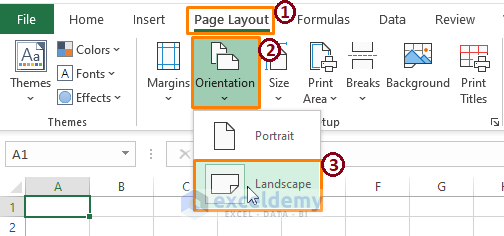
1. Changing Page Orientation from Page Layout to Print Horizontally in Excel
🔺 Go to the Page Layout tab > Click on Orientation (from the Page Layout section) > Select Landscape printing.
After selecting the Page Layout as Landscape, go to the Print section by pressing CTRL+P. You can make other customizations from the Print section Settings.
Read More: How to Print Worksheet with Comments in Excel
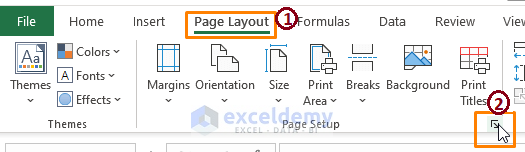
2. Using Page Setup Dialog Box to Print Horizontally in Excel
🔺 Another way to select Page Orientation is the Page Setup dialog box. Hover to Page Layout > Click on the Icon within the Page Setup section.
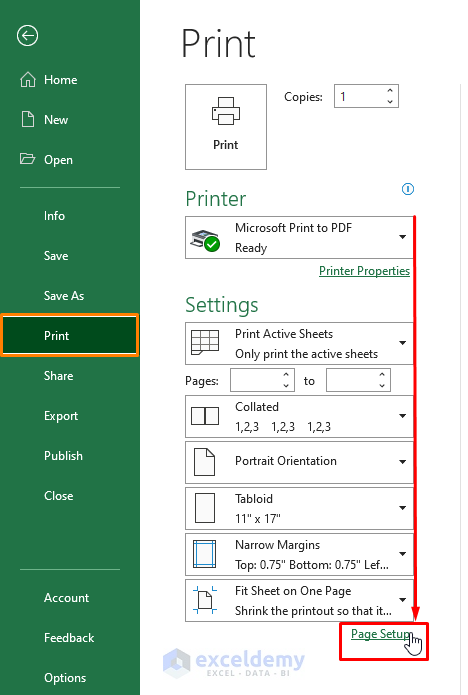
🔺 You can also bring out the Page Setup dialog box using the Page Setup option under the Printer Settings.
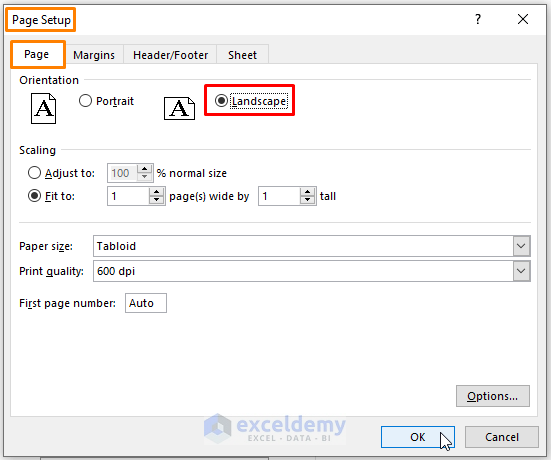
🔺 Clicking on the Page Layout Icon or Page Setup Option brings the Page Setup dialog box. From the dialog box, Select Landscape as Orientation in the Page section.
⧫ Click OK.
Afterward, you can choose any means to Print the desired worksheet.
Read More: How to Not Print Empty Cells in Excel
3. Changing Page Orientation from Printer Setting to Print Horizontally
There are a ton of options to customize the Print view under the Printer Settings. In this case, we just change the Page Orientation to Landscape using the Page Orientation drop-down options.
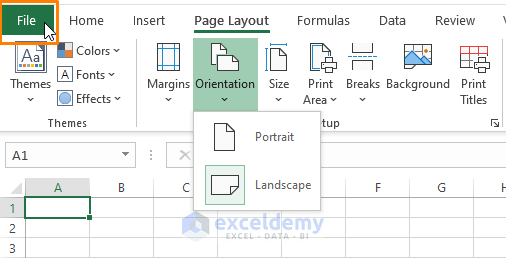
🔺 Click on the File ribbon.
🔺 Clicking File brings the options. Select Print (from the options) > Choose Landscape Orientation under Settings from Page Orientation drop-down options.

4. Printing Horizontally Using a Pre-formatted Excel Template
Also, we can make a blank worksheet or worksheets as Excel Templates (.xlsx or .xlsm file) to automatically print data in a horizontal layout.
Step 1: Select a worksheet or worksheets. In case, you want to select multiple worksheets, just hold SHIFT (for adjacent) or CTRL (for non-adjacent) then select the worksheets of your desire.
Step 2: Move to the Page Layout tab > Select Orientation (from the Page Setup section) > Choose Landscape.
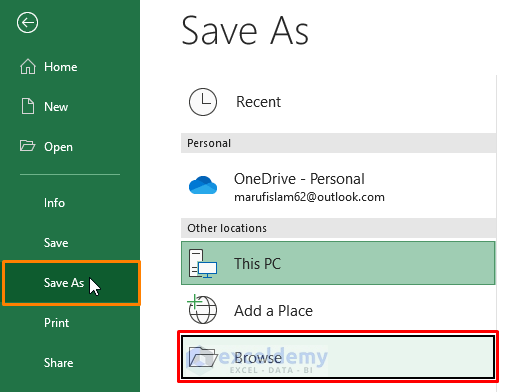
Step 3: Go to the File tab.
Step 4: Select Save As then Click on Browse.
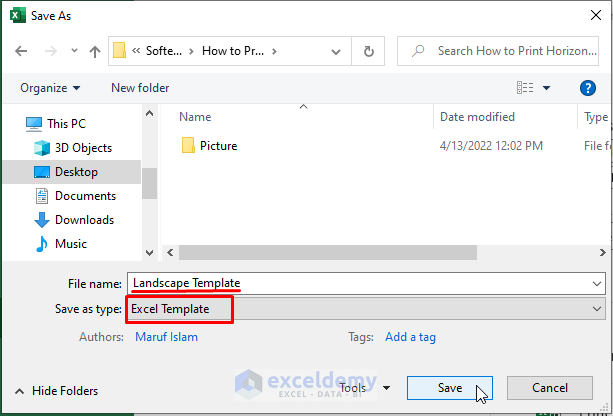
Step 5: Choose a Folder (i.e., Desktop > Preferred Folder) to save the file. Assign the file a Name and Select the Save as type as Excel Template.
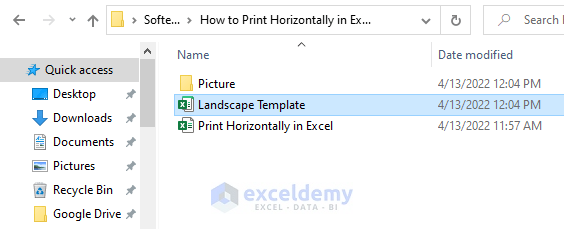
🔺 You can print the worksheet horizontally using the Template, every time you use it as your workbook.
Read More: How to Print Graph in Excel
Download Excel Workbook
Conclusion
In this article, we demonstrate several ways to print horizontally in Excel. Hope these shown methods excel in their purpose in your case. Comment, if you have further inquiries or have anything to add.
Related Articles
<< Go Back to Print Excel Sheet | Print in Excel | Learn Excel
Get FREE Advanced Excel Exercises with Solutions!
