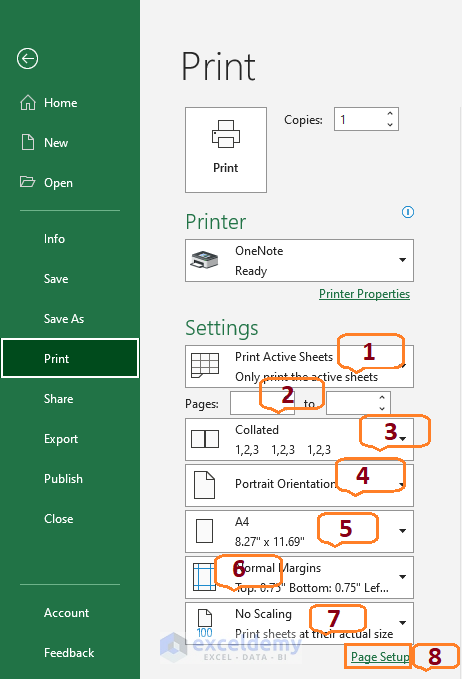
Here’s an overview of the print settings.
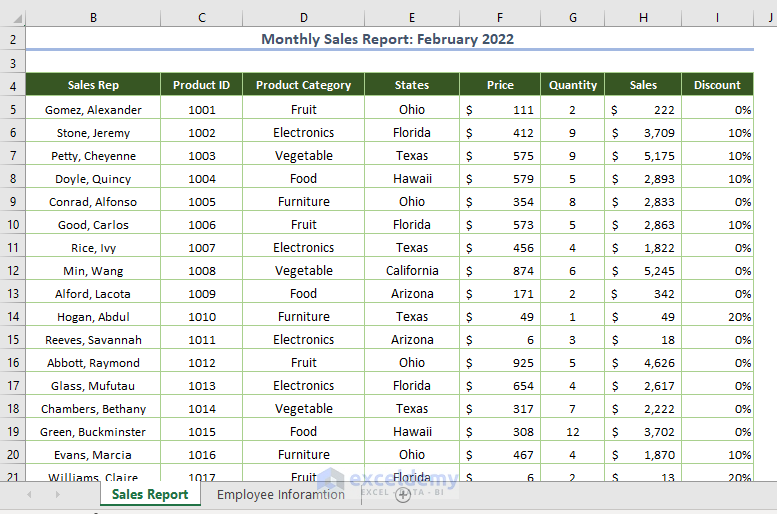
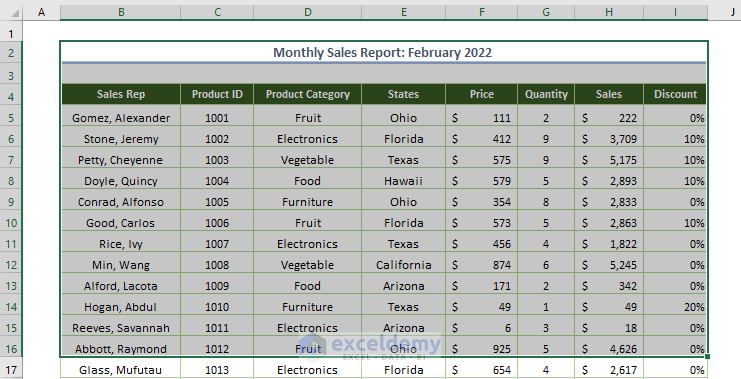
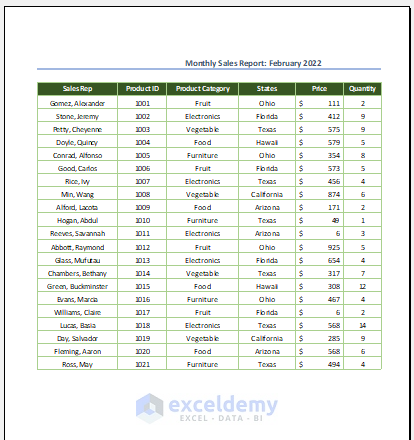
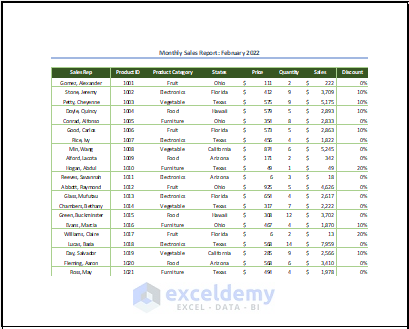
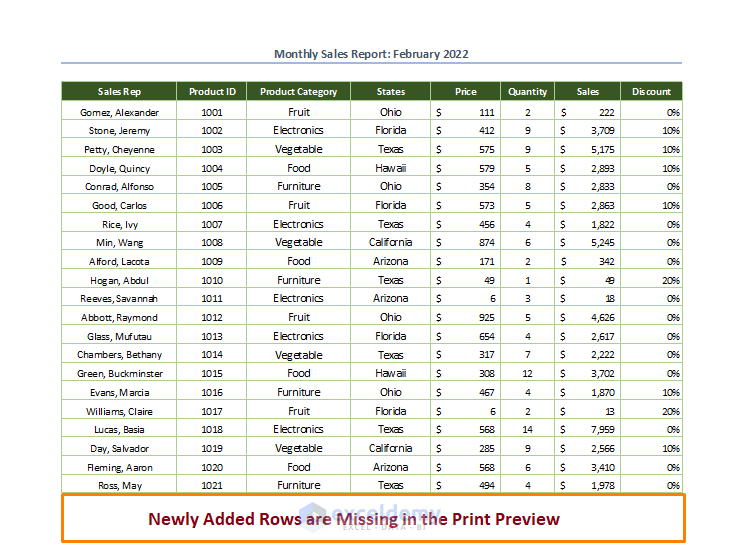
For our sample dataset, we have two working sheets in the workbook. The first sheet contains the Monthly Sales Report: February 2022.
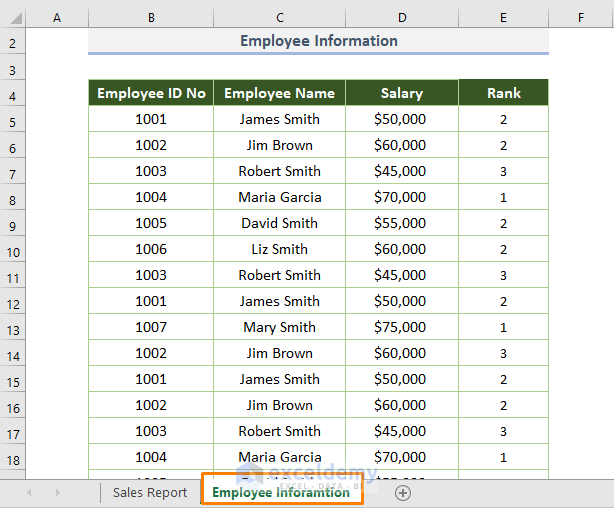
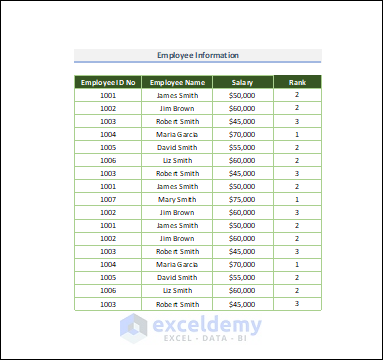
The second working sheet depicts the Employee Information of a certain company.
Method 1 – Fixing Print Area
You’ll see there are three options if you click on the drop-down arrow of Print Active Sheets.
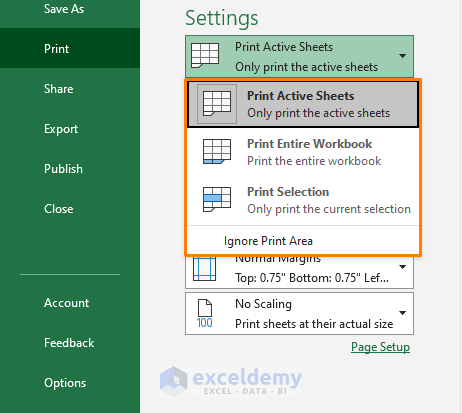
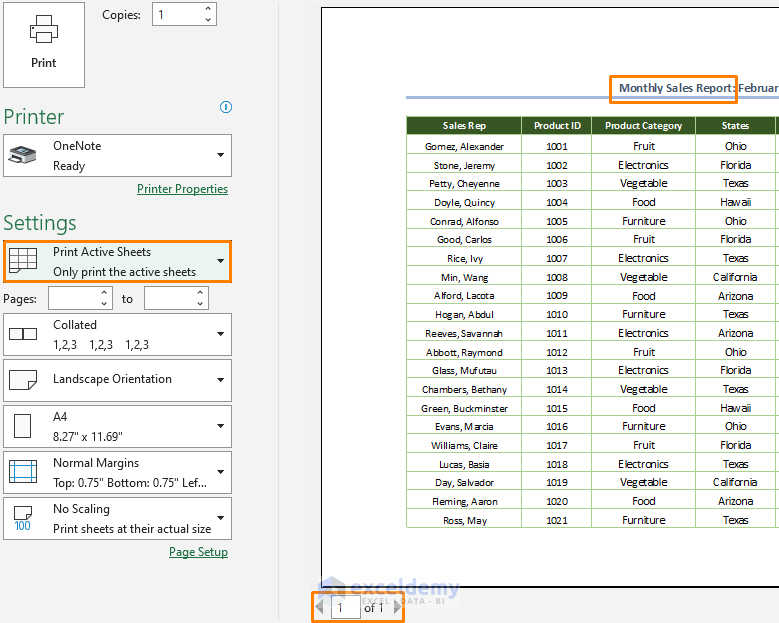
1.1. Print Active Sheets
To print the current working sheet of your workbook, use the Print Active Sheets from the drop-down lists.
1.2. Print All Working Sheets of Workbook
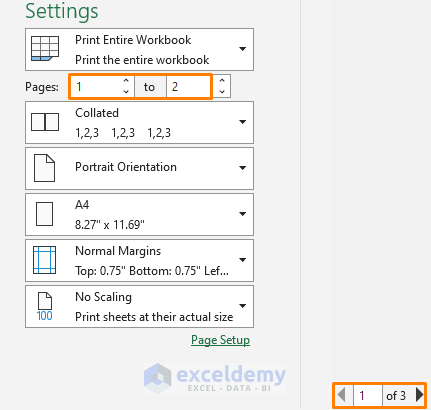
To print all working sheets of your workbook, choose the option of Print Entire Workbook from the drop-down lists.

I have two working sheets in my workbook and I selected the second sheet, that is why the print preview shows page 2 as shown in the image above.
1.3. Print Selected Area
You can print selected areas (selected cells) instead of the entire worksheet or workbook.
In the print preview, some cells are available from the dataset to print.
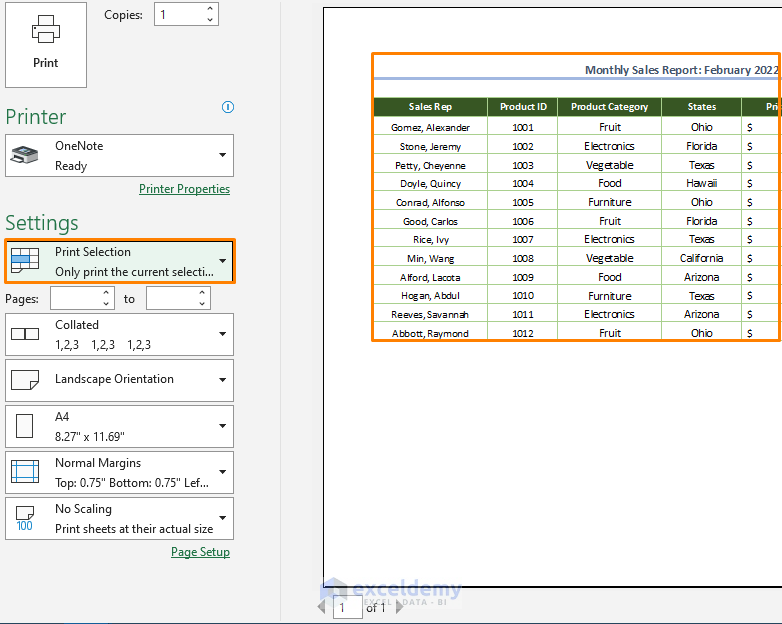
Select cells from the worksheet..
Pick the Print Selection (as shown in the image above) from the drop-down lists of the Print Active Sheets.
Method 2 – Setting Print Range
Fix the page range before printing. If you have 3 pages on your workbook, but you wish to print the first two pages. Put 1 & 2 in the blank spaces after the Pages.
Read More: How to Not Print Empty Cells in Excel
Method 3 – Selecting Collated or Uncollated from Print Settings
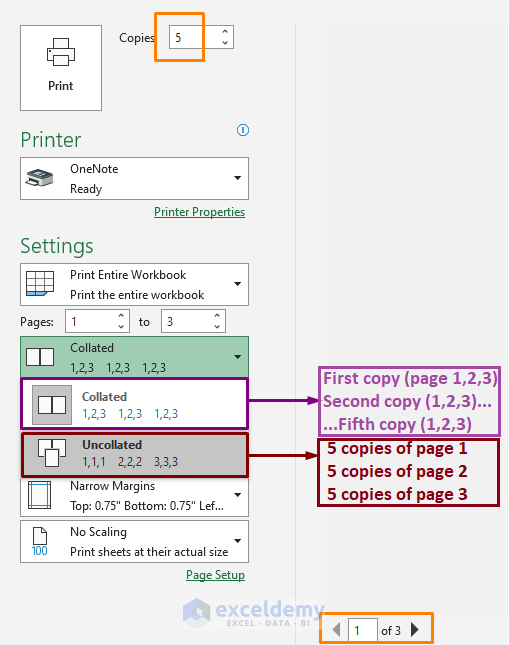
To print multiple copies(e.g. 5) of the pages, use the Collated or Uncollated settings.
To print all pages of the entire book the first time, second time…fifth time, you can choose the Collated option. That means this option will print the entire workbook separately.
Pick the Uncollated option if you want to print 5 copies of page 1, 5 copies of page 2.
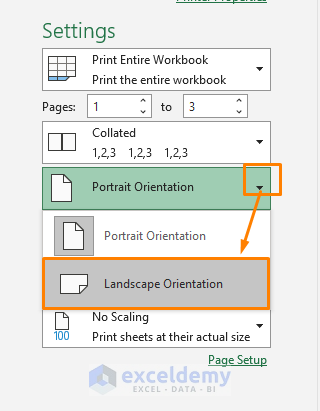
Method 4 – Choosing Orientation of Page
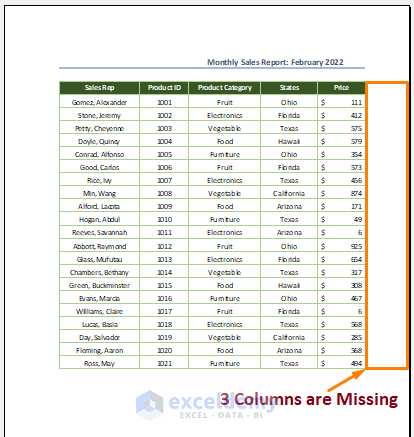
By default, the orientation of the page is Portrait in Excel.
Look at the image below.
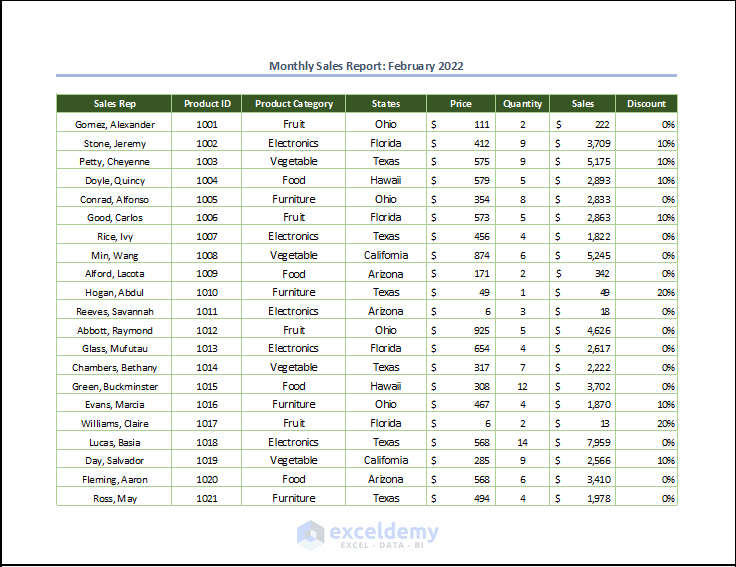
Some columns (Sales & Discount) are missing in the print preview. The Portrait orientation is not suitable for this print area. Select the Landscape Orientation and no columns will be missing.
All columns are visible in the following picture after changing the page orientation.
Read More: How to Print Horizontally in Excel
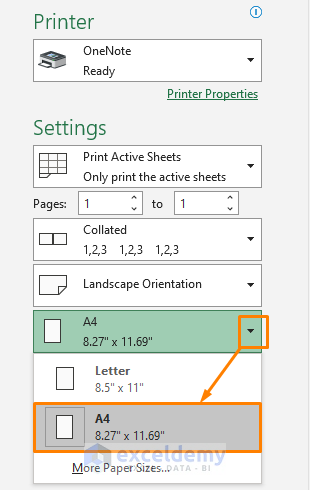
Method 5 – Preferring Paper Size
You can choose the paper size based on your dataset. For example, if you have a larger dataset, you may choose the A3 paper size. And if you want to print in standard paper size, select and print with A4 size.
Read More: How to Print Excel Sheet with Table
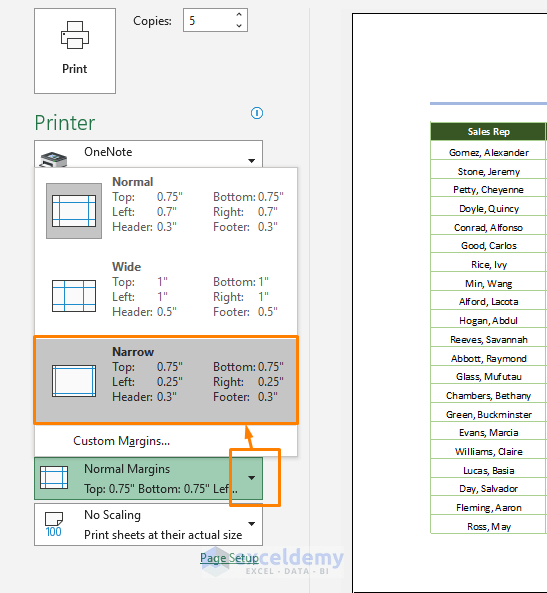
Method 6 – Changing Margins
You can change the margins option. Click on the drop-down arrow of Normal Margins to see three types of margins. Choose the Normal if your print area is standard or pick Narrow if your area is larger.
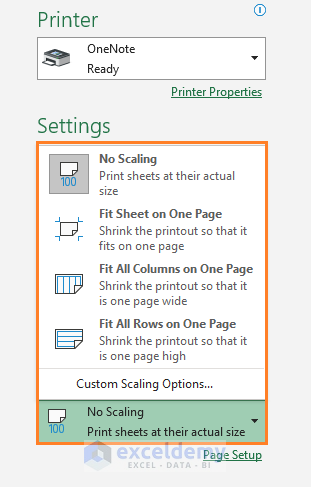
Method 7 – Adjusting Scaling in the Print Settings
You’ll get four scaling options if you click on the drop-down arrow of the No Scaling option.
7.1. Fit Sheet on One Page
Sometimes, you won’t get all print areas on one page as there is No Scaling option by default.
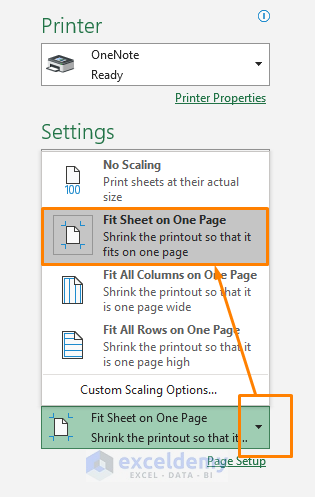
Choose the Fit Sheet on One Page, you’ll get the following print preview where all columns and rows are seen.
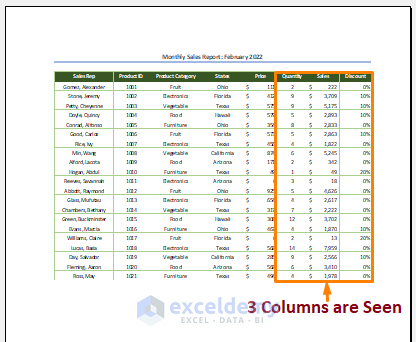
7.2. Fit All Columns on One Page
In the following print preview, you see that 3 columns are missing.
To print all columns on one page, choose the Fit All Columns on One Page.

On selecting the scaling option, you’ll see the following print preview where the 3 missing columns are seen.
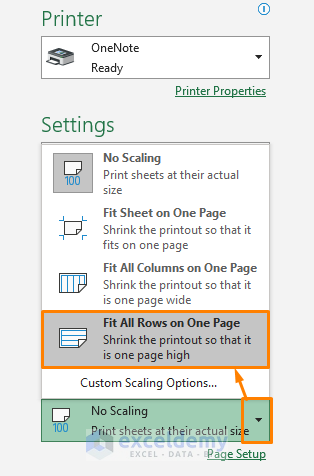
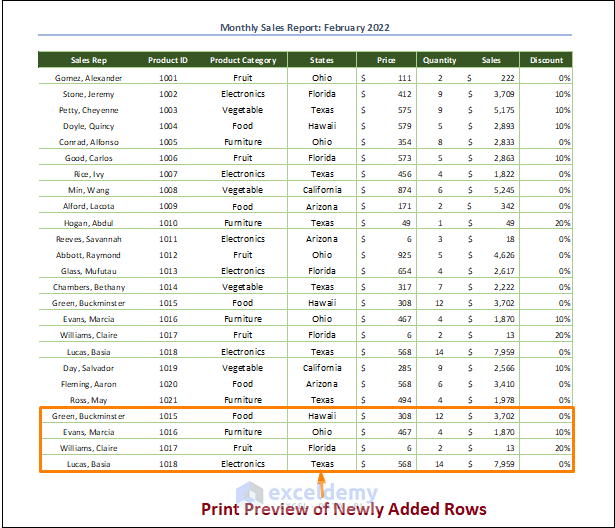
7.3. Fit All Rows on One Page
Assuming that you add some extra rows (as illustrated in the following picture) below the cells of the current worksheet.
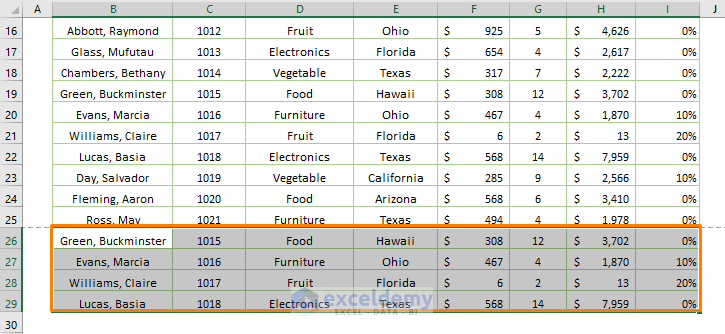
The newly added rows are missing in the print preview, but you have to print the whole dataset including those newly added rows.
Select the Fit All Rows on One Page option from the scaling options.
You’ll get the following print preview where all rows are seen.
You can utilize the paper size, margins, scaling settings to make the Excel sheet bigger while printing.
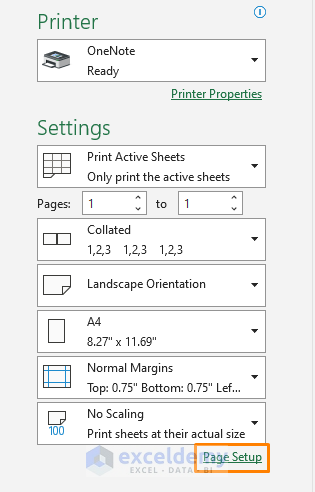
Method 8 – Modifying Page Setup Option of Print Settings
Click on the Page Setup option under the scaling options.
You’ll see the Page Setup dialog box after clicking on the Page Setup option.
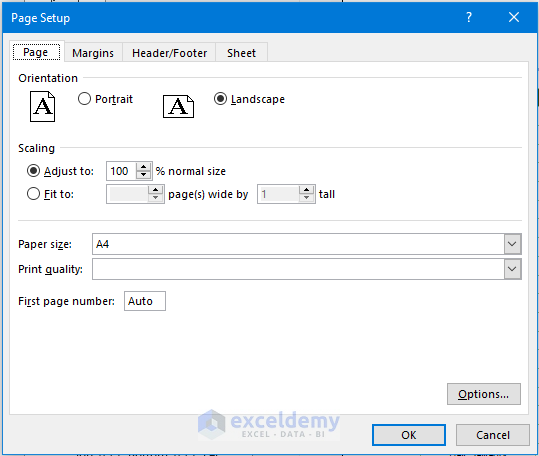
Four tabs are available in the above dialog box, namely Page, Margins, Header/Footer & Sheet.
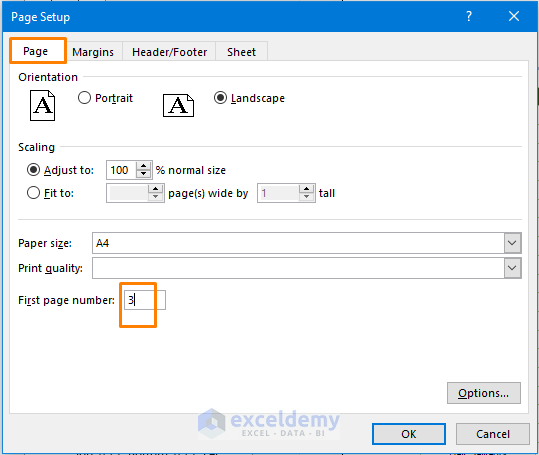
8.1. Starting Print from a Custom Number
By default, the First page number is Auto. But if you want to print page 3, insert 3 instead of Auto.
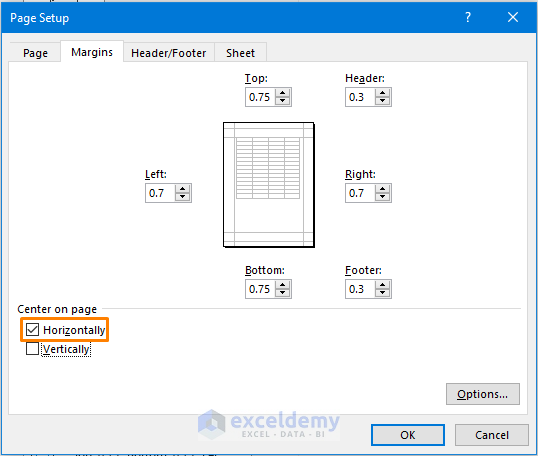
8.2. Adjusting Custom Margins
In the following picture, the print area is not centered on page.
To fix the problem,
Go to the Margins tab and check the box before Horizontally.
The print preview will look like this.
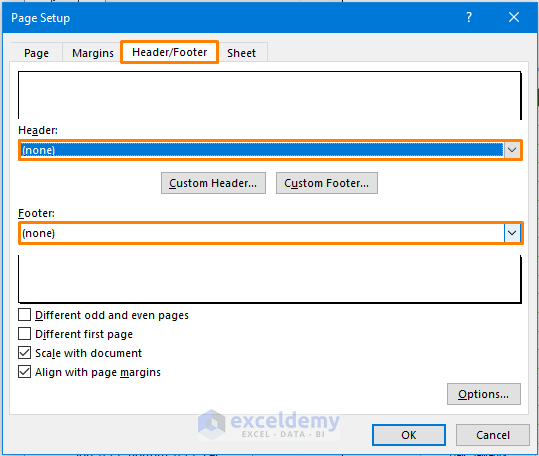
8.3. Removing Header & Footer
If you want to remove the header & footer while printing, go to the Header/Footer tab and select (none) for both Header and Footer options.
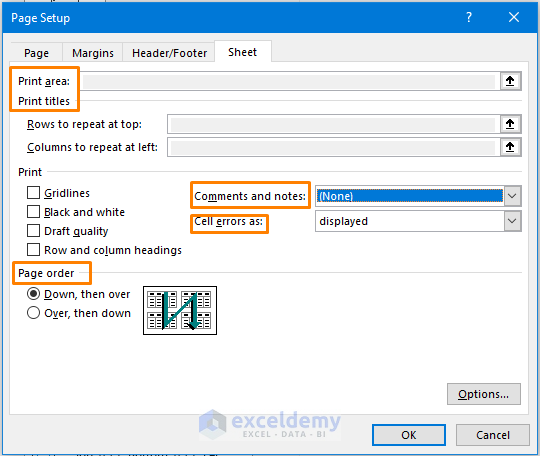
8.4. Working with the Sheet Tab
Look at the image below, there are options to modify.
Download Practice Workbook
Related Articles
<< Go Back to Print in Excel | Learn Excel
Get FREE Advanced Excel Exercises with Solutions!

How do you change which settings appear as default when you open print? For example, I’d like to be able to select color or mono or grey scale from the opening menu, without having to dive deeper into the page setup or printer properties.
Hello Stephen,
It’s not possible to set the color or grayscale options to appear as default when opening the print menu in Excel. Those settings are controlled at the system level via your printer preferences. In Excel, you can still access these settings, but each time you print, you’ll need to manually adjust the color options unless they’ve been preset in your system’s printer properties.
To adjust your printer preferences at the system level rather follow these steps:
1. Go to your Devices and Printers settings in your operating system.
2. Right-click on your printer >> select Printing Preferences, and configure your preferred settings there.
This will set your defaults across all programs, including Excel, without needing to change them each time in the print menu.
Regards
ExcelDemy