It is quite irritating for anyone if they discover that the Print Preview of their document does not match the Printed edition. If you are curious as to how you can resolve this issue, this article may come in handy for you. In this article, we discuss how you can solve the issue of Print Preview in Excel Doesn’t Match Document with an elaborate explanation.
Print Preview in Excel Doesn’t Match Document: 7 Possible Solutions
We presented 7 reliable solutions to the problem of Print Preview in Excel does not match the document. The solution ranges from clearing the Print area and checking the Printer driver to scaling page layout settings.
Solution 1: Disable Scale Content for A4 Paper Sizes
In many cases, we get our document Printed out not the way we wanted. It may look more stretched, or more squeezed. Which ultimately distorts the final file. Maybe the reason behind this could be Excel trying to scale the content to a specific size of paper. The remedy to this issue is to disable the scaling content from the Advanced Excel Options.
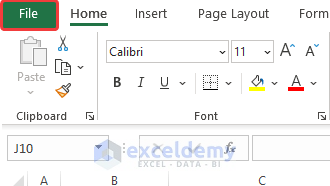
- Click on File in the corner of the sheet.
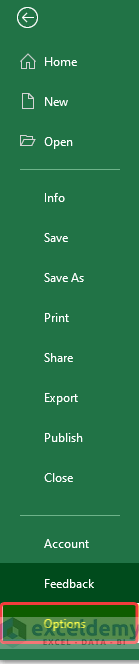
- Then click on the Options.
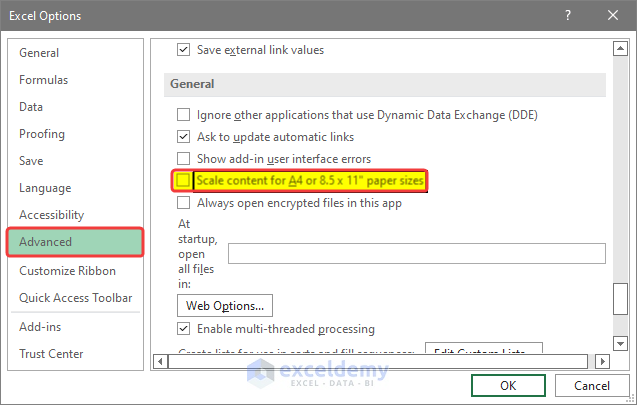
- Then in the Excel Options window, click on the Advanced option.
- Then Search for the General group.
- Then in the General group, check the Scale content for A4 or 8.5’✖ 11’ paper sizes.
- Click OK after this.
Hopefully, this will solve your issue.
Solution 2: Check Your Printer
In a lot of cases, we might need to work on a PC that is connected to multiple Printers at the same time. There also could be multiple Printer drivers. This could lead to confusion. Because the Print Preview is not controlled by Excel, rather it depends on the selected Printer in the Preview. The Printer returns the Preview to the Excel Print Preview. If the user observes the Preview on the Printer and switches to a new Printer just before the Printing, it could Print out the document in another format. So, the bottom line is to use the same Printer for Preview and Print.
Solution 3: Check Printer Driver
Check to see whether you have the latest and greatest Windows Printer drivers installed for your Printer. To check if the latest Printer driver is available for your Windows version, go to the manufacturer’s website and check for it there.
Solution 4: Avoid Wrapping Texts
Wrap text can cause instability while Printing out documents in Excel. In Excel always use Alt+Enter to separate or break lines inside the cell. Especially in the title of sheets.
Solution 5: Try Clearing Print Area
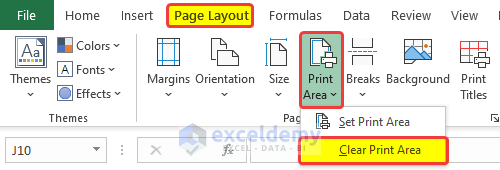
You can obviously set your Print Preview by pressing Ctrl+P. Clearing the Print area can help avoid this issue of documents not matching. To do this, go to the Page Layout tab. Then click on the Print Area, then from the drop-down menu, click on the Clear Print Area.
💬 Note
- If you have multiple Print areas in your sheet, then this Clear Print Area can erase all of them. So be careful before using them.
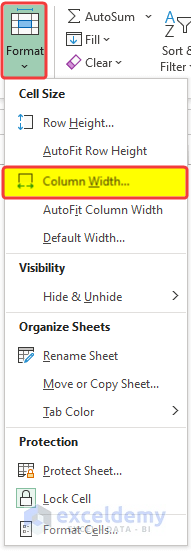
Solution 6: Fix Column Width
In some instances, we see that the column width of the Printout documents is not matching with the original document.
Resize Column Width Manually
It would be best if you resized the columns manually by yourself. You need to resize the columns as you need and check them again in the Print Preview. It is a constant checking process.
- To resize the column width, you can drag the column heading boundary to your need.
- Or you can select a column and then from the Format Cells option, from the dropdown menu, click on the Column Width.
- You can type the appropriate size and click OK.
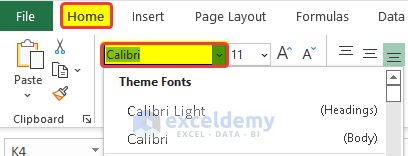
Switch Cell Styles to Normal
Sometimes the fonts that look fancy and good-looking can be totally opposite when they are Printed out. So, try to use normal fonts or try different fonts.
- To do this, first press Ctrl+A on the keyboard.
- Then from the Home tab, click on the Cell Styles, and then from the dropdown menu select Normal. Doing this will switch the cell style to Normal.

Use Monospace Font
The monospace fonts are basically fonts with a fixed width, fixed pitch, and non-proportional font. They occupy the same amount of space in the horizontal direction.
Although there is a myriad of fonts right now available in different software, the monospace fonts are given preferences over the variable-spaced fonts. Because it makes the readability of the fonts much easier. The same case with the Printers here, using monospace fonts can make the Printer’s job a lot easier to Print, as its IDE can read the font with much ease.
Solution 7: Modify Page Layout Setting
Before you even go to the Print Preview window, you can set up the Print options and orientation from the Page Layout tab. You can set the page orientation, margins, and scaling and subsequently can avoid the error of a Printed document not matching the original document.
You also can stretch the document to a full page quite easily.
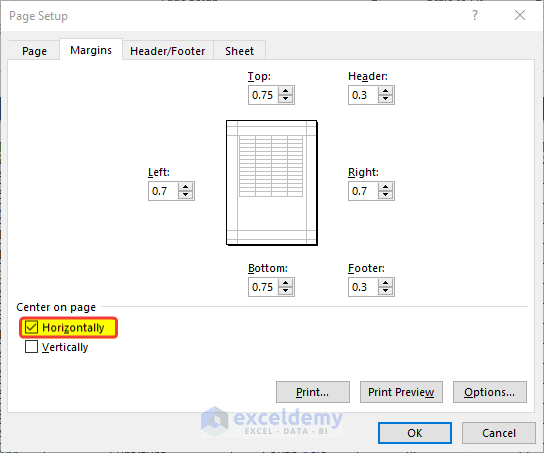
Choose Custom Margins
Altering the custom margins can solve the issue of Print Preview doesn’t match the document.
- To do this, go to the Page Layout.
- From the drop-down menu, click on Custom Margins.
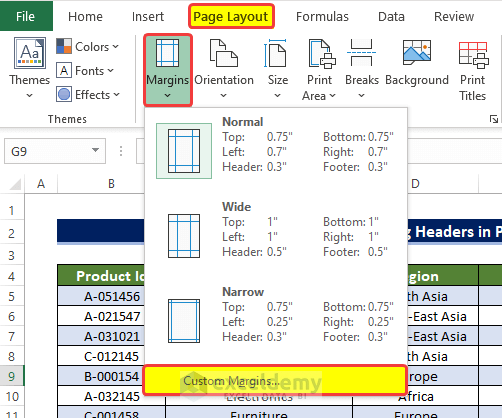
- Then in the Page Setup dialog box, modify the margin as you wish.
- Then click OK.
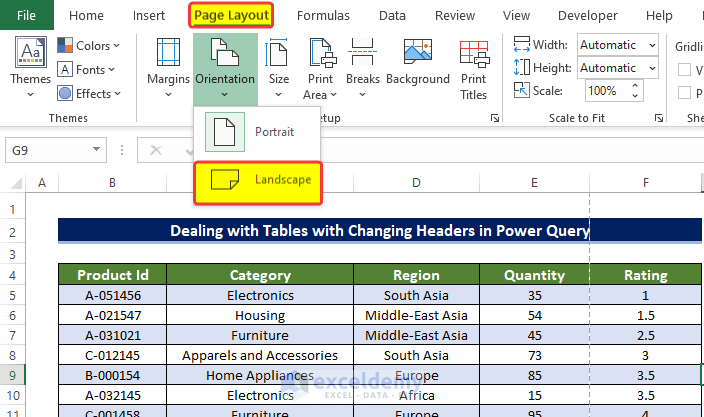
Try Different Orientation
If your data is hard to fit into one sheet horizontally, then try to change the Orientation to the landscape. In that way, the data will be spread horizontally and can be visible well.
- To do this, go to Page Layout. From there, click on Orientation.
- From the drop-down menu, select Landscape.
- Doing this could help you squeeze all the columns into one page compared to the Portrait orientation.
Alter Scale Percentage in Scale to Fit Group
Scale to fit is a valuable feature to fit all the elements in a single page or window. You can edit the Height and Width automatically or scale them automatically in the Scale window. Please try to keep the Scaling between 70-80 percent.

Read More: [Fixed!] Print Preview in Excel Does Not Show All Pages
Conclusion
Here, we presented 7 possible and reliable solutions for Print Preview in Excel that don’t match the document with a detailed explanation. Feel free to ask any questions or feedback through the comment section.
Related Articles
- [Fixed!] Print Preview Not Available in Excel
- How to Delete Blank Pages in Print Preview in Excel
- [Fixed!] Table Border Not Showing in Print Preview
<< Go Back to Print Preview in Excel | Print in Excel | Learn Excel
Get FREE Advanced Excel Exercises with Solutions!
