Looking for ways to know how to group checkboxes in Excel? Usually, we use checkboxes to select or unselect an option in Excel. Here, you will find step-by-step explained ways to group checkboxes in Excel.
How to Group Checkboxes in Excel: 3 Ways
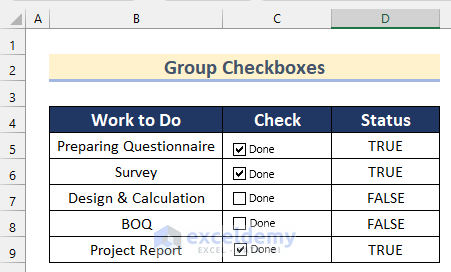
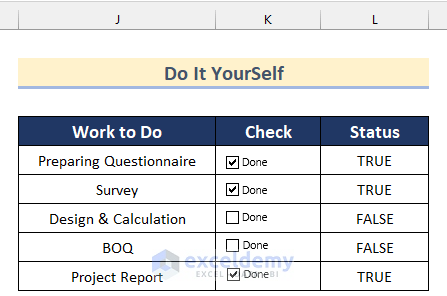
Here, we have a dataset containing a list of Work to Do, Check options, and their Status. Now, we will use this dataset to show you how to group checkboxes in Excel.
1. Using Group Feature from Context Menu Bar in Excel
In the first method, we will show you how to use Group Feature to group checkboxes in Excel.
Follow the steps given below to do it on your own.
Steps:
- In the beginning, select all the checkboxes by pressing CTRL.
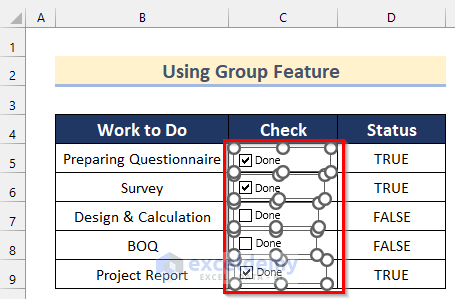
- Then, right-click on the Checkboxes.
- After that, click on the Group option >> select Group.
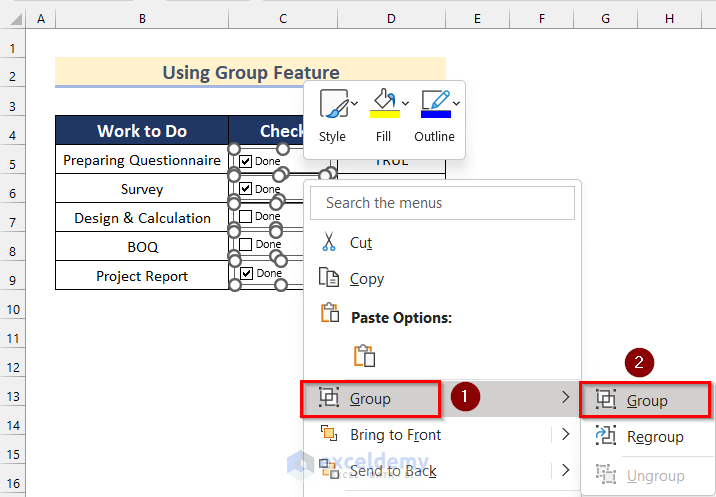
- Finally, you will get all your Checkboxes in a group using Group Feature.

2. Use of Group Box Command to Group Checkboxes in Excel
Additionally, we can group checkboxes in Excel using Group Box. Group Box is mainly used to display multiple Checkboxes together. Here, you will find step-by-step ways to use the Group box to group checkboxes in Excel.
Step-01: Inserting Group Box
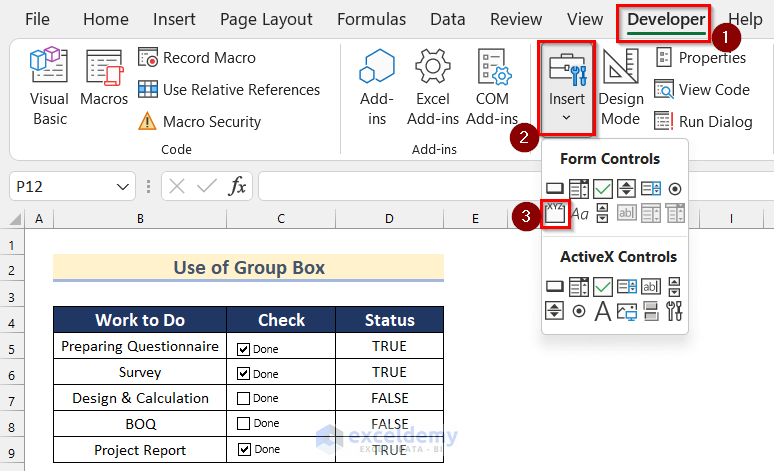
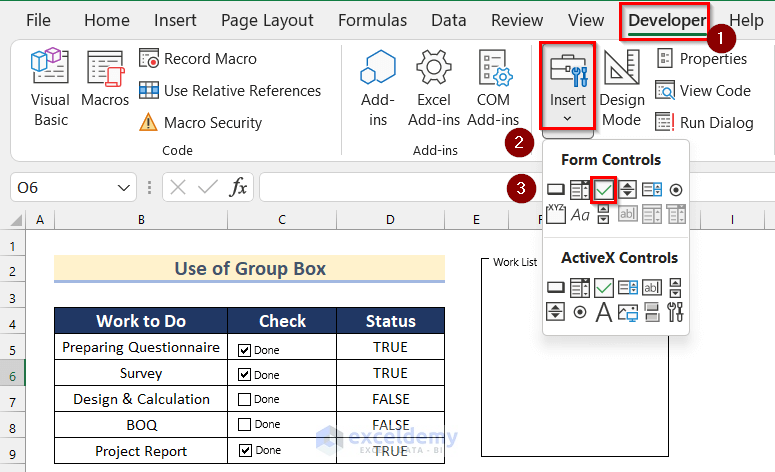
Here, we will show you how to insert a Group Box in Excel from the Developer tab. Go through the steps given below to do it on your own.
- First, go to the Developer tab >> click on Insert >> From Controls select Group Box.
- Now, a Group Box will appear.
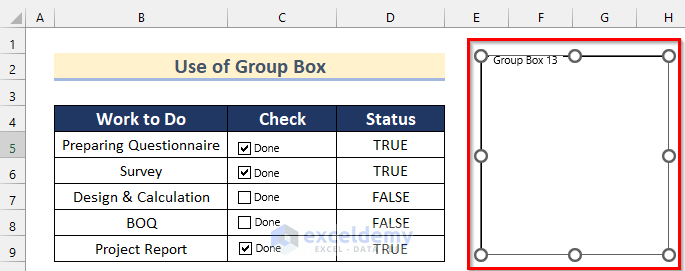
- Then, type Work List as the Group Box name.

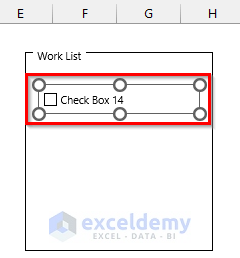
Step-02: Inserting Checkboxes into Group Box
Next, we will show you the necessary steps to insert checkboxes into a Group Box. Follow the steps given below to do it on your own.
- In the beginning, go to the Developer tab >> click on Insert >> From Controls select Check Box.
- Now, insert a Check Box into the Group Box.
Step-03: Formatting Checkboxes
Now, you will find step-by-step ways to Format Checkboxes in Excel.
- First, right-click on the Check Box.
- Then, select Edit Text.
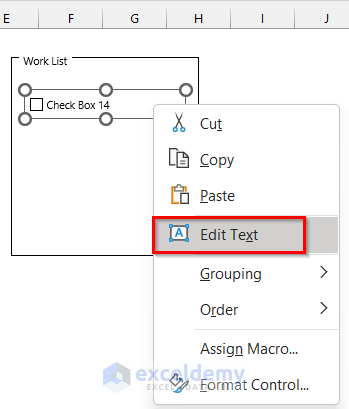
- After that, type Questionnaire as Check Box.
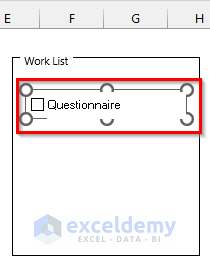
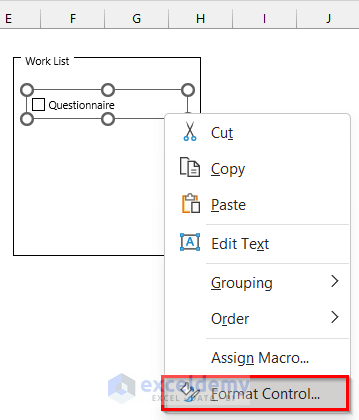
- Next, right-click on the Check Box again.
- Then, select Format Control.
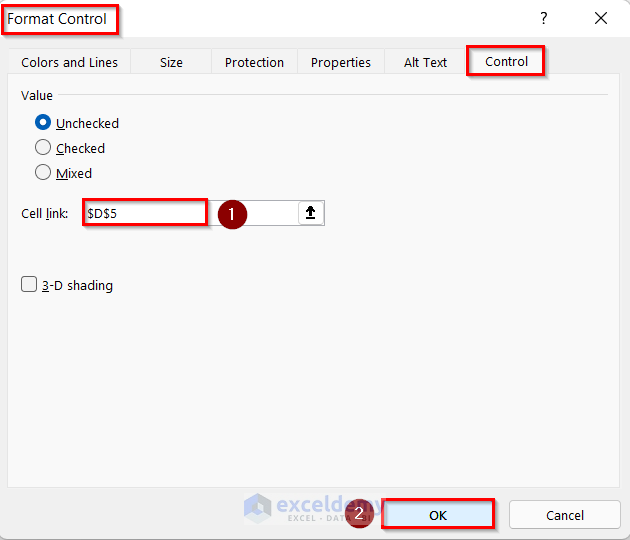
- Now, the Format Control box will appear.
- Afterward, from the Control section insert Cell D5 as the Cell link.
- Next, press OK.
- Finally, you will get a Checkbox inserted into the Group Box.
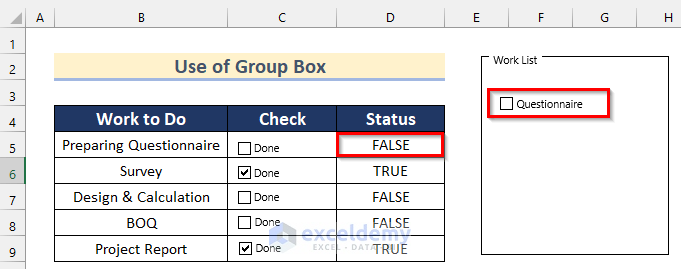
- Next, to check if the Checkbox is actually linked with Cell D5, turn on the Questionnaire Checkbox.
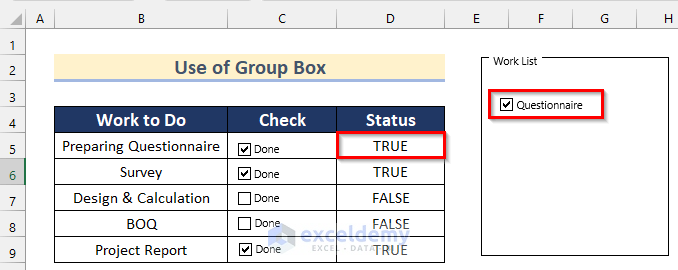
Here, you can see that the value of Status in Cell D5 has changed into TRUE from FALSE.
- Similarly, insert other Checkboxes in the Group Box using the steps given above.
- Finally, you will get a Group Box containing all the Checkboxes.
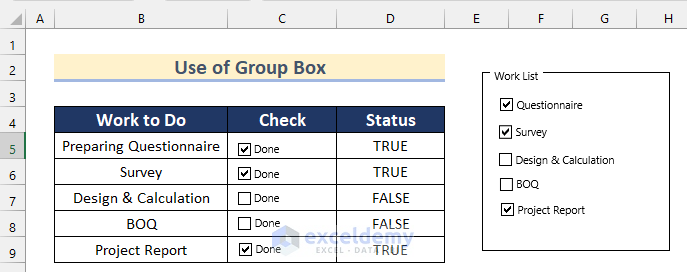
Thus, we can use Group Box to Group Checkboxes in Excel.
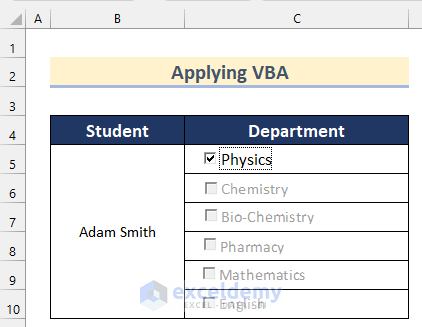
3. Applying VBA to Group Checkboxes in Excel
In the final method, we will show you how to apply VBA to group checkboxes in Excel such that you can only select a single Checkbox in the grouped Checkboxes.
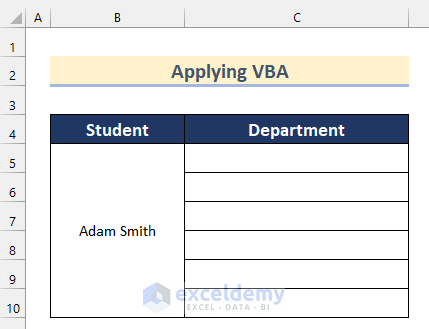
Step-01: Inserting Checkboxes
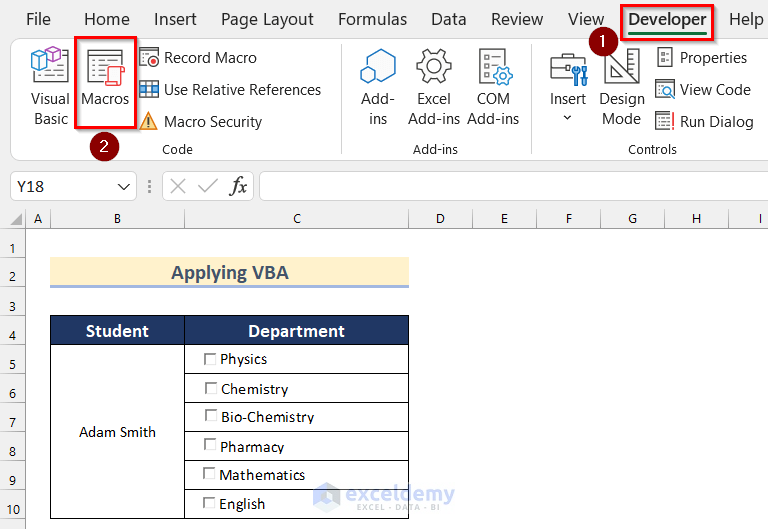
Here, we have a dataset containing the name of a Student. Now, we will show you how to insert the names of the Departments into Checkboxes.
Follow the steps given below to do it on your own.
- In the beginning, go to the Developer tab >> click on Insert >> from ActiveX Controls select Check Box.
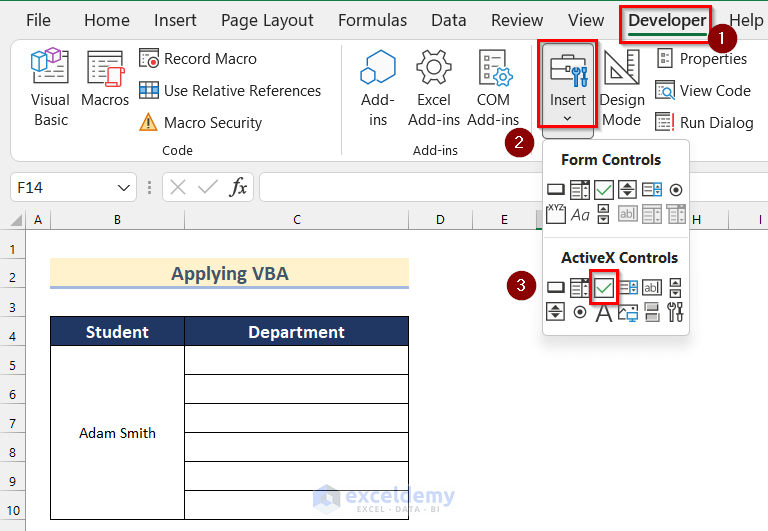
- Now, insert a Check Box into Cell C5.
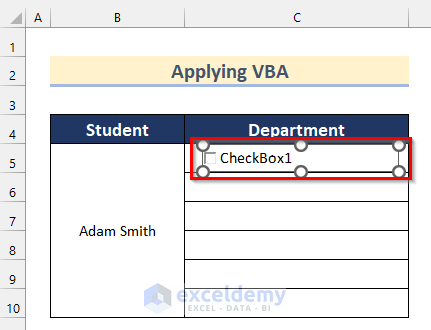
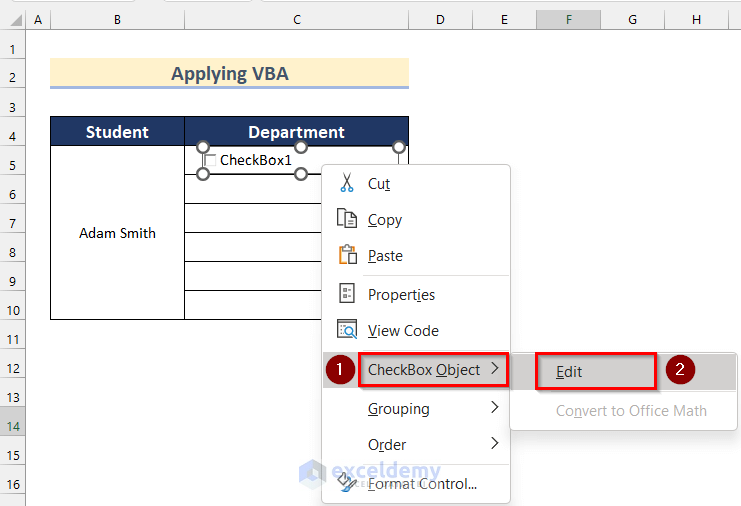
- After that, right-click on the Check Box.
- Then, click on CheckBox Object >> select Edit.
- Now, type Physics in the CheckBox.
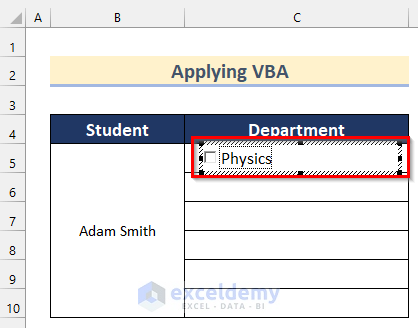
- Next, press ENTER.

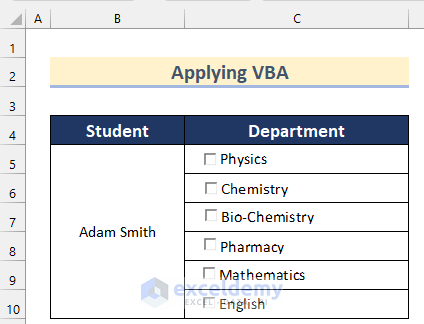
- After that, insert Other Departments in Checkboxes according to your preference going through the same steps given above. Here, we inserted Chemistry, Bio-Chemistry, Pharmacy, Mathematics, and English Departments in Checkboxes.
Read More: How to Add a Checkbox in Excel
Step-02: Applying VBA
In this step, we will show you how to apply VBA to group checkboxes in Excel. Follow the steps given below to do it on your own.
- First, go to the Developer tab >> click on Visual Basic.
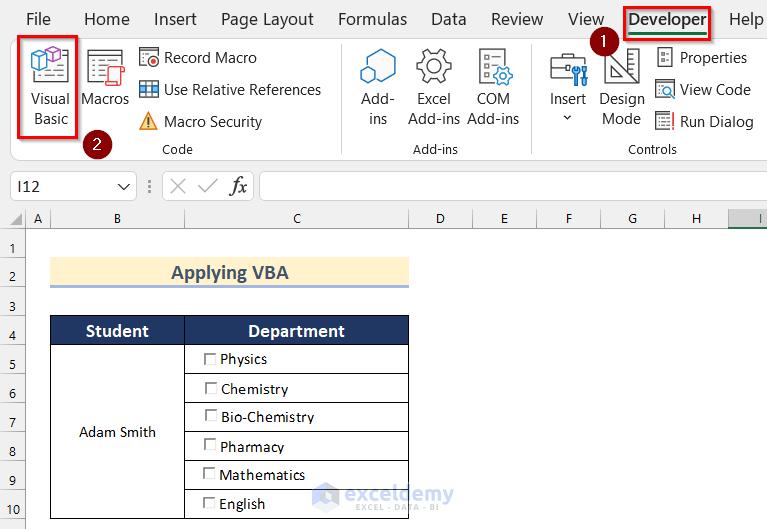
- Now, the Visual Basic Box will open.
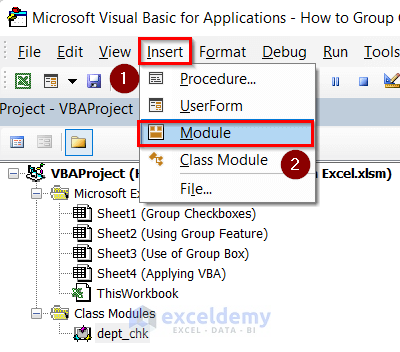
- Then, click on Insert >> select Class Module.
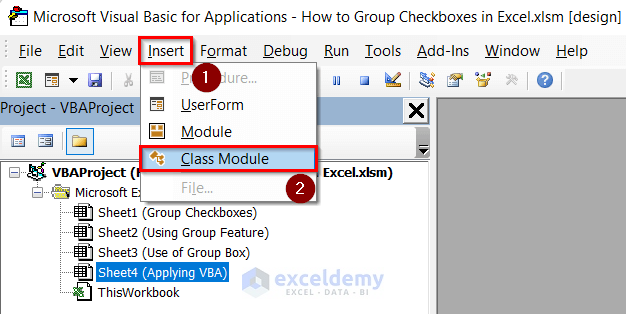
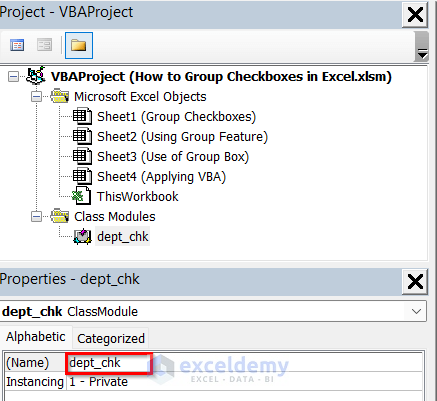
- After that, type dept_chk as Class name in the Name box of the Properties tab.
- Now, write the following code in your Class Module.
Option Explicit
Public WithEvents check As MSForms.CheckBox
Private Sub check_Click()
Call sel_dept_CheckBox(check)
End Sub
Sub sel_dept_CheckBox(Target As Object)
Dim subject As Object
Dim row As String
Dim Column As Integer
If Target.Object.Value = True Then
    row = Right(Target.Name, Len(Target.Name) - 8)
    For Column = 1 To ActiveSheet.OLEObjects.Count
      If Column <> Int(row) Then
        Set subject = ActiveSheet.OLEObjects.Item(Column)
        subject.Object.Value = False
        subject.Object.Enabled = False
      End If
    Next
Else
    row = Right(Target.Name, Len(Target.Name) - 8)
    For Column = 1 To ActiveSheet.OLEObjects.Count
      If Column <> Int(row) Then
        Set subject = ActiveSheet.OLEObjects.Item(Column)
        subject.Object.Enabled = True
      End If
    Next
End If
End Sub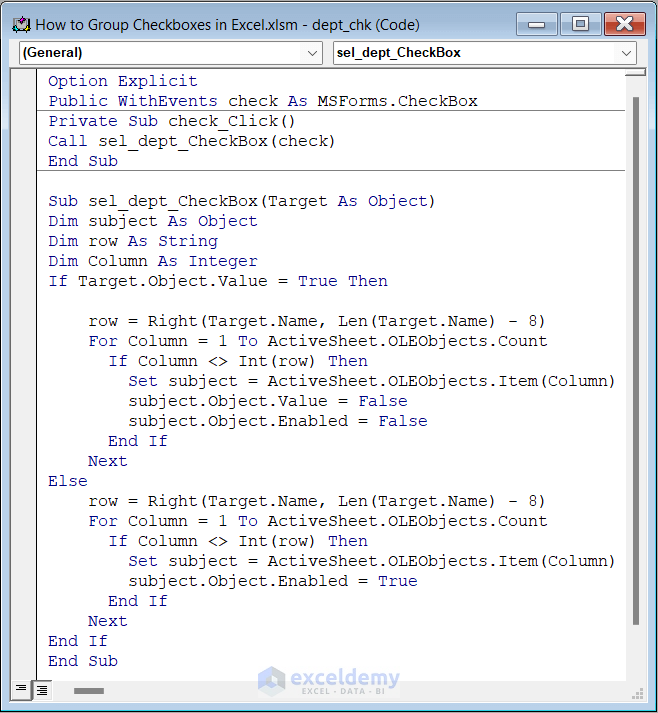
Code Breakdown
- First, we set the check as MSForms CheckBox.
- Then, we created a Public Sub as check_Click().
- After that, we called check in sel_dept_CheckBox.
- Next, we ended the Sub.
- Again, we created a Sub in sel_dept_CheckBox where we set Target as Object.
- Then, we declared the subject as Object, row as String and Column as Integer.
- After that, we used the IF function to check if Target value is True, then it will return the row as Right(Name of Target, Length of Target – 8).
- Now, we used For loop from Column=1 to ActiveSheet.OLEObjects.Count.
- Next, we used the IF function to check Column is in Int(row) then it will return subject= ActiveSheet.OLEObjects.Items(Column), subject Value as False and subject Enabled as False.
- Then, we ended the IF function.
- After that, we set If Target value is False, then it will return the row as Right(Name of Target, Length of Target – 8).
- Now, we used For loop from Column=1 to ActiveSheet.OLEObjects.Count.
- Next, we used the IF function to check Column is in Int(row) then it will return subject= ActiveSheet.OLEObjects.Items(Column) and subject Enabled as True.
- Then, we ended the IF function.
- After that, we ended the Sub.
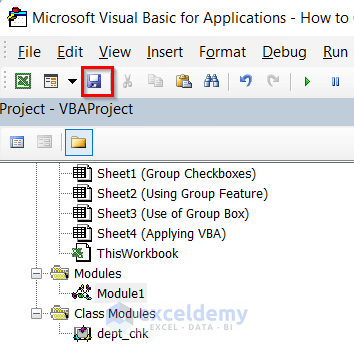
- Again, click on Insert >> select Module.
- Then, write the following code in your Module.
Dim list As New Collection
Public Sub dept_chk_Init()
Dim Applying_VBA As Worksheet
Dim subject As Object
Dim dept As dept_chk
   Set Applying_VBA = ActiveSheet
   Set list = Nothing
    For Each subject In Applying_VBA.OLEObjects
        If subject.Name Like "CheckBox**" Then
            Set dept = New dept_chk
            Set dept.check = CallByName(Applying_VBA, _
            subject.Name, VbGet)
            list.Add dept
        End If
    Next
    Set dept = Nothing
End Sub
Code Breakdown
- First, we declared the list as a New Collection.
- Then, we created a Public Sub as dept_chk_Init().
- After that, we declared Applying_VBA as Worksheet, subject as Object and dept as dept_chk.
- Now, we set Applying_VBA as ActiveSheet and list as Nothing.
- Next, we used a For loop in Applying_VBA for Each subject.
- Then, we used the IF function to check if subject Name is CheckBox, it will return dept as New dept_chk and dept will be called by Name.
- After that, we ended the IF function.
- Next, we set dept as Nothing.
- Now, click on the Save Button.
- After that, go to the Developer tab >> click on Macros.
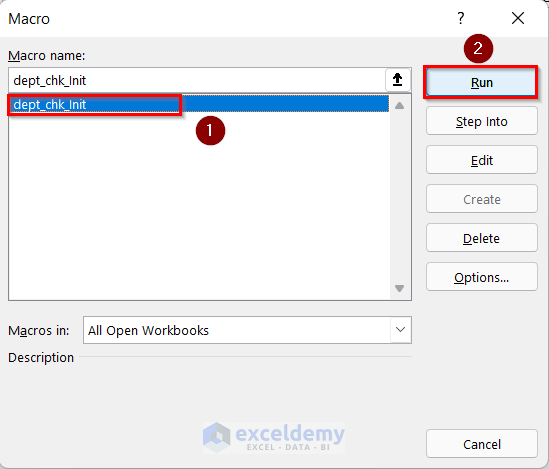
- This will open the Macro dialogue box.
- Now, inside the box choose your Macro. In our case, we chose the dept_chk_init code.
- Then, press Run.
- Finally, you will get grouped Checkboxes where you can only check a single Checkbox using VBA.
Practice Section
In this section, we are giving you the dataset to practice on your own and learn to use these methods.
Download Practice Workbook
Conclusion
So, in this article, you will find a step-by-step way to group Checkboxes in Excel. Use any of these ways to accomplish the result in this regard. Hope you find this article helpful and informative. Feel free to comment if something seems difficult to understand. Let us know any other approaches which we might have missed here. Thank you!
Related Articles
- How to Align Checkboxes in Excel
- How to Add Checkbox in Excel without Using Developer Tab
- How to Link Multiple Checkboxes in Excel
- How to Resize Checkbox in Excel
- How to Count Checkboxes in Excel
- How to Filter Checkboxes in Excel
- How to Apply Conditional Formatting Using Checkbox in Excel
- How to Remove Checkboxes from Excel
<< Go Back to Excel CheckBox | Form Control in Excel | Learn Excel
Get FREE Advanced Excel Exercises with Solutions!
