A checkbox is an interactive tool in Excel that lets you select or deselect an option. Checkboxes can be used to make dynamic charts, dashboards, and interactive checklists.
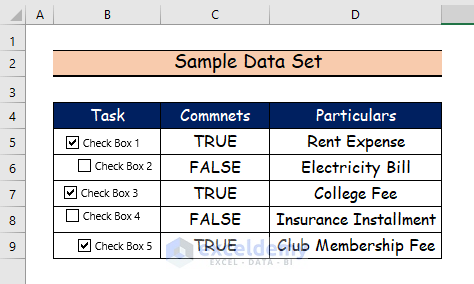
To demonstrate how to Align Checkboxes in Excel using 2 different methods, we’ll use the following sample data set:
Method 1 – Utilizing the Page Layout Tab
In this method, we’ll first create the checkboxes, then align them.
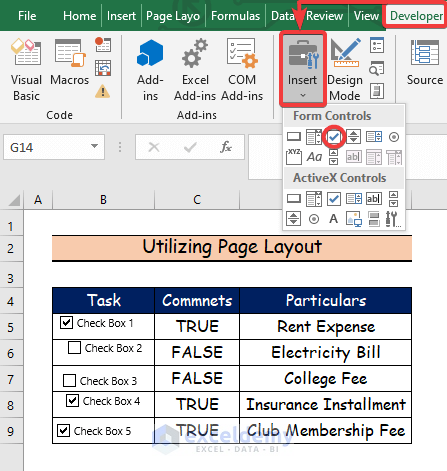
Step 1 – Create Checkboxes:
- Open the Developer tab.
- Click the cell where you want the check box to appear (here, in column B)
- Click the Insert button.
- Select the Checkbox from the Form Controls section of the box that opens.
- Click the cursor (which will transform into a cross). Use it to design a box specifying the dimensions of the checkbox.
- Checkboxes appear with text as below.
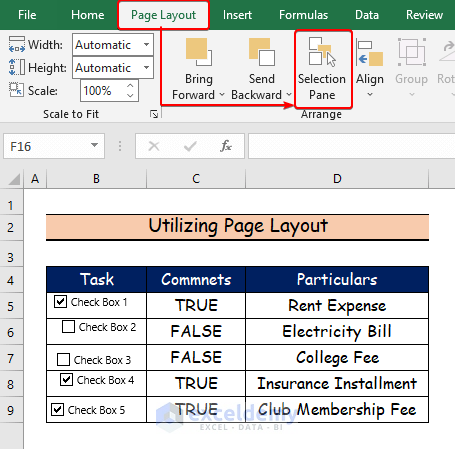
Step 2 – Align Checkboxes:
- Open the Page Layout tab.
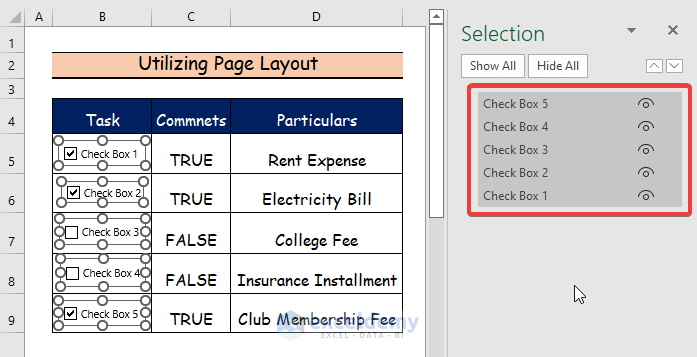
- Click the Selection Pane button.
- Select all the Checkboxes.
- Click the Align button, then Align Center from the drop-down menu.
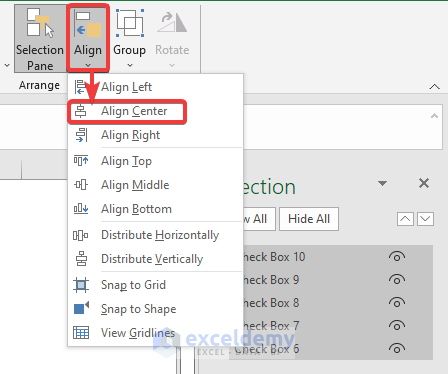
- The checkboxes will now be center-aligned.

Read More: How to Link Multiple Checkboxes in Excel
Method 2 – Applying VBA Code
For this method, we’ll assume unaligned checkboxes have already been created, and use VBA Code to align them.
Steps:
- Open the Developer tab.
- Click Visual Basic.
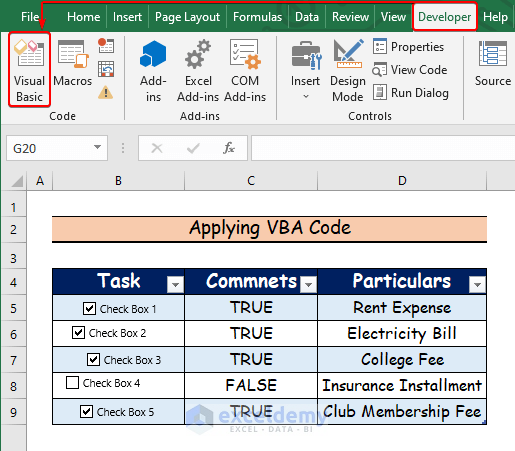
- The Visual Basic Application window opens.
- Click the Insert menu-item.
- Select Module from the drop-down.

- Into the box that opens, paste the following VBA code:
Sub Alignment_Checkbox()
    Dim zRg As Range
    Dim checkBox1 As Object
    Dim checkBox2 As CheckBox
    On Error Resume Next
    'Screen will not be Updated
    'For running the code fast
    Application.ScreenUpdating = False
    'Aligned Checkboxes using property change
    For Each CheckBox In ActiveSheet.Objects
        If TypeName(checkBox1.Object) = "CheckBox" Then
            Set zRg = checkBox1.TopLeftCell
            checkBox1.Width = zRg.Width * 2 / 3
            checkBox1.Left = zRg.Left + (zRg.Width - checkBox1.Width) / 2
        End If
    Next
    For Each checkBox2 In ActiveSheet.CheckBoxes
    'Aligned Checkboxes using property change
        Set zRg = checkBox2.TopLeftCell
        checkBox2.Width = zRg.Width * 2 / 3
        checkBox2.Left = zRg.Left + (zRg.Width - checkBox2.Width) / 2
    Next
    Application.ScreenUpdating = True
End Sub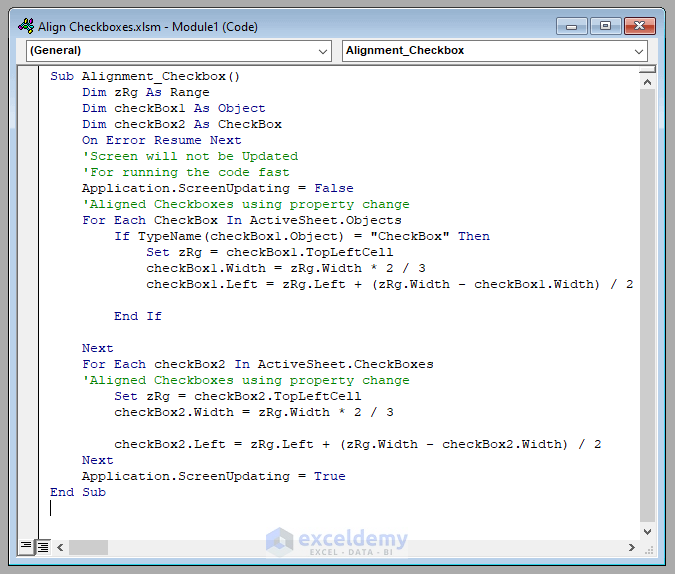
VBA Code Breakdown
- We name our Sub Procedure Alignment_Checkbox_Folder.
- We refer to our current Worksheet as Active Worksheet.
- We use the If conditional statement If TypeName(checkBox1.Object) = “CheckBox” to apply the condition for the Checkboxes.
- We specify the Range for the Checkboxes with the statement Set zRg = checkBox1.TopLeftCell.
- We specify the Width of the checkboxes with the statement checkBox1.Width = zRg.Width * 2 / 3.
- We specify the alignment of the Checkboxes with the statement checkBox1.Left = zRg.Left + (zRg.Width – checkBox1.Width) / 2.
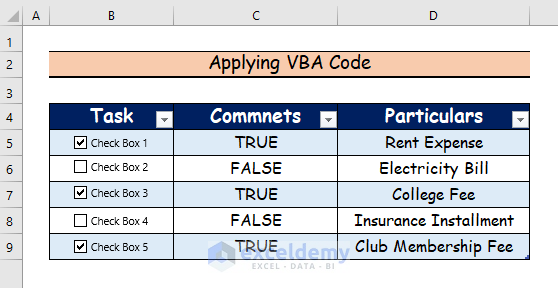
- Save and run the VBA Code.
- The checkboxes are now center-aligned.
Download Practice workbook
Related Articles
- How to Add Checkbox in Excel without Using Developer Tab
- How to Resize Checkbox in Excel
- How to Count Checkboxes in Excel
- How to Filter Checkboxes in Excel
- How to Remove Checkboxes from Excel
<< Go Back to Excel CheckBox | Form Control in Excel | Learn Excel
Get FREE Advanced Excel Exercises with Solutions!

This method seems to work well for a single column or row of checkboxes. I have a sheet with multiple columns and rows of checkboxes, but your method is lining them up in a single column in the middle of the page.
Any suggestions?
Hello TIM
Thanks for reaching out and sharing your query. You want an Excel VBA code that works perfectly for multiple columns and rows of checkboxes. I am presenting an enhanced VBA sub-procedure that may help you.
OUTPUT OVERVIEW:
Enhanced Excel VBA Code:
Hopefully, the sub-procedure will reduce your hassle. Good luck.
Regards
Lutfor Rahman Shimanto
Excel & VBA Developer
ExcelDemy