This is an overview.
Download Practice Workbook
Download the practice workbook.
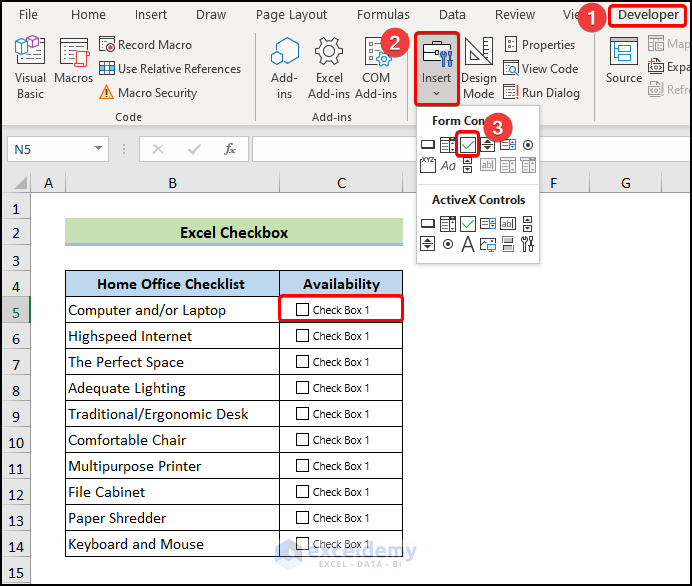
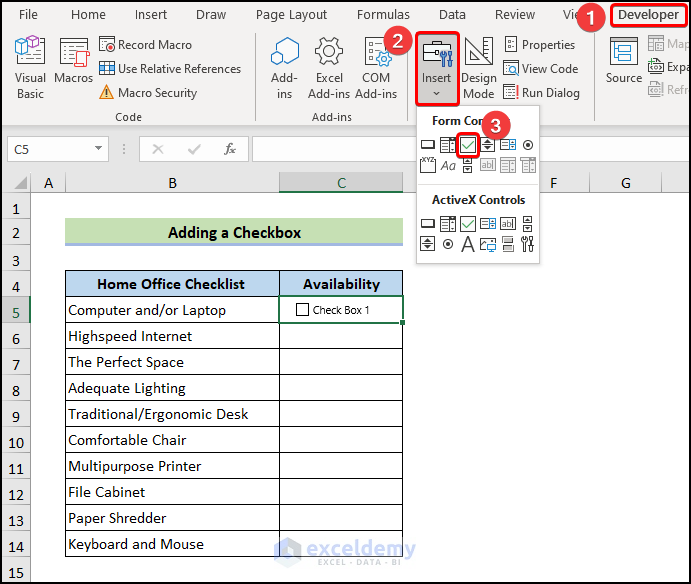
How to Add a Checkbox in Excel.
- Go to the Developer tab and click Insert.
- Select Check Box in Form Controls.
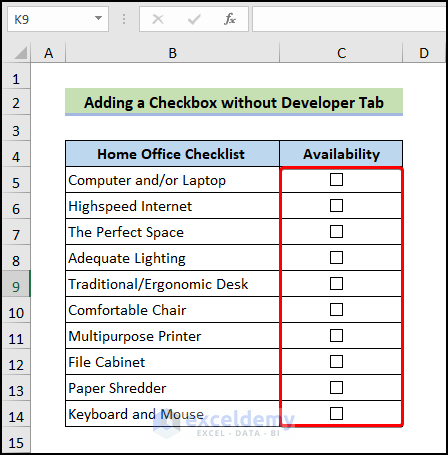
How to Add Check Boxes without the Developer Tab in Excel
- Press Alt + F11 to open the Microsoft Visual Basic for Applications window.
- Go to the Insert tab and select Module.
- Enter the code in the Module:
Sub Add_Checkbox()
Dim x As Range
Dim y As checkbox
Dim yRange As Range
On Error Resume Next
Set yRange = Application.InputBox(Prompt:="Select range", Type:=8)
If Err.Number <> 0 Then Exit Sub
On Error GoTo 0
For Each x In yRange
Set y = yRange.Parent.CheckBoxes.Add(0, 1, 1, 0)
With y
.Top = x.Top + x.Height / 2 - y.Height / 2
.Left = x.Left + x.Width / 2 - y.Width / 2
.Locked = False
.Caption = ""
.Name = x.Address
End With
Next x
End Sub- Press Ctrl + S to save the code.
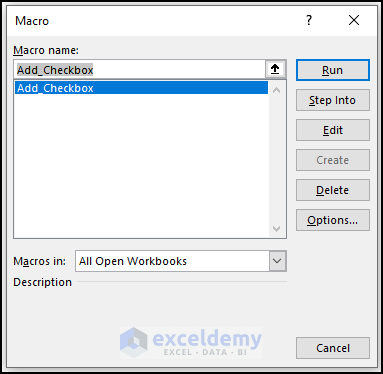
- Press Alt + F8 to open the Macro window.
- Run the code by selecting it from the Macro window.
- In the input box, select the range to add the checkboxes.
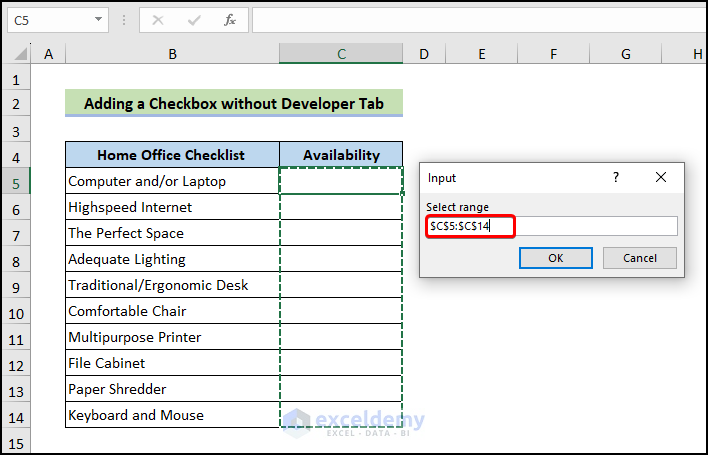
This is the output.
How to Format a Checkbox in Excel
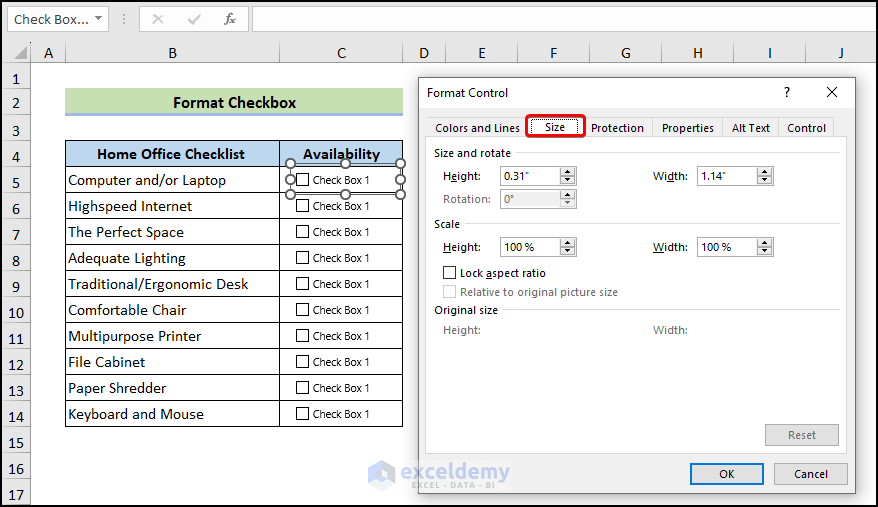
Resizing a Checkbox
- Right-click the checkbox and select Format Control.
- Select Size and Rotate In Size.
- Enter values in height and width.
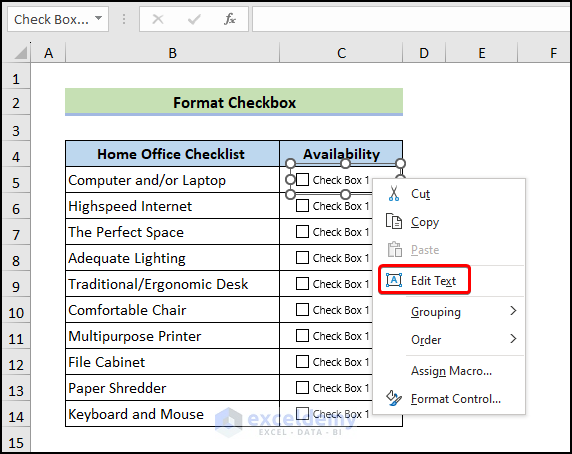
Renaming a Checkbox
- Right-click and choose Edit Text: enter new text.
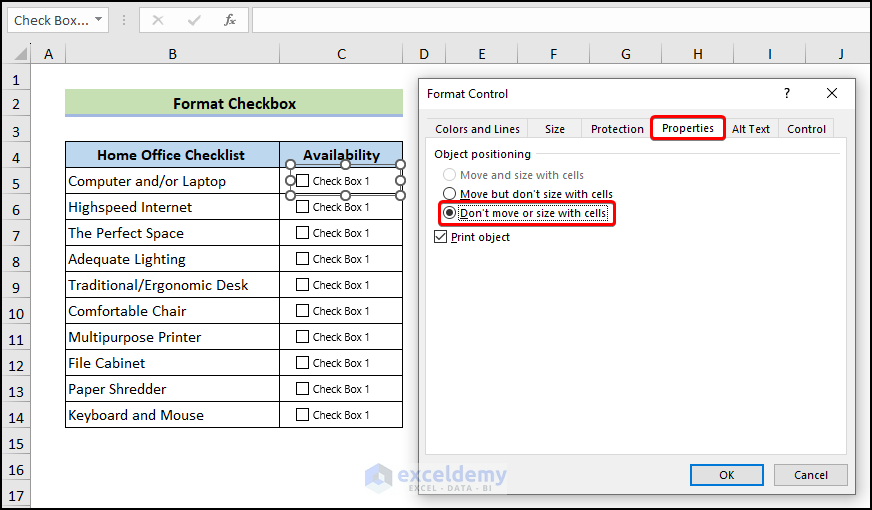
Fixing the Position of a Checkbox
- Right-click the checkbox, go to Format Control, and select Properties.
- Select Don’t move or size with cells in object’s positioning.
- The checkbox will remain fixed.
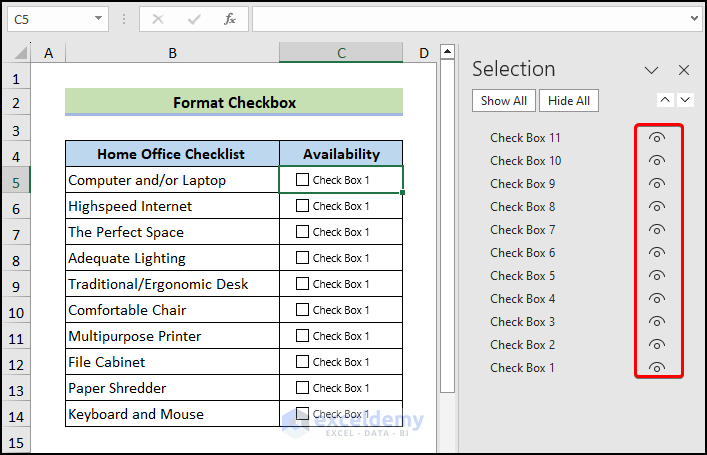
Hide or Unhide a Checkbox
- Access the selection pane pressing Alt + F10.
- Click the icon to hide the checkbox.
- Click it again to unhide it.
How to Link a Checkbox to a Cell in Excel
- Right-click the checkbox and choose Format Control.
- Enter or select a cell ($D$5) to link to the checkbox in Cell Link.
- The default value of Checked is TRUE, and Unchecked is FALSE.
- Click OK.
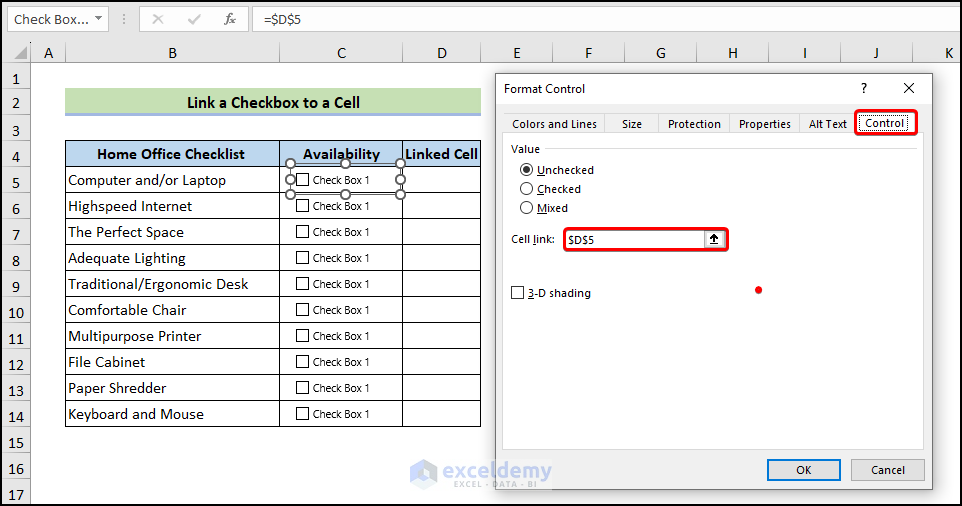
D5 cell is connected to the C5 checkbox. If you check the box, TRUE will be displayed in D5.

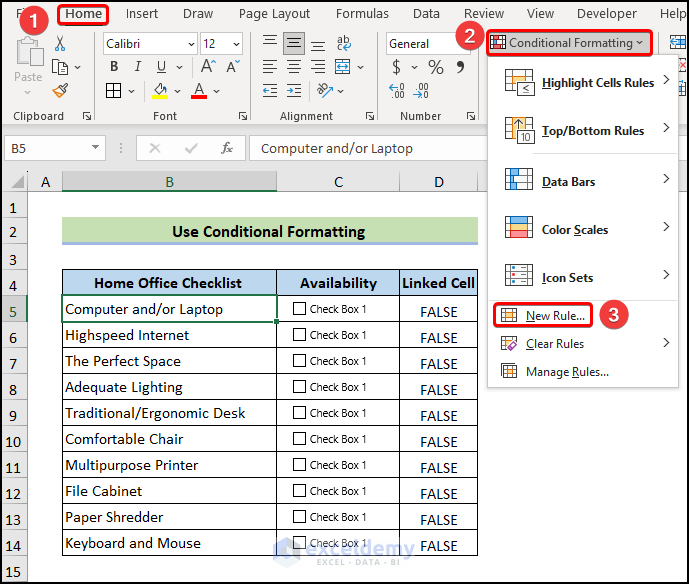
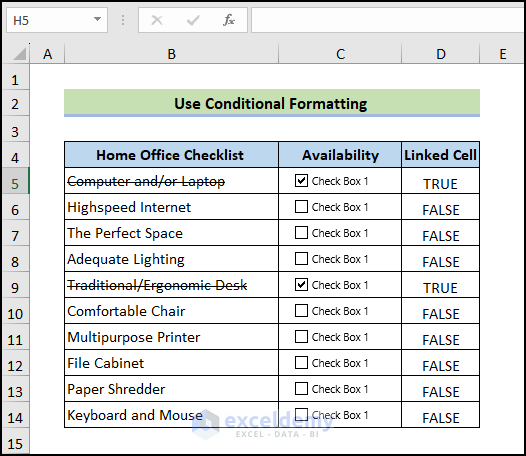
How to Use Conditional Formatting with Checkboxes in Excel
- Select a cell and go to the Home tab as shown below.
- In Conditional Formatting, click New Rule.
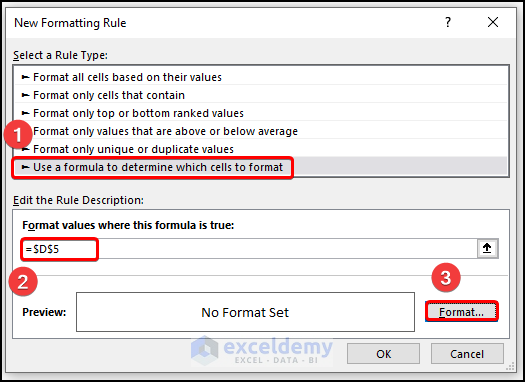
- Enter the cell reference and choose Use a formula to determine which cells to format.
- Click Format.
- Check Strikethrough in Font.
- Click OK.
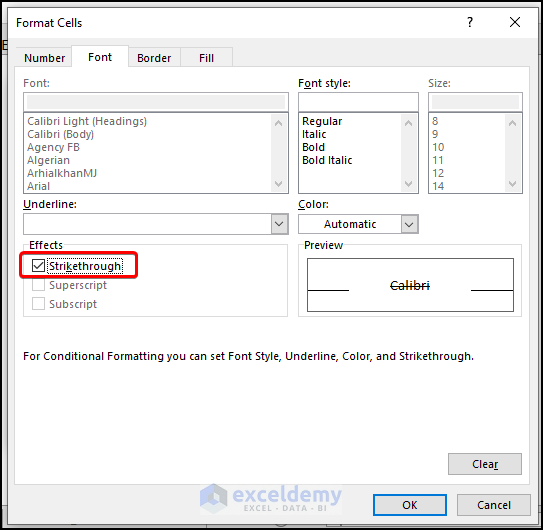
- Accept the preview by clicking OK.
- The value in B5 is highlighted when the checkbox in C5 is selected.
- Follow the above steps for the other checkboxes.
Using Checkboxes in Excel – Examples
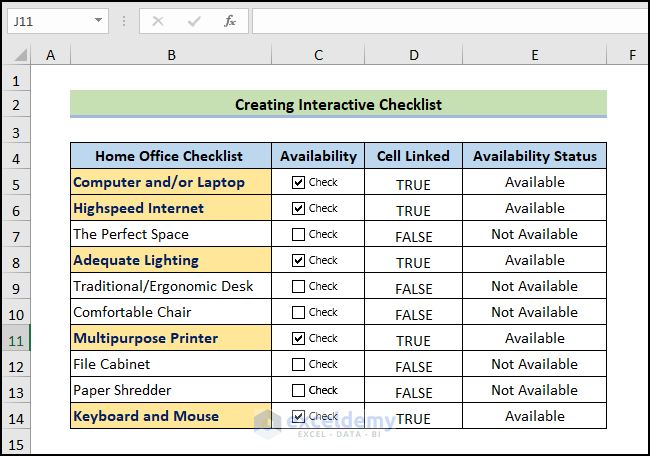
1. How to Create an Interactive Checklist in Excel
Use the Conditional Formatting.
2. Add a Checkbox to Create an Interactive Checklist with Summary
Use checkboxes to create an interactive checklist with a summary.

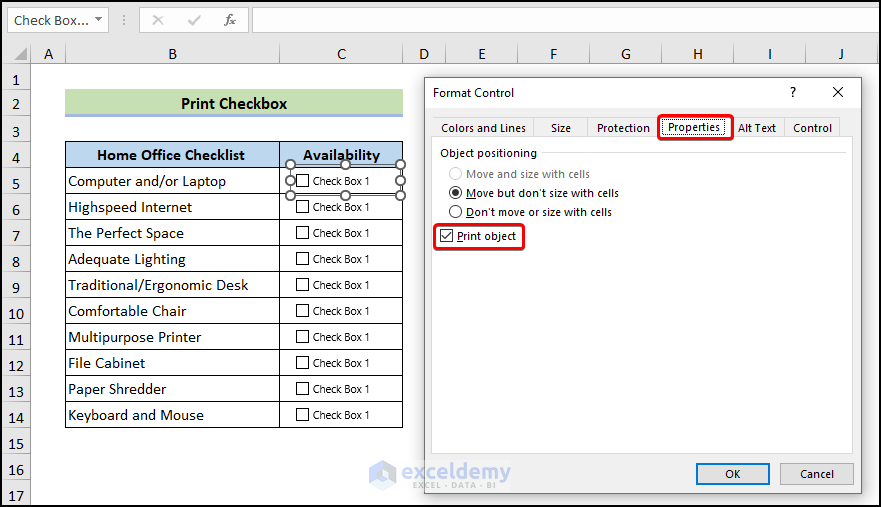
How to Print a Checkbox in Excel
- Right-click the checkbox, choose Format Control, and go to Properties.
- Check Print Object.
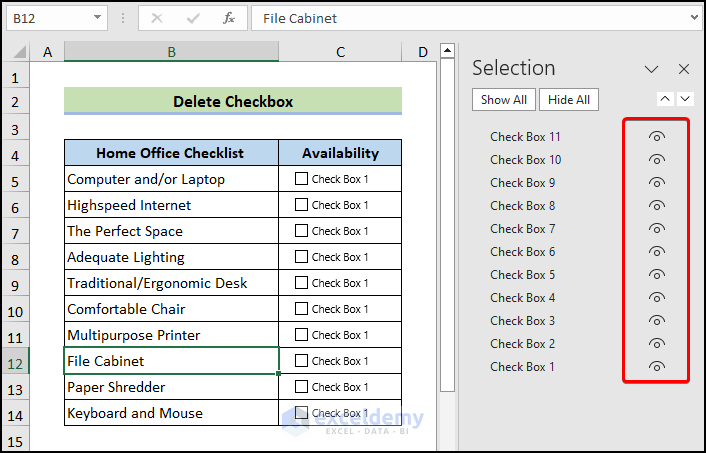
How to Delete a Checkbox in Excel
- Go to the Home Tab and click Editing.
- Choose Find & Select and select Selection Pane.
- Inside the selection pane, you will find a list of all checkboxes used in your worksheet. Select them individually or select multiple checkboxes by holding the control key.
- Press delete.
Things to Remember
- Drag the Fill Handle down to add the checkboxes. Double-clicking the Fill Handle will not work.
- If you are working with VBA code, save the file as an Excel Macro-Enabled Workbook.
Frequently Asked Questions
1. How can I count the number of checked or unchecked checkboxes in Excel?
To count the number of checked or unchecked checkboxes, use the COUNTIF or the SUMPRODUCT formulas and the cell range containing the linked checkbox values. To count the number of checked checkboxes, use the formula: =COUNTIF(A1:A10, TRUE), assuming the checkboxes are linked to A1:A10.
2. Can I customize the appearance of a checkbox in Excel?
Yes. Right-click the checkbox and select Format Control. Modify size, color or font.
Excel Checkbox: Knowledge Hub
<< Go Back to Form Control in Excel | Learn Excel
Get FREE Advanced Excel Exercises with Solutions!

Is there a way to change the position of the text from right side of check box to left side? Or should I just set the text to empty on the check box and put whatever I want to the left, (not directly tied to the checkbox)
Hello Stephanie,
Great question! Unfortunately, Excel’s Form Control checkboxes don’t support moving the label text to the left side directly. A common workaround is exactly what you suggested, et the checkbox text to blank and place a regular text box or cell with your desired label to the left of the checkbox. While it’s not directly tied to the checkbox, this method gives you full control over positioning and layout.
Regards
ExcelDemy
Is there a way to conditionally add a checkbox if the cell adjacent to it contains text?
Hello Sara,
Yes, you can achieve this with a bit of VBA. Excel doesn’t support adding form controls like checkboxes conditionally through formulas, but you can use a simple macro to loop through a range and add checkboxes next to cells that contain text.
Here’s a sample VBA code that adds checkboxes conditionally next to cells only if the adjacent cell contains text:
1. Press Alt + F11 to open the VBA Editor.
2. Insert a new module (Insert > Module).
3. Paste the code and run it (F5) while your desired worksheet is active.
Regards
ExcelDemy