Method 1 – Removing Checkboxes from Excel with Go To Command
Steps:
- Go to Home >> Select Find & Select (in the Editing section) >> Select Go To Special.
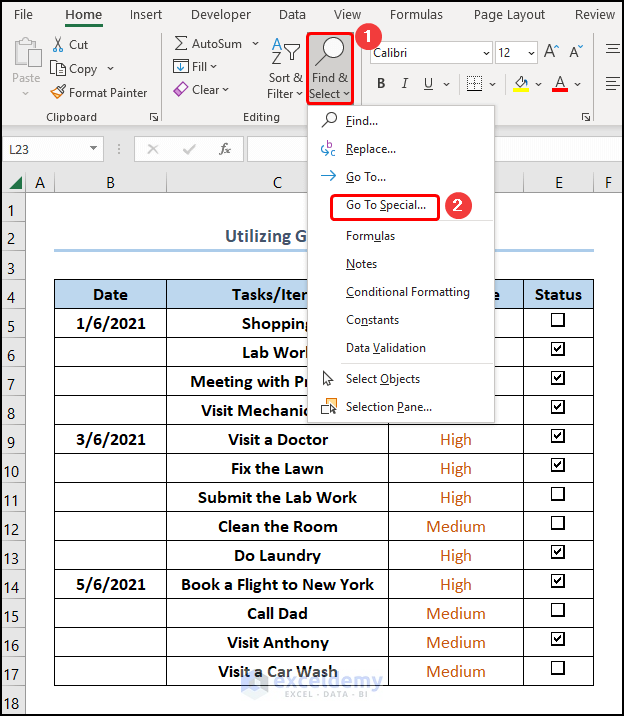
This opens the Go To Special window.
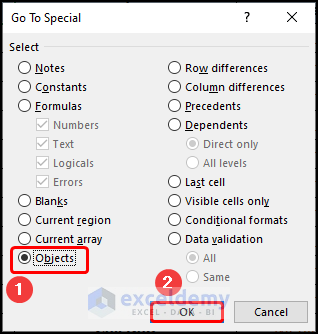
- Select Objects >> click OK.
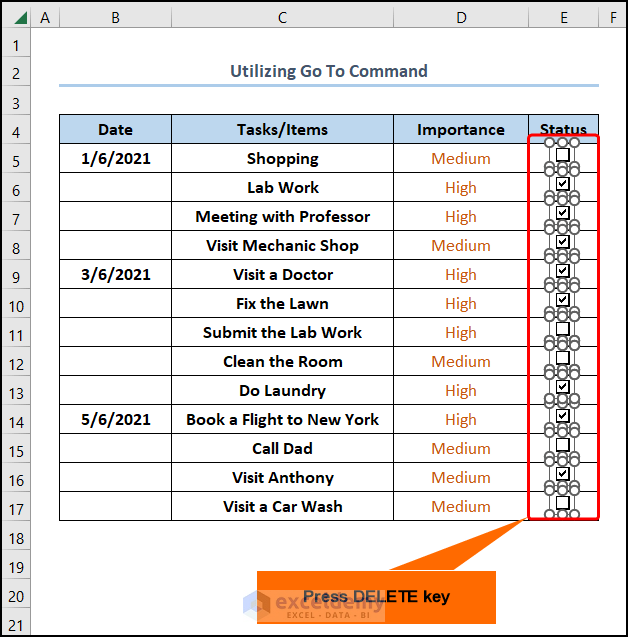
- All the checkboxes in the worksheet get selected, as you can see in the following image >> hit the DELETE key.
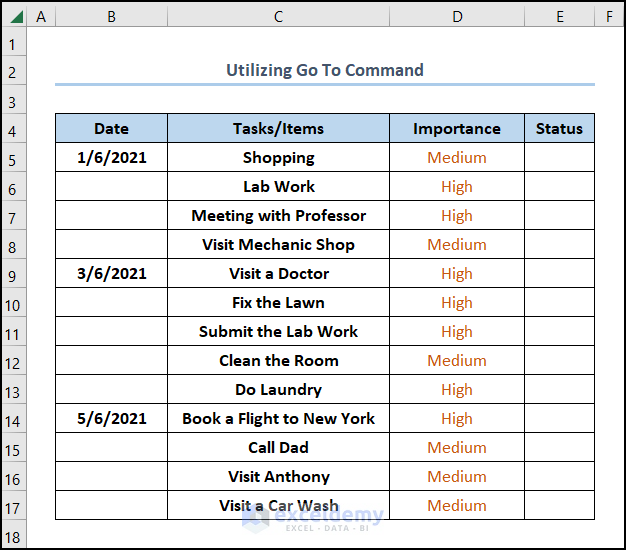
The final output should appear in the figure shown below.
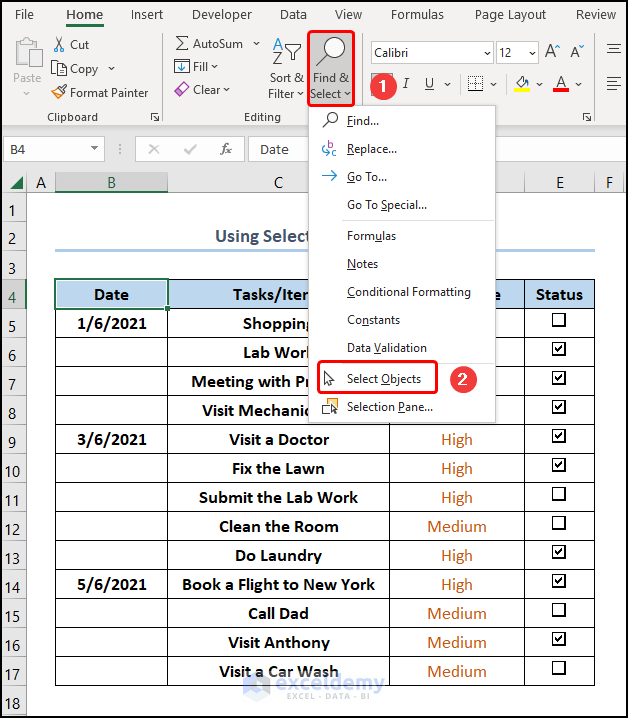
Method 2 – Using Excel Select Objects Option to Remove Multiple Checkboxes
Steps:
- Select Find & Select (in the Editing section) >> choose Select Objects from the options.
Select Objects enables the default selection.
- Hold down the left mouse button >> Drag the cursor over the checkbox to select the whole range >> click on the DELETE key.
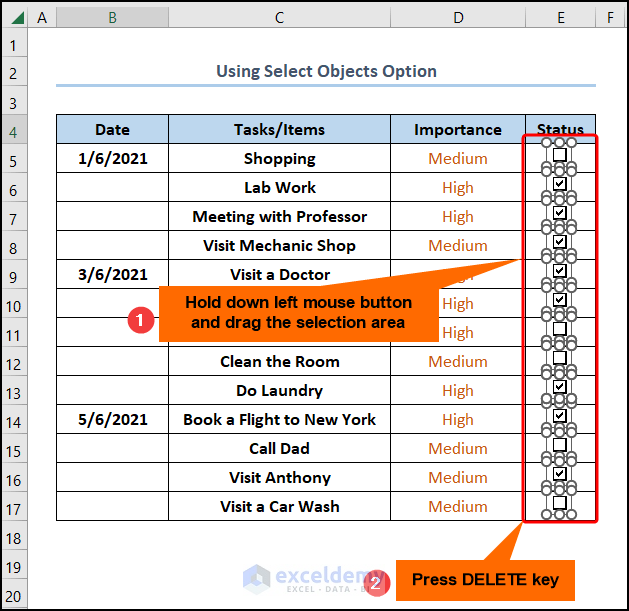
That is how simple it is to remove check boxes from Excel.

Both Go To Special and Select Objects are similar features. You can use one of them as you desire.
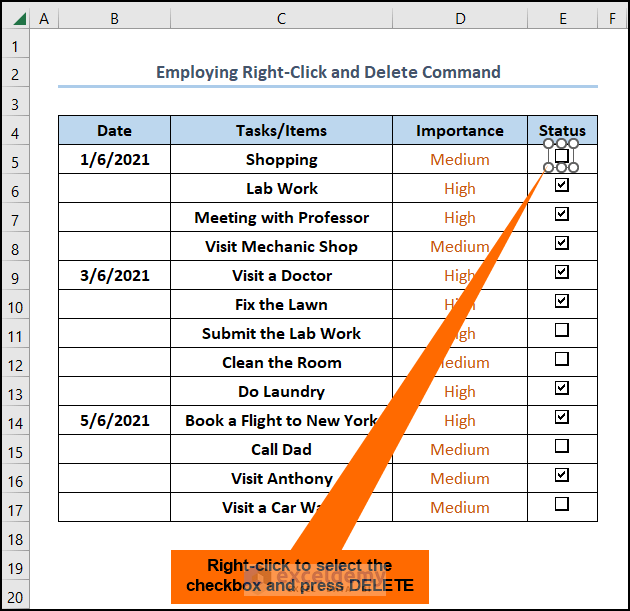
Method 3 – Erasing Single Checkbox by Right-Click and Delete Command
Steps:
- Right-click to choose a checkbox >> press the DELETE button on your keyboard.
The image below shows the final output.
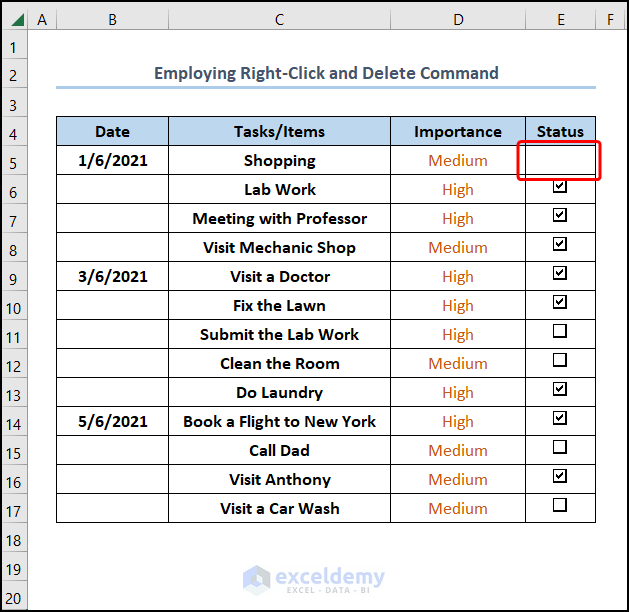
Although it’s tedious work, you can Repeat the process to select as many checkboxes as you want. For better representation, we select all the checkboxes using this process and then remove them by tapping the DELETE key.
Method 4 – Applying Selection Pane Tool to Eliminate Checkboxes from Excel
Steps:
- Jump to the Find & Select drop-down >> click Selection Pane.

- Left-Click to select all the checkboxes as shown below >> tap DELETE.
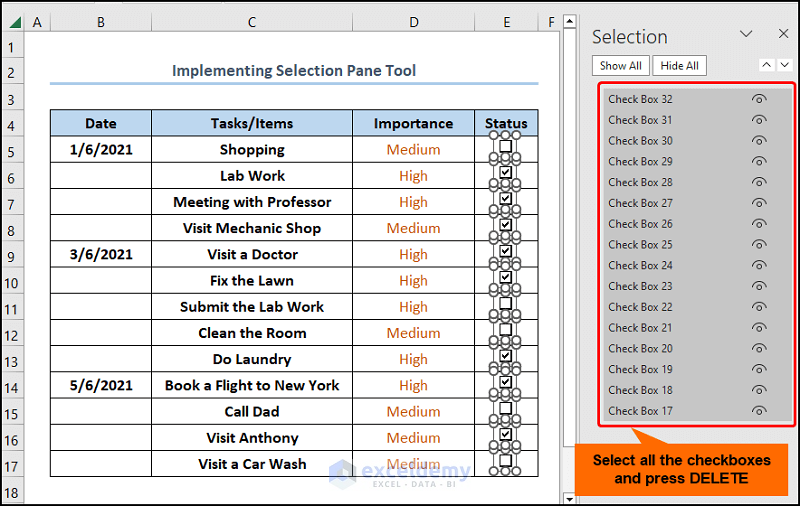
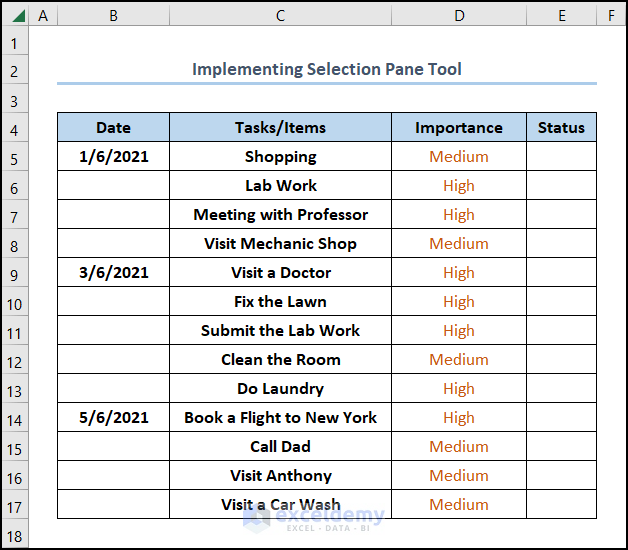
This removes all the checkboxes at once.
Method 5 – Get Rid of Multiple Checkboxes from Excel Manually
Steps:
- Right-click each of the checkboxes to select them >> tap on DELETE.
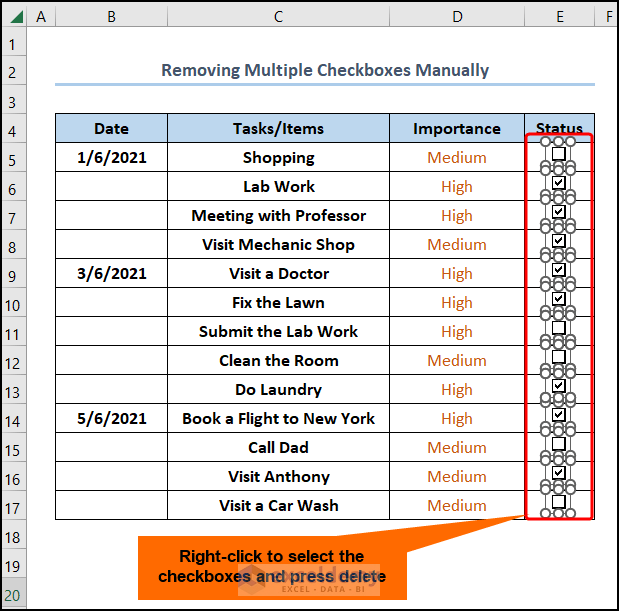
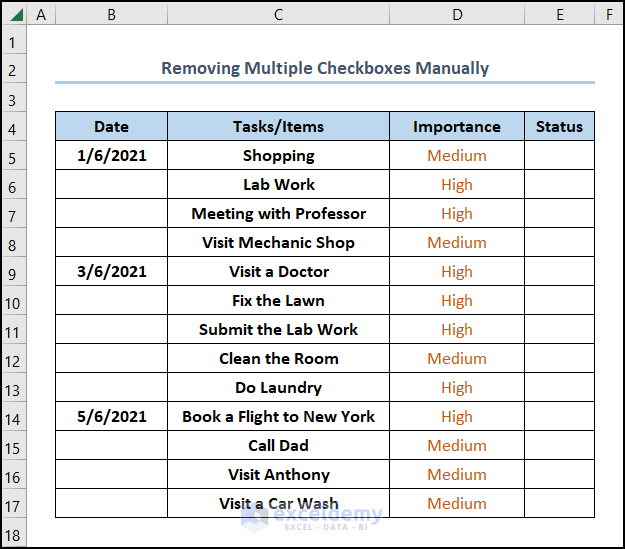
This removes all the checkboxes, as evident in the screenshot below.
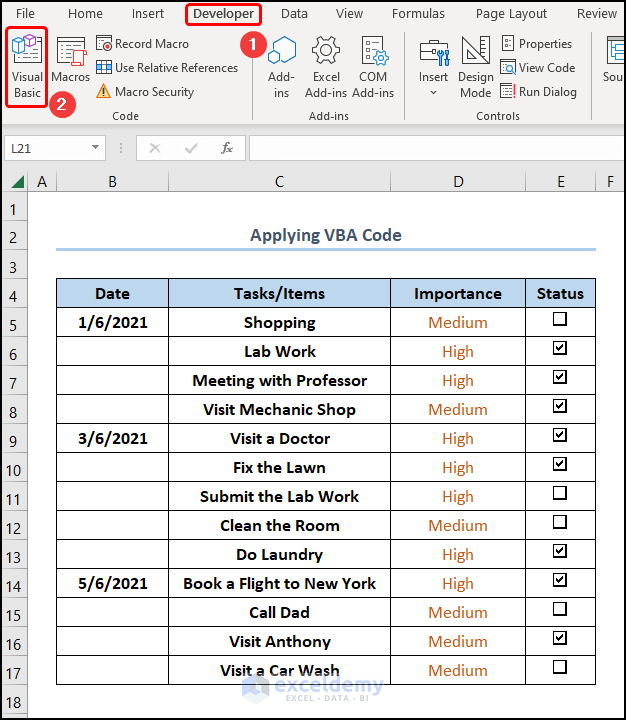
Method 6 – Applying Excel VBA Code to Remove Checkboxes
Steps:
- Proceed to the Developer tab >> click the Visual Basic button.
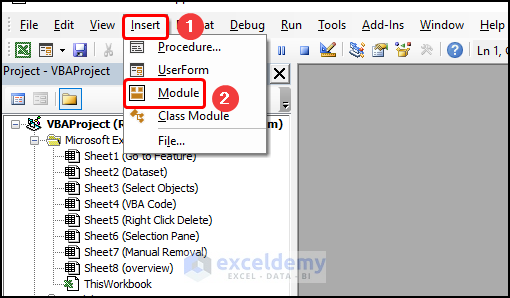
- Go to the Insert tab >> select Module.
Copy the code from here and paste it into the window below.
Sub Delete_check_box()

For Each objects In ActiveSheet.Shapes

    If objects.Type = msoFormControl Then
    If objects.FormControlType = 1 Then objects.Delete
    End If

Next

End Sub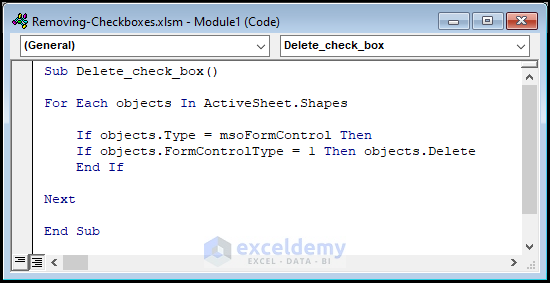
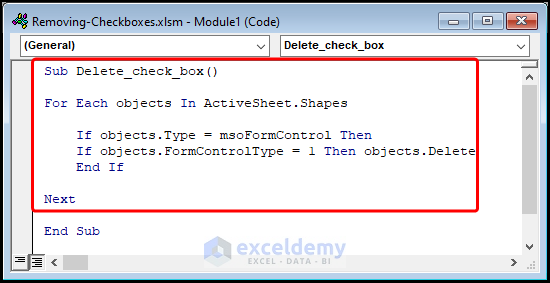
Explain the VBA code used to remove checkboxes.
- The sub-routine is given a name, it is Delete_check_boxes().
- Use a For Loop to iterate through each shape in the active worksheet and use the If Then statement to delete them.
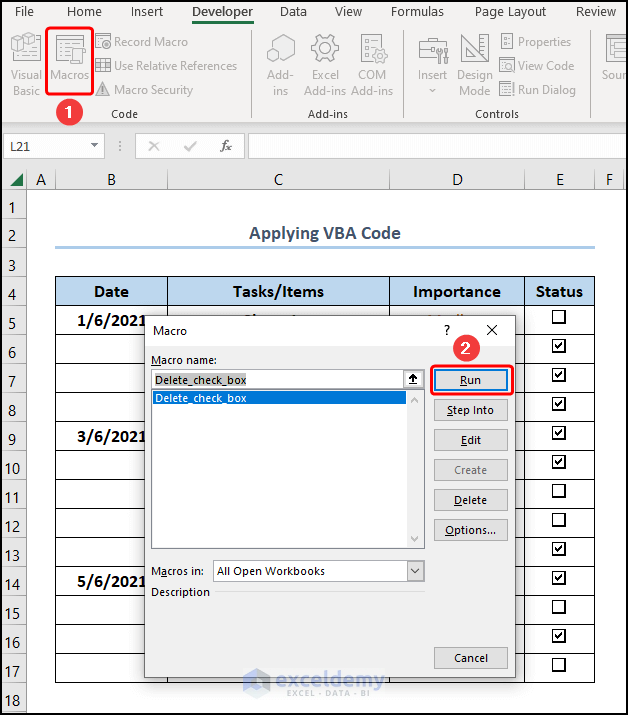
- Close the VBA window >> click the Macros button >> hit Run.
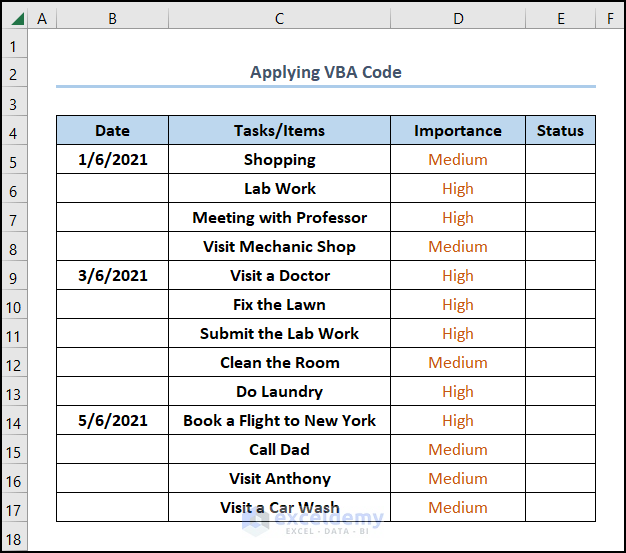
The results should look like the picture given below.
Download Practice Workbook
Related Articles
- How to Add a Checkbox in Excel
- How to Align Checkboxes in Excel
- How to Add Checkbox in Excel without Using Developer Tab
- How to Link Multiple Checkboxes in Excel
- How to Resize Checkbox in Excel
- How to Count Checkboxes in Excel
- How to Filter Checkboxes in Excel
<< Go Back to Excel CheckBox | Form Control in Excel | Learn Excel
Get FREE Advanced Excel Exercises with Solutions!
