In this tutorial, we will learn how to create a formula in Excel to change the date by 1 year. While you are working with date type information you might need to change only the value of the year part from your date value. For this change, any specific year value can be added or subtracted from the date value. To illustrate the use of different functions in this article clearly, we will go to use a unique dataset for all the methods.
How to Create a Formula in Excel to Change Date by 1 Year: 3 Quick Methods
Throughout this article, we will use 3 methods to create a formula in excel to change the date by 1 year. These methods will be executed by the use of the DATE function and the EDATE function.
1. Use the DATE Function to Generate a Formula in Excel to Change Date by 1 Year
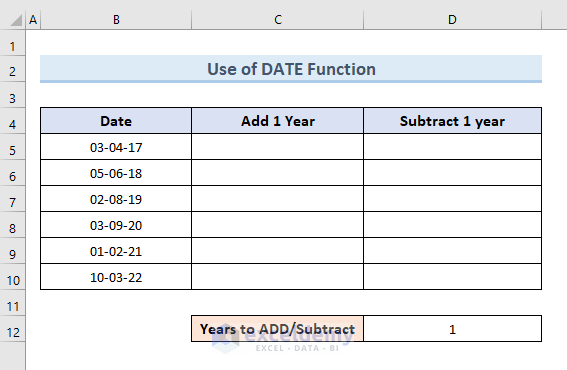
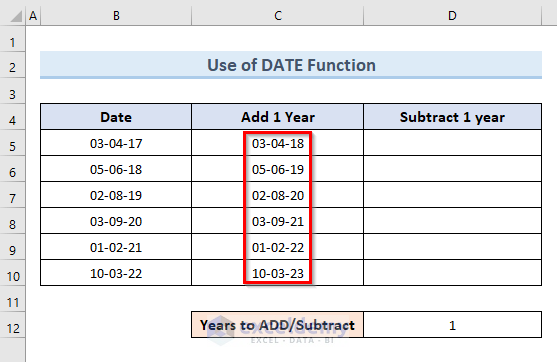
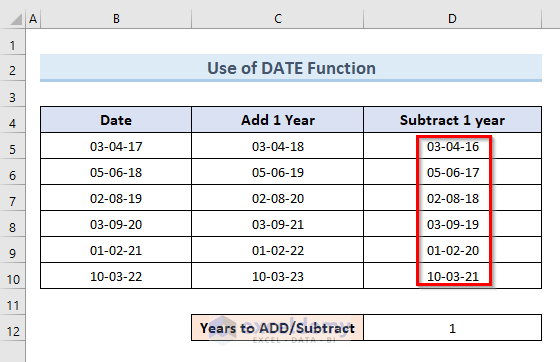
First and foremost, we will use the Date function. The DATE function in Excel is used to generate a date by merging values (year, month, and day). In the following dataset, we have some date values in cells (B5:B10). We will add and subtract 1 year to these date values to change the date by 1 year.
So, let’s see the steps to add or subtract 1 year from a date value.
STEPS:
- Firstly, select cell C5. Insert the following formula in that cell:
=DATE(YEAR(B5) + 1, MONTH(B5), DAY(B5))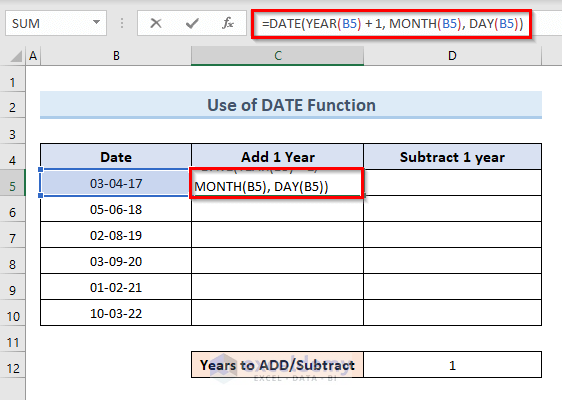
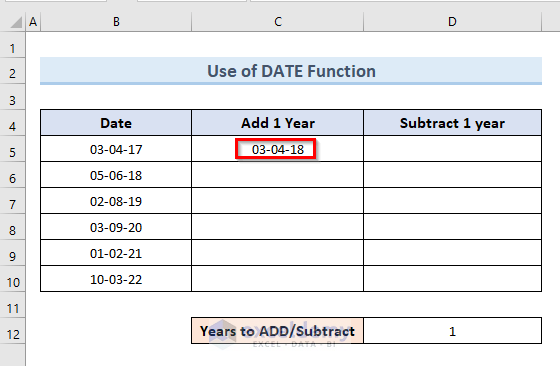
- Now, press Enter.
- The above command adds 1 year with cell B5.
- Secondly, select cell C5. Move the mouse cursor to the bottom right corner of the selected cell, where it will turn into a plus (+) sign, as shown below.
- Thirdly, click the plus (+) sign and drag the Fill Handle down to cell C10 to duplicate the formula from cell C5. To get the same result, we can double-click on the plus (+) sign.
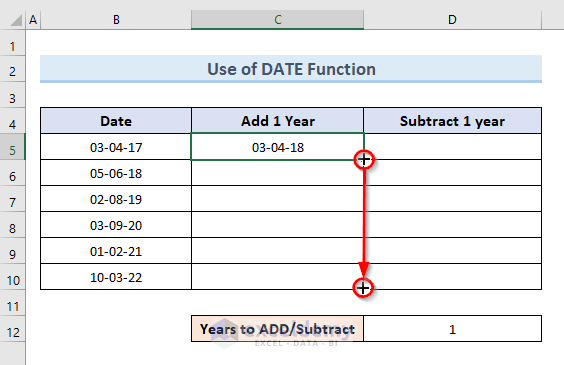
- Then, free the mouse click.
- So, we get all the dates of the cell range (C5:C10) is increased by 1 year in the cell range (D5:E10).
NOTE:
To subtract 1 year from the same values of dates, follow the below process.
STEPS:
- Select cell C5 and insert the following formula:
=DATE(YEAR(B5) - 1, MONTH(B5), DAY(B5))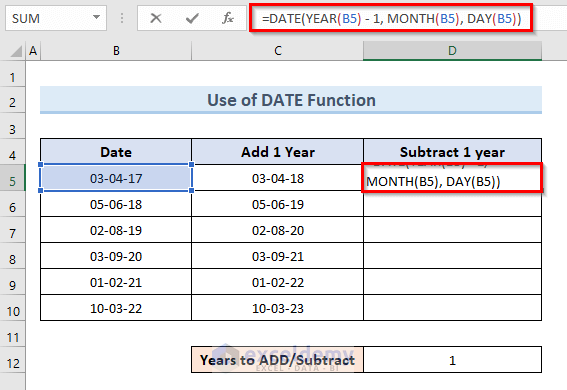
- Now, hit Enter.
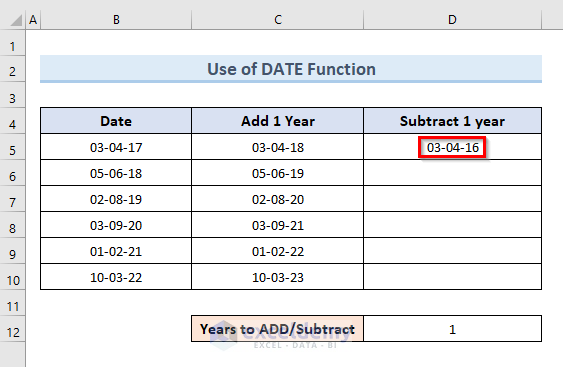
- The above action subtracts 1 year from the date value of cell B5.
- After that, select cell D5. Click on the Fill Handle tool and drag it to cell D10.
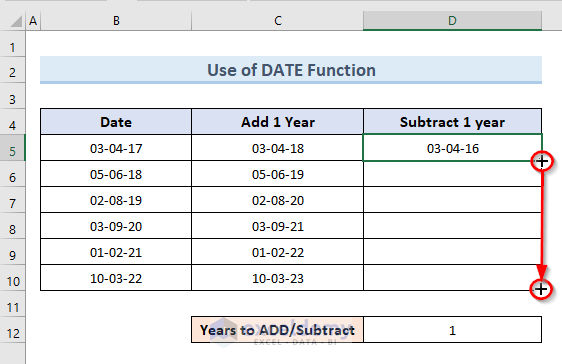
- Drop the mouse click.
- Lastly, we can see that all the value dates in the cell range (B5:B10) are subtracted by 1 year in range (D5:E10).
Read More: How to Add 3 Months to a Date in Excel
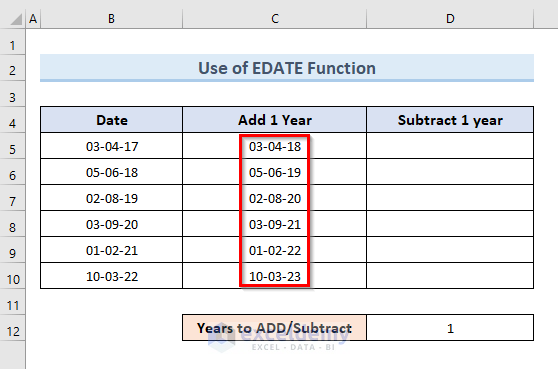
2. Create a Formula in Excel to Change Date by 1 Year with Excel EDATE Function
In the second method, we will perform the same task which is to create a formula in Excel to change the date by 1 year. The only difference is this time we will use the EDATE function. The EDATE function generates a date that is a predefined number of months before or after the start date.


Let’s take a look at the steps to use the EDATE function in this method.
STEPS:
- First, select cell C5. Insert the following formula in that cell:
=EDATE(B5,12)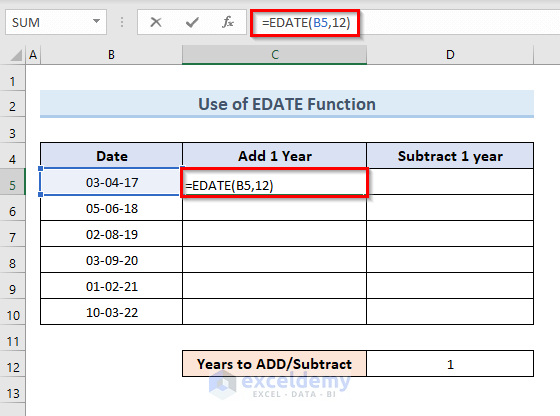
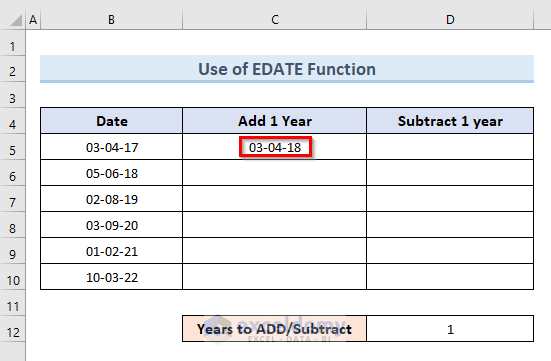
- Now, press Enter.
- The above command adds 1 year with the date value of cell B5.
- Next, pick cell C5. Slide the mouse pointer to the selected cell’s bottom right corner, where it will change into a plus (+) sign, as displayed below.
- Then, to duplicate the formula from cell C5, click the plus (+) sign and drag the Fill Handle down to cell C10. We can get the same outcome by double-clicking on the plus (+) sign.
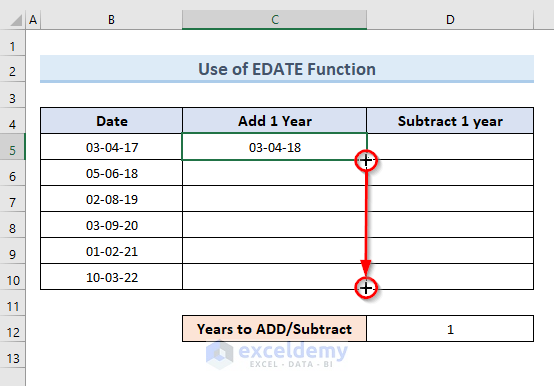
- After that, release the mouse click.
- So, we can see that all of the values of dates in the range (B5:B10) increase by one year in the cell range (C5:C10).
NOTE:
Here, follow the below steps to subtract 1 year from the same range.
STEPS:
- In the beginning, select cell B5. Write down the following formula in that cell:
=EDATE(B5,-12)
- Hit Enter.
- The above operation subtracts one year from cell B5’s date value.

- Next, select cell D5. Drag the Fill Handle tool to cell D10 by clicking on it and dragging it there.

- Now, remove the mouse click.
- Finally, we can observe that all the values of dates in the range (B5:B10) are subtracted by 1 year in the range (D5:D10).

Read More: How to Add Years to a Date in Excel
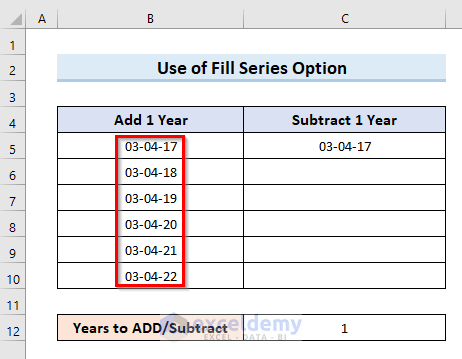
3. Fill Series Option to Create a Formula in Excel to Change Date by 1 Year
We can also use the Excel Fill Series option to change any date by 1 year. The Excel Fill Series option fills the worksheet’s specified range of cells with a series of numbers, characters, or dates. In the following dataset, we have two same dates in cells B5 & C5. We will fill the cell range (B5:B10) by adding 1 year with each step. On the other hand, we will fill the cell range (C5:C10) by subtracting 1 year in each step.

So, simply follow the steps to conduct this operation.
STEPS:
- Firstly, select the cell range (B5:B10).
- Secondly, go to the Home From the Editing section of the ribbon click on the option Fill.
- Then, select the option Series from the drop-down menu.
- In short: Select range (B5:B10) > Home > Fill > Series
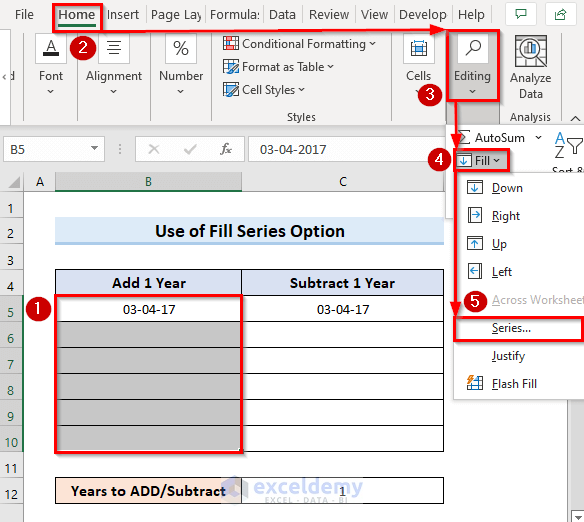
- Now, a new dialogue box will open. In the box check the option Columns in the “Series in” section, Date in the Type section, Year in the “Date unit”.
- Set the “Step value” as 1 and press OK.

- So, we can see the cell range (B5:B10) is filled with date values now. If we notice we will see that each value in that range increases by 1 year from the previous value.
NOTE:
Now to subtract 1 year we have to go through the same procedures just for the cell range (C5:C10).
STEPS:
- First, select the cell range (C5:C10).
- Next, go to the Home Click on the option Fill from the Editing section of the ribbon.
- Then, from the drop-down menu select the option Series.
- In short: Select range (C5:C10) > Home > Fill > Series
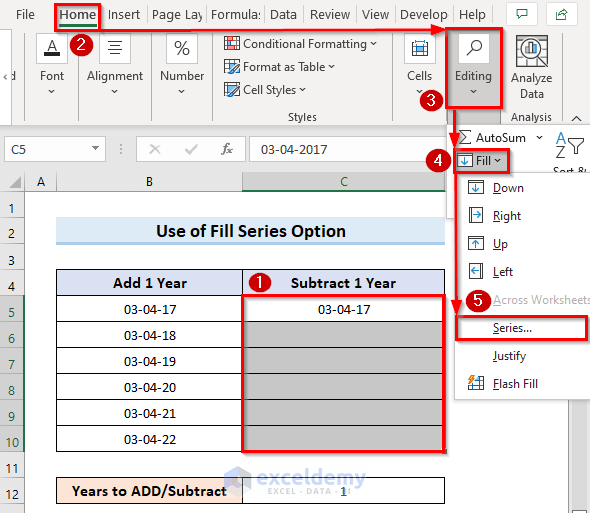
- We can see a new dialogue box now. In the box check the option Columns in the “Series in” section, Date in the Type section, Year in the “Date unit”.
- Set the “Step value” to -1 and press OK.

- As a result, the cell range (C5:C10) is now filled with date values. If we look closely we can see that each value in that range decrease by 1 year from the previous value.

Read More: How to Add 2 Years to a Date in Excel
Download Practice Workbook
You can download the practice workbook from here.
Conclusion
Therefore, this tutorial will show you how to create a formula in Excel to change the date by 1 year. Use the practice worksheet that comes with this article to put your skills to the test. If you have any questions, please leave a comment below. Our team will make every effort to respond to you as quickly as possible. Keep an eye out for more creative Microsoft Excel solutions in the future.
Related Articles
- How Do I Add 7 Days to a Date in Excel
- How to Add 30 Days to a Date in Excel
- How to Add Weeks to a Date in Excel
- How to Add Months to Date in Excel
- How to Add 3 Years to a Date in Excel
- How to Add 6 Months to a Date in Excel
- How to Add Days to a Date in Excel Excluding Weekends
<< Go Back to Adding Days to Date | Calculate Dates | Date-Time in Excel | Learn Excel
Get FREE Advanced Excel Exercises with Solutions!
