In this article, we will discuss VBA codes to unwrap text. We often use the Wrap Text command to fit text inside a cell. In order to unwrap the text, we will have to click on the Wrap Text command again. In a large dataset, it becomes tedious and time-consuming to unwrap all the texts just by using this command. This is where VBA codes come into play. A VBA code can automate unwrapping text. We can unwrap all the texts that are wrapped just by running a VBA code. We can also apply conditions in VBA codes just unwrap texts with particular values. So, VBA makes unwrapping texts faster and easier.
Unwrap Text with Excel VBA: 4 Easy Ways
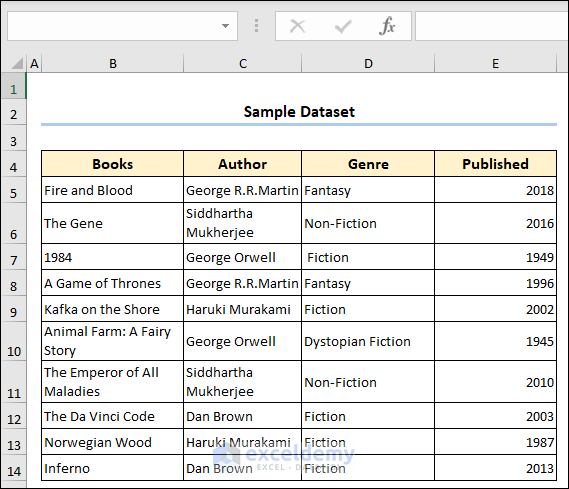
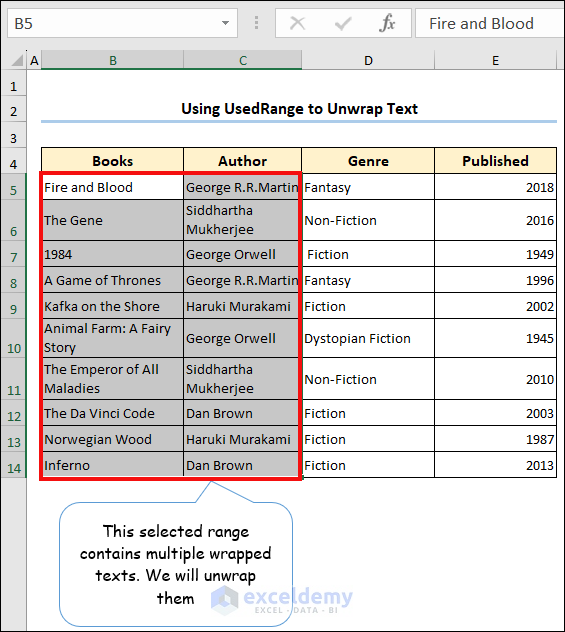
We can unwrap text in Excel in different ways. Today, we will discuss 4 methods of “VBA Unwrap Text.” Here, we have a dataset that contains information about some books i.e.: writers, genre, and publication year. As the books’ and authors’ names are long, they are wrapped in cells. We will use different VBA codes to unwrap those texts.
1. Using Range.WrapText Property to Unwrap Text
In this method, we will use the Range.WrapText property to unwrap texts in a certain range. The Range.WrapText property takes two values True and False. We will make the property False from True in order to unwrap texts.
1.1 Unwrapping Entire Row
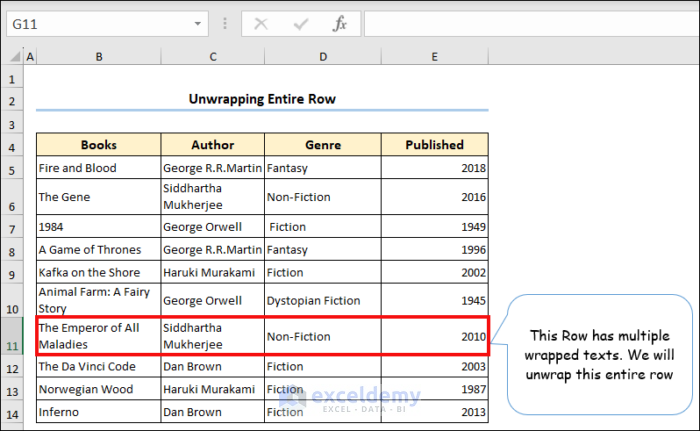
Here, we will use a VBA code to unwrap an entire row of texts. As we can see, the book’s name and the author’s name are wrapped in the 11th row. We will unwrap them using a VBA code.
The VBA code that we will use is as follows,
Sub EntireRow()
Dim ws As Worksheet
Set ws = ThisWorkbook.Worksheets("Entire Row")
ws.Range("11:11").WrapText = False
ws.Range("11:11").EntireRow.AutoFit
Set Rng = ws.Range("B4:E14")
For i = 1 To Rng.Columns.Count
    Rng.Cells(8, i).EntireColumn.AutoFit
Next i
End Sub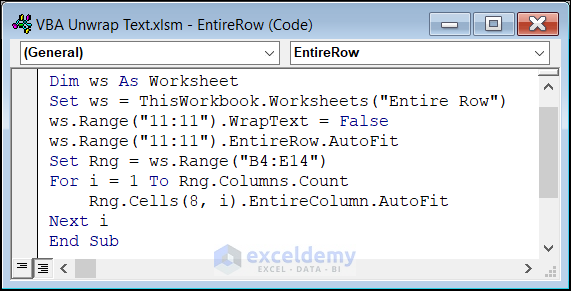
VBA Code Breakdown:
Sub EntireRow()
Dim ws As Worksheet
Set ws = ThisWorkbook.Worksheets("Entire Row")
ws.Range("11:11").WrapText = False
First, the code declares a Worksheet variable “ws” and then set the “Entire Row” sheet as its value.
Then, the code sets the WrapText property to False with the line. So the wrapped texts get unwrapped.
ws.Range("11:11").EntireRow.AutoFit
Set Rng = ws.Range("B4:E14")
For i = 1 To Rng.Columns.Count
    Rng.Cells(8, i).EntireColumn.AutoFit
Next i- The EntireRow.Autofit property autofits the width of the 11th row according to the texts.
- The For Loop runs through the B4:E14 range and sets the column width of the B:E columns according to the width of the texts in the 11th row.
- Here, the 11th row of the sheet is the 8th row of the B4:E14 range.
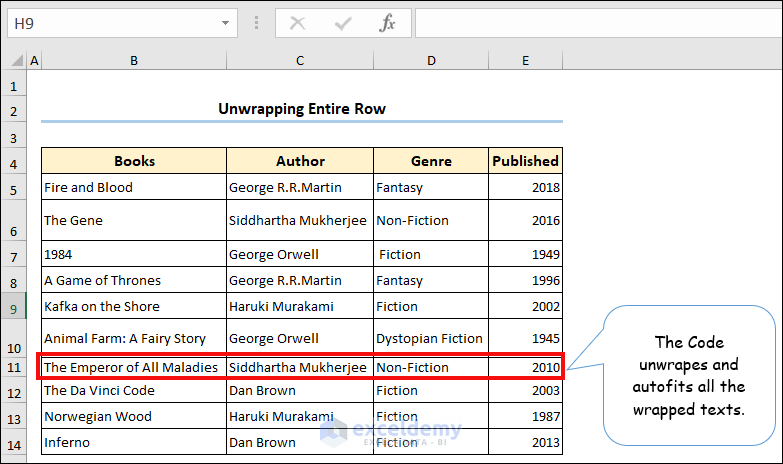
As we run this code by launching VBA Macro editor, the code will unwrap all the texts in the row.
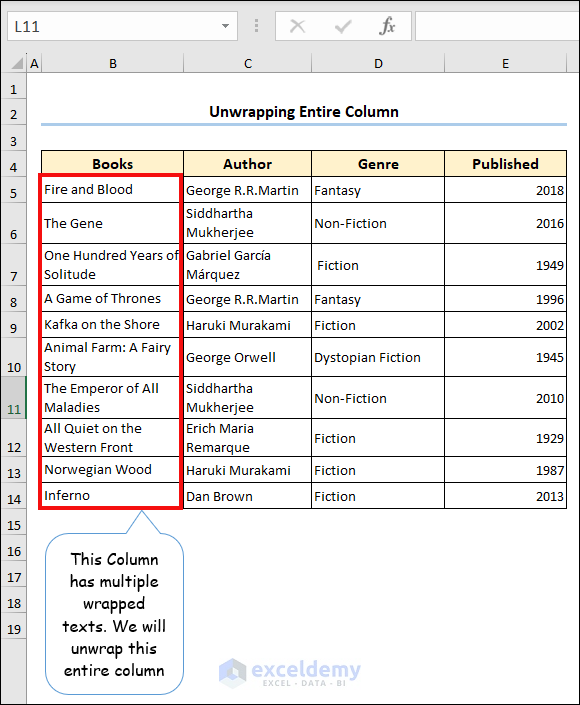
1.2 Unwrapping the Entire Column
In this instance, we will unwrap the texts of an entire column. The B column or the “Books” column contains several wrapped texts. We will unwrap each of them.
We will use the ensuing VBA code to unwrap text from an entire column.
Sub EntireColumn()
Dim ws As Worksheet
Set ws = ThisWorkbook.Worksheets("Entire Column")
ws.Range("B:B").WrapText = False
ws.Range("B:B").EntireColumn.AutoFit
Set Rng = ws.Range("B4:E14")
For i = 1 To Rng.Rows.Count
    Rng.Cells(i, 1).EntireColumn.AutoFit
Next i
End Sub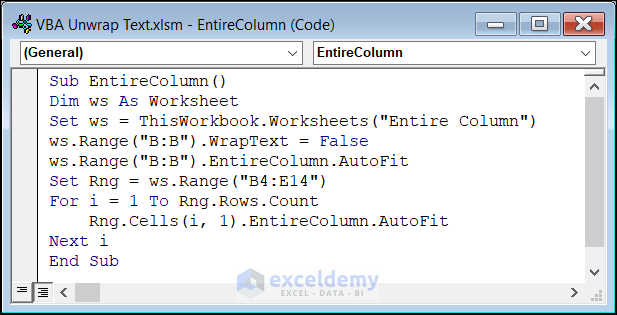
VBA Code Breakdown:
ws.Range("B:B").WrapText = False
ws.Range("B:B").EntireColumn.AutoFit
Set Rng = ws.Range("B4:E14")
For i = 1 To Rng.Rows.Count
    Rng.Cells(i, 1).EntireColumn.AutoFit
Next i- The first line sets the WrapText property for the entire B column to False. So, all the texts that are wrapped get unwrapped.
- The next line autofits the B column according to the width of the unwrapped texts.
- The For Loop runs through the rows of the B4:E14 range and adjusts the row heights of the range according to the texts in the B column.
- The Rng.Cells(i, 1) indicate the ith cell of the first column of the B4:E14 range.
As we execute the code, the code will unwrap the wrapped texts of the B column.

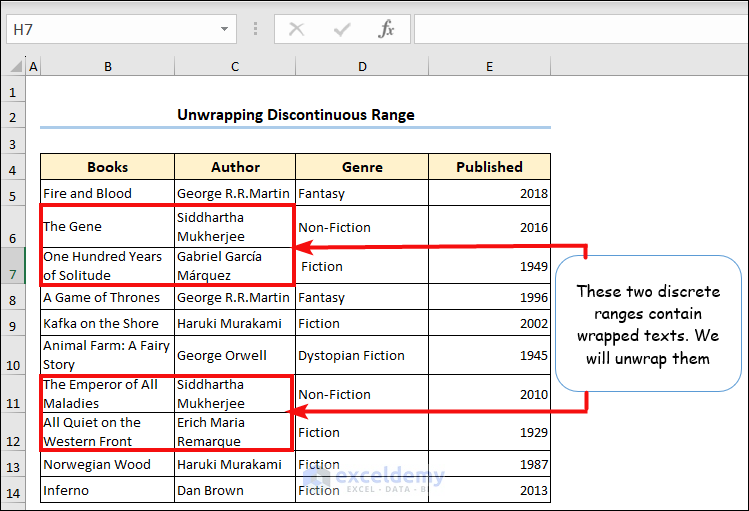
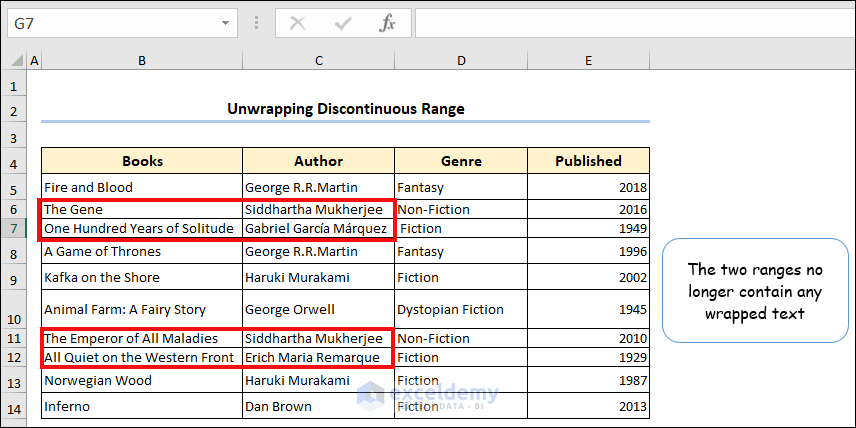
1.3 Unwrapping Discontinuous Range
We often encounter wrapped texts in different locations of the dataset in a way that they are not consistent. In this dataset, the B6:C7 and B11:C12 range have wrapped texts. These are discontinuous ranges. We unwrap the texts of these ranges as well.
We will apply the VBA code below to unwrap the text.
Sub DiscontinuousRange()
Dim ws As Worksheet
Set ws = ThisWorkbook.Worksheets("Discontinuous Range")
Set Rng = ws.Range("B6:C7,B11:C12")
Rng.WrapText = False
For Each Cell In Rng
    Cell.EntireColumn.AutoFit
    Cell.EntireRow.AutoFit
Next Cell
End Sub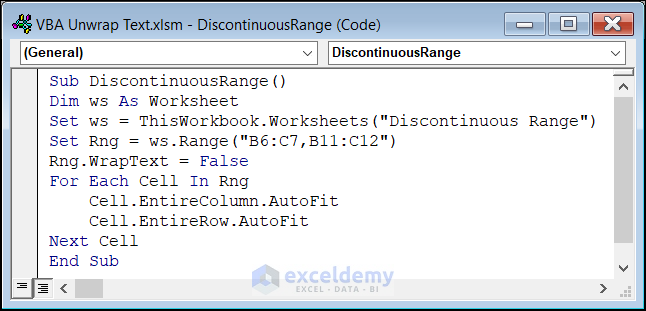
VBA Code Breakdown:
Set Rng = ws.Range("B6:C7,B11:C12")
Rng.WrapText = False- Here, we declare the B6:C7 and B11:C12 ranges as the values for the “Rng” variable.
- We then set the WrapText property of the “Rng” variable to False.
For Each Cell In Rng
    Cell.EntireColumn.AutoFit
    Cell.EntireRow.AutoFit
Next Cell- This For Loop iterates through each cell in the “Rng” range and autofits the entire column and row of each cell according to the text inside the text.
After executing the code, we will see that the code has unwrapped texts in those two ranges and also autofitted the cell sizes according to the texts inside them.
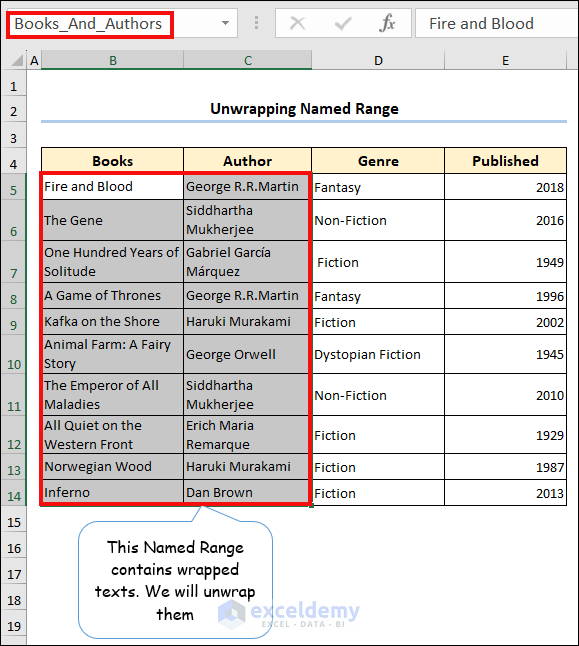
1.4 Unwrapping Named Range
In this example, we will see a VBA code to unwrap the text of a NamedRange. In the dataset below, we set the name of the B5:C14 range as “Books_And_Authors”. We will unwrap texts from this NamedRange.
We will use the following VBA code to unwrap text from a NamedRange.
Sub NamedRange()
Dim ws As Worksheet
Set ws = ThisWorkbook.Worksheets("Named Range")
Set Rng = ws.Range("Books_And_Authors")
Rng.WrapText = False
For Each Cell In Rng
    Cell.EntireColumn.AutoFit
    Cell.EntireRow.AutoFit
Next Cell
End Sub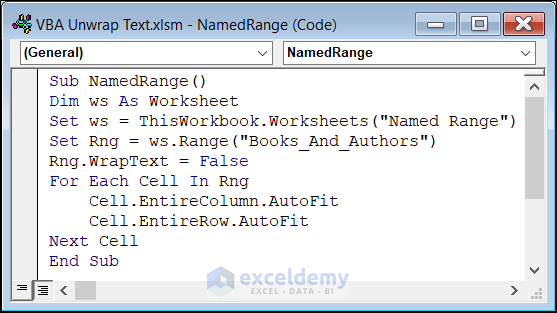
VBA Code Breakdown:
Set Rng = ws.Range("Books_And_Authors")
Rng.WrapText = False- Here, we declare the “Books_And_Authors” NamedRange which contains the B5:E14 range as the values for the “Rng” variable.
- We then set the WrapText property of the “Rng” variable to False.
For Each Cell In Rng
    Cell.EntireColumn.AutoFit
    Cell.EntireRow.AutoFit
Next Cell- This For Loop iterates through each cell in the “Rng” range and autofits the entire column and row of each cell according to the text inside the text.
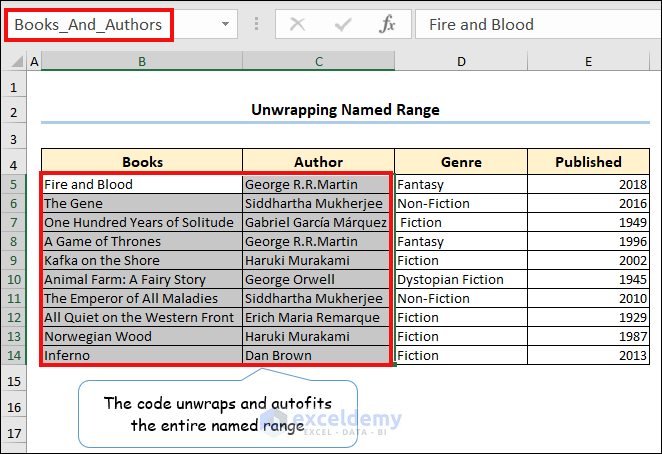
As we can see from the image below, as soon as we run the code the wrapped texts within this range get unwrapped.
2. Unwrapping Text from Selection
In this method, we will select a range of cells and then unwrap the wrapped texts from that selection using a VBA code. As the image below shows, here we have selected the B5:C14 range from the dataset.
We will use the code below to unwrap texts from our selection.
Sub Text_From_Selection()
Dim Rng As Range
Set Rng = Application.Selection
Rng.WrapText = False
For Each Cell In Rng
    Cell.EntireColumn.AutoFit
    Cell.EntireRow.AutoFit
Next Cell
End Sub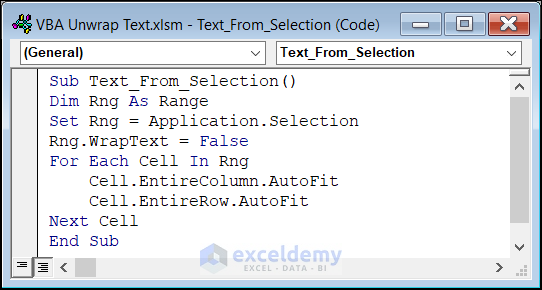
VBA Code Breakdown:
Set Rng = Application.Selection
Rng.WrapText = False- The first line sets the user selection with the Application.Selection as the value for the “Rng” variable.
- The following line sets the Range.WrapText property of the selected range to False in order to unwrap texts.
For Each Cell In Rng
    Cell.EntireColumn.AutoFit
    Cell.EntireRow.AutoFit
Next Cell- The For Loop autofits each cell from the selected range according to the text it contains.
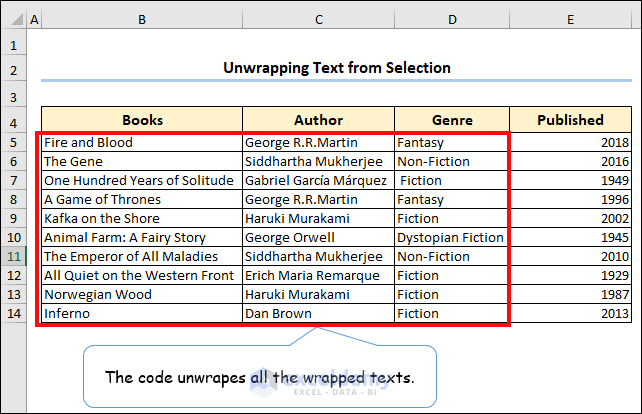
As soon as we run the code, Excel will unwrap all the wrapped texts from the selected range.
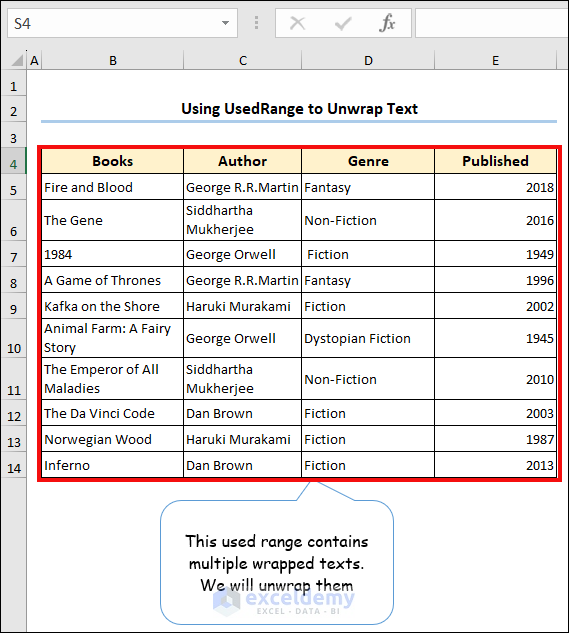
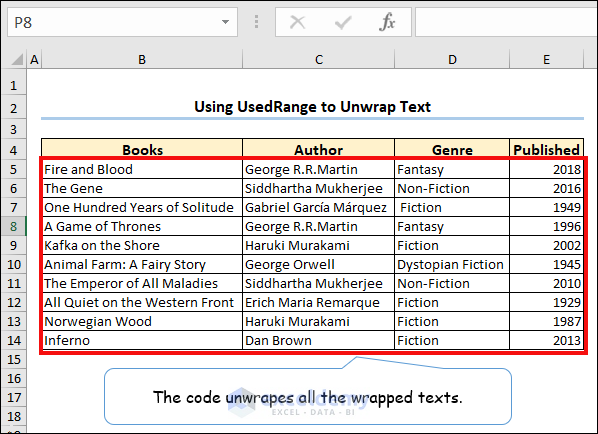
3. Using Used Range to Unwrap Text
The Worksheet.UsedRange property returns the range of a worksheet that is being used. The range may contain blank rows or columns or cells inside it. Here, the Used Range property will take the entire B4:E14 range as the used range. We will unwrap texts from this range.
We will use the ensuing VBA code to unwrap text from a used range.
Sub UsedRange()
Dim ws As Worksheet
Set ws = ThisWorkbook.Worksheets("Used Range")
Set Rng = ws.UsedRange
Rng.WrapText = False
For Each Cell In Rng
    Cell.EntireColumn.AutoFit
    Cell.EntireRow.AutoFit
Next Cell
End Sub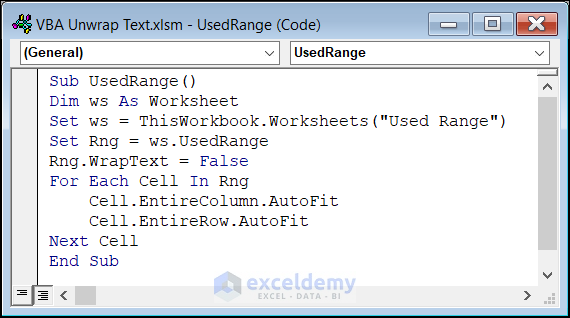
Similar to the previous codes, this code sets the Range.WrapText property of the used range to False and then autofits the rows and columns of that range.
As we run the code, we will find all the wrapped texts are unwrapped by the VBA code.
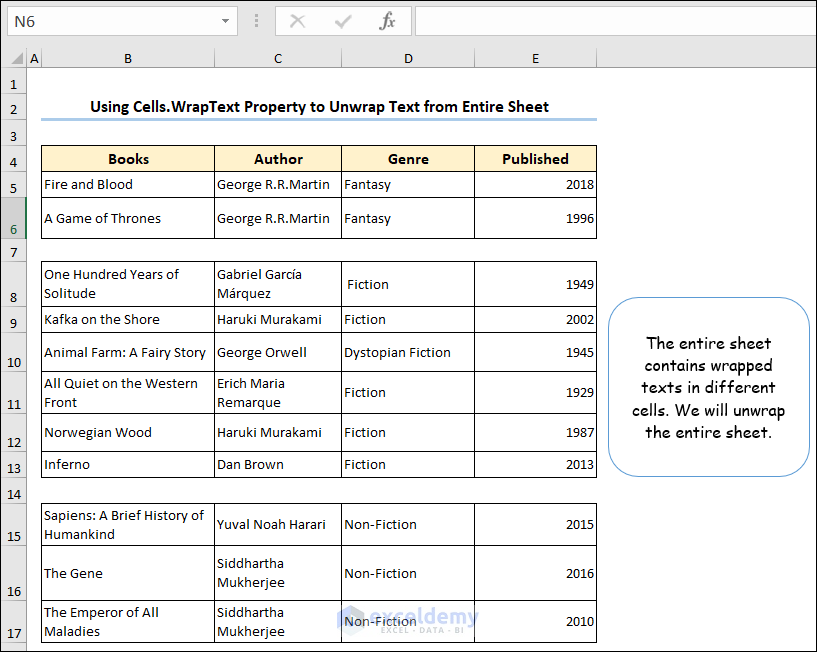
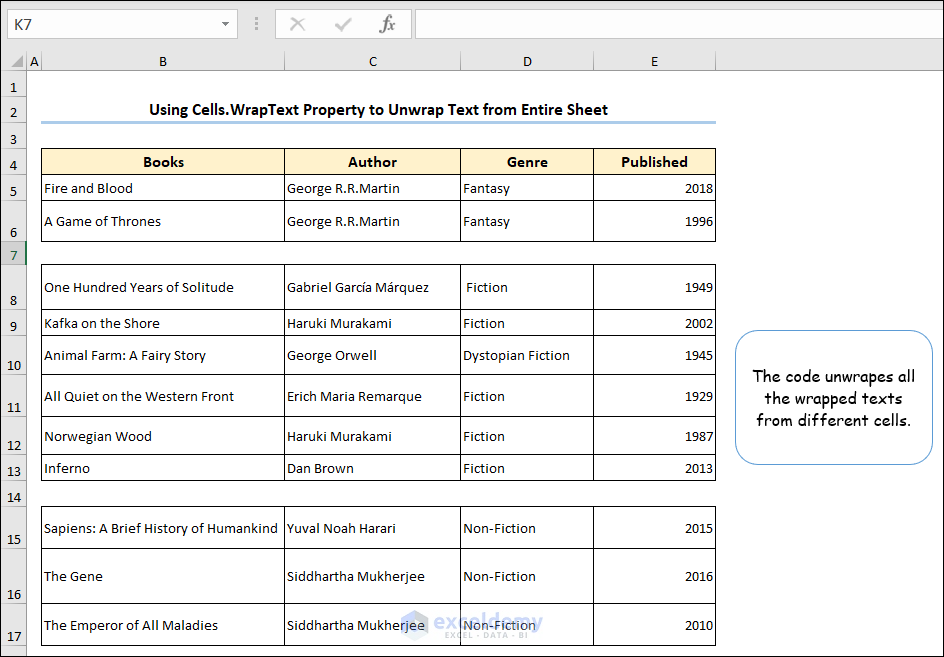
4. Using Cells.WrapText Property to Unwrap Text from Entire Sheet
Sometimes we can have wrapped texts at different cells of the entire worksheet. In that case, unwrapping texts from different cells of the sheet will take time and it will be monotonous as well. Here, we will apply a VBA code that can unwrap the entire worksheet at a time. Thus, we will be able to unwrap texts from different cells simultaneously.
We will apply the code below to do so.
Sub Entire_Sheet()
Dim ws As Workshee
Set ws = ThisWorkbook.Worksheets("Entire Sheet")
ws.Cells.WrapText = False
End Sub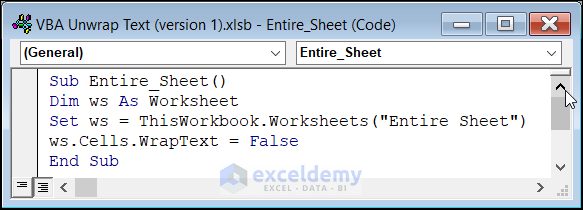
VBA Code Breakdown:
ws.Cells.WrapText = FalseThis line sets the “WrapText” property of all cells in the “ws” worksheet to “False”.
As soon as we run the code, the wrapped texts from different cells will be unwrapped.
Frequently Asked Questions
1. How do I clear text in VBA?
To clear text in VBA, you can use the Range.ClearContents method of the Range object. Here’s an example code snippet that demonstrates how to clear the contents of a cell:
Sub ClearText()
    Range("A1").ClearContents
End Sub
In the above example, the “ClearText” subroutine clears the contents of cell A1 in the currently active worksheet.
2. How do I wrap text in VBA?
You can wrap text in VBA using the WrapText property of a cell. The WrapText property allows you to set whether the text in a cell should be wrapped within the cell or displayed in a single line that extends beyond the cell boundaries.
Here’s an example code snippet that shows how to wrap text in a cell:
Sub wrapText()
    Range("A1").Select
    Selection.WrapText = True
End Sub
In this example, the code selects cell A1 and sets the WrapText property to True, which will cause any text in that cell to wrap within the cell.
3. What is break mode in VBA?
In VBA, break mode is a state that the code execution enters when an error occurs during the running of a macro. When VBA encounters an error, it will pause the execution of the code and enter break mode, allowing you to examine the state of the program and debug any issues that caused the error. While in break mode, the VBA editor displays the code at the line that caused the error and highlights the line in red to help you identify where the error occurred.
You can then use the debugging tools in the VBA editor to examine the values of variables and objects, step through the code line by line, or make changes to the code to fix any errors. In addition to being triggered by errors, you can also enter break mode manually by using the “Break” button on the VBA editor toolbar. This can be useful if you need to interrupt a long-running macro or if you want to pause the execution of a macro to examine the state of the program.
Once you have fixed any issues that caused the error, you can exit break mode and continue the execution of the macro by clicking the “Continue” button on the VBA editor toolbar. Alternatively, you can use the “Step Over” or “Step Into” buttons to move through the code one line at a time to ensure that your changes are correct before continuing the execution of the macro.
Download Practice Workbook
You can download the practice book here.
Conclusion
Here, we have learned about VBA codes to wrap text in Excel. After going through this article, users will have a clear idea about the Range.WrapText property. They will be able to unwrap texts from a column or a row or any range accordingly. We hope the content of this article has been useful to you. Feel free to mention your queries or suggestions in the comment section.
Related Articles
- How to Wrap Text in Merged Cells in Excel
- How to Wrap Text across Multiple Cells without Merging in Excel
- Excel Auto Fit Row Height for Wrap Text
- How to Write a Paragraph in Excel Cell
- [Solution:] Excel Wrap Text Not Working for Merged Cell
- Excel VBA to Wrap Text
- VBA to Wrap Text for Entire Sheet in Excel
<< Go Back to Wrap Text | Text Formatting | Learn Excel
Get FREE Advanced Excel Exercises with Solutions!
