This article will provide a proper guideline on how to unwrap text in Excel efficiently.
What Is Wrap Text in Excel?
In Excel, wrapping text is a feature by which a cell can be made to display all the information inside it, even if this data overflows the cell boundary. The wrap text feature adjusts the cell width according to the length of the cell contents, as in the example below.
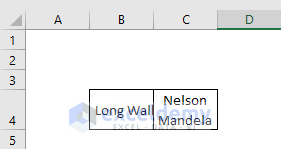
Here, cells B4 and C4 have different alignments. The wrap text feature applied in cell C4 increased the column width and displays all the text in two lines, whereas in cell B4 we didn’t use the wrap text feature, which is why the text is cut off at the cell border.
How to Unwrap Text in Excel: 4 Methods
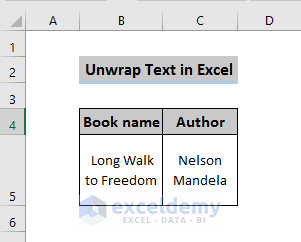
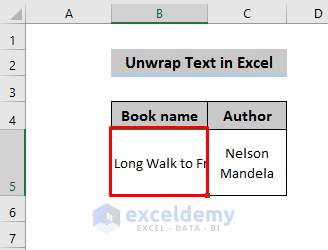
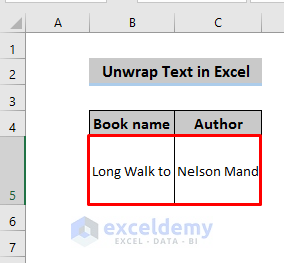
To illustrate our methods (two using Excel functions and the other two using VBA codes), we’ll use the following dataset that includes the Book Name and Author. The dataset has had the Wrap Text feature applied to it.
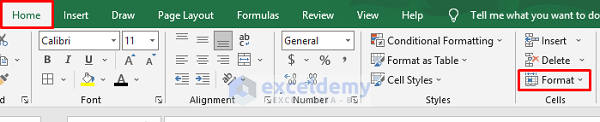
Method 1 – Using the Home Tab to Unwrap Text
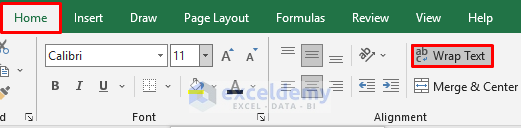
The most common way to unwrap text is to use a ribbon option on the Home tab.
Steps:
- Select the cell/s to unwrap.
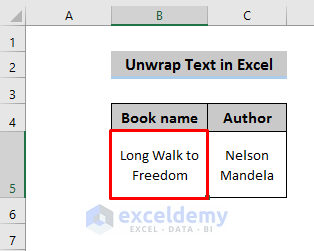
- Go to the Home tab in the ribbon, and in the Alignment section click on the Wrap Text option.
- The text in the cell is unwrapped, as evidenced by the contents no longer fitting within the cell boundaries..

Method 2 – Unwrapping Text Using Format Cells
Our next method to unwrap text in Excel is by using Format Cells.
There are 3 ways to open the Format Cells feature:
Keyboard Shortcut:
Press Ctrl + 1 and the Format Cells box will pop up.
Format Cells Option:
Select the text to unwrap, right-click on it, and select Format Cells from the context menu.
From the Home Tab:
Select the Home tab in the ribbon, then select the Format option from the Cells section.
Steps:
- Open Format Cells using any of the above methods.
A Format Cells box will pop up.
- Tick the Alignment tab and untick Wrap text.
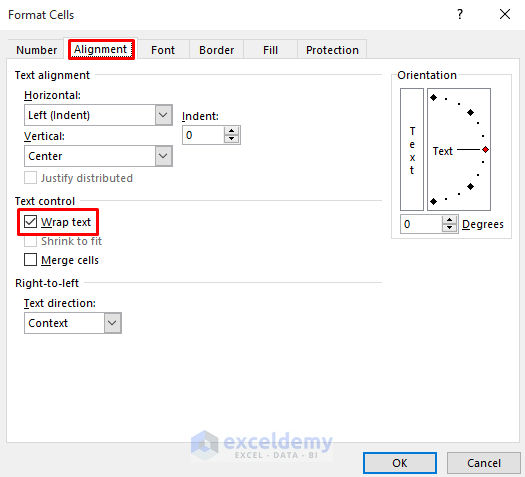
- Click OK to remove the Wrap text feature from the selected cell.
Method 3 – Using VBA Code to Unwrap Text
We can use VBA to unwrap text.
Steps:
- Open the Developer tab.
- If you don’t see it, display the Developer tab on the ribbon by Customizing the Ribbon, or use the keyboard shortcut Alt+F11.
- In the VBA interface that opens, select the Insert tab and then the Module option.
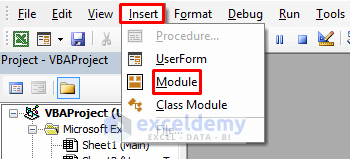
- In the Module window, enter the following code:
Sub Unwrap_Text()

'unwrap text in cell B5 in worksheet named Using_VBA

Worksheets("Using VBA").Range("B5").WrapText = False
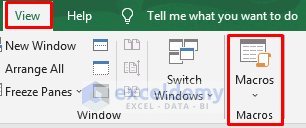
End Sub- Select the View tab and click on Macro.
The Macro option is also available on the Developer tab.
- Select Unwrap Text from the Macro window and click Run
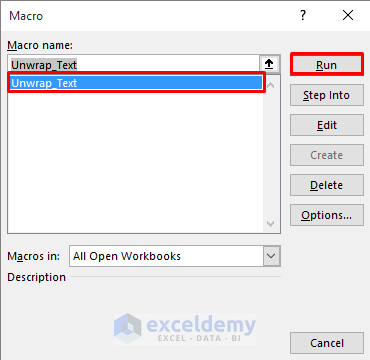
All the wrapped text will be replaced by unwrapped text.

Method 4 – Using VBA Code to Unwrap Text in Selected Cells
For our last method, we’ll use VBA code to unwrap text in multiple cells.
Steps:
- Like in the previous method, open a new Module window.
- In the Module window, enter the following code:
Sub Unwrap_Text_for_cells()

'unwrap text in selected cells

Range("B5:C5").WrapText = False

End Sub- Open the Macro window from the View or Developer tabs.
- Select Unwrap_Text_for_cells and click on Run.
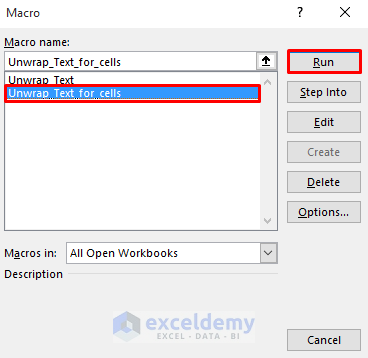
The text is unwrapped in the selected cells.
Download Practice Workbook
Related Articles
- Wrap Text Shortcut Key in Excel
- How to Make Text Automatically Wrap Around in Excel
- [Fix] Wrap Text Not Working in Excel: 4 Possible Solutions
- [Fixed] Wrap Text Not Showing All Text in Excel
- [Fix]: Excel Wrap Text Cutting off Words
<< Go Back to Wrap Text | Text Formatting | Learn Excel
Get FREE Advanced Excel Exercises with Solutions!
