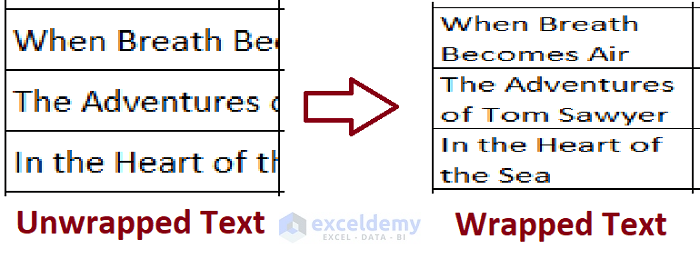
What is Text Wrapping?
Text wrapping refers to converting single-line text into multiple lines to better display cell contents to users.
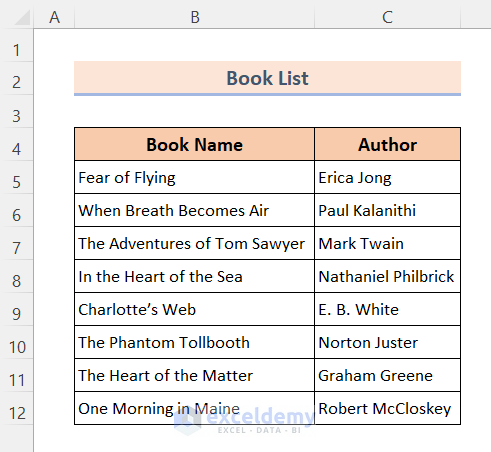
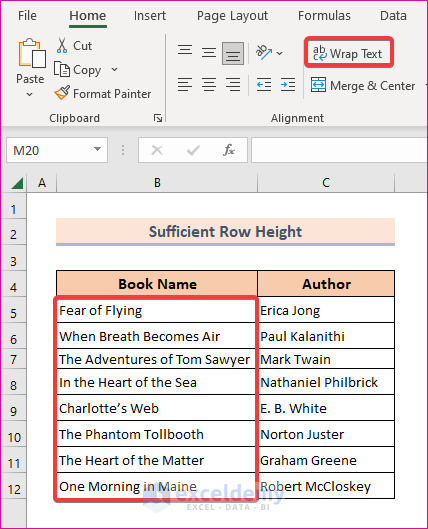
Dataset Overview
We’ll use a Book List as a data table to demonstrate the methods to wrap text in Excel.
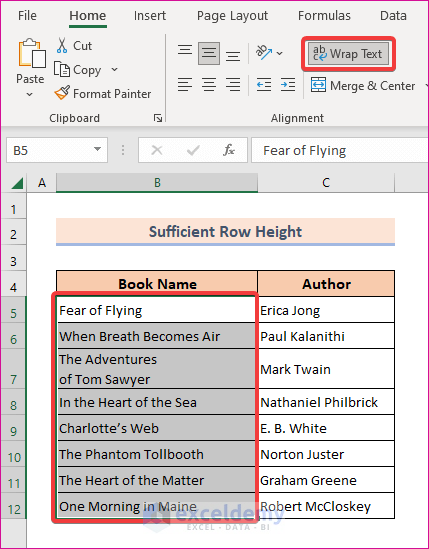
Shortcut Key 1 – Automatic Text Wrapping
To wrap text in Excel, use the built-in Wrap Text tool found in the Alignment group under the Home ribbon. Alternatively, you can quickly wrap text using the keyboard shortcut:
Steps
- Select the cell range where you want to apply text wrapping.
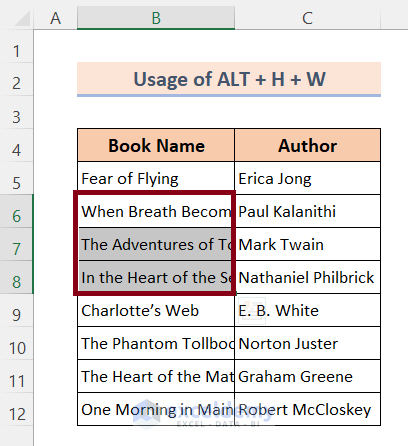
- Press ALT + H + W sequentially.
Herewith the results: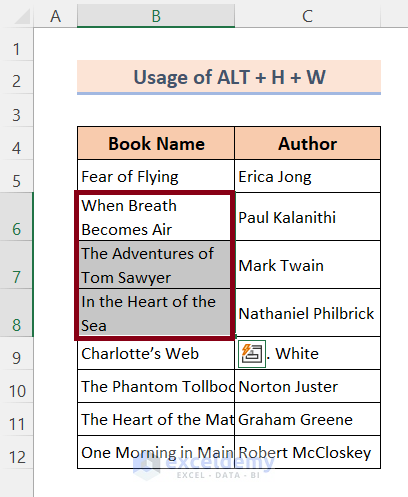
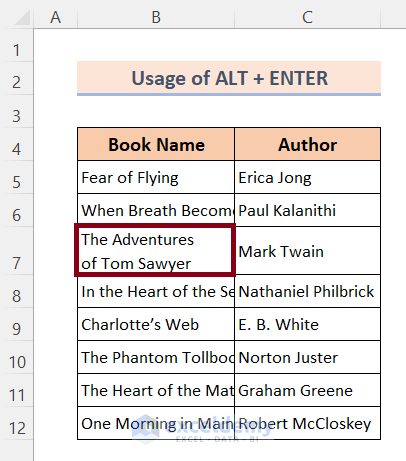
Shortcut Key 2 – Line Break for Text Wrapping
For breaking long single-line text into multiple lines, use this keyboard shortcut:
Steps:
- Place your cursor on the text where you want the line break.
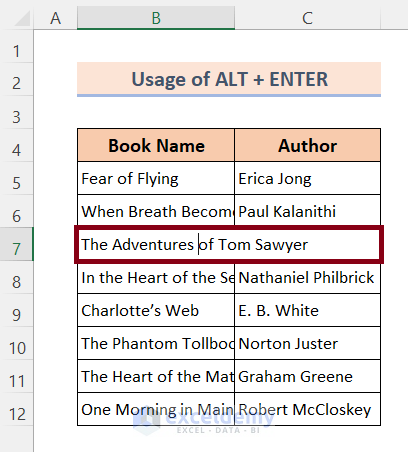
- Press ALT + ENTER.
- Press ENTER to finish.
Shortcut Key to Unwrap Text
- Select the cell range.
- Press the ALT + H + W keys together or click the Wrap Text command under the Home ribbon.
Troubleshooting Text Wrapping Issues
If text remains invisible after applying wrapping, consider these solutions:
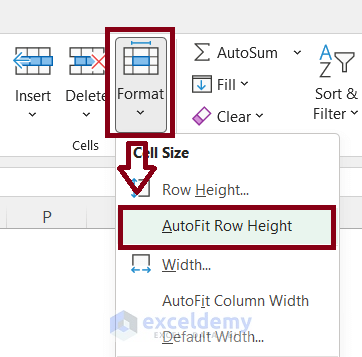
1. AutoFit Row Height
Ensure row height is sufficient.
- Select the cell.
- Go to the Home ribbon.
- Click on Format.
- Choose AutoFit Row Height.
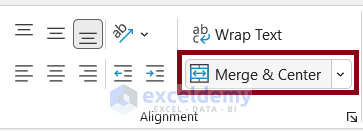
2. Disable Merge & Center
If applied, disable the Merge & Center command.
- Select the cell.
- Go to the Home ribbon.
- Click on Merge & Center.
3. Force Apply Wrap Text
To force apply the wrap text feature:
- Turn the Wrap Text command off.
- Then turn it on.
4. Adjust Horizontal Alignment
To prevent spilling over into the next cell, user may set Fill for Horizontal Alignment. In this case the wrap text feature won’t work. To disable this functionality,
- Open the Format Cells dialog box by pressing the CTRL + 1.
- Go to the Alignment tab.
- Set General under the Horizontal option.
- Click OK.

Read More: [Fix] Wrap Text Not Working in Excel: 4 Possible Solutions
Things to Remember
ALT + H + W applies the Wrap Text command.
ALT + ENTER inserts a line break in text.
Download Practice Workbook
You can download the practice workbook from here:
Related Articles
- How to Make Text Automatically Wrap Around in Excel
- [Fixed] Wrap Text Not Showing All Text in Excel
- [Fix]: Excel Wrap Text Cutting off Words
<< Go Back to Wrap Text | Text Formatting | Learn Excel
Get FREE Advanced Excel Exercises with Solutions!
