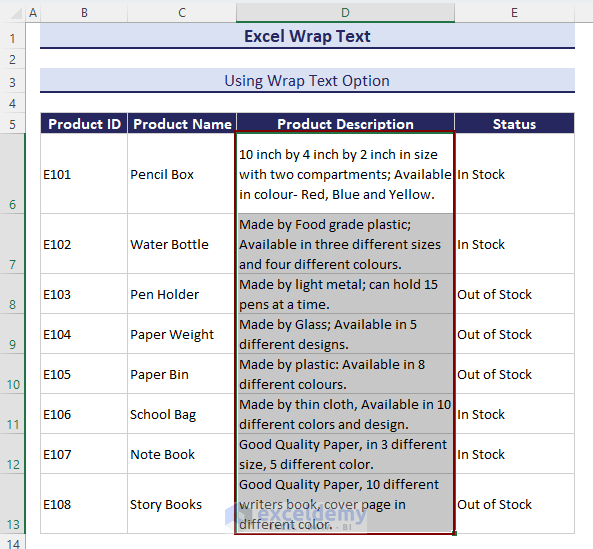
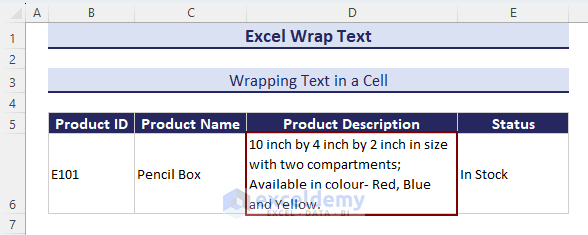
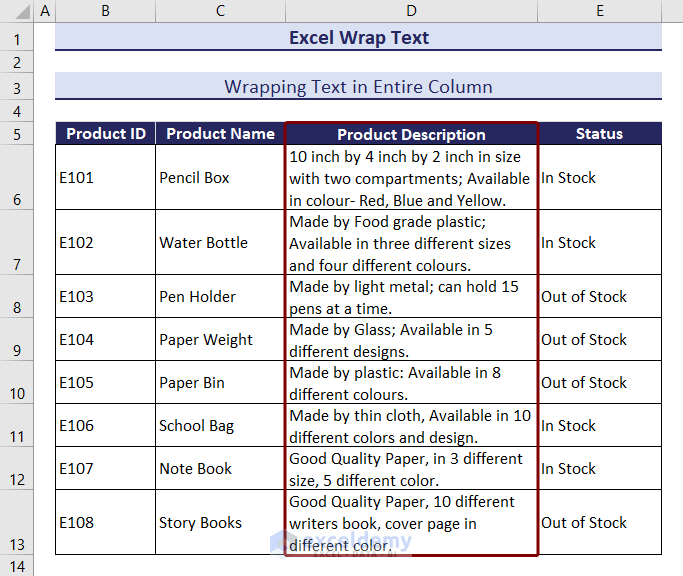
Method 1 – Using the Wrap Text Option from the Home Tab
- Select range D6:D13.
- Go to the Home tab.
- Click on Wrap Text in the Alignment group.

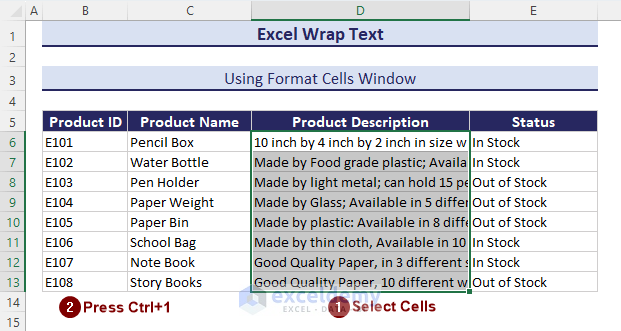
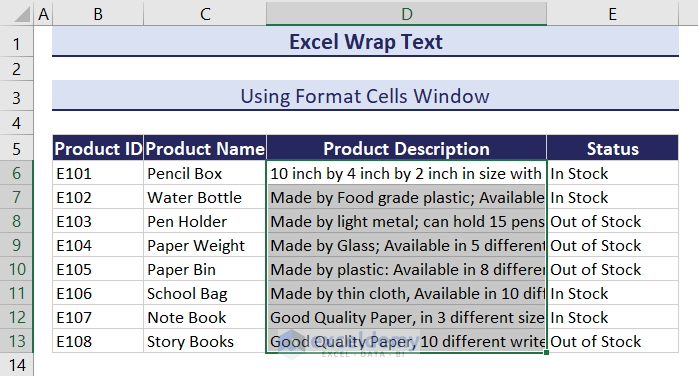
Method 2 – Using the Format Cells Dialog Box
- Select the desired range (e.g., D6:D13).
- Press Ctrl+1 to open the Format Cells dialog box.
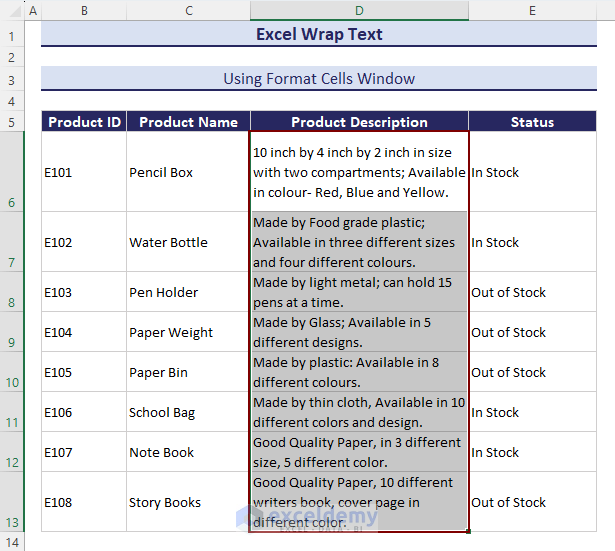
- Go to the Alignment tab.
- Check Wrap Text under Text Control and click OK.

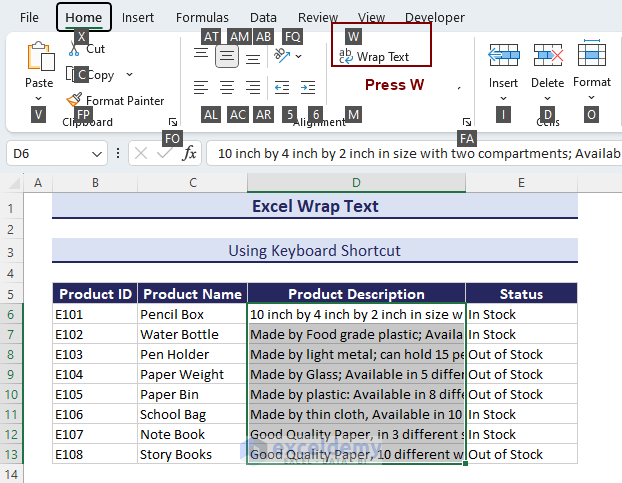
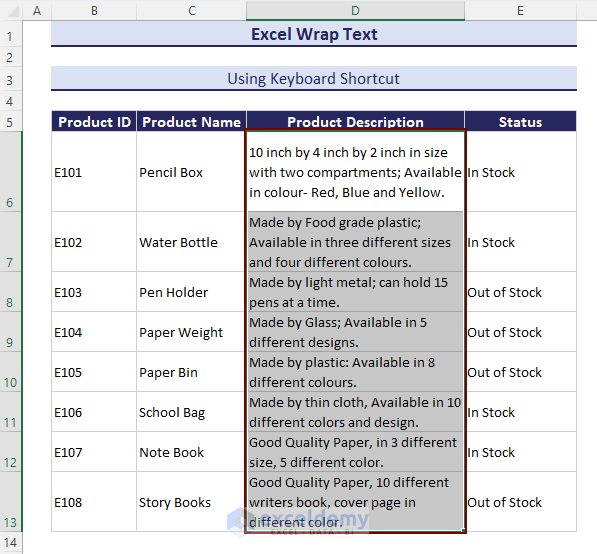
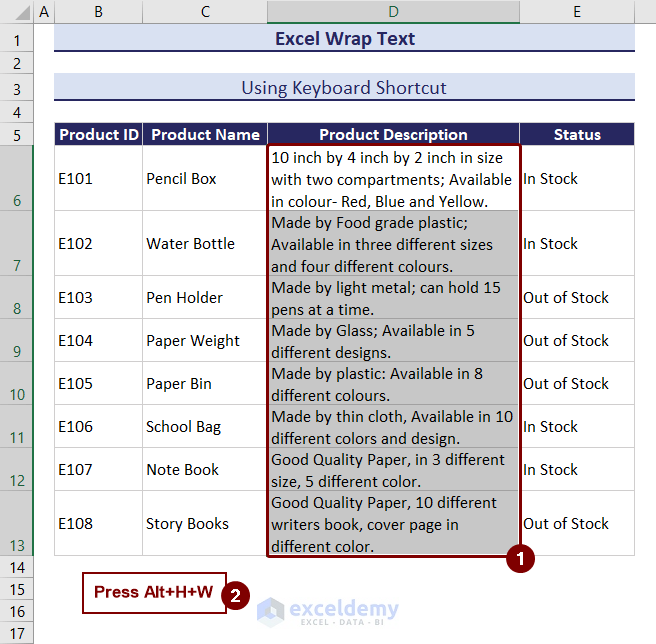
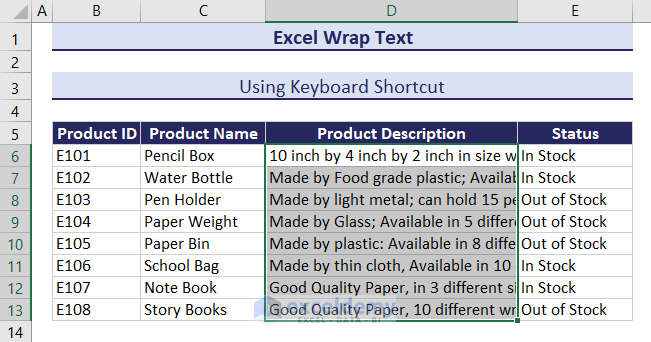
Method 3 – Using the Keyboard Shortcut
You can easily apply the wrap text command using a shortcut key in Excel:
- Select the range D6:D13.
- Press Alt+H.
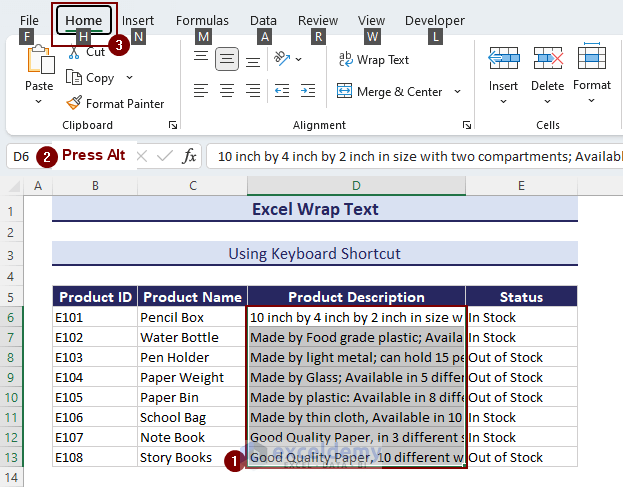
- Press W to apply Wrap Text.
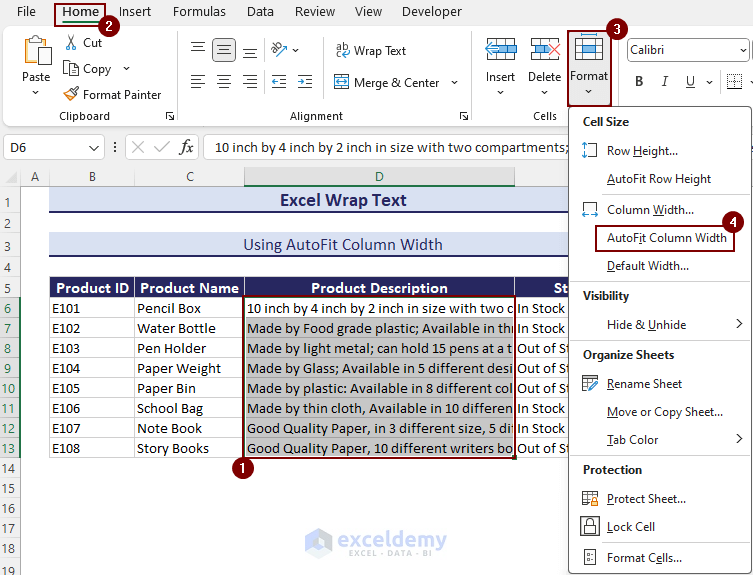
Method 4 – Using the AutoFit Column Width Option
To display the entire text inside a cell, follow these steps:
- Select the cells where you want to wrap text (e.g., D6:D13).
- Go to the Home tab.
- Expand the Format option from the Cells group.
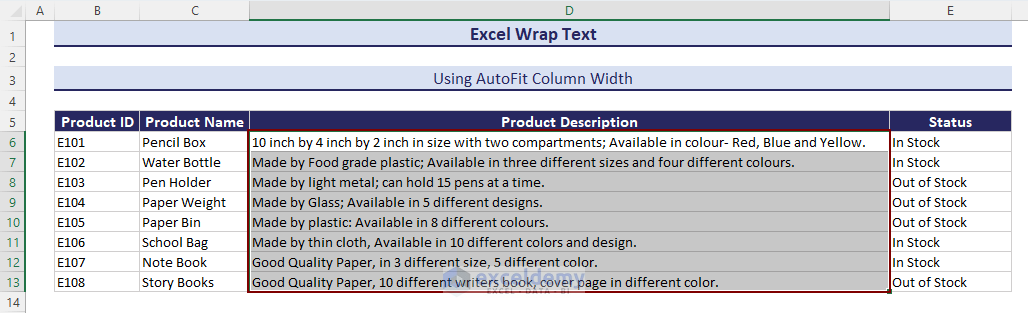
- Choose AutoFit Column Width.
Click the image to get a better view
Click the image to get a better view
How To Wrap Text Manually in Excel
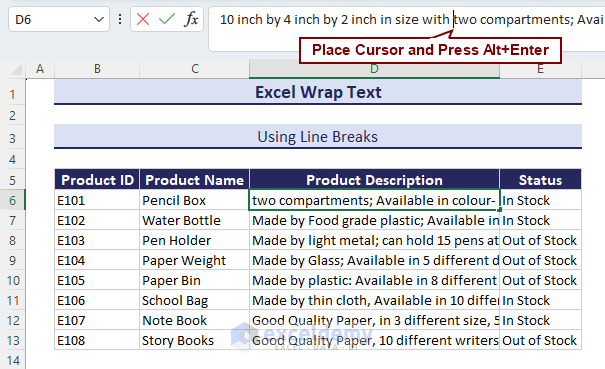
Insert Line Breaks to Manually Wrap Text
You can manually wrap text by inserting line breaks. Although this method takes longer, it can be useful in specific cases:
- Select a cell and go to the Formula bar.
- Place the cursor where you want to insert a line break.
- Press Alt+Enter.
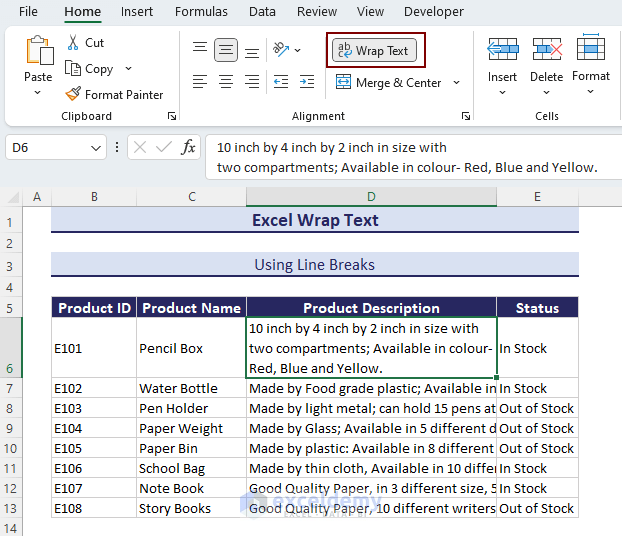
- After inserting the line breaks, press Enter.
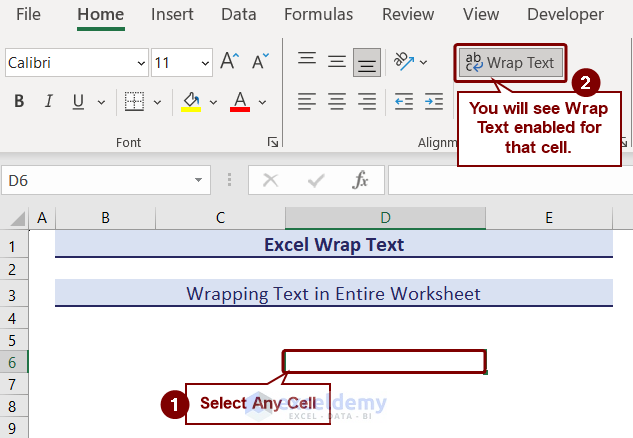
Now, if you select cell D6, you’ll see that the Wrap Text feature is enabled.
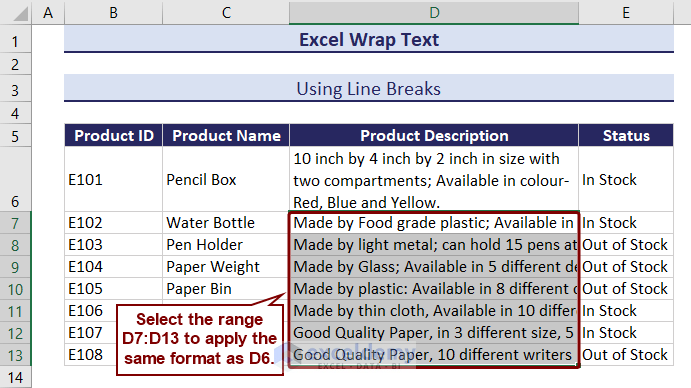
You can apply the same format to other cells using Format Painter.
- Select cell D6.
- Go to Home and click on Format Painter.

- Select the range D7:D13 to apply the same format as D6.
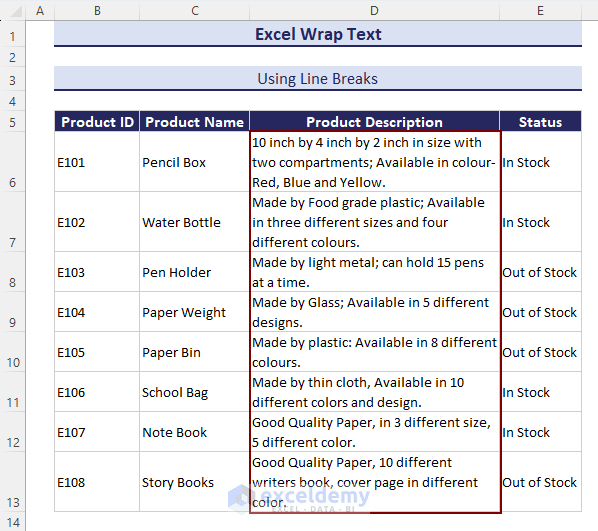
We have applied the Wrap Text feature manually.
Removing Manual Line Breaks
To remove manual line breaks:
- Place the cursor where a new line starts.
- Press Backspace to remove line breaks one by one.
If you need to remove line breaks from multiple cells at once:
- Select the intended cells and press Ctrl+H.
- In the Find and Replace window, place your cursor in the Find what section and press Ctrl+J.
- Keep the Replace with section empty and click Replace all.
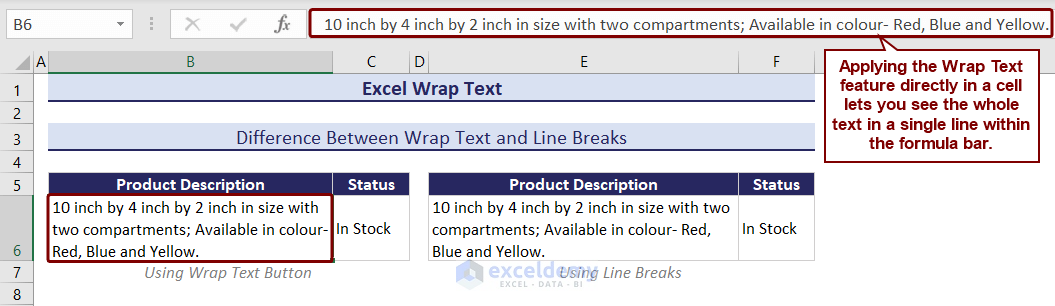
Differences Between Wrap Text Feature and Line Breaks
There’s an interesting difference between the Wrap Text feature and line breaks:
- Applying the Wrap Text feature directly in a cell displays the whole text in a single line within the formula bar.
Click the image to get a better view
Click the image to get a better view
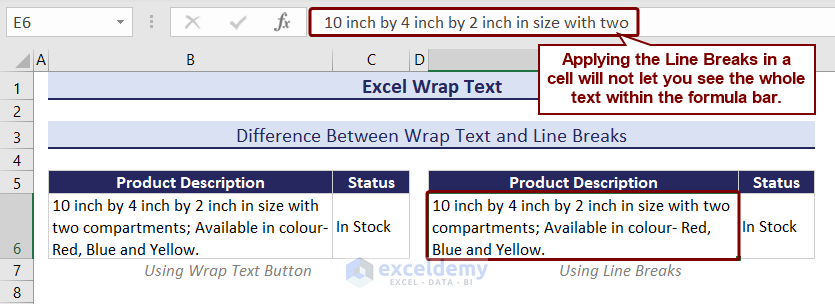
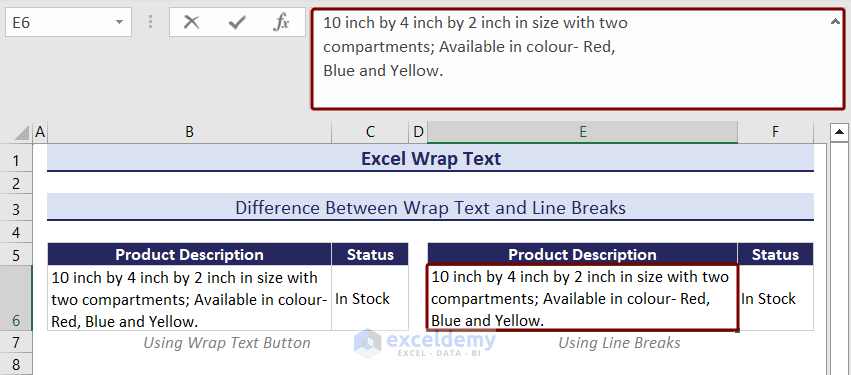
- Using line breaks won’t show the entire text within the formula bar; you’ll need to expand it to see the full content.
Click the image to get a better view
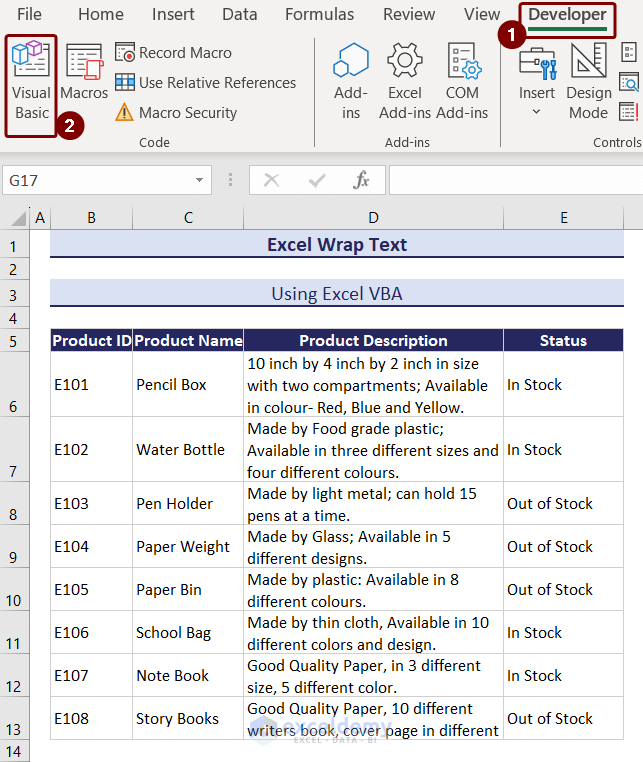
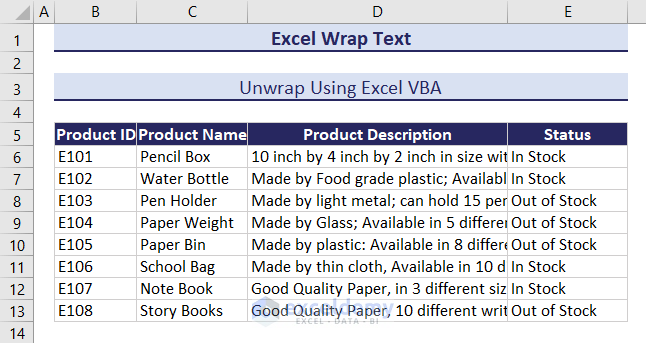
How to Wrap Text Using Excel VBA
We will use Excel VBA wrap text to wrap text in cells, ranges, rows, columns, or entire worksheets:
1. Wrapping Text in a Cell
- Activate the intended sheet.
- Go to Developer and click on Visual Basic.
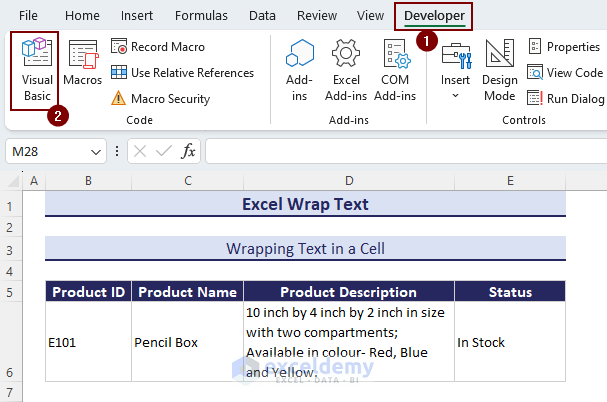

- Insert the following code in a Module and run it:
Sub WrapCell()
    Cells(6, 4).WrapText = True
End Sub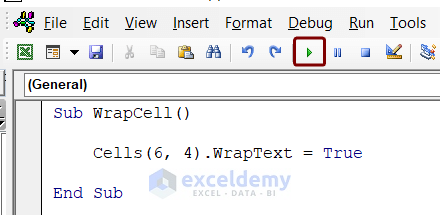
Alternatively, you can use this code:
Sub WrapCellAlternative()
    Range("D6").WrapText = True
End Sub
As a result, we can see that the Wrap Text feature is enabled for cell D6.
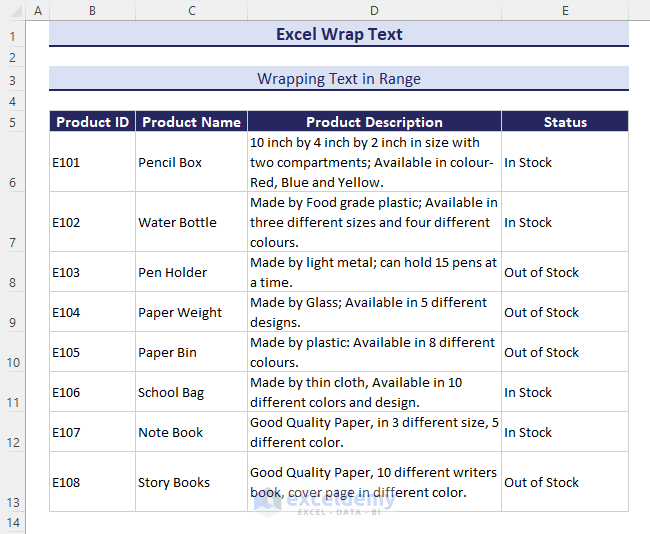
2. Wrapping Text in Range (e.g., D6:D13)
- Activate the intended sheet.
- Navigate to Developer and click on Visual Basic.
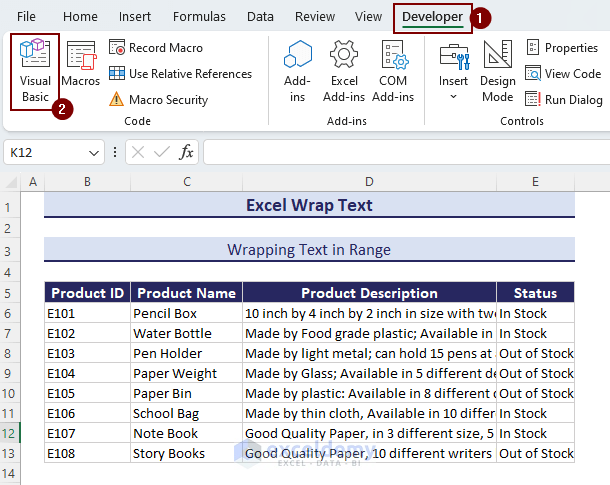
- Insert the following code in a module and run it:
Sub WrapRange()
    Range("D6:D13").WrapText = True
End Sub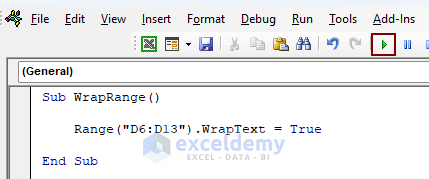
You have successfully enabled the Wrap Text feature for the specified cell range.
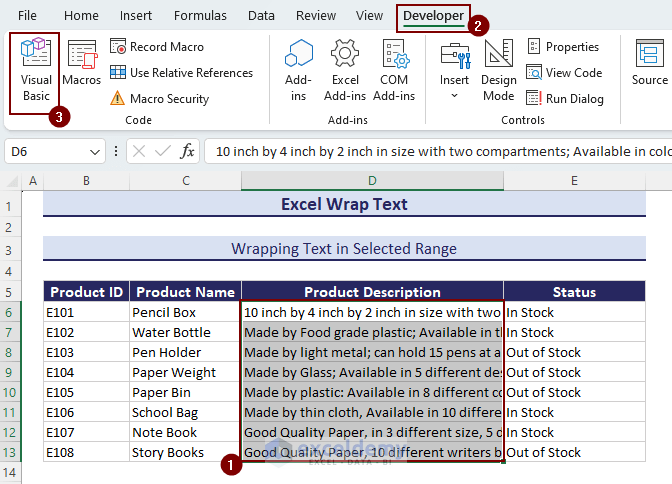
3. Wrapping Text in a Selected Range
To apply the wrap text feature to a selected range, follow these steps:
- Select the range D6:D13.
- Go to the Developer tab and click on Visual Basic.
- In the VBA Editor window, insert the following code in a new module:
Sub WrapSelectedRange()
    Dim selectedRange As Range
    Dim cell As Range
    If Selection.Cells.Count = 1 Then
        Set selectedRange = ActiveSheet.UsedRange
    Else
        Set selectedRange = Selection
    End If
    For Each cell In selectedRange
        cell.WrapText = True
    Next cell
    Selection.Rows.AutoFit
End Sub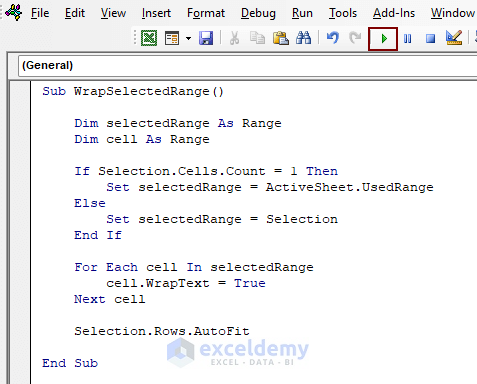
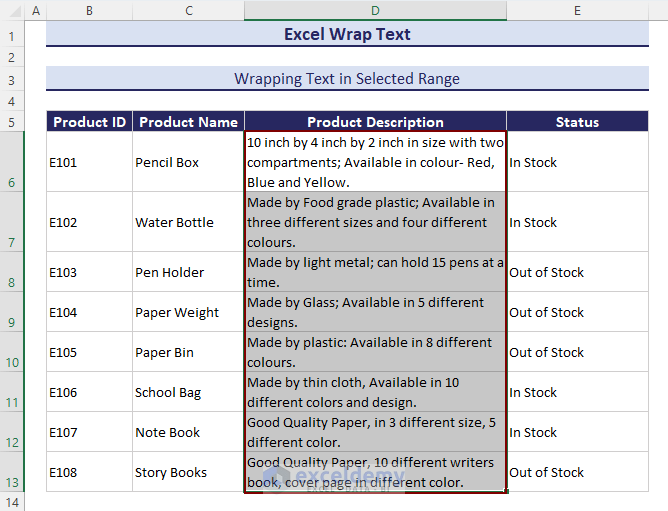
- You’ll see that the Wrap Text feature is enabled for the selected range.
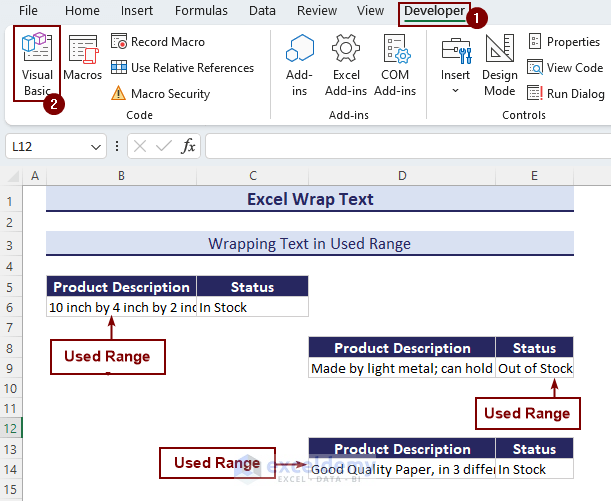
4. Wrapping Text in Used Range
- Go to the Developer tab and click on Visual Basic.
- In the VBA Editor window, insert the following code in a new module and run it:
Sub WrapUsedRange()
    Dim ws As Worksheet
    Set ws = ThisWorkbook.Sheets("In Used Range (VBA)")
    ws.UsedRange.WrapText = True
End Sub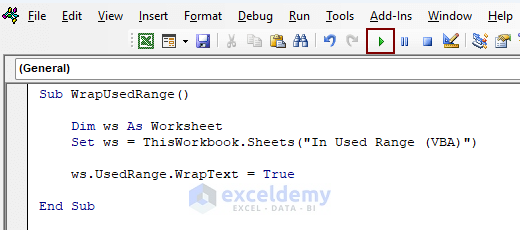
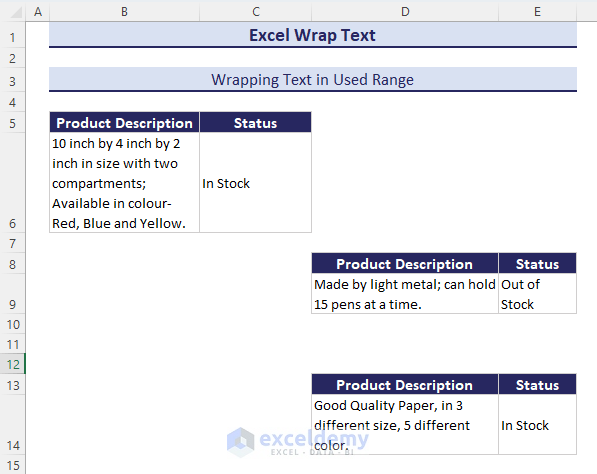
- Select any cell within the Used Range, and you’ll see that the Wrap Text feature is enabled.
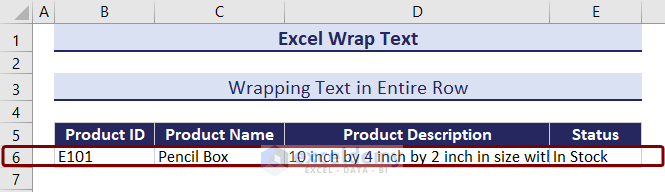
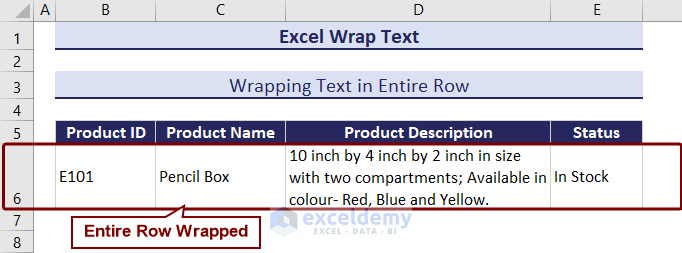
5. Wrapping Text in Entire Row (e.g., row 6)
- Open the VBA Editor.
- Click on Insert and choose Module.
- Insert the following code and run it:
Sub WrapEntireRow()
    Dim ws As Worksheet
    Set ws = ThisWorkbook.Sheets("In Entire Row (VBA)")
    ws.Range("6:6").WrapText = True
End Sub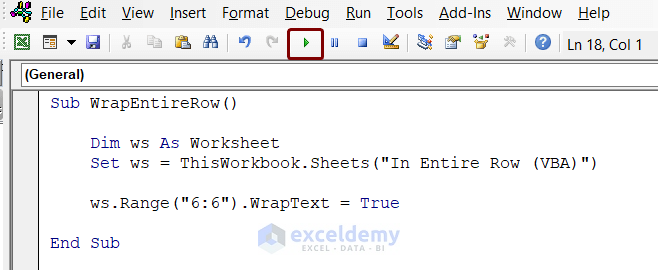
Make sure to adjust the sheet name (In Entire Row (VBA)) in the code to match your workbook.
You can see that the text in Row 6 is wrapped.
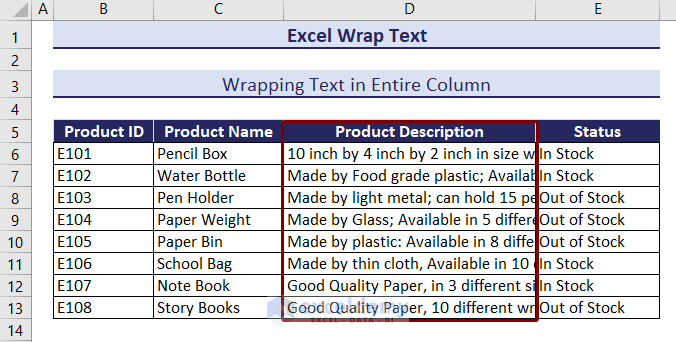
6. Wrapping Text in Entire Column (e.g., Column D)
- In the Visual Basic Editor window, click on Insert and choose Module.
- Paste the following code and run it:
Sub WrapEntireColumn()
    Range("D:D").WrapText = True
End Sub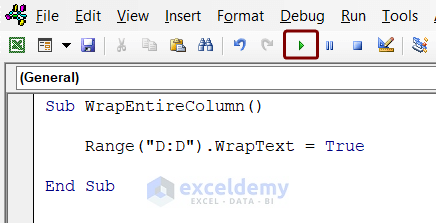
- Insert long text within any cell of Column D to see the result.
7. Wrapping Text in an Entire Worksheet
- Open the VBA Editor.
- Click on Insert and choose Module.
- Insert the following code and Run it.
Sub WrapEntireWorksheet()
    Dim ws As Worksheet
    Set ws = ThisWorkbook.Sheets("In Entire Worksheet (VBA)")
    ws.Cells.WrapText = True
End Sub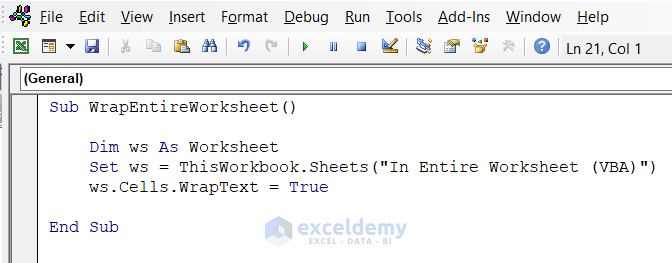
- Select any cell within that sheet to verify that the Wrap Text feature is enabled.
You can also loop through all sheets in a workbook and apply Wrap Text using the following code:
Sub WrapAllWorksheets()
    Dim ws As Worksheet
    For Each ws In ActiveWorkbook.Worksheets
       Cells.WrapText = True
    Next ws
End Sub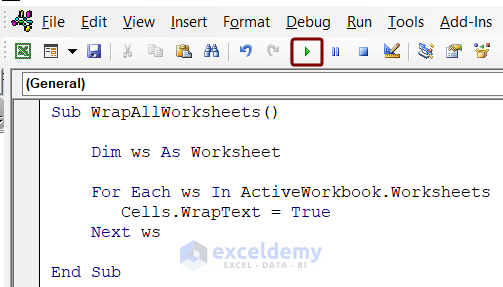
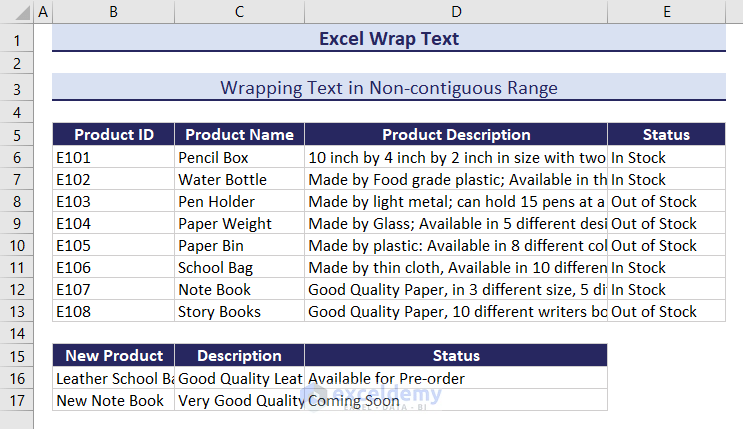
8. Wrapping Text in Non-contiguous Range
- Go to Developer and select Visual Basic.
- Click on Insert and select Module.
- Paste the following code and Run it.
Sub WrapNoncontiguousRange()
    Range("D6:D13,C16:C17").WrapText = True
End Sub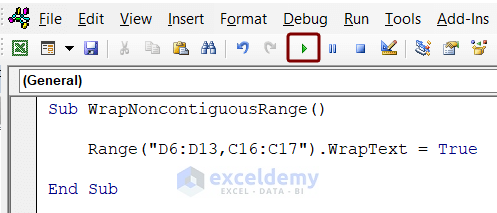
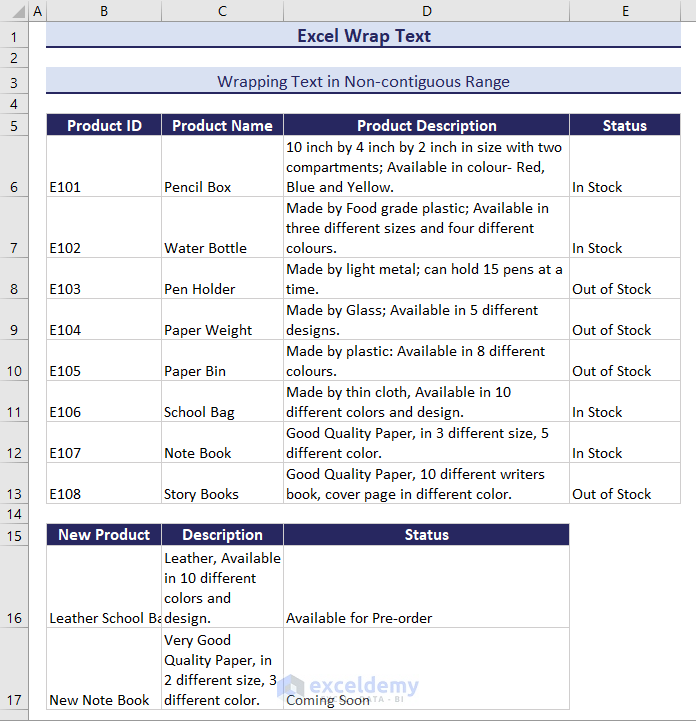
- You’ll see that Wrap Text is enabled for the D6:D13 and C16:C17 ranges.
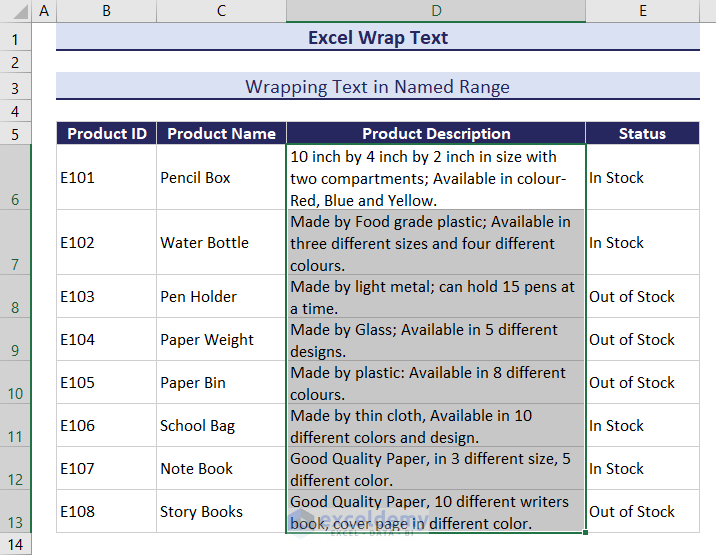
9. Wrapping Text in Named Range
- Select the D6:D13 range and type Product Description in the Name Box to create a Named Range.

- Insert a Module in Visual Basic Editor.
- Then, insert the following code and Run it.
Sub WrapUsedRange()
    Dim ws As Worksheet
    Set ws = ThisWorkbook.Sheets("In Used Range (VBA)")
    ws.UsedRange.WrapText = True
End Sub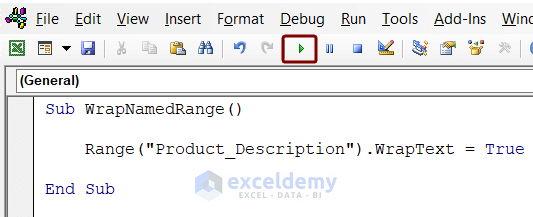
The Wrap Text feature will now be applied to the Named Range.
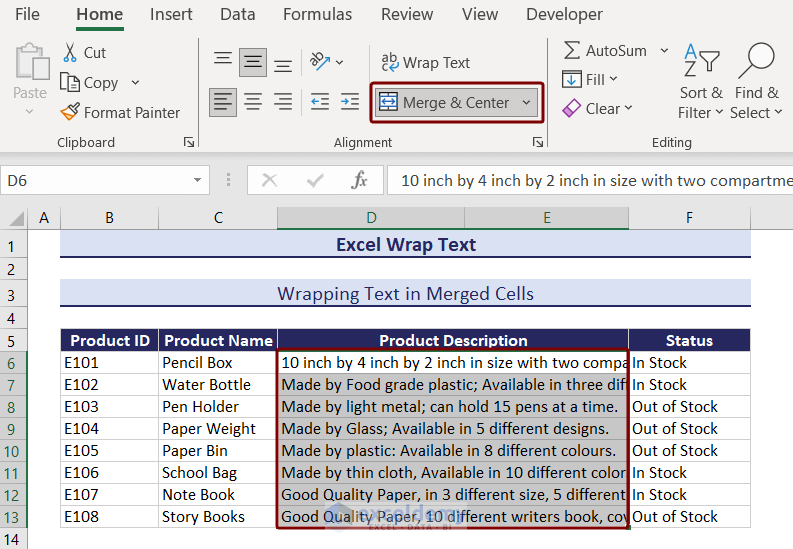
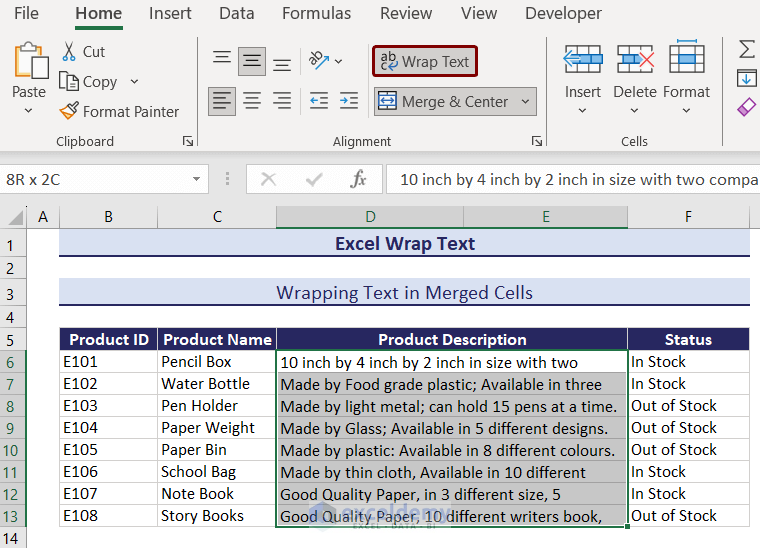
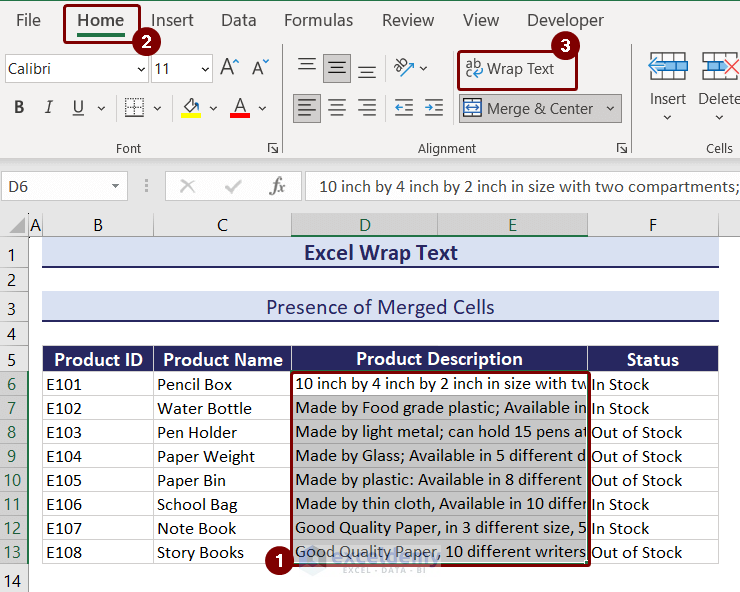
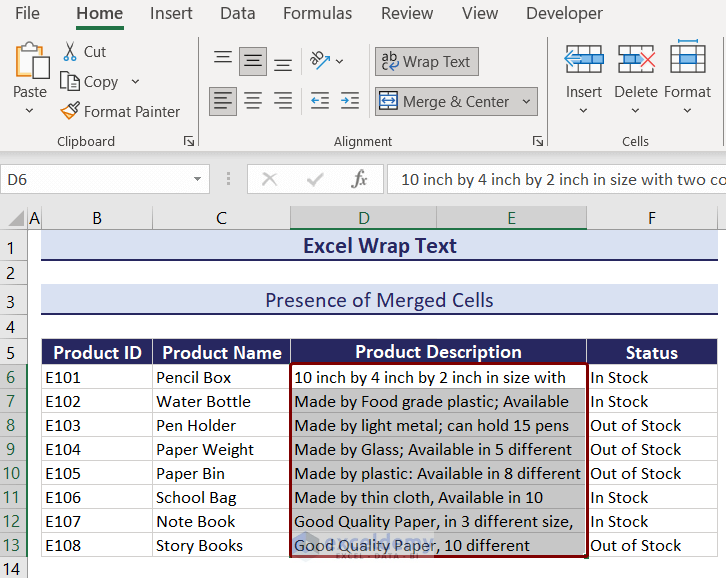
How to Wrap Text in Merged Cells in Excel
When dealing with merged cells in Excel, wrapping text becomes essential to ensure that all content is visible. Follow these steps to wrap text in merged cells:
Click the image to get a better view
- Select the Merged Cells:
- Identify the merged cells where you want to wrap the text (e.g., cells in the Product Description column).
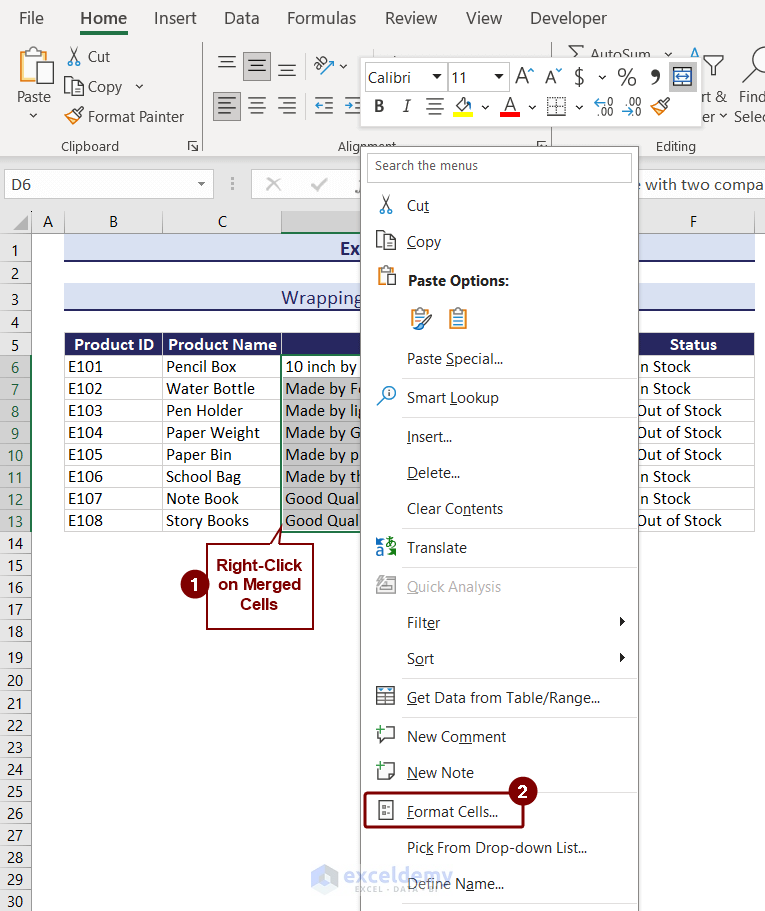
- Right-click on the selected merged cells to open the context menu.
- Format Cells:
- Click on Format Cells from the context menu.
Click the image to get a better view
-
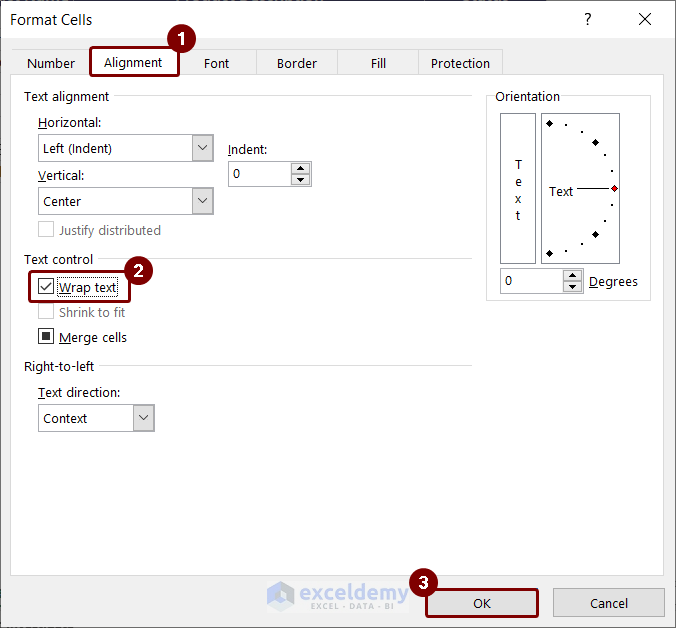
- The Format Cells dialog box will appear.
- Enable Text Wrapping:
- In the Format Cells dialog box, navigate to the Alignment tab.
- Check the Wrap text box under the Text control section.
- Click OK to apply the changes.
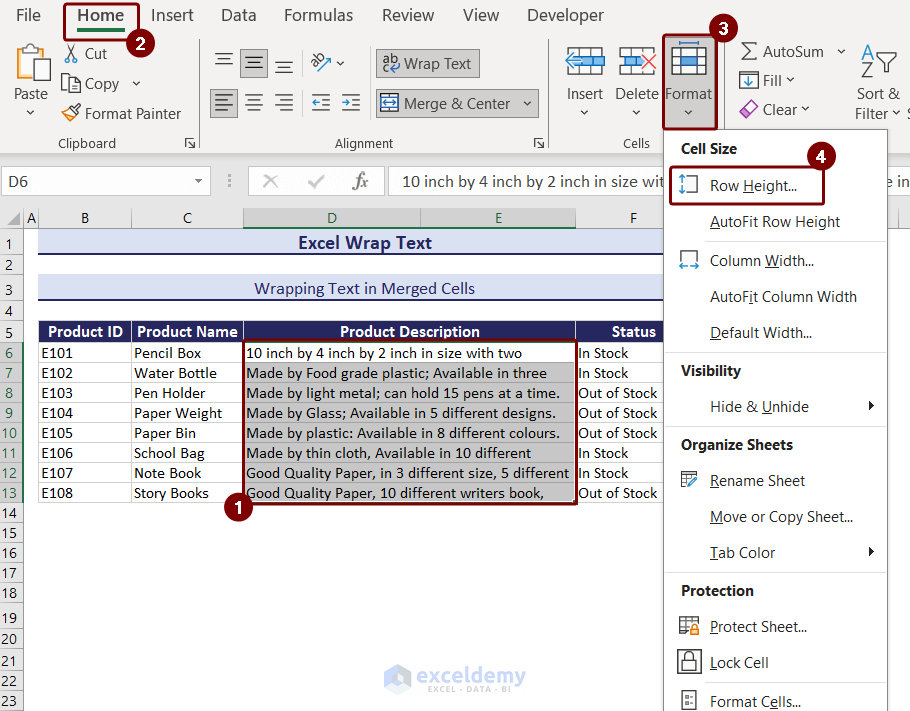
- Adjust Row Height:
- By default, the wrapped text may not be fully visible due to the row height.
Click the image to get a better view
-
- Select the cells (e.g., D6:D13) containing the wrapped text.
- Go to the Home tab and expand the Format option.
- Choose Row Height under Cell Size.
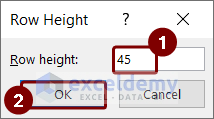
Click the image to get a better view
-
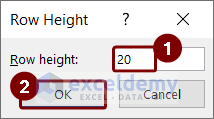
- Set Row Height to 45 to ensure the wrapped text is fully visible.
- Press OK.
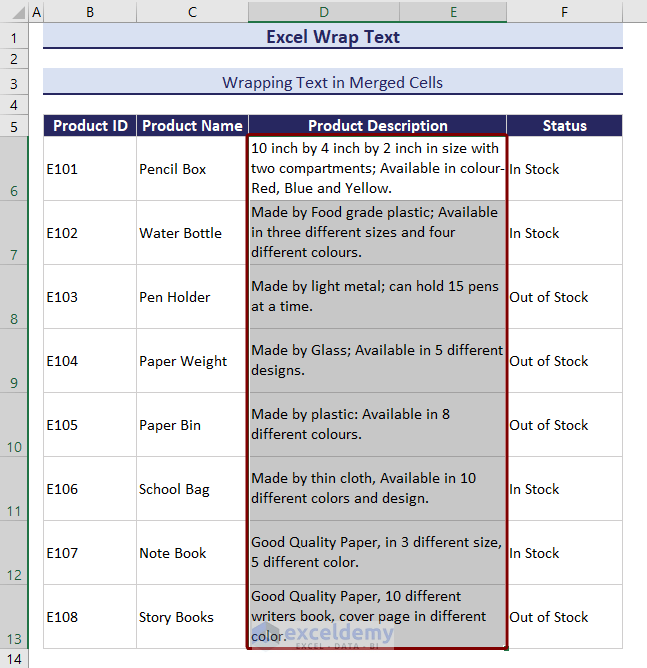
You’ll be able to see all the wrapped text in the merged cells.
How Do You Wrap Text on a Mac?
On a Mac, we can wrap text by going to the Format menu after choosing the cells. Check the Wrap Text box and click OK.
How to Unwrap Text in Excel
To remove text wrapping (i.e., unwrap text) in Excel, consider the following methods:
Method 1 – Deselect Wrap Text Option
- Select the intended cells.
- Go to the Home tab.
- Deselect the Wrap Text option.
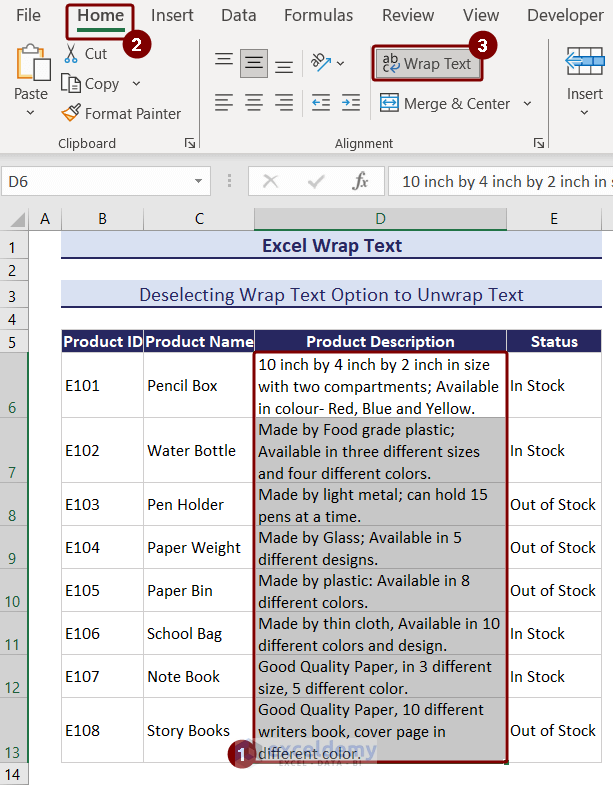
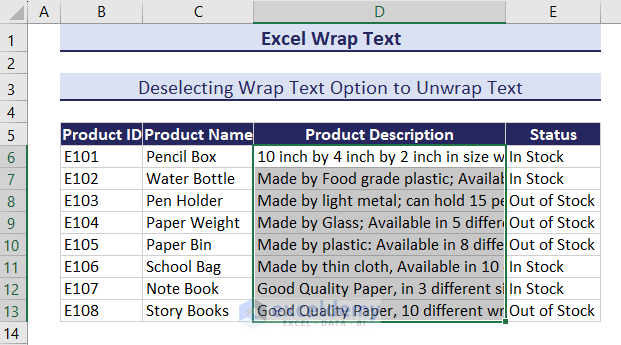
- This will revert the text to its original single-line format.
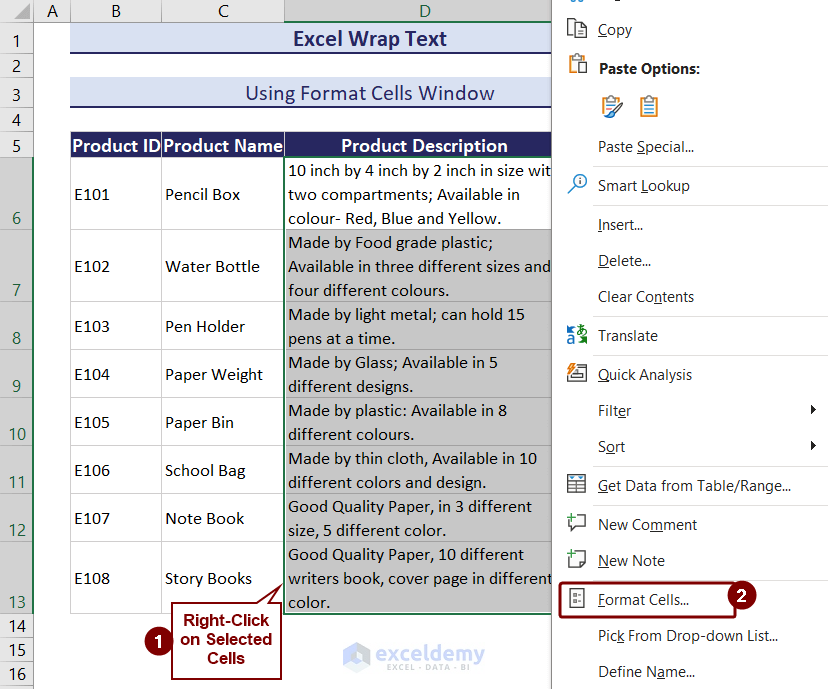
Method 2 – Use Format Cells Window
- Right-click on any selected cell.
- Choose Format Cells.
Click the image to get a better view
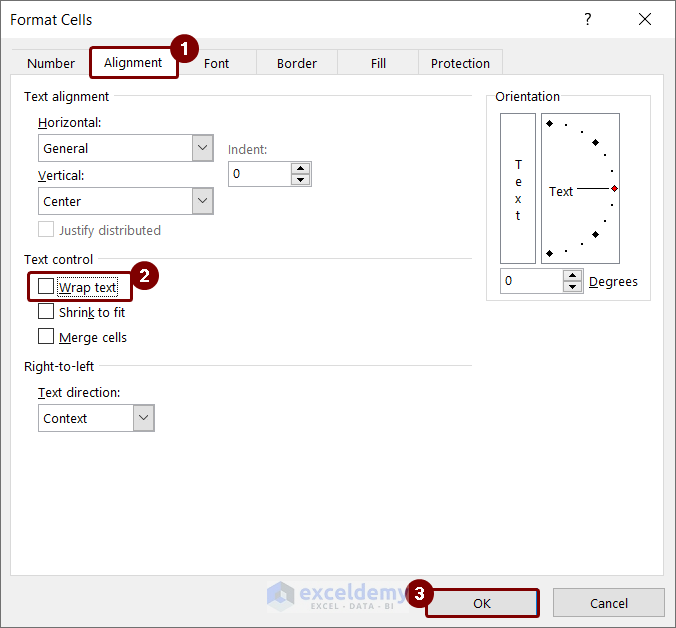
- In the Format Cells window, go to the Alignment tab.
- Uncheck Wrap Text under Text Control.
- Click OK.
You’ll be able to see all the wrapped text in the merged cells.
Method 3 – Apply a Keyboard Shortcut
- Select the desired cells.
- Press Alt+H+W to remove text wrapping.
As a result, the output will look like this:
4. Using Excel VBA
If you prefer automation, use VBA (Visual Basic for Applications):
- Go to the Developer tab and select the Visual Basic option.
- Insert a Module in Visual Basic Editor.
- For example, to unwrap text in range D6:D13, insert the following code in a module:
Sub UnwrapUsingVBA()
Range("D6:D13").WrapText = False
End Sub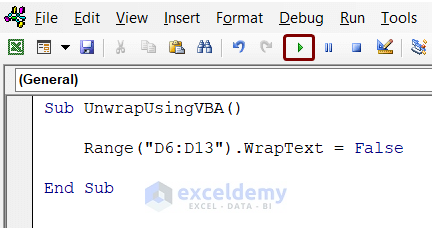
- Run the code by pressing the Run button or F5.
The wrapped text is unwrapped.
Why Is the Wrap Text Feature Not Working in Excel?
There are common reasons why the Wrap Text feature may not work as expected:
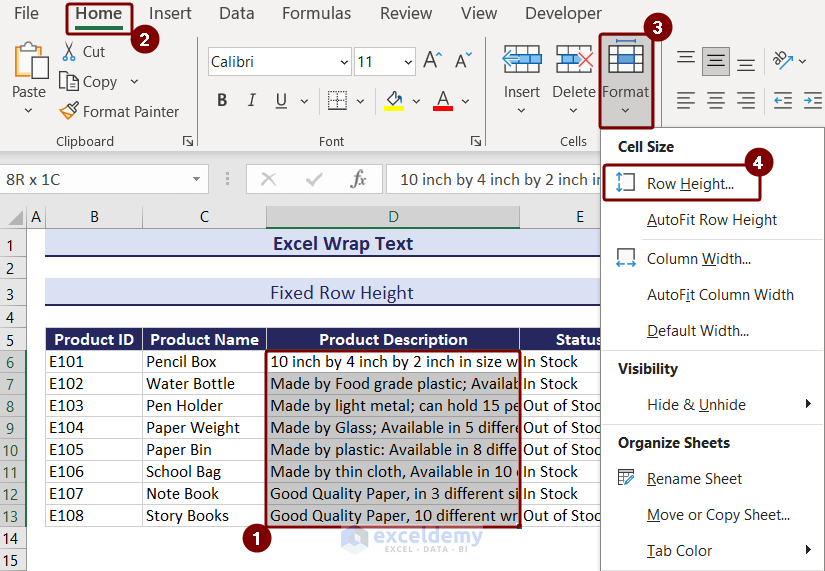
Reason 1: Fixed Row Height
- If you manually set the Row Height of a cell, the Wrap Text feature will not work for that cell.
- To resolve this, select range D6:D13, go to Home, select Format, click on Row Height, and choose an appropriate height.
Click the image to get a better view
- Alternatively, use AutoFit Row Height to adjust the row height automatically.
Reason 2: Presence of Merged Cells
- The Wrap Text feature doesn’t work on merged cells.
- You must choose between merging cells or applying text wrapping.
- If needed, follow the extended steps mentioned in the article to combine both options.
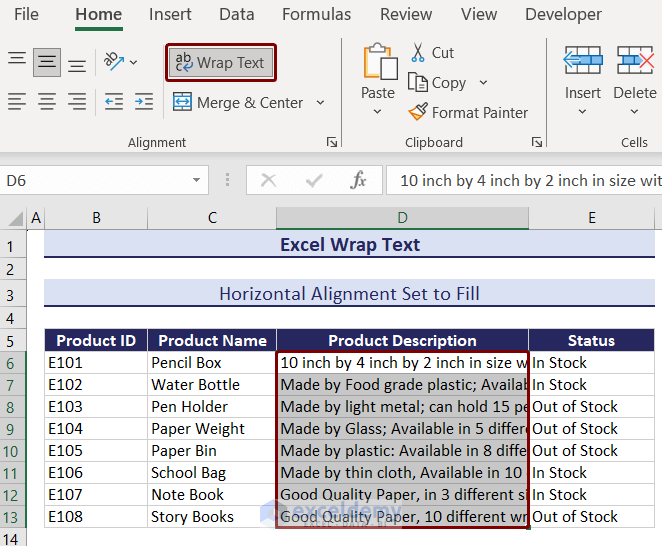
Reason 3: Horizontal Alignment Set to Fill
Another factor that can prevent text wrapping from working is the horizontal alignment being set to Fill. Even if the Wrap Text option is enabled, the text won’t wrap properly.
To address this issue:
- Select the cells where you want text wrapping to work.
- Press Ctrl+1 to open the Format Cells dialog box.
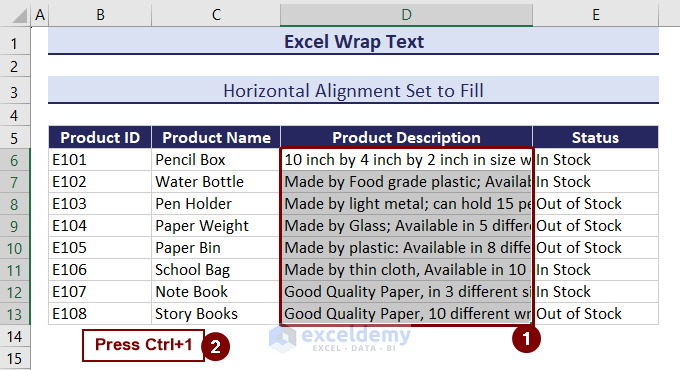
- Go to the Alignment tab.
- In the Text Alignment section, check the horizontal alignment setting.
- If it’s set to Fill, change it to General.
- Click OK to apply the changes.

By adjusting the horizontal alignment to General, you’ll ensure that text wrapping functions correctly.
Things to Keep in Mind?
While going through this article, there are a few things you should keep in mind.
- Consider opening the practice workbook alongside this article for reference.
- Avoid manual wrapping when dealing with large datasets.
- If you plan to use Excel VBA code, save the workbook as a macro-enabled file.
Download Practice Workbook
You can download the practice workbook from here:
Wrap Text in Excel: Knowledge Hub
<< Go Back to Text Formatting | Learn Excel
Get FREE Advanced Excel Exercises with Solutions!

Is there any way to control where automatic wrapping breaks the text. For instance, if I have a string of text with dashes in it, it will break before as well as after the dash. Since my text is numerical, this makes it break after the dash in what should be a negative number (-9.0, -8.1, –
7.5, etc). I would like to find settings or options that allow me to set rules for line breaking like in Word.
Hello Dmullins,
Excel doesn’t have built-in settings to control where automatic text wrapping breaks. However, you can use manual line breaks by pressing Alt + Enter at desired points within the cell. This approach ensures consistent wrapping without breaking important numerical or formatted text. If your issue involves dashes breaking negative numbers, removing unnecessary spaces or formatting the text as a number may help prevent unwanted line breaks.
Regards
ExcelDemy