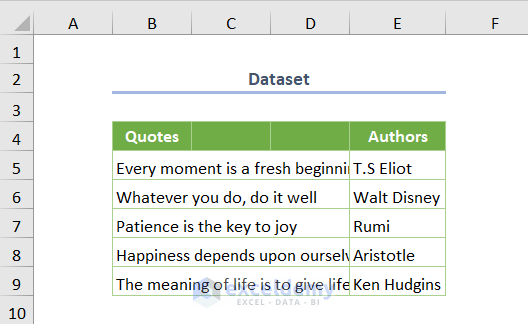
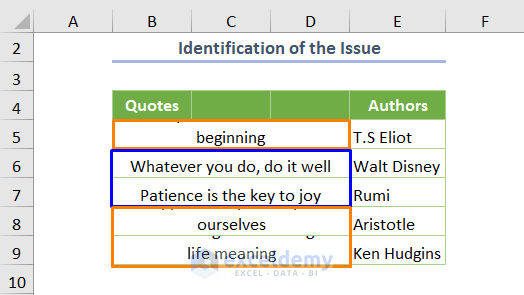
The dataset showcases Quotes and the corresponding Authors. Each quote covers 3 cells and the text isn’t completely displayed. Wrap the text after merging those cells.
Issue:
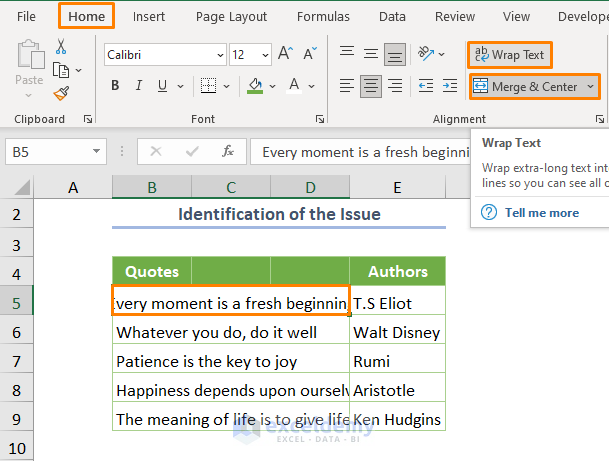
- Select a quote (e.g. B5:D5).
- Click Merge & Center.
- Select Wrap Text in Alignment.
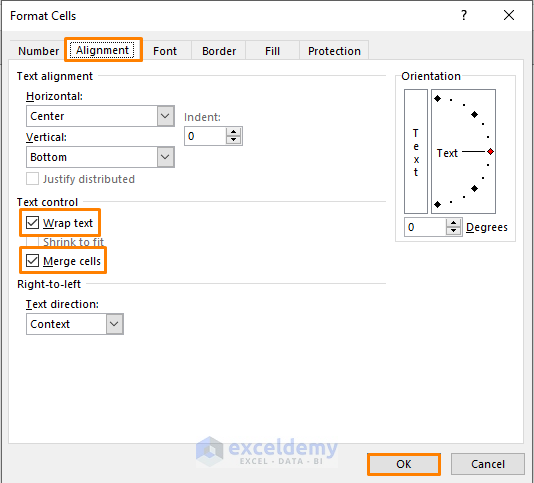
Alternatively, you can use the Format Cells option (press CTRL + 1 to open the Format Cells dialog box). Go Alignment and check Wrap Text and Merge Cells.
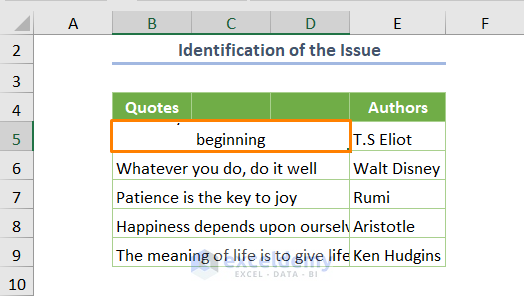
This is the output.
Note: you cannot merge all the cells containing your dataset.You have to select the adjacent cells to merge.
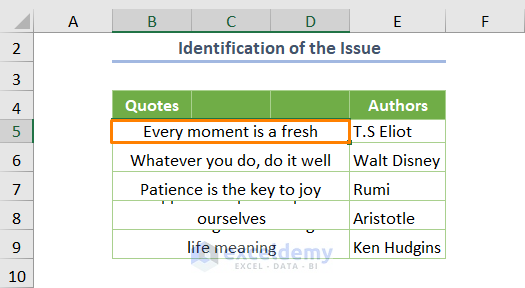
If you repeat the process in the cells below, you’ll get the following output.
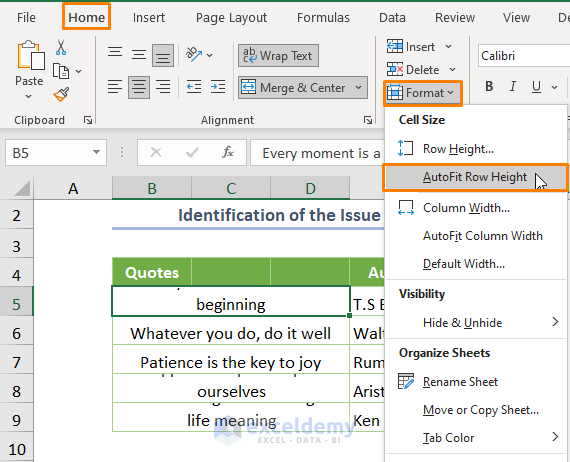
- Autofit the row height: click AutoFit Row Height in Format.
You’ll get the following output (the Wrap Text option is not working over the merged cells: Row 5, 8, and 9).
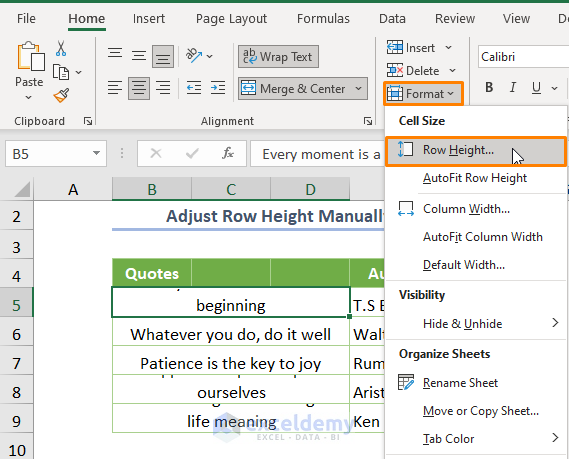
Solution 1 – Adjust the Row Height and Column Width Manually
- Select any cell and go to the row number. Drag down your cursor.
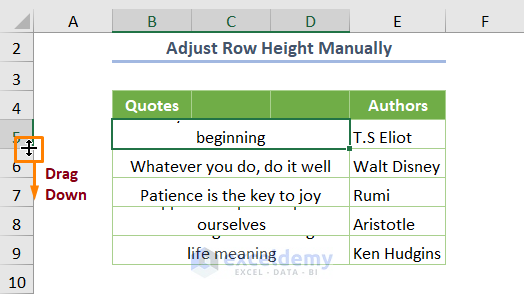
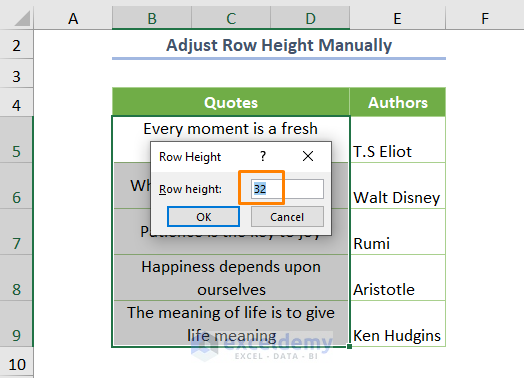
- You can also enter the row height by selecting Row Height in Format.
- Enter 32 as the row height.
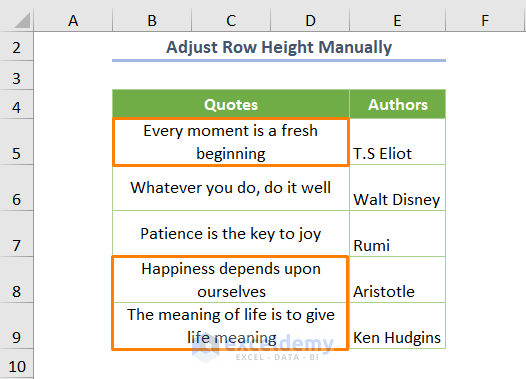
Both the Wrap Text and Merge Cells options are working well.
Adjust the column width if you have merged cells in columns.
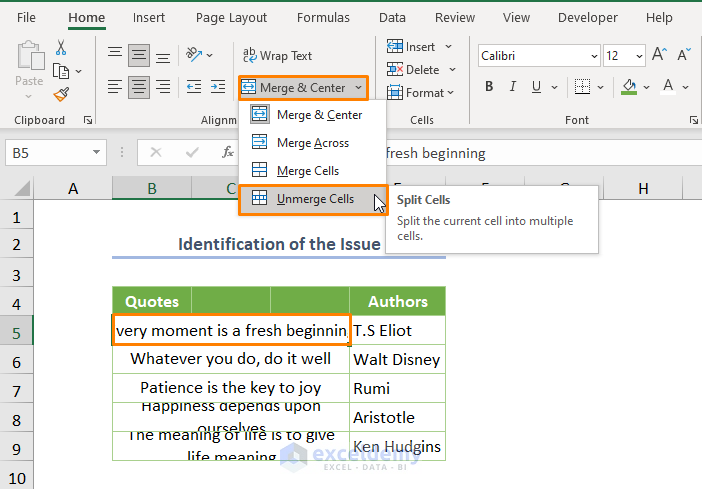
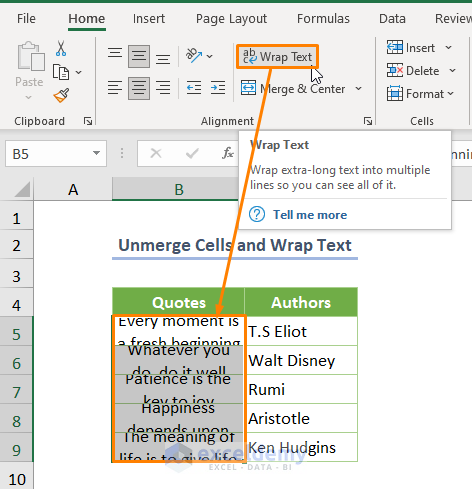
Solution 2 – Unmerge Cells and Then Wrap theText
- Select Unmerge Cells in Merge & Center.
This is the output.

- Select the cell range and click Wrap Text.
- Choose AutoFit Row Height.
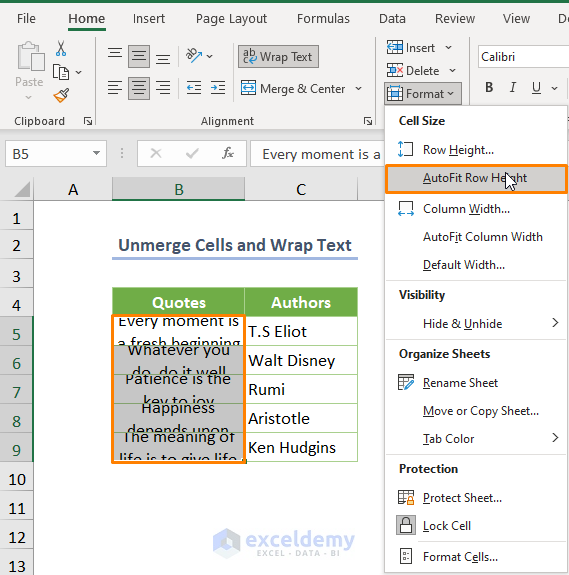
This is the output.

Read More: Excel Auto Fit Row Height for Wrap Text
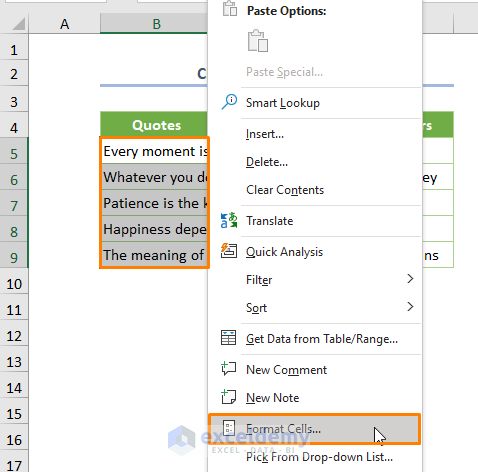
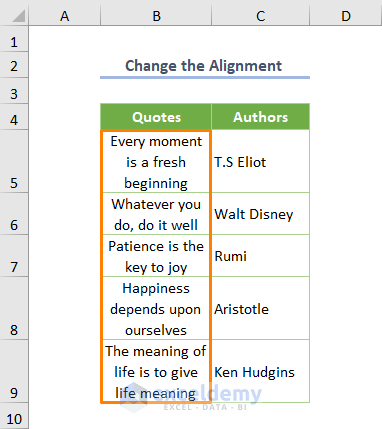
Solution 3 – Change the Alignment Before Merging Cells
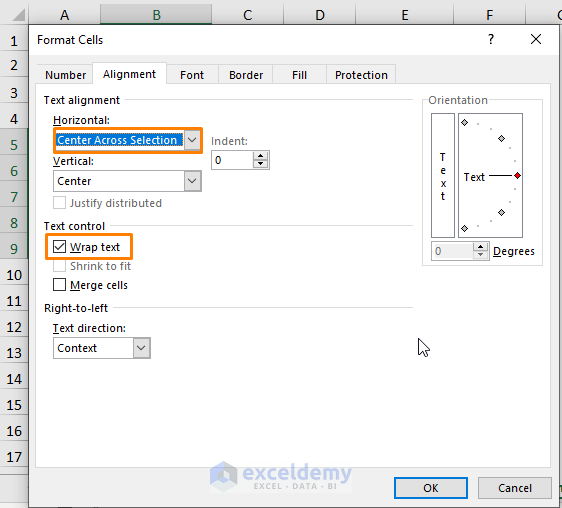
- Select the unmerged cells, and choose Format Cells.
- Go to Alignment and in Horizontal, choose Center Across Selection.
- Check Wrap text.
- Autofit cells.
This is the output.
Solution 4 – Insert a Line Break
- Place the cursor before the hyphen and press ALT + ENTER to insert a line break.
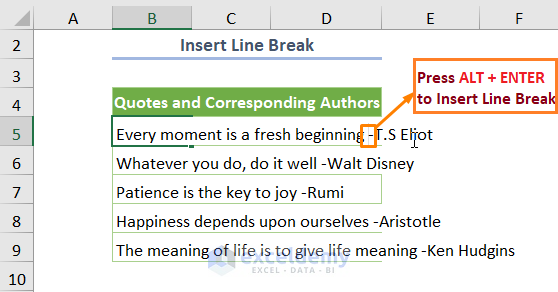
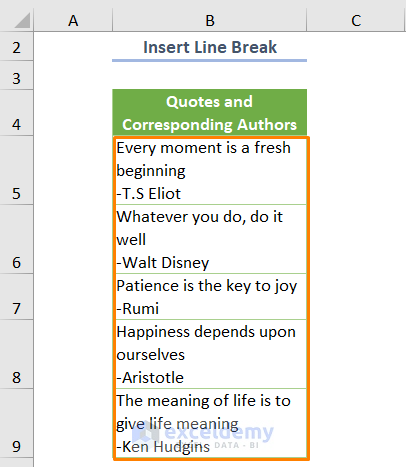
This is the output.
- Autofit cells.
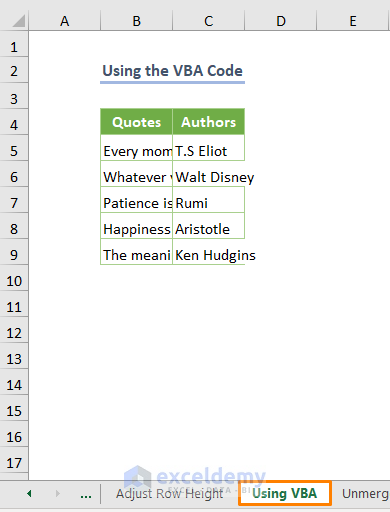
Solution 5 – Using a VBA Code
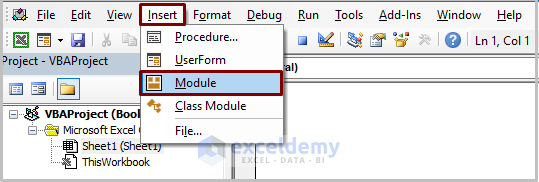
- Click Developer > Visual Basic.

- Go to Insert > Module.
Enter the following code.
Sub MergeWrap_VBA()
Dim rn As Long, Mrow As Long, ERow As Long, MCol As Long
Dim cn As Long, n As Long, rh As Single, mr As Long
Application.DisplayAlerts = False
Sheets("Using VBA").Copy After:=Sheets(Sheets.Count)
On Error Resume Next
ActiveSheet.Name = "Outupt Using VBA"
Cells().WrapText = True
Rows.AutoFit
MCol = Cells(1, 1).End(xlToRight).Column
Mrow = Cells(Rows.Count, 1).End(xlUp).Row
For rn = Mrow To 2 Step -1
    If Cells(rn, 1).Value = "" Then
        If ERow = 0 Then ERow = rn
       ElseIf ERow > 0 Then
        rh = Rows(r).RowHeight
        n = ERow - rn + 1
        If n > 0 Then Rows(rn & ":" & ERow).RowHeight = h / n
        For cn = 1 To MCol
               For mr = ERow To rn Step -1
                If Cells(mr, cn).Value = "" Then
                       Range(Cells(mr, cn), Cells(mr - 1, cn)).MergeCells = True
                   End If
            Next
        Next
        ERow = 0
    End If
Next
Application.DisplayAlerts = True
With Worksheets("Outupt Using VBA").Columns("B")
 .ColumnWidth = .ColumnWidth * 2
End With
End Sub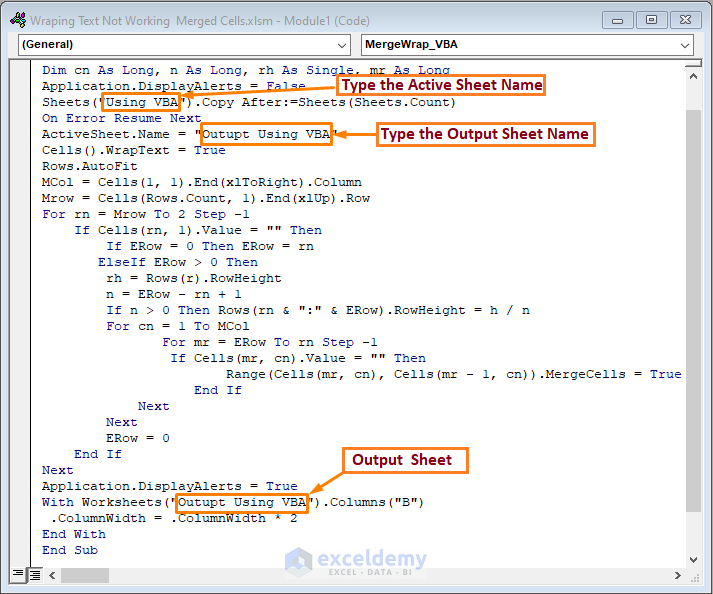
The variables are declared. The code generates a copy of the input into a new sheet. The WrapText is assigned to True to wrap the texts. The Range.End property is used to return the maximum column and row number. The For loop returns the output. The Column.Width property increases the width of column B.
Things to Change While Using the Code:
- Enter the active sheet name (“Using VBA”).
- Change the output sheet: “Output Using VBA”.
- Define the column to wrap the text.
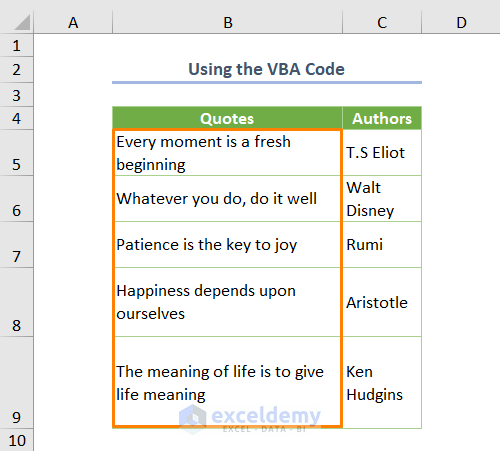
Run the code (press F5 or Fn + F5), you’ll see the following output.
Read More: [Fixed] Wrap Text Not Showing All Text in Excel
Download Practice Workbook
Related Articles
- How to Wrap Text in Merged Cells in Excel
- How to Wrap Text across Multiple Cells without Merging in Excel
- How to Write a Paragraph in Excel Cell
- Excel VBA to Wrap Text
- VBA to Wrap Text for Entire Sheet in Excel
<< Go Back to Wrap Text | Text Formatting | Learn Excel
Get FREE Advanced Excel Exercises with Solutions!
