Download Practice Workbook
What Is a Data Model in Excel?
The Excel Data Model is a special kind of data table where two or more tables are connected based on common fields or identifier keys. In the data model, the word “Model” describes how each table is related. Linking data this way is typically done through a common column.
How to Create an Excel Data Model Using Relationship Toolbar
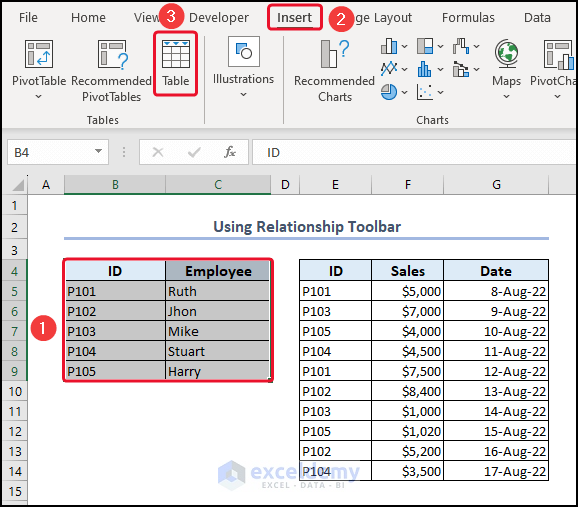
- Select the first dataset.
- Go to the Insert tab.
- Select Table.
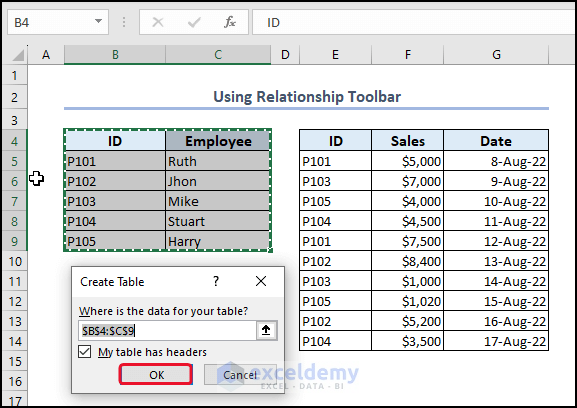
- Click OK in the Create Table dialog box. Make sure that the entire dataset, including the header, is selected.
- Create a table for the other datasets.
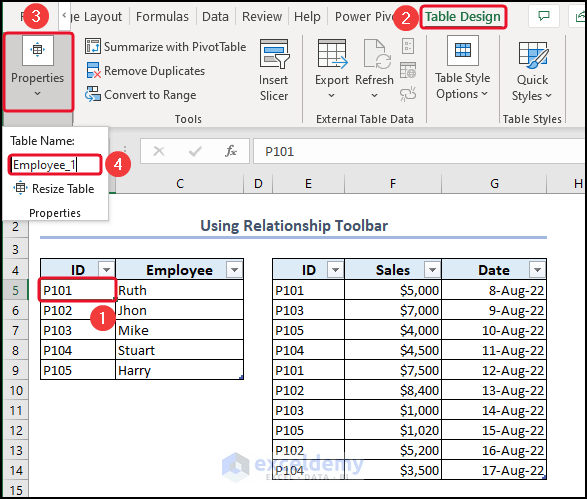
- Click on a cell of the first table.
- Go to Table Design in the ribbon.
- In the Properties field, type a name for the table. We put Employee_1.
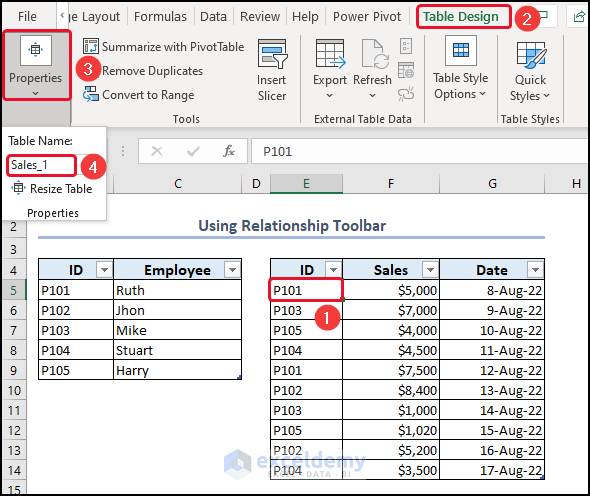
- We set the name for the second table as Sales_1.
- Click on cell B5.
- Go to the Data tab and select Relationships.
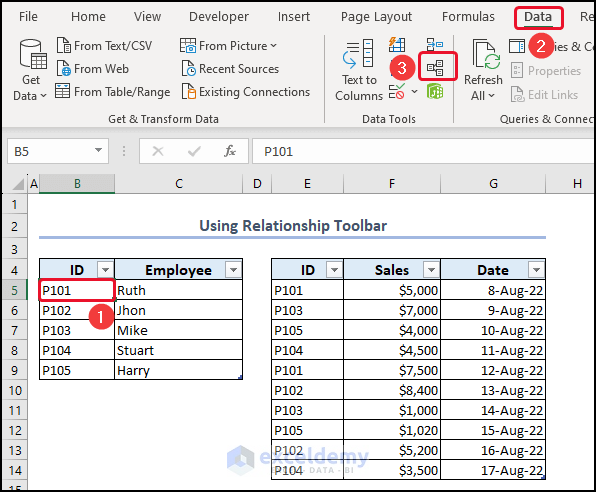
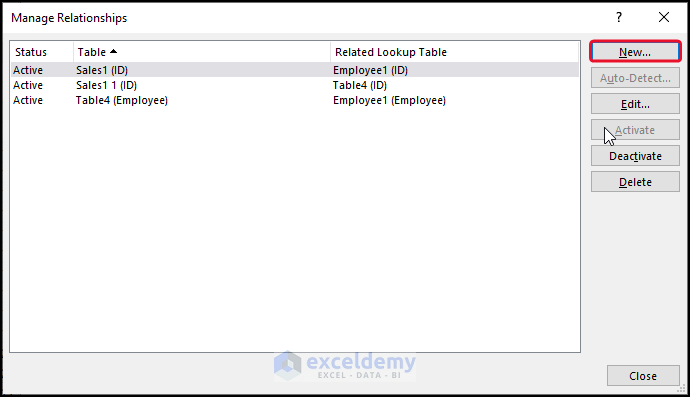
- In the Manage Relationships dialog box, click on New.
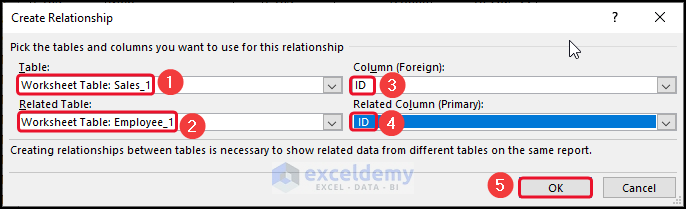
- In the Create Relationship dialog box, select Worksheet Table: Sales_1 in the Table field.
- Select Worksheet Table: Employee_1 for Related Table.
- Select ID in the Column and Related Column.
- Press OK to confirm.
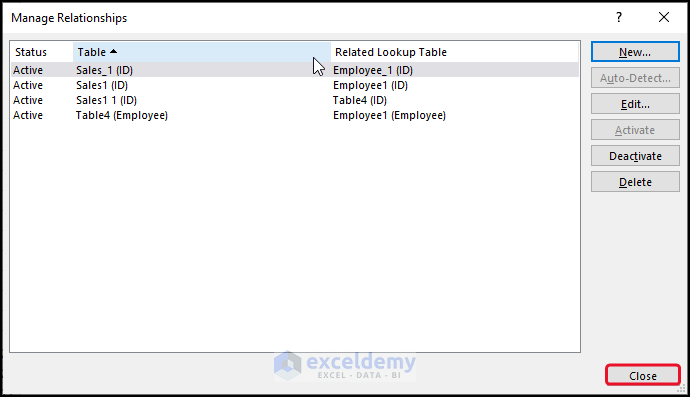
- In the Manage Relationships dialog box, click Close.
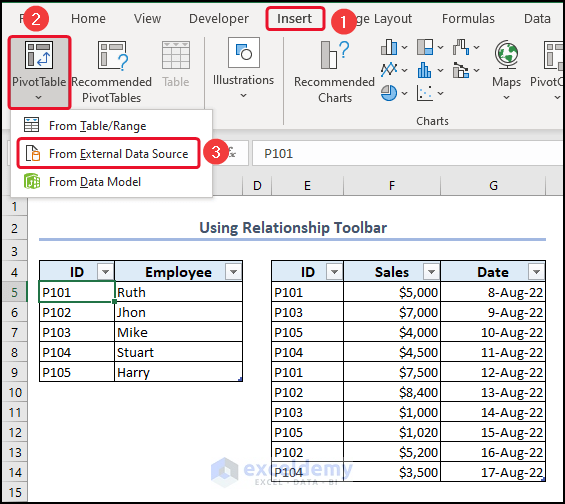
- Go to the Insert tab and click on Pivot Table.
- Select From External Data Source.
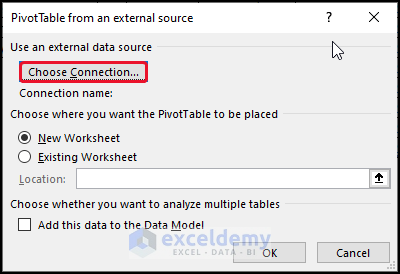
- Click on Choose Connection in the PivotTable from an external source window.
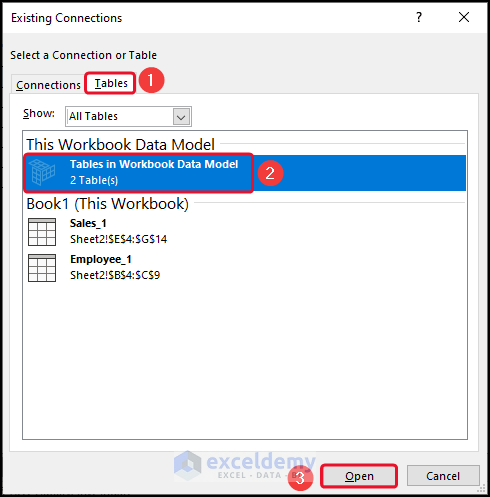
- In the Existing Connections dialog box, go to the Tables tab.
- Click on Tables in Workbook Data Model.
- Click Open.
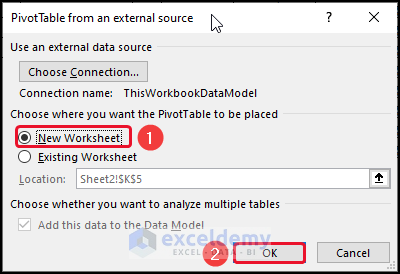
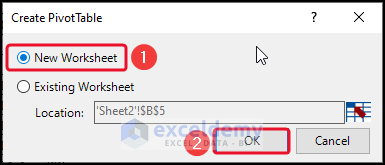
- Select New Worksheet and click OK.
- From PivotTable Fields, select Employee from the Employee_1 table, then drag it to the Rows.
- Select Sales from the Sales_1 table and drag it to Values.
- You will see the Data Model after pressing Update.

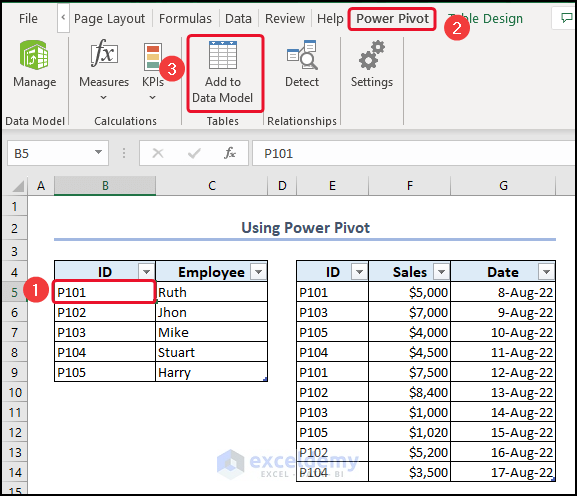
How to Create Data Model Using Excel Power Pivot
- Following the steps described above, we created the following two Tables.
- Click on cell B5, go to the Power Pivot tab, and click on Add to Data Model.
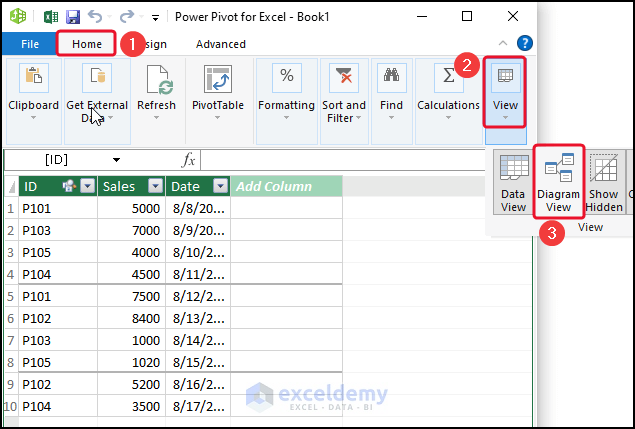
- From the View tab, select Diagram View.

- Go to the Home tab, select the PivotTable group, then choose PivotTable.

- In the Create PivotTable dialog box, select New Worksheet and click OK.
- In the PivotTable Fields menu, select Employee from the Employee_1 table and drag it to Rows.
- Select Sales from the Sales_1 table and drag it to Values.
- Press Update and you can see the Data Model.

How to Create Data Model Using Power Query in Excel
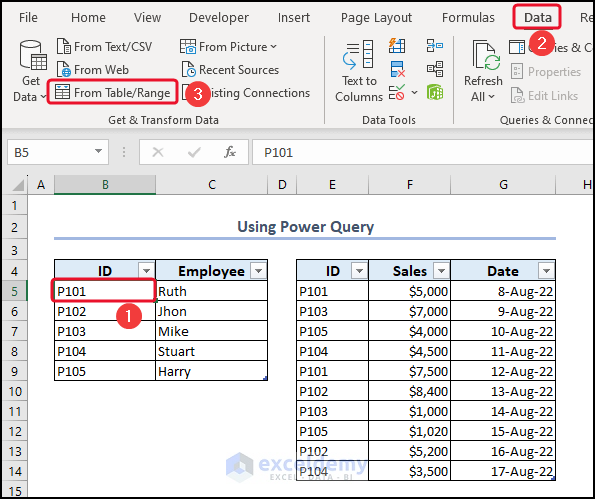
- Following the steps from Method 1, we created and named two Tables.
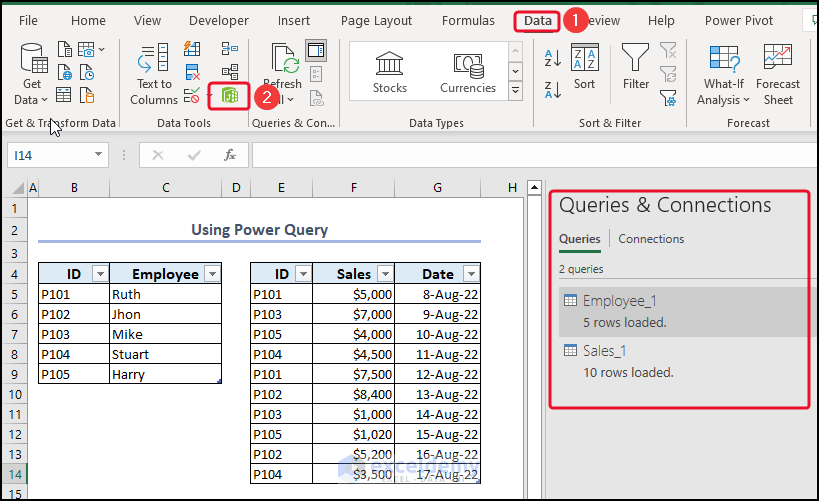
- Click on cell B5, go to the Data tab, and click on From Table/Range (in Get & Transform Data).
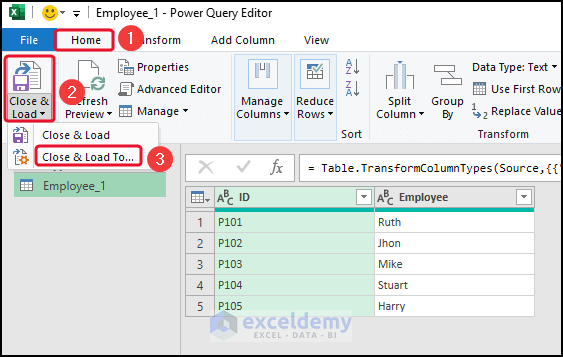
- In the Power Query Editor window, go to Home.
- Select Close & Load and click on Close & Load To.
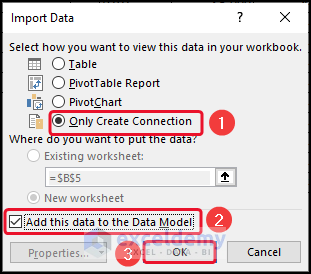
- In the Import Data dialog box, select Only Create Connection.
- Mark Add this data to the Data Model and click OK.
- Go to the Data tab and click on Manage Data Model.
- Go to the Home tab, select View, and choose Diagram View.
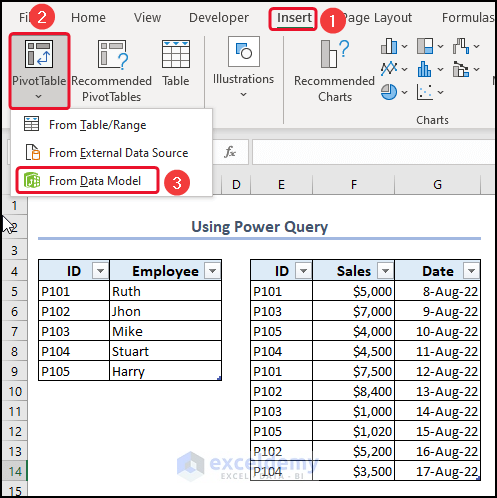
- Go to the Insert tab, select Pivot Table, and choose From Data Model.
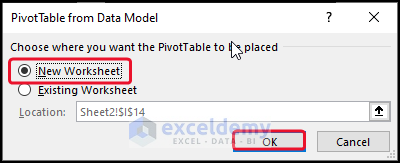
- In the PivotTable from Data Model dialog box, check New Worksheet and click OK.
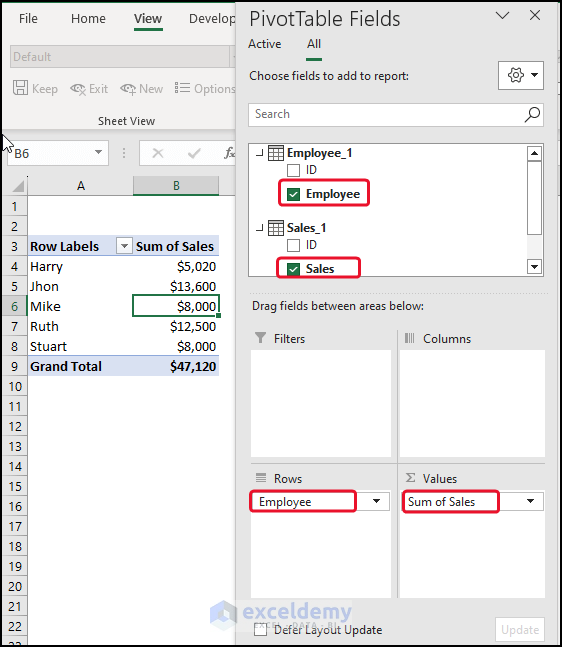
- In the PivotTable Fields menu, select Employee from the Employee_1 table and drag it to Rows.
- Select Sales from the Sales_1 table and drag it to Values.
- Press Update to finish the Data Model.
Data Model in Excel: Knowledge Hub
- Create a Data Model in Excel
- Use Data Model
- Manage Data Model
- Get Data from Data Model
- Update Data Model
- Use Reference of Data Model in Formula
- Add Table to Data Model
- Remove Table from Data Model
- Remove Data Model from Pivot Table
- Data Model vs. Power Query: Main Dissimilarities to Know
- Fixed!] Excel Data Model Relationships Not Working
Things to Remember
- We can examine the information from multiple tables together by using the data model. When we establish connections within the data model, we eliminate the need for using VLOOKUP, SUMIF, INDEX, and MATCH functions.
- Data models are automatically created when importing datasets into Excel from external sources. If we import related tables with primary and foreign key relationships, we can automatically generate table connections.
- When creating relationships, the columns we connect in tables should have the same type of information.
- With pivot tables that are created using the data model, we can add slicers and use them to filter the data in pivot tables based on any field we want.
Data Model in Excel: Knowledge Hub
- How to Create a Data Model in Excel
- How to Use Data Model in Excel
- How to Get Data from Data Model in Excel
- How to Update Data Model in Excel
- How to Use Reference of Data Model in Excel Formula
- How to Add Table to Data Model in Excel
- How to Remove Table from Data Model in Excel
- Create Relationships in Excel
<< Go Back to Learn Excel
Get FREE Advanced Excel Exercises with Solutions!
