Method 1 – Applying Relationship Feature
⏩ Steps:
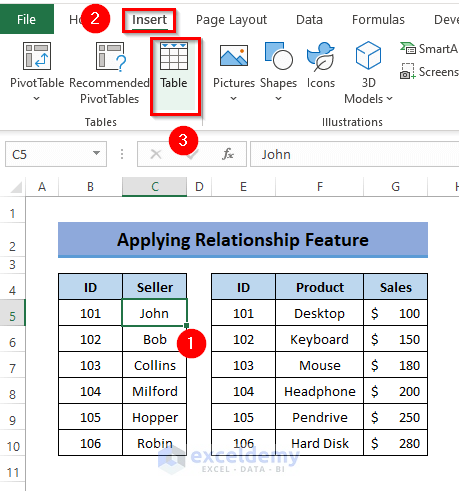
- Click on any cell of your first dataset.
- Go to the Insert tab> click Table under the Tables group.
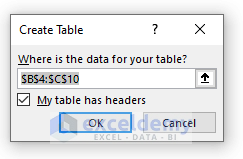
- A dialog box with the heading Create Table will appear in the window. In the data field of the box, you will see that Excel has recognized all the cells of the range of the data although you have selected only a single cell. Keep the My table has headers checked and click OK.
- A table will be inserted into your data range.
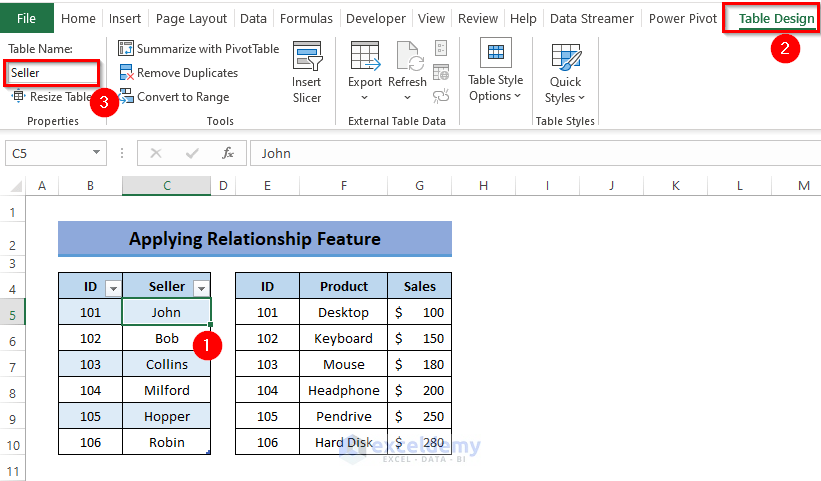
- Select any cell in the table. A new tab named Table Design in the toolbar appears.
- Go to the Table Design tab> assign a name to your table (i.e. Seller).
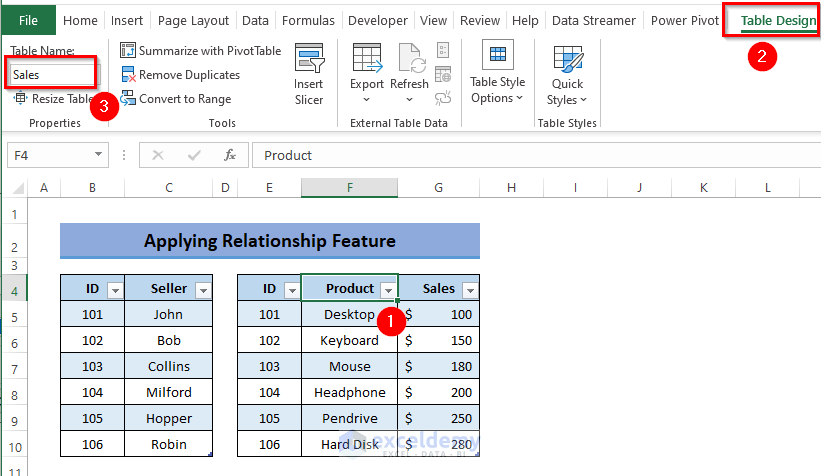
- Repeat the steps for the other table and assign a name (i.e. Sales).
- Click in any table and go to the Data tab> click Relationships under the Data Tools group.
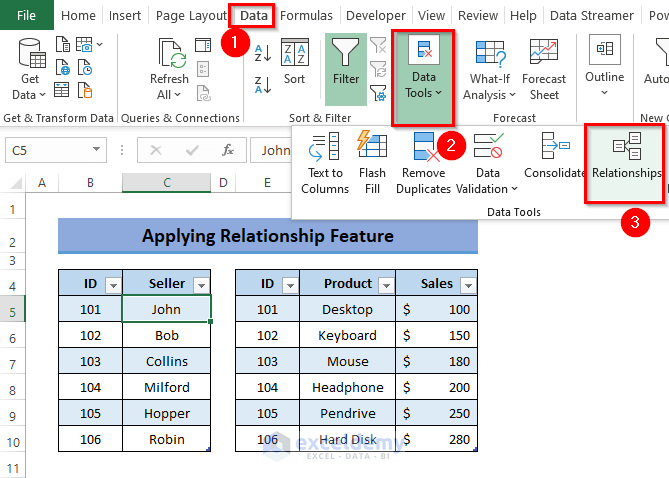
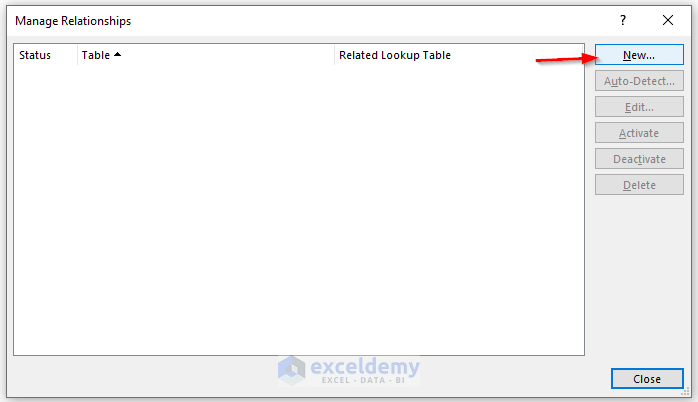
- The Manage Relationships dialog box will appear.
- Click New.
- Create relationship prompt will open. Select four fields in this prompt.
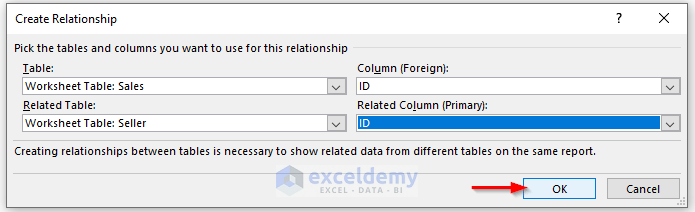
- Table: The first table you want to analyze (i.e. Sales)
- Column(Foreign): The common column between the tables (i.e. ID)
- Related Table: Table that looks up the value in the previous table (i.e. Seller)
- Related Column (Primary): The common column between the tables (i.e. ID)
- Click OK.

- Close the Manage Relationships box to confirm the relationship.

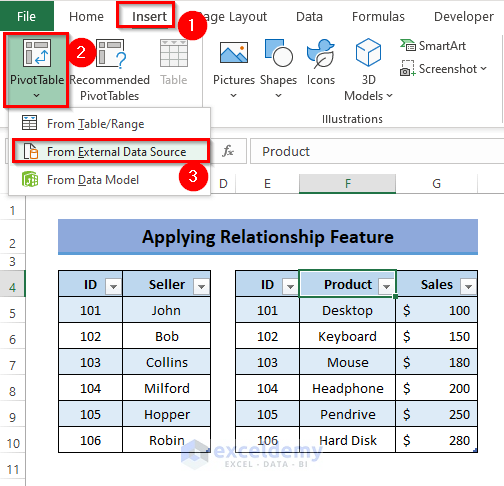
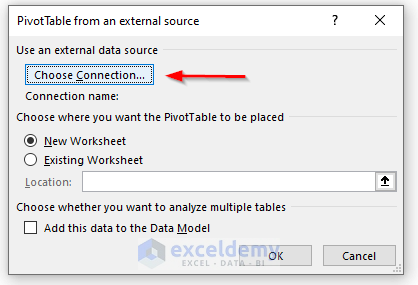
- Go to the Insert tab> click dropdown of the PivotTable > select From External Data Source.
- PivotTable from an external source box will appear. Click Choose Connection…
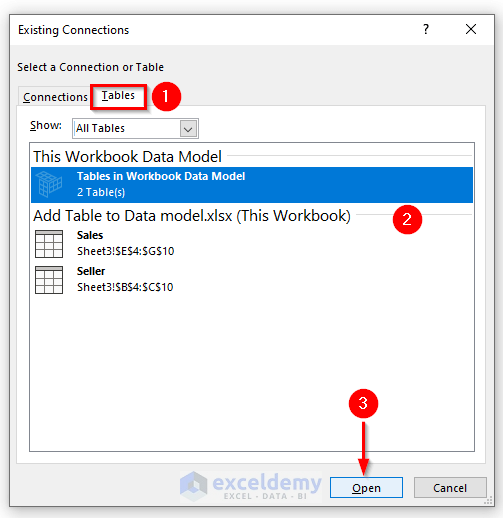
- From the Existing Connection prompt, go to the Tables group and click Tables in Workbook Data Model and click Open.
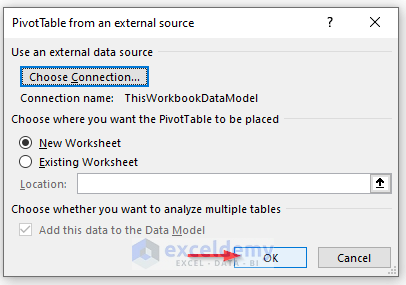
- Click OK on the PivotTable from an external source.
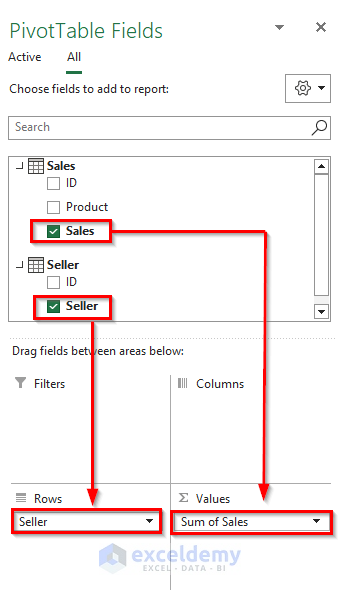
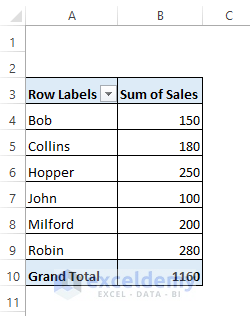
- The PivotTable field will appear on the right side of the Excel window. Drag the fields to relevant areas (i.e. Seller=> Rows, Sales=> Values).
- The table will be added to your data model.
Read More: How to Create a Data Model in Excel
Method 2 – Applying the Power Query Tool
⏩ Steps:
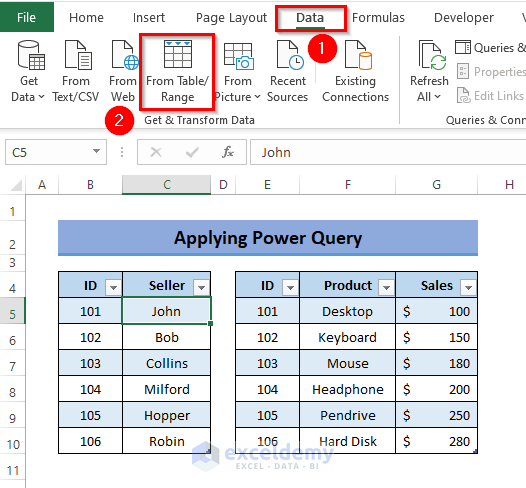
- Follow the steps in Method 1 to create table from your data.
- Go to the Data tab> click Form Table/Range.
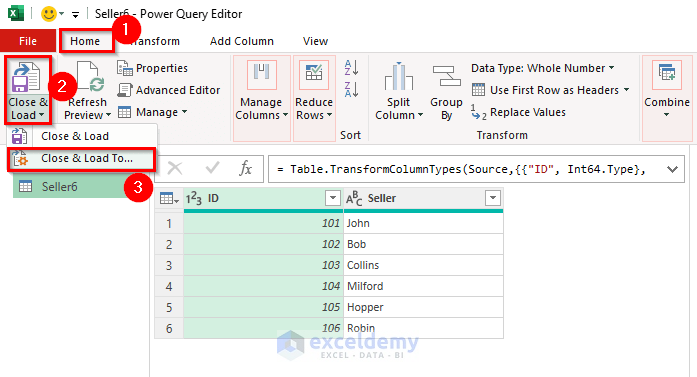
- The Power Query Editor window will appear on the worksheet. From the Home tab of this window> click the dropdown of Close & Load > select Close & Load To…
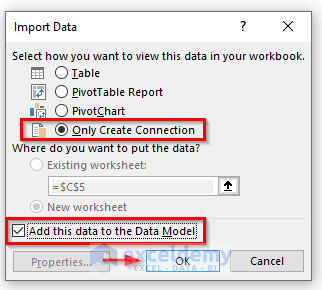
- A pop-up named Import Data will appear.
- Select Only Create Connection and keep Add this data to the Data Model and click OK.
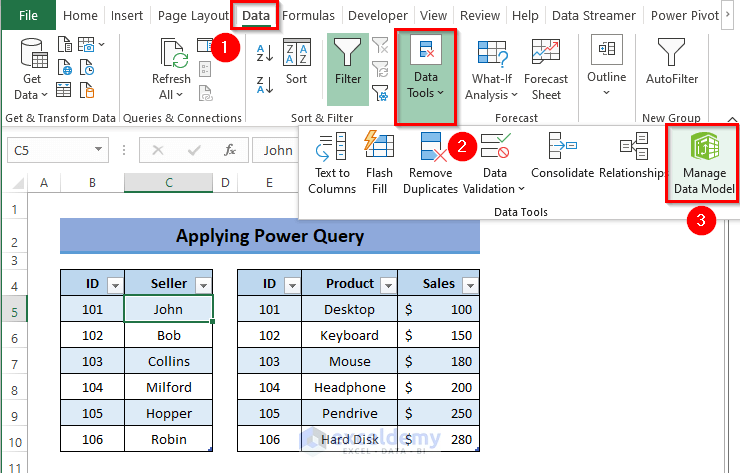
- Go to the Data tab> select Data Model from the Manage Data Model group.
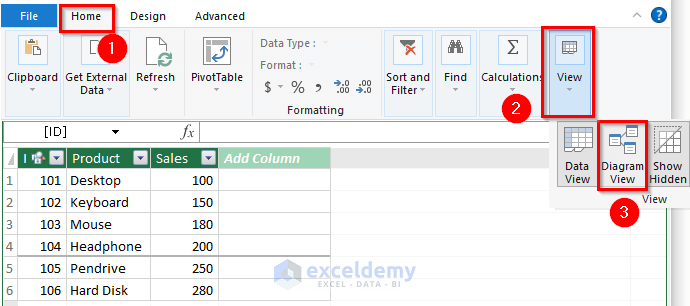
- The Power Pivot window will appear. From the Home tab> select Diagram View from the View tab.
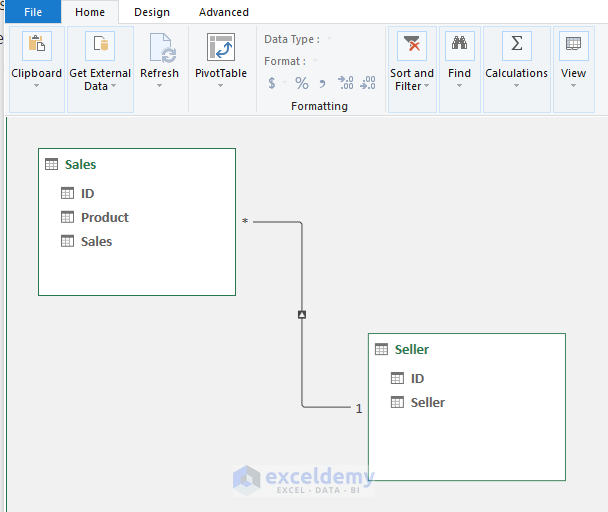
- The relationship will be created in diagram view. This is one to many relationship (* denotes many).
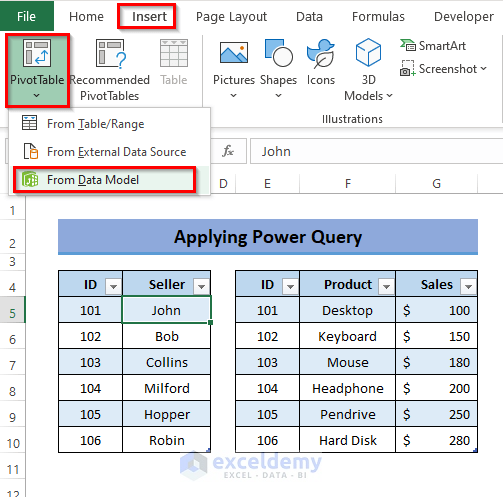
- Go to the Insert tab> click dropdown of the PivotTable> select From Data Model.
- Create PivotTable by following these steps of Method 1 for your data model.
Read More: Excel Data Model vs. Power Query: Main Dissimilarities to Know
Method 3 – Utilizing the Power Pivot Feature
⏩ Steps:
- Follow these steps of Method 1 to create table from your data.
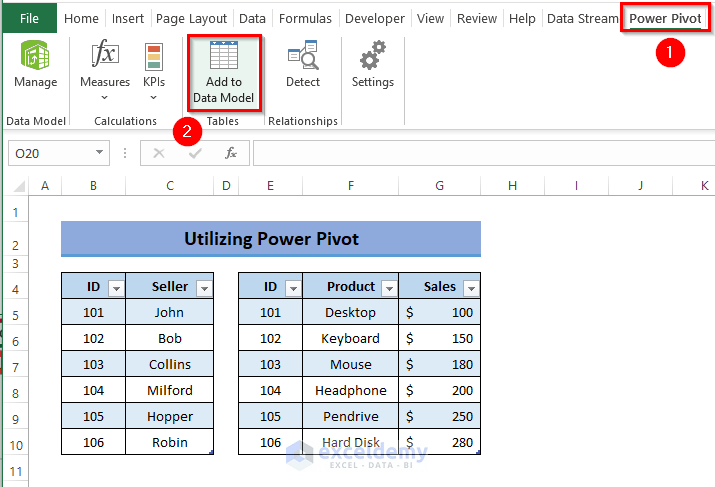
- Go to the Power Pivot tab and select Add to Data Model under the Tables group.
- Follow these steps of Method 2. Repeat the steps to add a table to the data model.
Download Practice Workbook
Related Articles
- How to Update Data Model in Excel
- How to Use Reference of Data Model in Excel Formula
- How to Get Data from Data Model in Excel
- How to Use Data Model in Excel
- How to Remove Table from Data Model in Excel
<< Go Back to Data Model in Excel | Learn Excel
Get FREE Advanced Excel Exercises with Solutions!
