While working in Microsoft Excel, often users have to input long texts in a cell. By default, Excel hides these long texts after a certain limit or when these texts go beyond their adjacent cell’s length limit. So, it is difficult for another user to understand the full meaning of those truncated texts. In this article, I will show you how to stop Excel from truncating text.
Stop Excel from Truncating Text: 3 Easy Methods
In this article, you will see three easy methods to stop Excel from truncating text. Firstly, I will alter the fill alignment of the truncated text to see the whole string. Secondly, I will apply the Wrap Text command for the same purpose. Lastly, I will format the cells containing truncated text and change the cell format into Shrink to Fit.
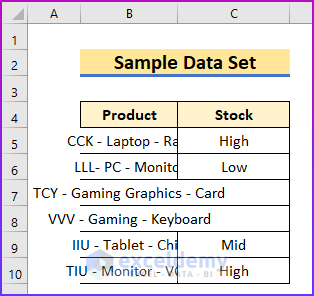
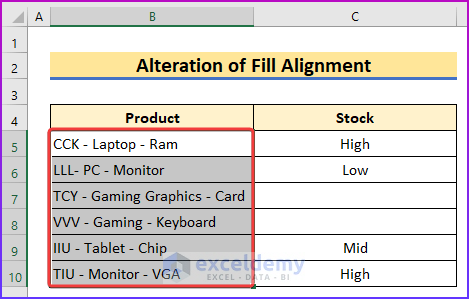
To illustrate my article further, I will use the following data set.
1. Alter Fill Alignment
The first method will show you how to stop Excel from truncating text by altering the fill alignment. After changing the alignment, you will be able to see the whole truncated text. For more details, see the following steps.
Steps:
- First of all, select the cell range B5:B10 and press Ctrl + 1 on your keyboard.
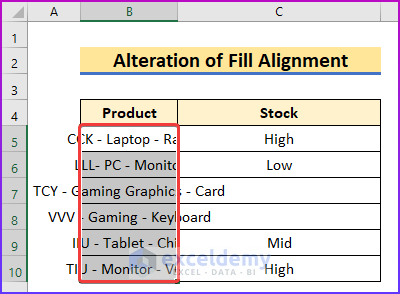
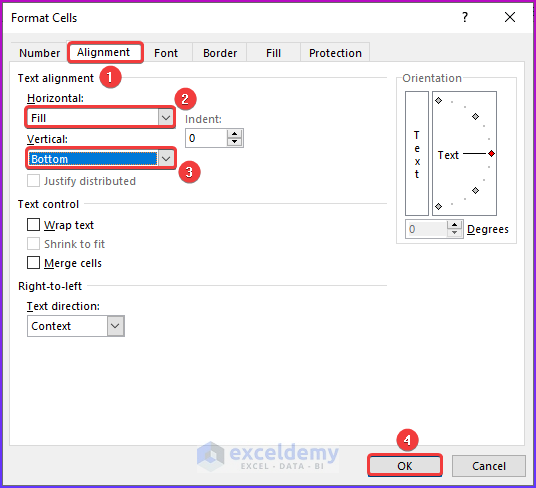
- Secondly, from the Format Cells dialog box, go to the Alignment group.
- Then, from the Horizontal dropdown, select Fill, and from the Vertical dropdown, select Bottom.
- Lastly, press OK.
- Thirdly, you will see the texts will be sorted in their adjacent cells but not fully visible.
- To solve the issue, place your cursor on the column that contains the text and double-click on the column header.
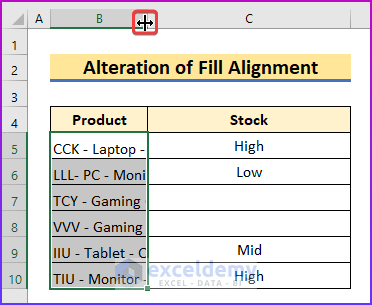
- Finally, you will see the whole text after performing the above steps.
Read More: How to Truncate Text from Left in Excel
2. Apply Wrap Text Command
The second method of this procedure will show you how to use an Excel command called Wrap Text. By applying this command, you can fix the truncated text. Let’s go through the following steps for a better understanding.
Steps:
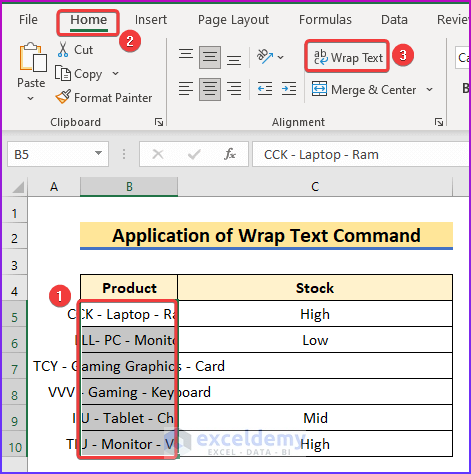
- Firstly, select the cell range B5:B10 and go to the Home tab of the ribbon.
- Secondly, from the Alignment group, choose the command named Wrap Text.
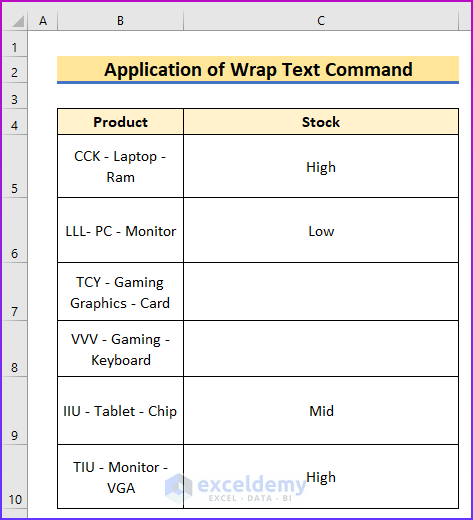
- Thirdly, you will see that the texts are arranged in their respective cells in more than one row.
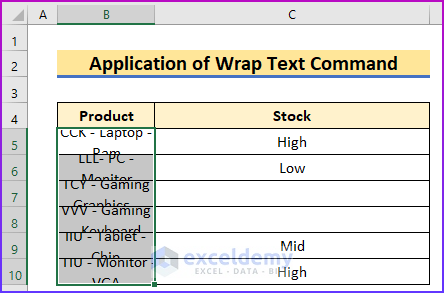
- Consequently, increase the cell size along the vertical direction to get a clear perspective.
Read More: How to Truncate Text from Right in Excel
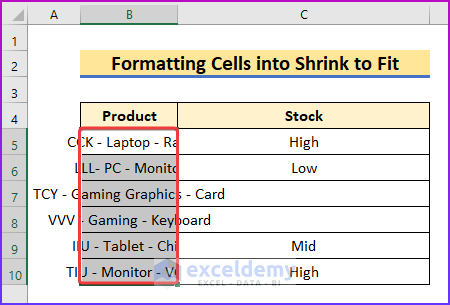
3. Format Cells into Shrink to Fit
In the last method of this procedure, I will shrink the truncated text size so that it can fit into its adjacent cell. The steps for this method are as following.
Steps:
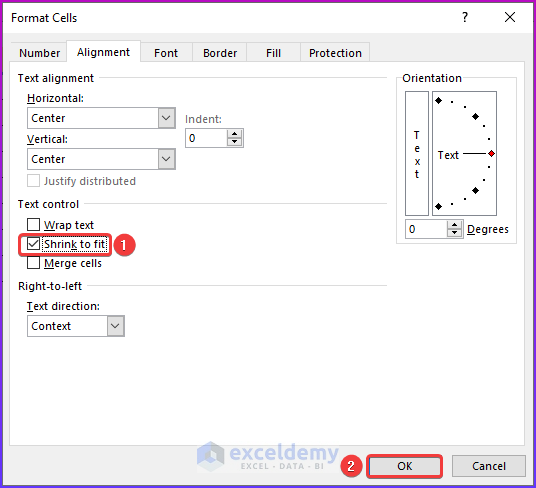
- In the beginning, select the cell range B5:B10, and on your keyboard press Ctrl + 1 to open the Format Cells dialog box.
- Secondly, mark the Shrink to Fit box to shrink the size of the selected truncated text and then press OK.
- Thirdly, after completing the previous step, you will see the text letters have been shrunk to adjust them into their cells.

Things to Remember
- While using the keyboard shortcut, press 1 from the alphanumeric keypad section to activate the Format Cells dialog box.
Download Practice Workbook
You can download the free Excel workbook here and practice on your own.
Conclusion
That’s the end of this article. I hope you find this article helpful. After reading the above description, you will be able to stop Excel from truncating text. Please share any further queries or recommendations with us in the comments section below.
Related Articles
- How to Truncate Text in Excel
- How to Truncate Numbers in Excel
- How to Truncate Decimal in Excel
- How to Truncate Date in Excel
- How to Use Truncate in Excel VBA
<< Go Back to Excel TRUNC Function | Excel Functions | Learn Excel
Get FREE Advanced Excel Exercises with Solutions!
