While working in Microsoft Excel, we need to put a title across cells so that we can understand the dataset easily. Putting a title across cells in Excel is an easy task. This is a time-saving task also. Today, in this article, we’ll learn three quick and suitable steps to put a title across cells in Excel effectively with appropriate illustrations.
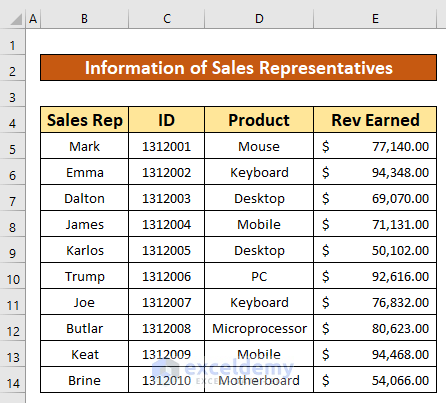
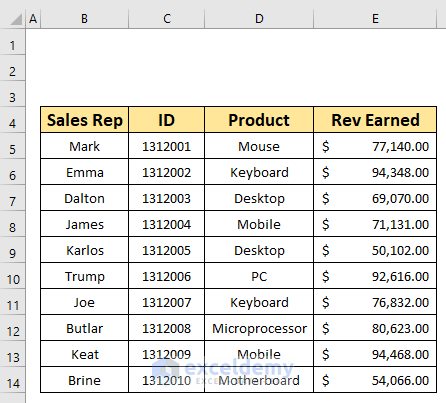
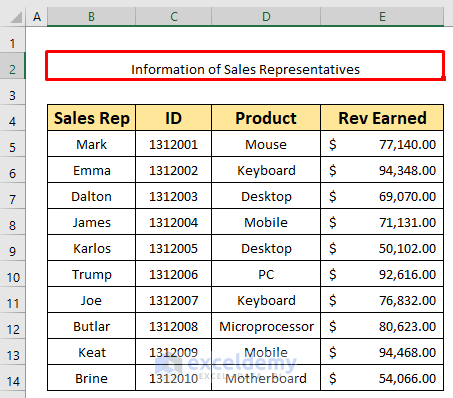
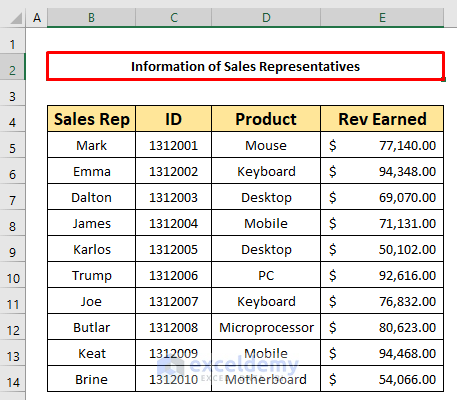
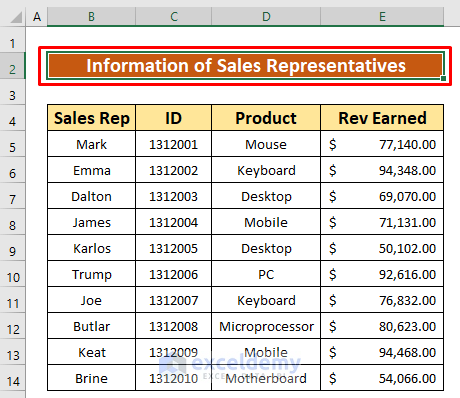
Let’s say, we have a dataset that contains information about several Sales Representatives of the Armani group. The Name of the Sales Representatives, their Identification number, types of products, and the revenue earned by the Sales Representatives are given in columns B, C, D, and E respectively. First of all, we will make a dataset with parameters. After that, we will put a title across cells in Excel using the Font command, Alignment command, and so on. Here’s an overview of the dataset for today’s task.
Let’s follow the instructions below to create a progress monitoring chart in Excel!
Step 1: Make a Dataset to Insert a Title Across Cells
In this portion, we will create a dataset to put a title across cells in Excel. We will make a dataset that contains information about several Sales Representatives of the Armani group. We will give a title across cells to understand the information of the Sales Representatives. So, our dataset becomes.
Step 2: Use Merge & Center Option to Put the Title Across Cells in Excel
In this step, we will create a title across cells in Excel. Hence, we will apply the Alignment command to merge cells and give Middle Align. From our dataset, we can easily do that. Let’s follow the instructions below to learn!
- First of all, select cells B2 to E2. After that, go to Home tab → Alignment group→ Merge & Centre option.
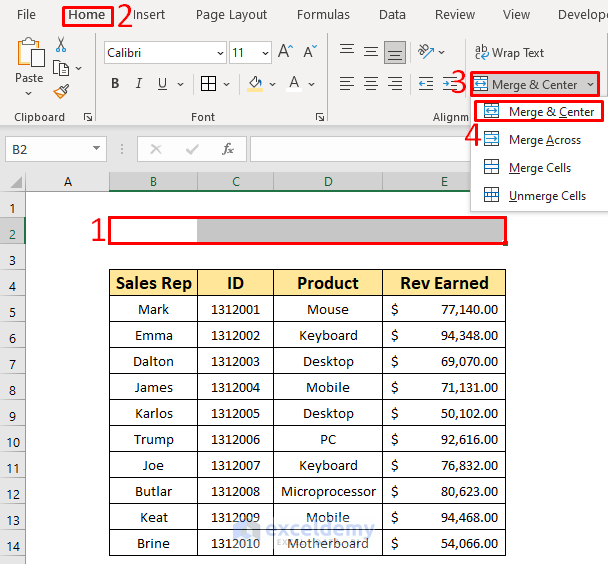
- As a result, you will be able to merge the selected cells.
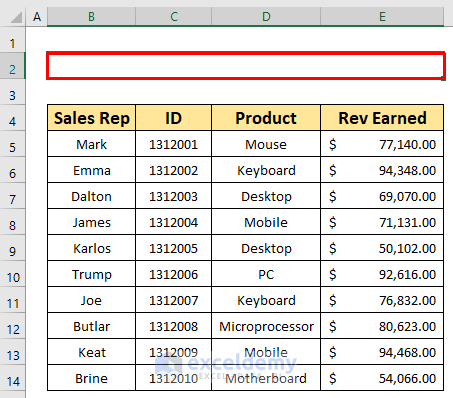
- Now, write down the below title in that merged cell. The title is “Information of Sales Representatives”.
- Further, go to Home → Alignment → Middle Align
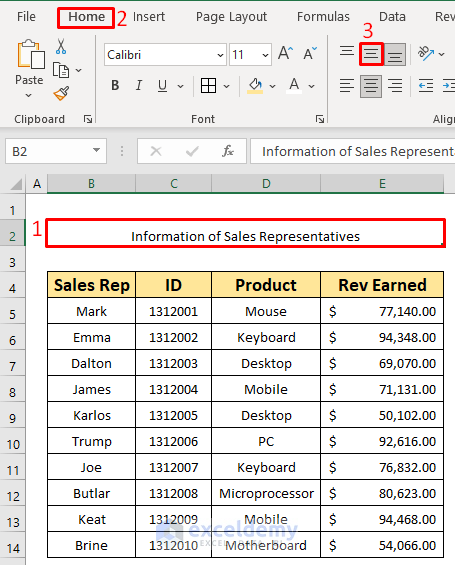
- Hence, you will be able to middle align the title which has been given in the below screenshot.
Step 3: Apply Formatting to the Title Across the Cells
Now, we will apply the Font command to give the format of the title. Let’s follow the instructions below to learn!
- First of all, we will bold our title. To do that, first, select the title. Then, press Ctrl + B on your keyboard simultaneously.
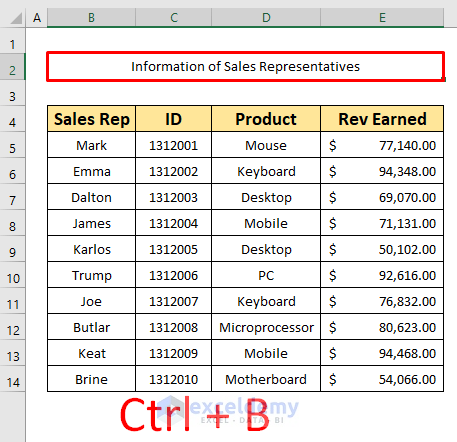
- As a result, we will be able to bold our title.
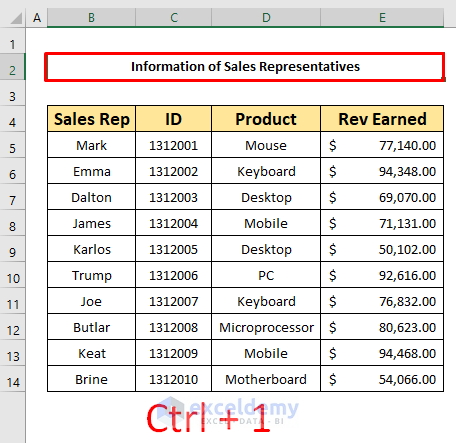
- Now press Ctrl + 1 on your keyboard simultaneously.
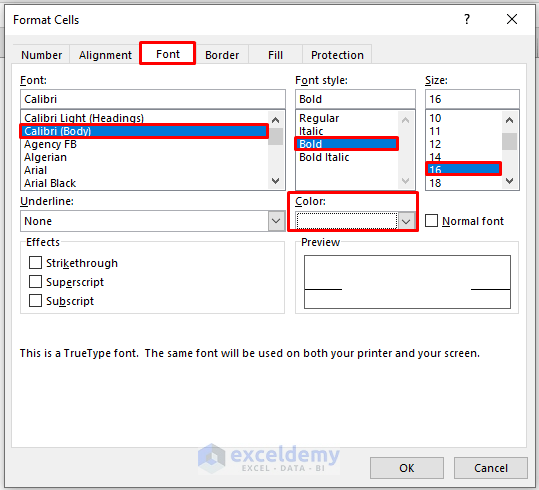
- As a result, a Format Cells dialog box will appear in front of you. From the Format Cells dialog box, firstly, select the Font tab.
- Secondly, select the Calibri(Body) from the Font drop-down list.
- Thirdly, select the Bold option from the Font style drop-down list.
- Further, select the 16 option from the Size drop-down list.
- At last, select the White color option from the Color drop-down list.
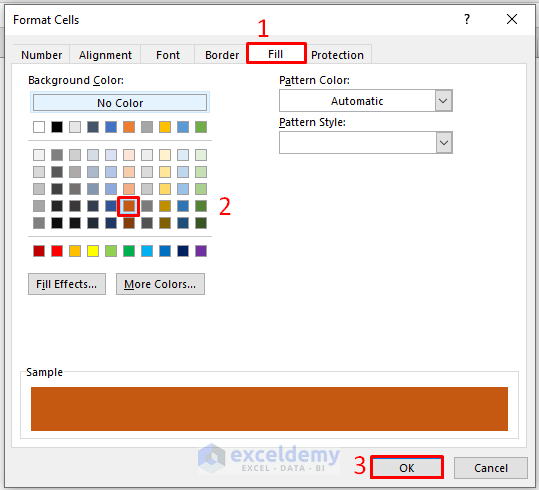
- After that, choose the Fill tab, and select any color to fill. We have to select a Deep Orange Hence, press the OK option.
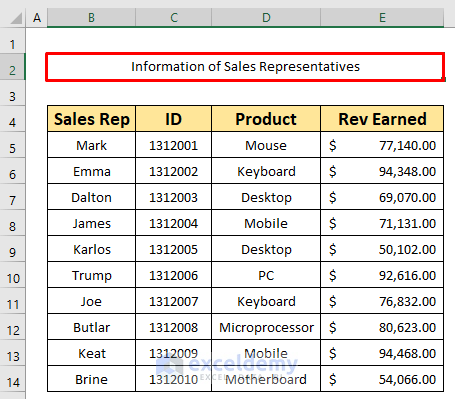
- After completing the above process, you will be able to put a title across cells and give the format of the title which has been given in the below screenshot.
Things to Remember
👉 You can also give the Format of a tile from your Home ribbon. To do that, go to Home → Font
👉 #N/A! error arises when the formula or a function in the formula fails to find the referenced data.
👉 #DIV/0! error happens when a value is divided by zero(0) or the cell reference is blank.
Download Practice Workbook
Download this practice workbook to exercise while you are reading this article.
Conclusion
I hope all of the suitable steps mentioned above to put a title across cells will now provoke you to apply them in your Excel spreadsheets with more productivity. You are most welcome to feel free to comment if you have any questions or queries.
Related Articles
- How to Insert Subtitle in Excel
- How to Make a Title in Excel
- How to Make a Title Page in Excel
- How to Center a Title in Excel
- How to Add a Title to a Table in Excel
- How to Merge and Center a Title in Excel
<< Go Back to Title in Excel | Worksheet Formatting | Learn Excel
Get FREE Advanced Excel Exercises with Solutions!
