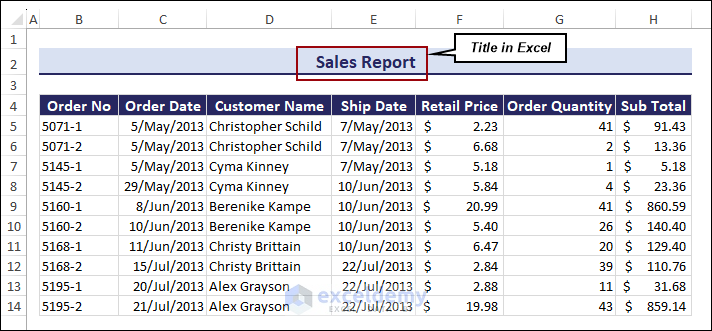
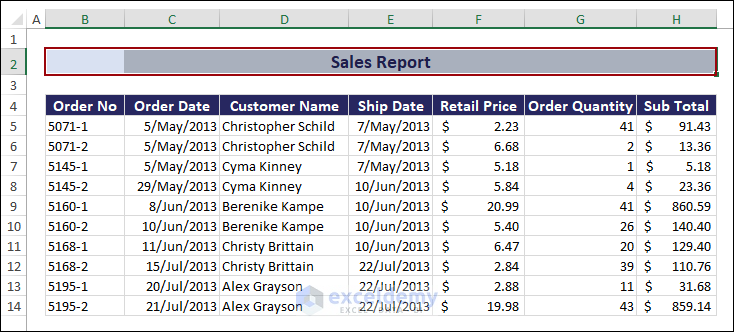
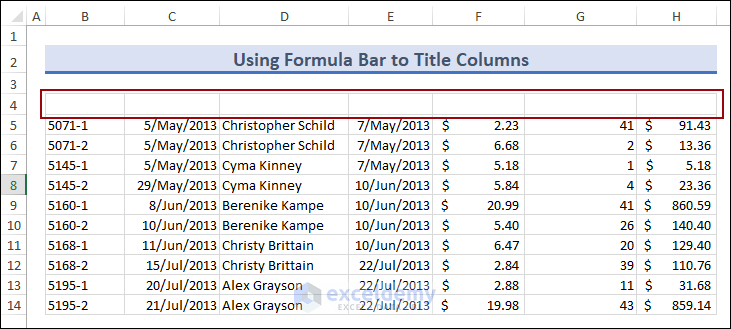
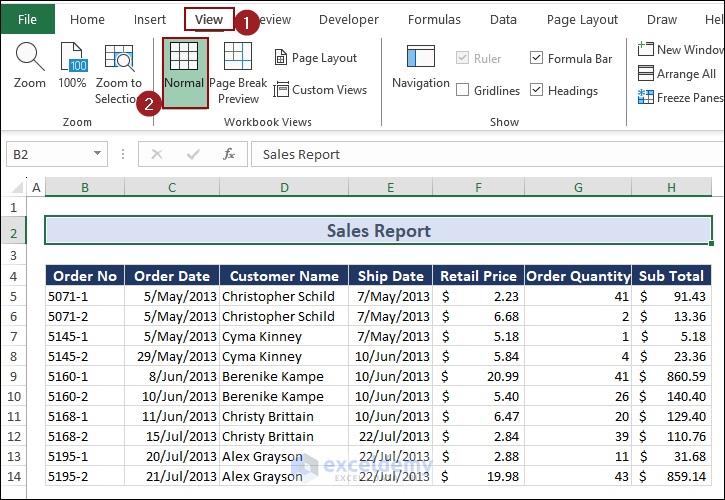
Dataset Overview
We will use the following dataset containing the sales report of a company.
What Is a Title in Excel?
A title in Excel provides a clear description or heading for your content, whether it’s a worksheet, chart, or graph. It helps readers interpret and analyze information effectively.
What Are the Types of Title in Excel?
- Worksheet Title: Represents the main subject or purpose of an entire worksheet.
- Cell Title: Provides additional context or description for specific cells.
- Column Title: Describes the data within individual columns.
- Row Title: Identifies and categorizes data within each row.
- Chart Title: Summarizes information presented in visual charts or graphs.
- PivotTable Title: Highlights insights from PivotTables.
- Report Title: Captures the main topic in reports or presentations.
What Is the Importance of Titles in Excel?
- Data Organization: Titles offer a quick overview, helping you and others understand the data.
- Data Interpretation: Well-chosen titles provide essential context about spreadsheet content.
- Data Filtering: Titles aid in identifying relevant columns or rows for filtering or sorting large datasets.
- Data Sharing: Clear, descriptive titles make it easier for recipients to grasp the data’s purpose.
- Documentation and Reference: Titles serve as reference points for future use and quick retrieval.
- Presentation and Reporting: Well-crafted titles enhance presentations, capture attention, and add impact.
Inserting a Title
Method 1 – Using the Merge & Center Feature
- Select the range (e.g., B2:H2).
- Go to the Home tab >> Alignment >> Merge & Center.

- Our selected cells are now merged.
- Type Sales Report as the title in the merged cells.
Notes: Merging cells retains data from the first cell; data from other cells is lost.
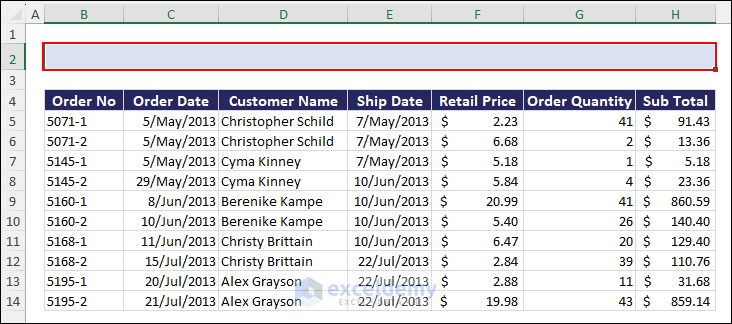
Method 2 – Inserting a Title Using the Center Across Selection Command
- We have entered a title in cell B2.
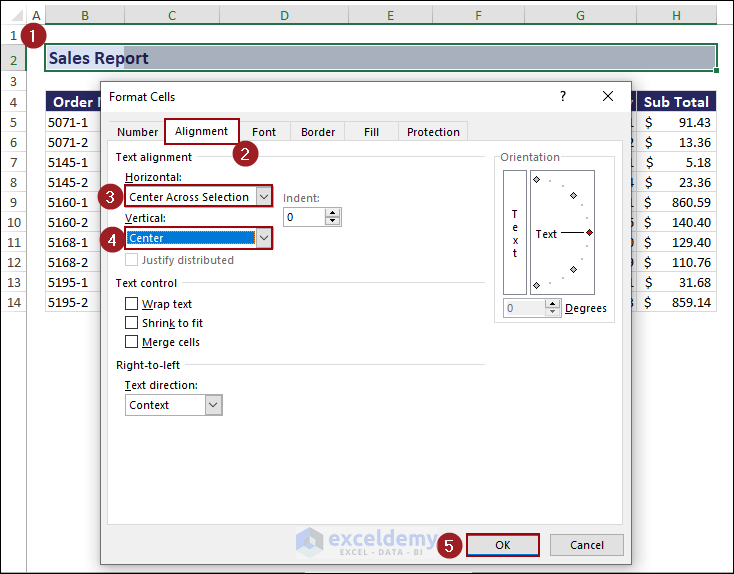
- Select the range (e.g., B2:H2) and press Ctrl + 1.
- In the Format Cells dialog, go to the Alignment tab.
- Choose Center Across Selection from the Horizontal drop-down.
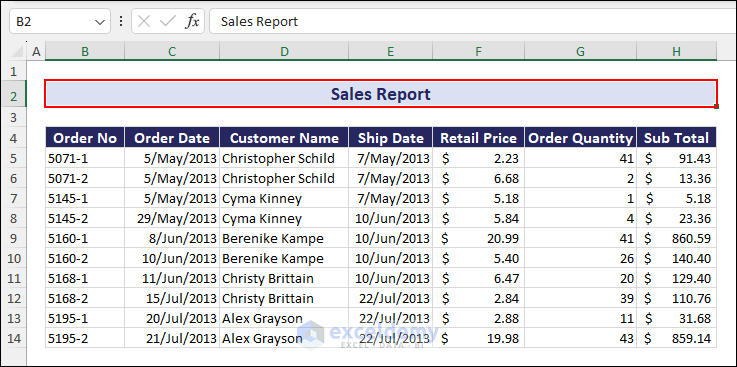
- Select Center from the Vertical drop-down and click OK.
- Your title is centered without losing data from the selected cells.
Note: By using the Center Across Selection option, you can center the title without losing any data from the selected cells.
Remember, clear titles improve data communication and understanding.
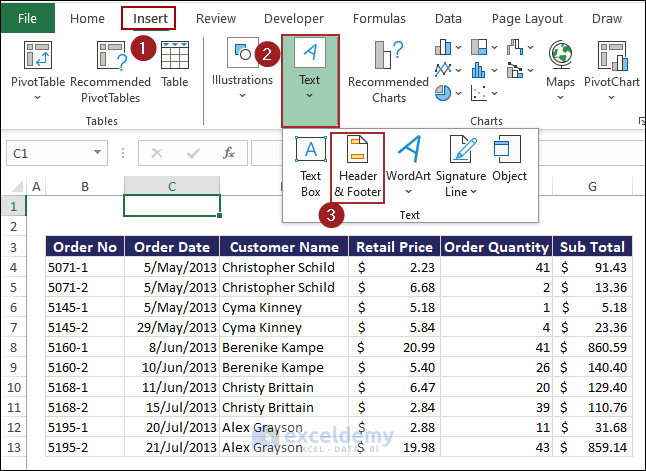
Method 3 – Adding a Title Using Header and Footer Feature
- Go to the Insert tab.
- Click on Header & Footer in the Text group.
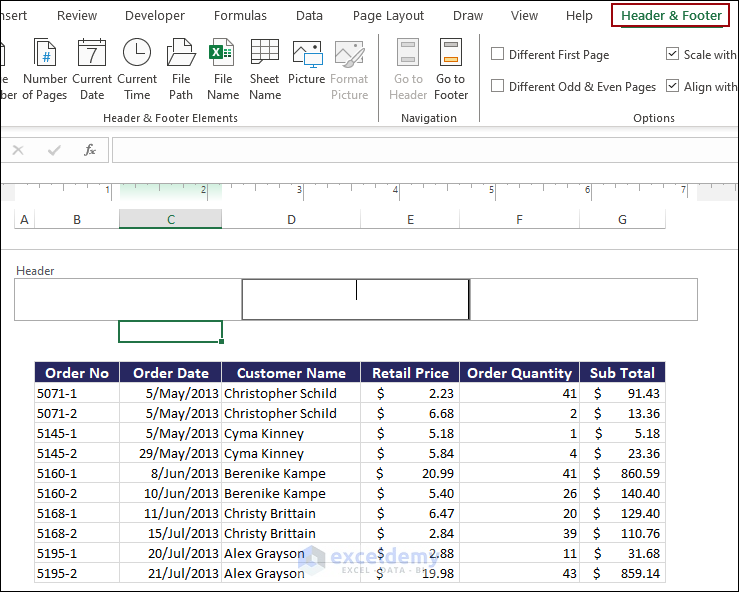
- The Header & Footer box appears on the Excel sheet.
- Click the Add header box.
- From the Header & Footer Elements group, choose File Name and Sheet Name with a space.
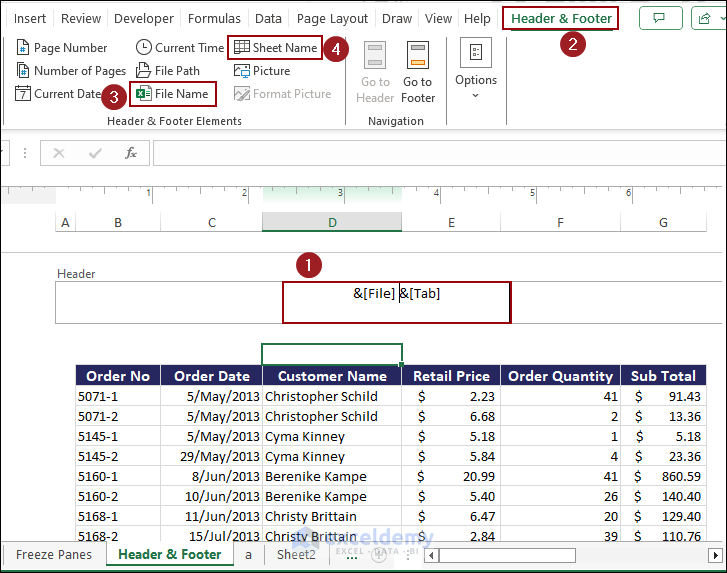
- Move your cursor to any other cell to see the title.
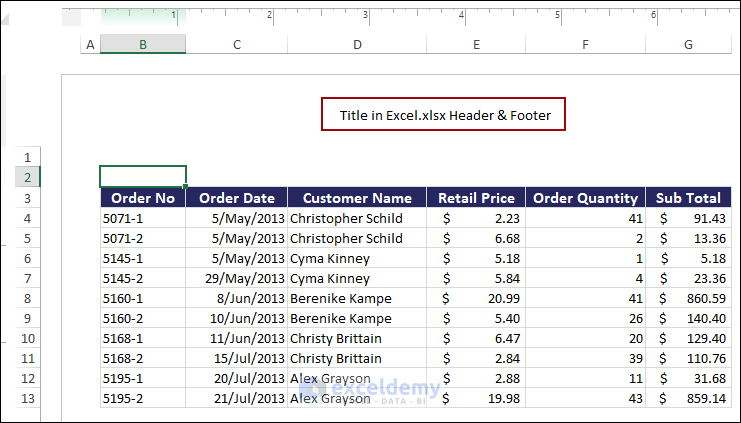
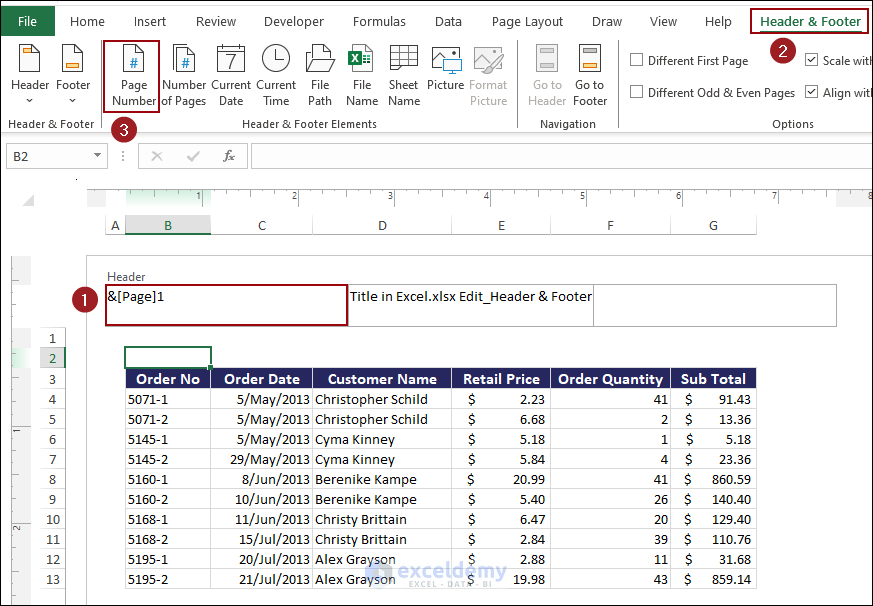
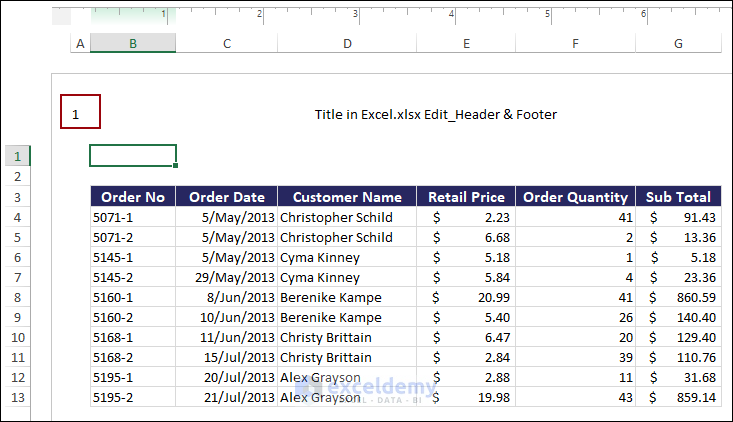
Method 4 – Adding Page Numbers, Dates, or Other Text
- Select Header.
- Go to the Header & Footer tab.
- Under Header & Footer Elements, choose Page Number.
Click here to enlarge the image
- Move your cursor to any cell to display the page number.
Formatting the Title in Excel
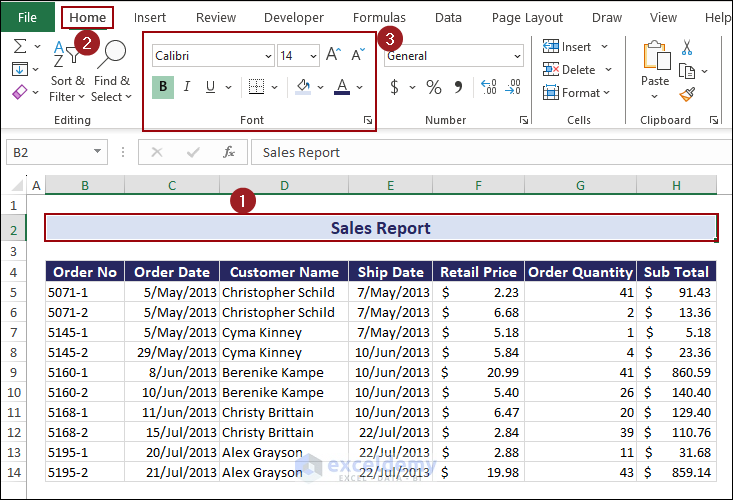
Method 1 – Using the Font Group
- Select the title of the data table.
- Go to the Home tab.
- Choose the Font group.
- Format the title (e.g., change font color, size, style).
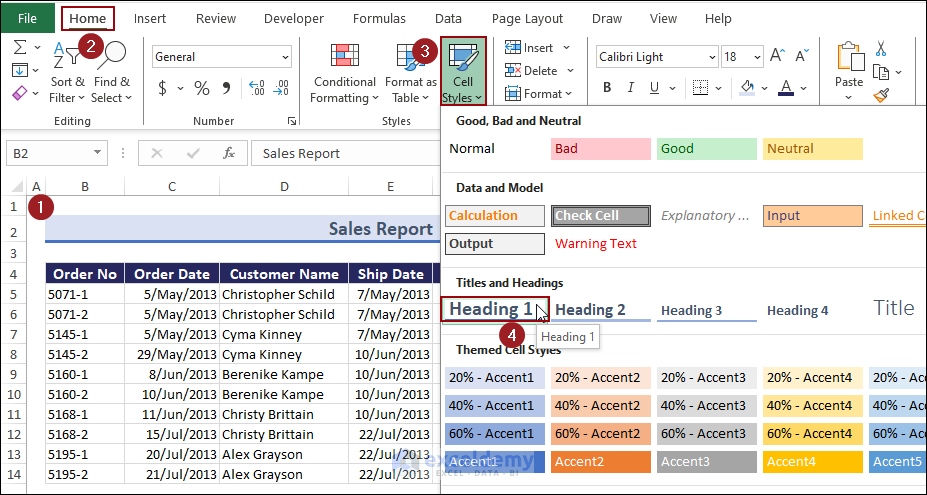
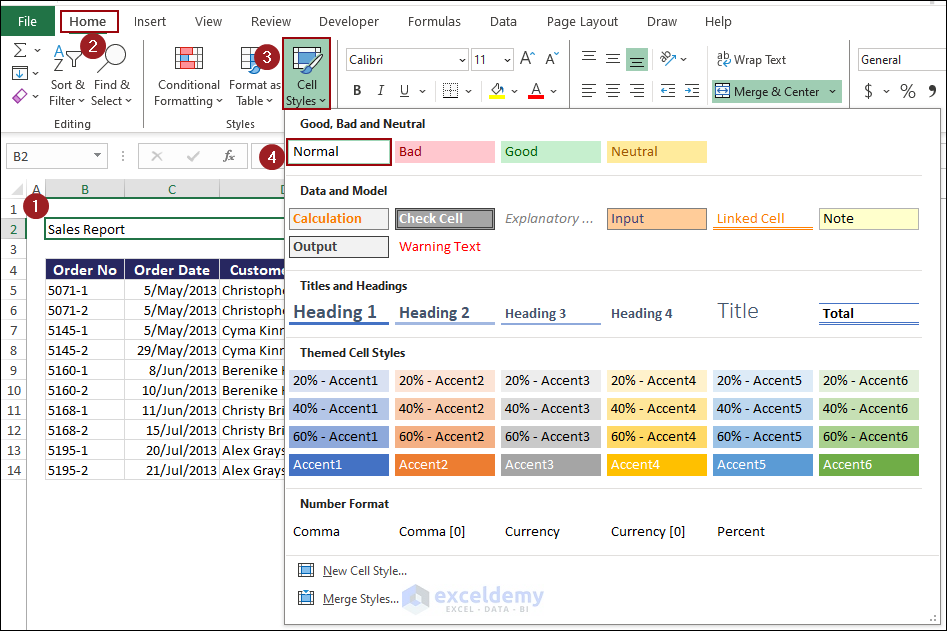
Method 2 – Using Cell Styles
- Select the title.
- Go to the Home tab.
- Choose the Font group.
- Select the Cell Styles drop-down list.
- Choose Heading 1 from the Title and Heading option.
Click here to enlarge the image
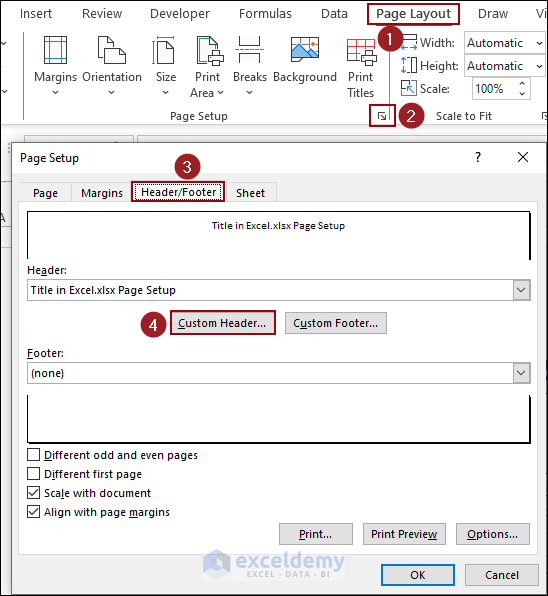
Method 3 – Editing the Header & Footer Title
- Go to the Page Layout tab.
- Click the arrow in the bottom-right corner.
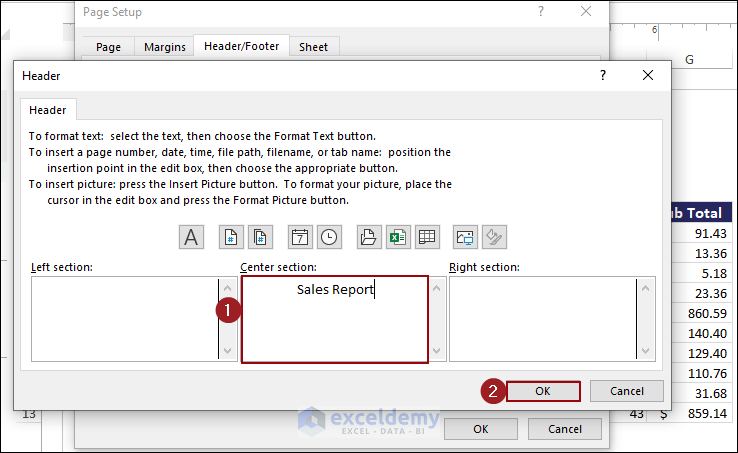
- In the Page Setup dialog, choose Custom Header from the Header/Footer tab.
- Insert Sales Report in the center section.
- Click OK twice.
- You will see the Sales Report as the header.
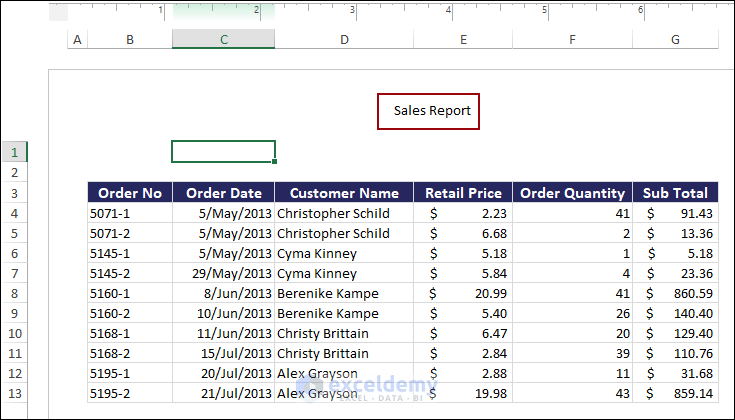
Following the above process, you can edit the header title as you want.
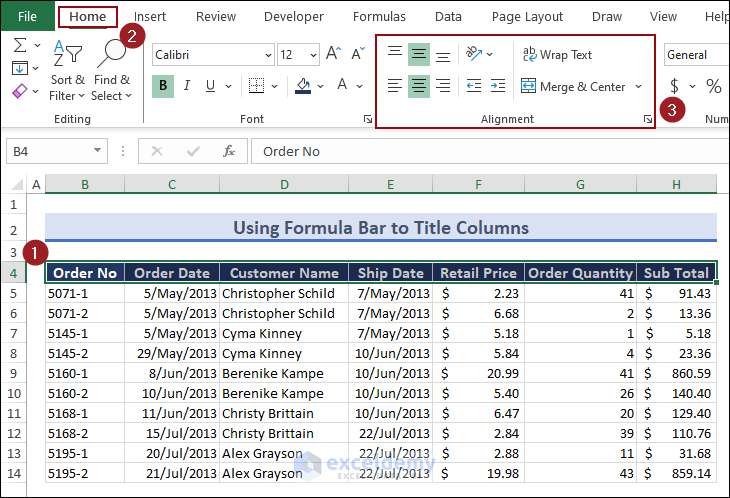
Titling a Column in Excel
- Using the Formula Bar:
- Select cell B4.
- Enter your desired column title (e.g., Order No) in the Formula Bar.
- Press Enter.
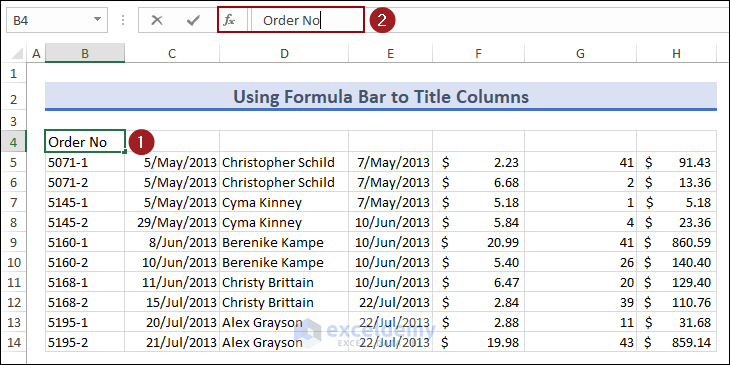
- Repeat for other columns (e.g., Order Date, Customer Name).
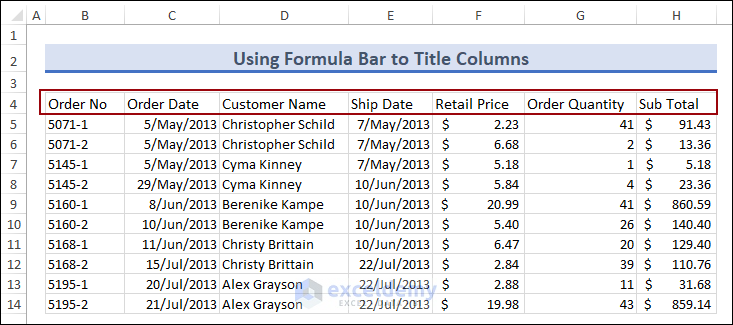
Formatting Column Titles:
- Select the range B4:H4.
- Go to the Home tab.
- Use the Font group to make text bold, italic, or change colors.
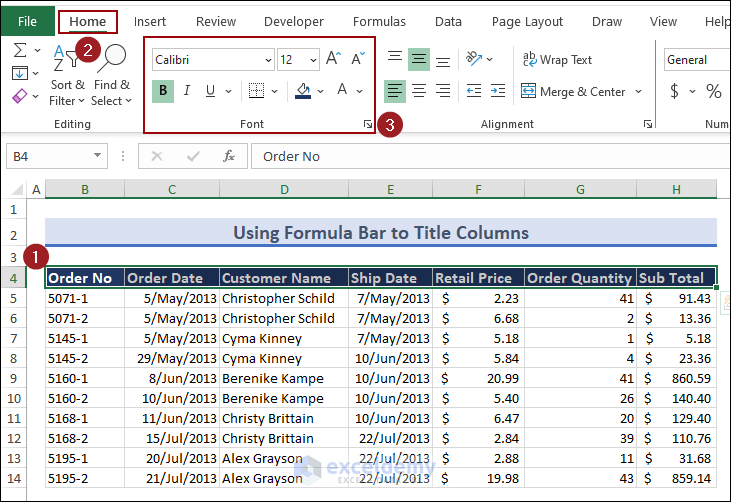
- Align the titles using Center and Middle Align from the Alignment group.
Removing a Title in Excel
- Select the cells with titles.
- Go to the Home tab.
- Choose Styles > Cell Styles > Normal.
- Alternatively, select the title and press Delete.
How to Add a Title in an Excel Chart
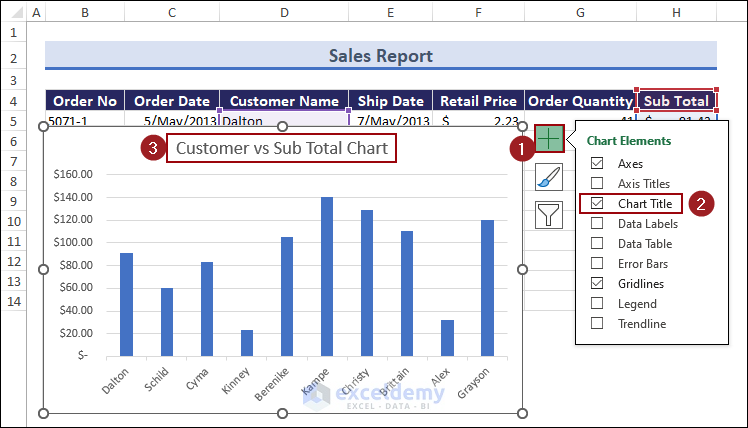
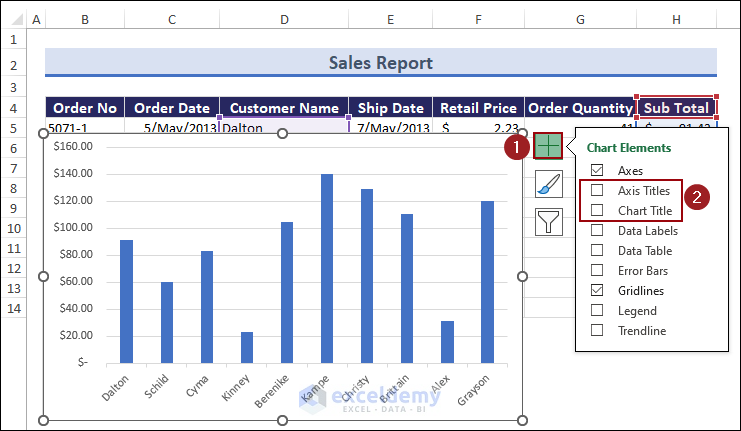
Method 1 – Adding and Formatting Chart Titles
- Click anywhere on the chart.
- Three buttons should appear to the right of your chart.
- Click on the Chart Elements button (the one with a ‘+’ icon).
- Check the checkbox next to Chart Title.
- Enter your desired title (e.g., Customer vs Sub Total).
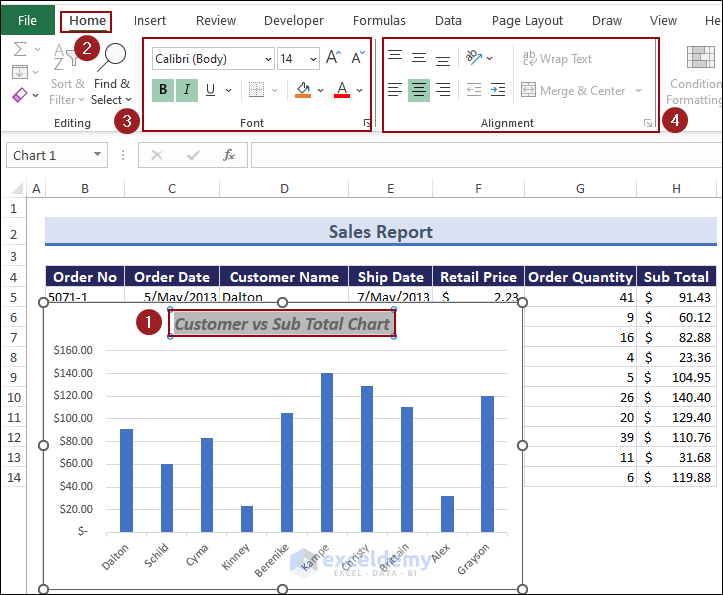
- To format the chart title:
- Select the chart title.
- Go to the Home tab.
- Use the Font group for bold, italic, and color formatting.
- Modify alignment using the Alignment group.
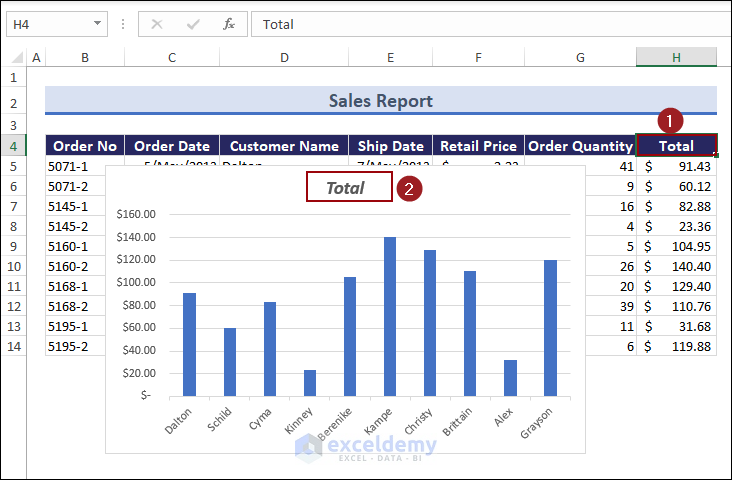
Method 2 – Creating a Dynamic Chart Title
- Select the chart title.
- Go to the Formula Bar.
- Enter an equal sign (=) and select any cell (e.g., $H$4) to create a link.
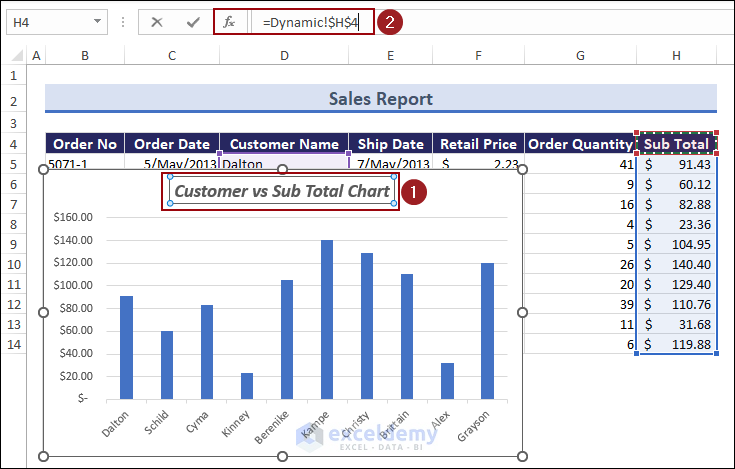
- Press Enter.
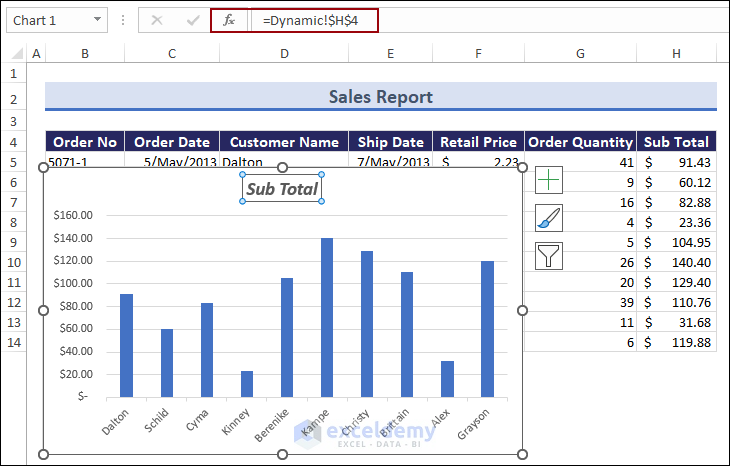
- Verify that the chart title updates dynamically when the linked cell changes (e.g., changing Sub Total to Total).
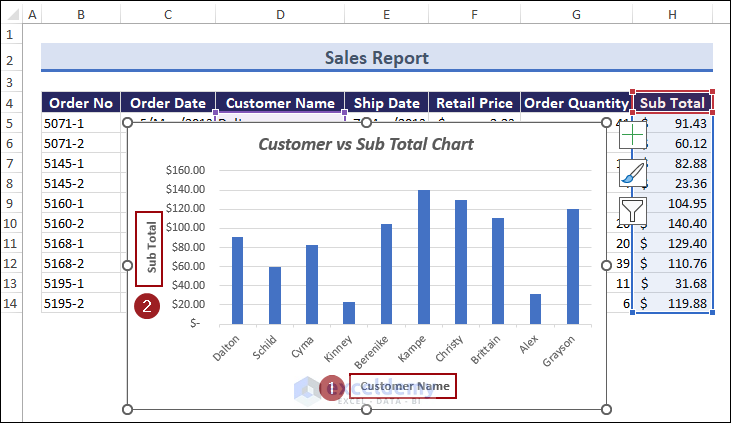
Method 3 – Adding Axis Titles
- Select the chart.
- Click the ‘+’ symbol at the top-right corner of the chart.
- Check the Axis Titles option from Chart Elements.
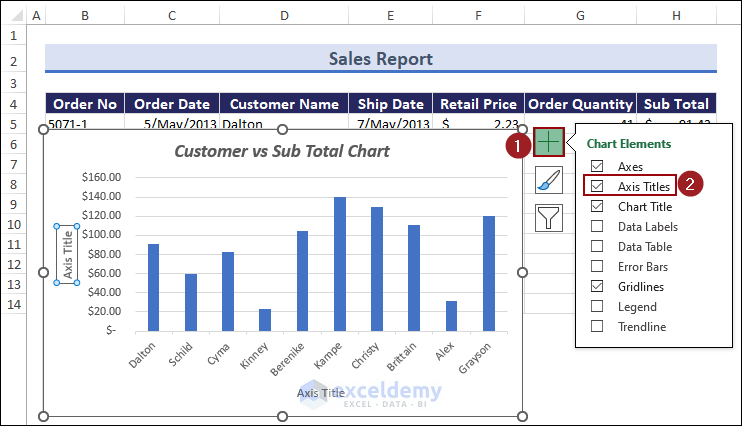
- Set the horizontal axis title as Customer Name and the vertical axis title as Sub Total.
Removing Chart or Axis Titles
- Uncheck the Chart Title & Axis Titles option from the Chart Elements group.
Freezing Titles in Excel
- Select the cell below the title (e.g., A3).
- Go to the View tab.
- Choose Window > Freeze Panes.
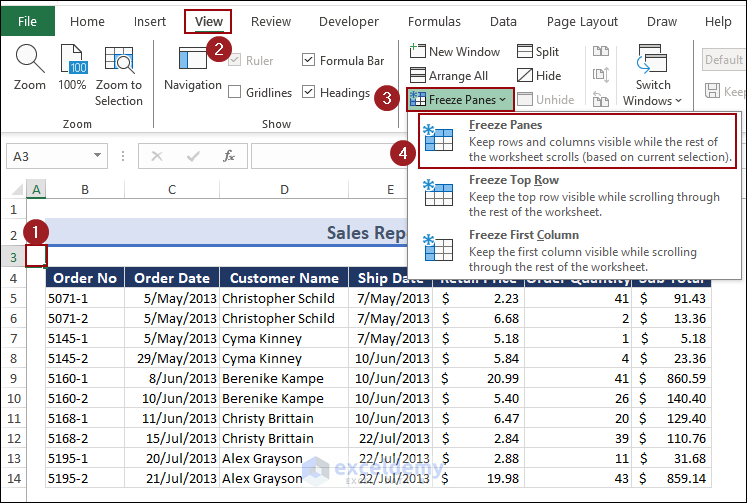
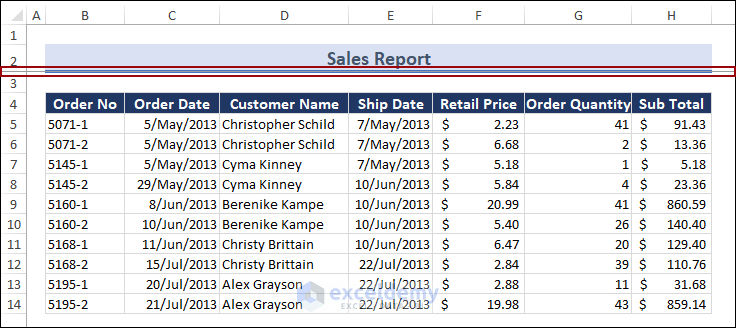
Your title remains visible during scrolling.
To unfreeze the titles, go back to the Freeze Panes dropdown menu and select Unfreeze Panes.
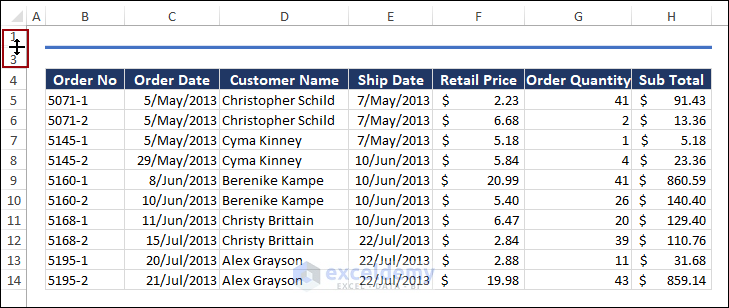
Hiding Titles
- Choose the View tab.
- Click on Workbook Views and select Normal.
- By default, titles within rows and columns are visible.
- Minimize row height by dragging the mouse upward below Row 2 to hide the title.
Download the Practice Workbook
You can download the practice workbook from here:
Things to Remember
- Remember to save your spreadsheet after adding titles.
- Explore additional features like Data Labels and Legends in the Chart Elements section.
- You can also use the Alignment and Font groups from the Home tab to further format your titles.
Frequently Asked Questions
Can I add a picture or image as the title in Excel?
Unfortunately, you cannot directly add a picture or image as a title in Excel. However, you can create a separate text box or shape and insert an image into it. Position it near the title area to achieve a similar effect.
Is there any character limit for the title in Excel?
Yes, there is a character limit for titles in Excel. The maximum length for a title is 255 characters, including spaces and special characters.
Can I use a formula as a title in Excel?
You can use a formula as a title in Excel. Follow these steps:
- Create the desired formula in a cell.
- If you want to display the formula result as a title, copy the formula cell.
- Right-click the destination cell where you want the title.
- Choose “Paste Values” to convert the formula result into a static title.
Title in Excel: Knowledge Hub
<<Go Back to Worksheet Formatting | Learn Excel
Get FREE Advanced Excel Exercises with Solutions!
