If you have an Excel worksheet with some very important functions and formulas, and you want to share this file with others without allowing them to edit it, or, if you want to protect your Excel cells from deletion, you are in the right place. The best solution we have been able to get includes the following 3 methods. In this article, you will learn these 3 effective ways to protect Excel cells from deletion.
How to Protect Excel Cells from Deletion: 3 Effective Methods
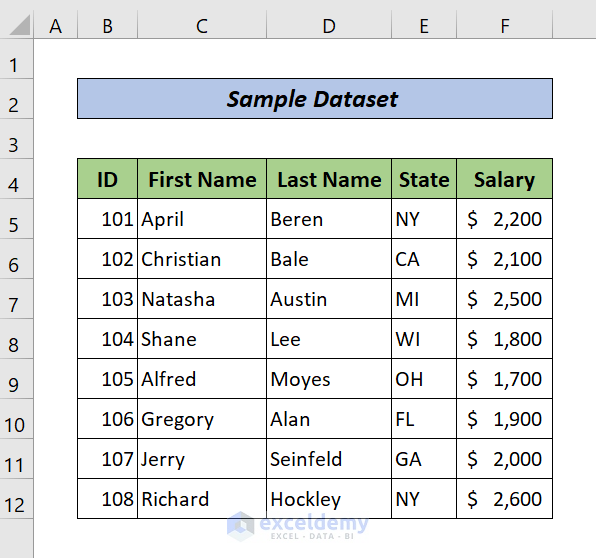
Let’s first introduce our sample dataset. We have data on some people’s first names, last names, states, and salaries. Our goal is to protect the cells C4:D12 from deletion.
1. Lock Cells and Protect Excel Spreadsheet to Save Them from Deletion
All cells in an Excel spreadsheet remain locked by default. But that will have no effect if we don’t protect the worksheet as well. After we do that, the deletion or any kind of editing in respective cells will be restricted.
To prevent the cells C4:D12 from deletion, just follow the steps below.
Steps:
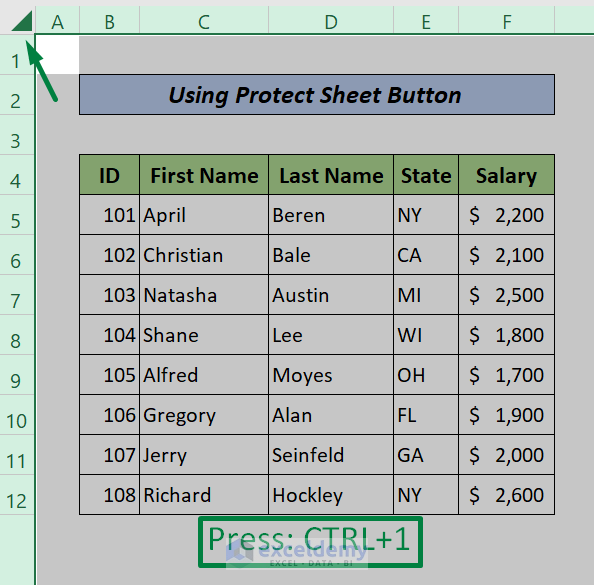
- First, press CTRL+A to select the whole sheet. Then, press CTRL+1. The Format Cells window will pop up.
- Under the Protection section, unmark the Locked checkbox, and finally, press OK.
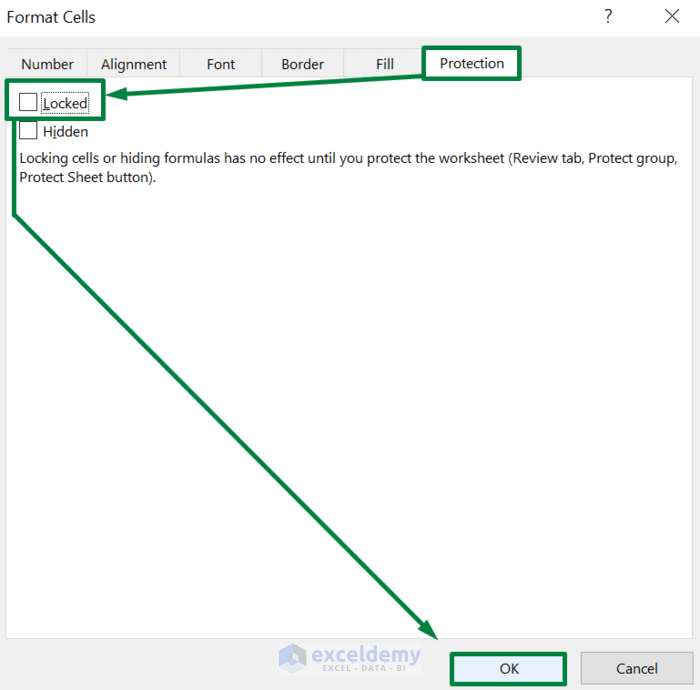
- Again, select the cells you want to protect by password. Then, again press CTRL+1, and the Format Cells window will appear.

- This time, mark the Locked option and then click on the OK button.

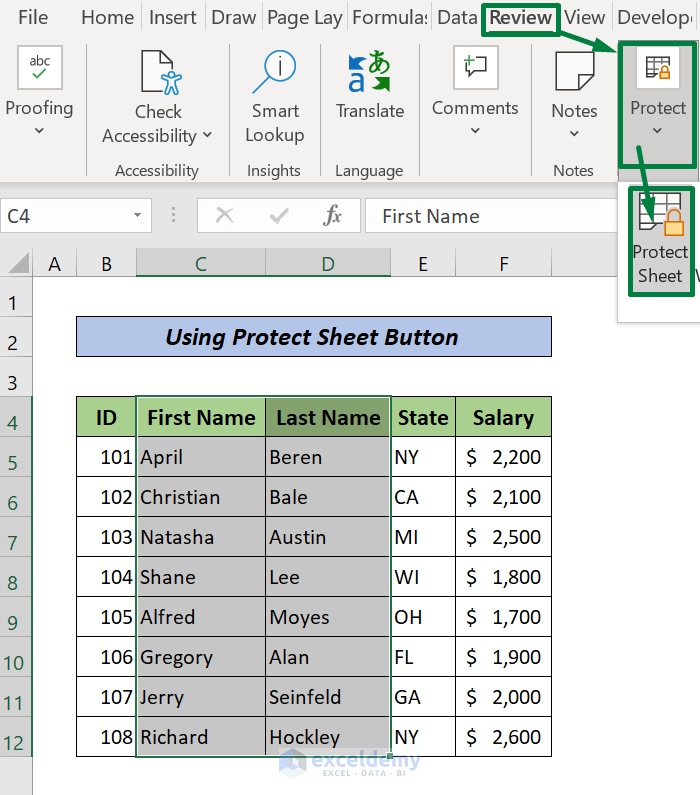
- Then, go to the Review tab. Under the Protect group, click on the Protect Sheet button. The Protect Sheet window will pop up.
- In the Password box, type your convenient password, and without doing anything more, press OK.
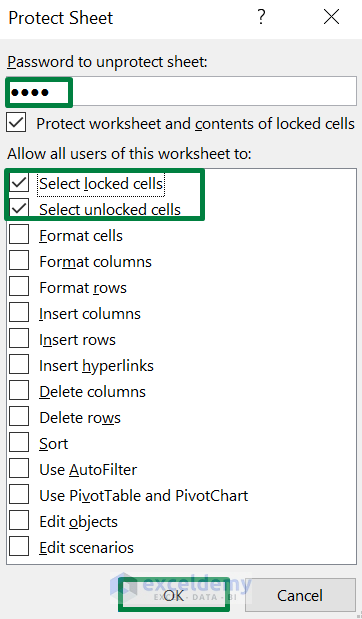
- The Confirm Password dialog box will appear. Reenter your password here. Then, press OK.

- Now, the cells C4:D12 are protected from deletion.
Read More: How to Lock Certain Cells in Excel
2. Set Excel File to Read-Only Mode
Another great way to protect the Excel cells from any kind of changes or deletion is to enable the ‘read-only’ mode’. Just follow the steps below to apply read-only mode in your Excel sheet.
Steps:
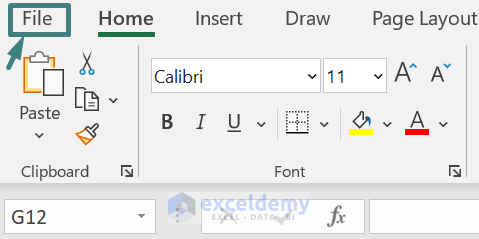
- Go to the File tab.
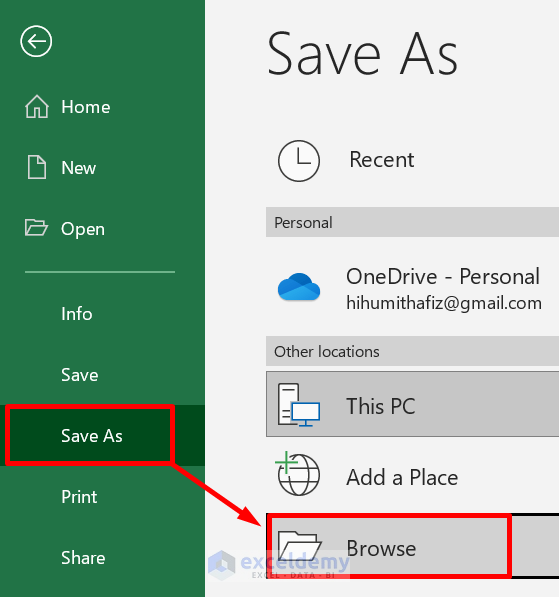
- Click on the Save As command. Then click on Browse. The Save As window from the File Manager will pop up.
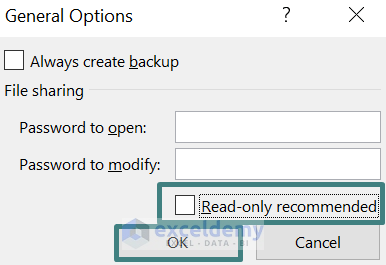
- Click on Tools. From the drop-down, click on General Options. The General Options window will pop up.

- Select the Read-only recommended check box. Finally, press OK.
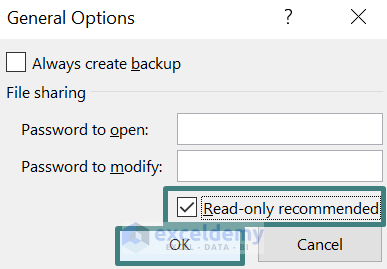
- Now, click on the Save button.

- At this moment, your worksheet will be in read-only mode. Now if you open the file again, and want to make any changes in the cells, a warning of read-only mode will appear.
How to Disable Read-Only Mode:
- However, if you want to recover the previous editing mode, you just need to click on ‘No’ in the warning window.

- Then, repeat all the steps above except, this time, unselect the Read-only recommended box and click on OK. In this way, you can remove the Read-only mode.
Read More: How to Protect Cells Without Protecting Sheet in Excel
3. Use a VBA Code
Besides the two methods above, you can protect Excel cells from editing or deletion by running a VBA code. Follow the steps below to do this.
Steps:
- Open the worksheet that contains specific cells (in this example, C4:D12) which you do not want to delete. Now, right-click on the sheet tab named VBA and click on the View Code option from the context menu.
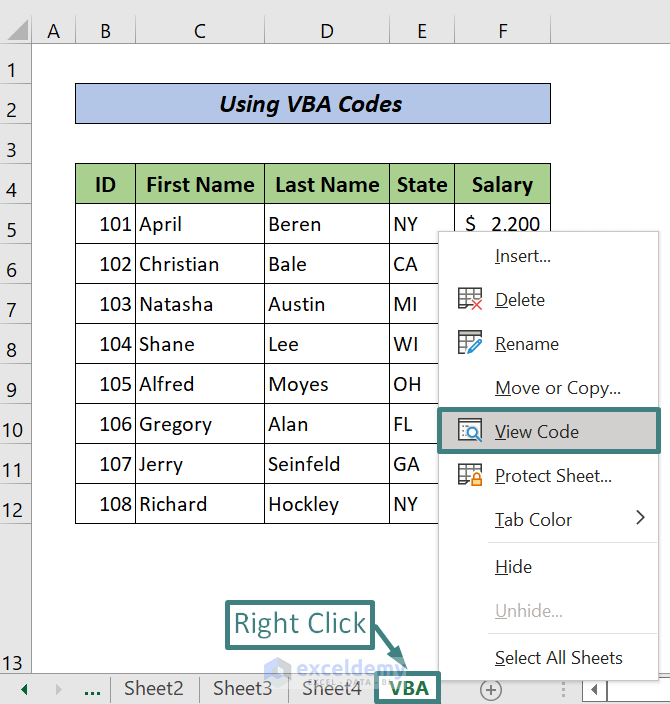
- A Microsoft Visual Basic for Applications window will pop up. Copy the following code and paste it into the module window. Finally, click on the Run button.
Private Sub Worksheet_Change(ByVal Target As Range)
If Intersect(Target, Range("C4:D12")) Is Nothing Then Exit Sub
On Error GoTo ExitPoint
Application.EnableEvents = False
If Not IsDate(Target(1)) Then
Application.Undo
MsgBox " The cells from the Range (C4:D12) can't be deleted ", vbCritical
End If
ExitPoint:
Application.EnableEvents = True
End Sub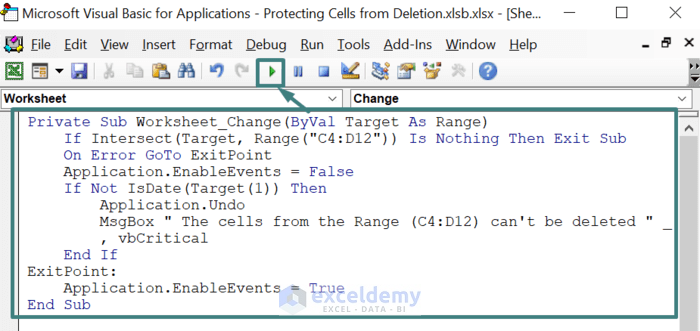
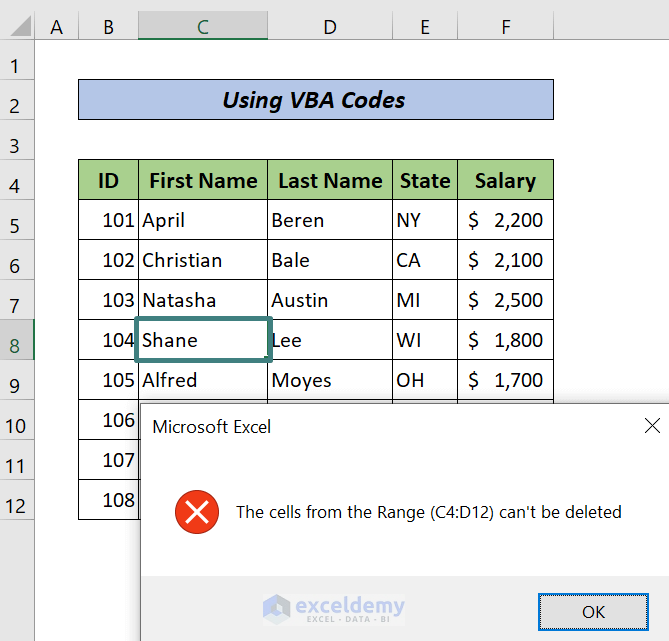
- Now, cells C4:D12 are protected from deletion or any kind of editing. If you want to edit or delete these cells, a warning window will pop up as in the following image.
Download Practice Workbook
Download the following Excel file for your practice. Password: 2022.
Conclusion
In this tutorial, I have discussed 3 effective ways to protect Excel cells from deletion. I hope you found this article helpful. Please, drop comments, suggestions, or queries if you have any in the comment section below.
Related Articles
- How to Lock Multiple Cells in Excel
- How to Lock a Cell in Excel Formula
- How to Protect Excel Cells with Formulas
- Protect Excel Cells But Allow Data Entry
- How to Lock Cell Value Once Calculated in Excel
- How to Unlock Cells without Password in Excel
<< Go Back to Protect Excel Cells | Excel Protect | Learn Excel
Get FREE Advanced Excel Exercises with Solutions!
