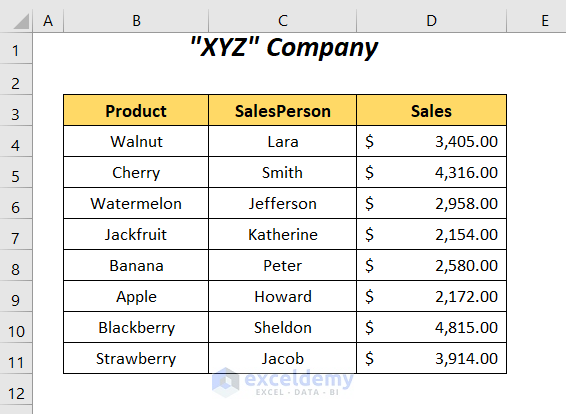
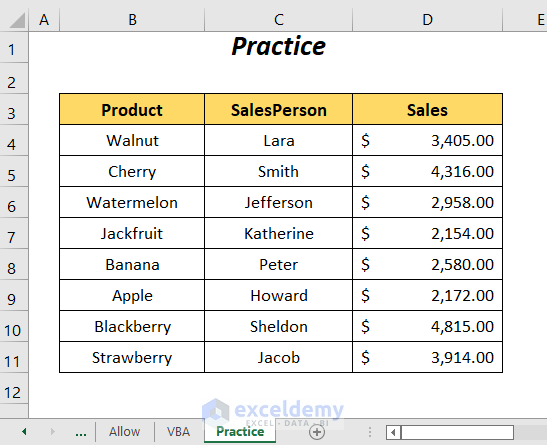
We have the following dataset containing the sales records of some products of a company. We will protect specific cells of this dataset without protecting the whole dataset or sheet.
Method 1 – Using the Format Cells Option to Protect Cells Without Protecting the Sheet
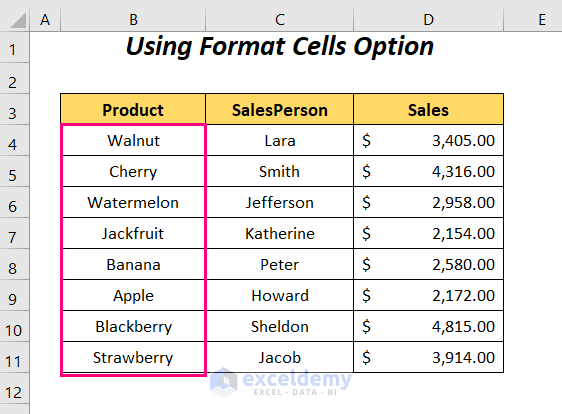
We will use the Format Cells option to protect the cells of the Product column only instead of protecting the whole dataset.
Steps:
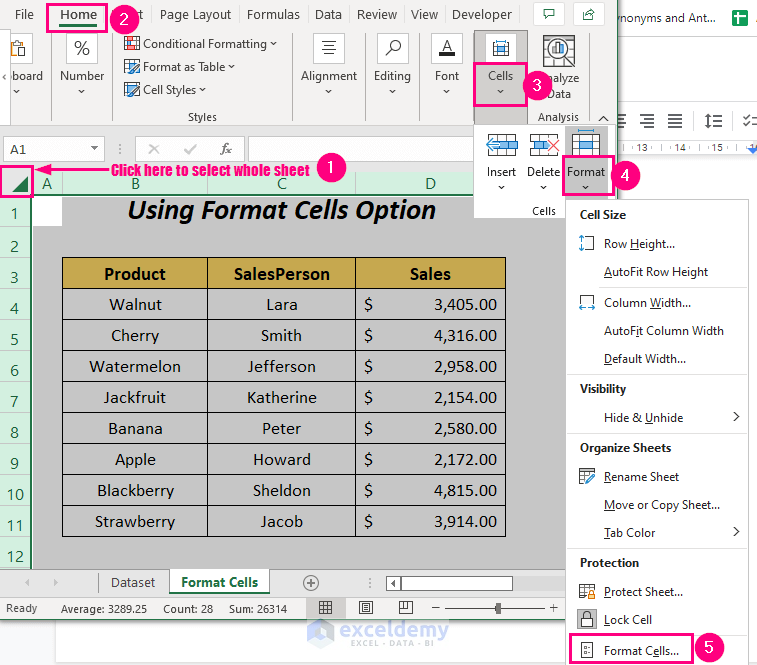
- Select the whole sheet by clicking on the triangle symbol in the top-left corner.
- Go to the Home tab and the Cells group.
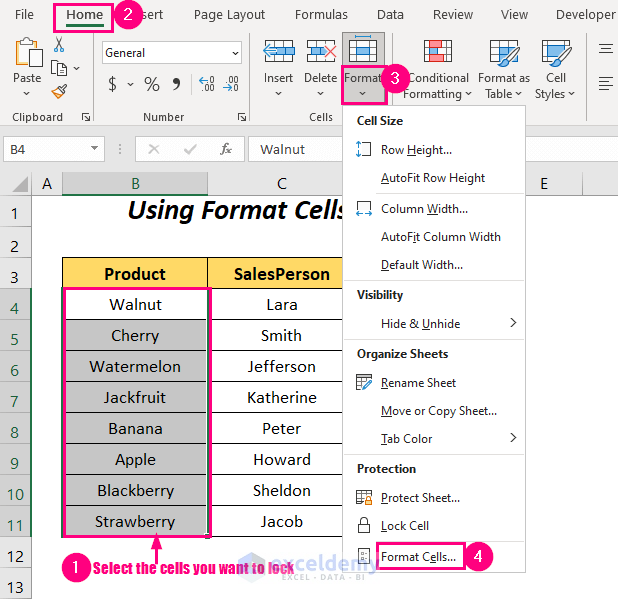
- Click on the Format drop-down and choose Format Cells.
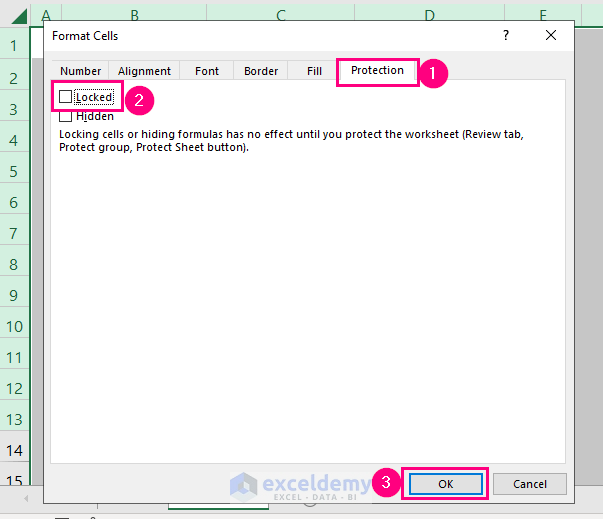
The Format Cells dialog box will appear.
- Click on Protection, uncheck the Locked option, and then select OK.
- Select the cells of the Product column and go to the Home tab and the Cells group.
- Choose the Format drop-down and select Format Cells.
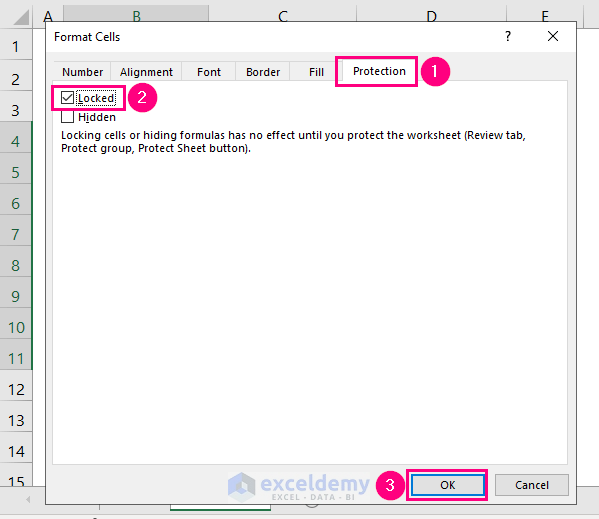
The Format Cells dialog box will appear again.
- Click on Protection, check the Locked option, and then select OK.
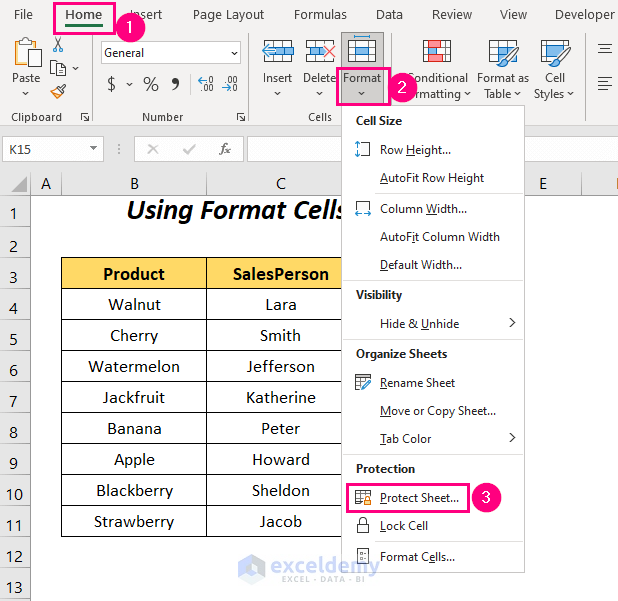
We will protect the sheet to check if only the selected cells are locked or not.
- Go to the Home tab and the Cells group.
- Click on the Format drop-down and choose Protect Sheet.
The Protect Sheet wizard will pop up.
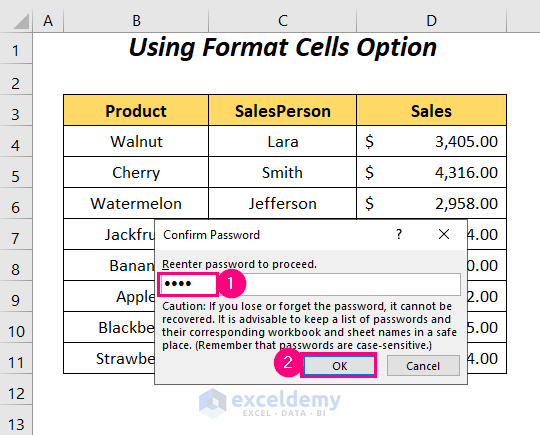
- Enter the password and press OK.
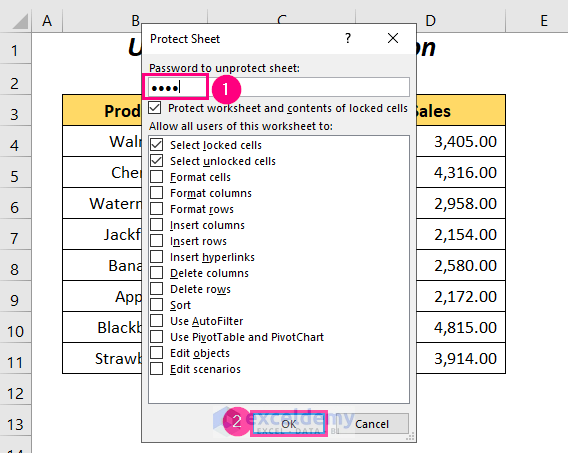
- Re-enter the password and press OK again.
If you want to change any of the cell’s values of the Product column, you will get the following error message.

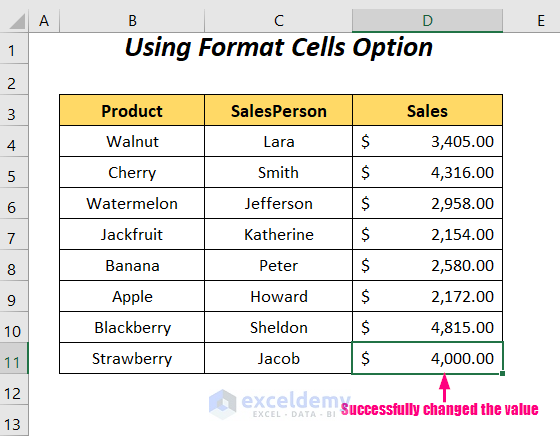
But, we have successfully changed the sales value for the Strawberry from $3,914.00 to $4,000.00.
Read More: How to Protect Excel Cells with Password
Method 2 – Using the Allow Edit Ranges Option to Protect Cells in Excel Without Protecting the Sheet
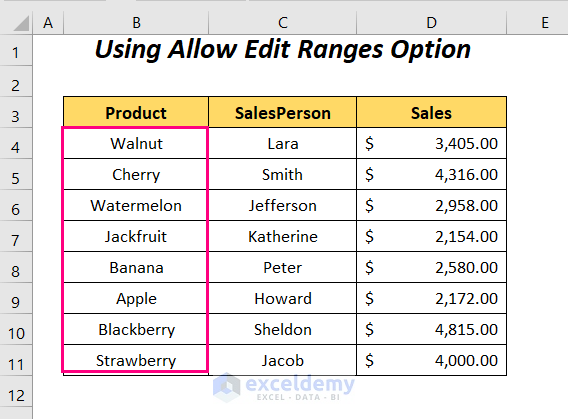
We will use the Allow Edit Ranges option to protect the cells of the Product column without locking the other cells of this sheet.
Steps:
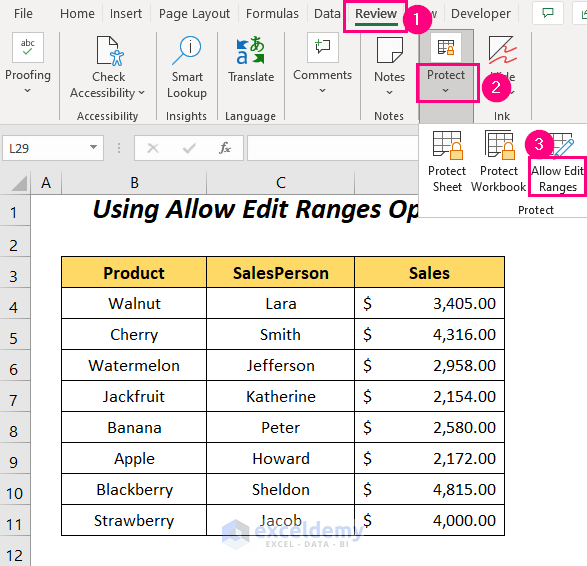
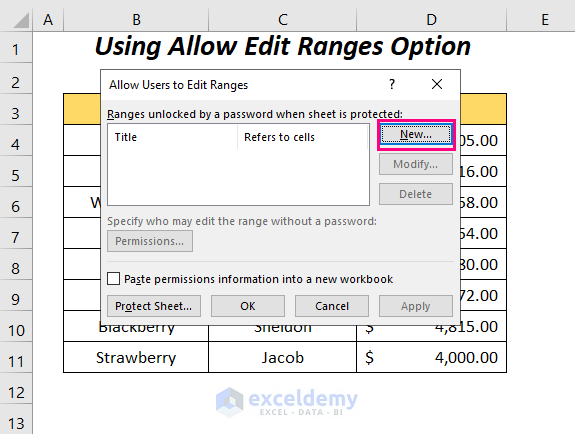
- Go to the Review tab and the Protect group, then select Allow Edit Ranges.
The Allow Users to Edit Ranges dialog box will open up.
- Select the New option.
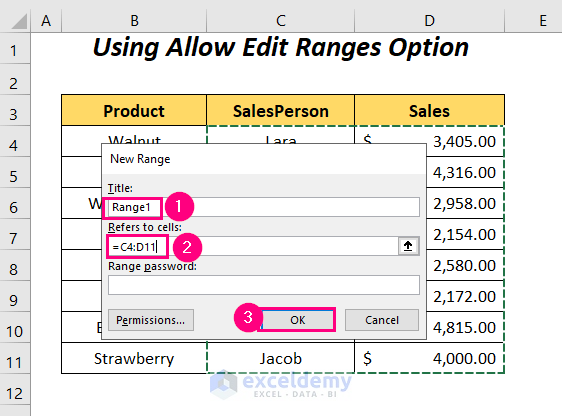
You will be taken to the New Range dialog box.
- Name the Title box as Range1 or any other thing you want and type the range C4:D11 in the Refers to cells box and press OK.
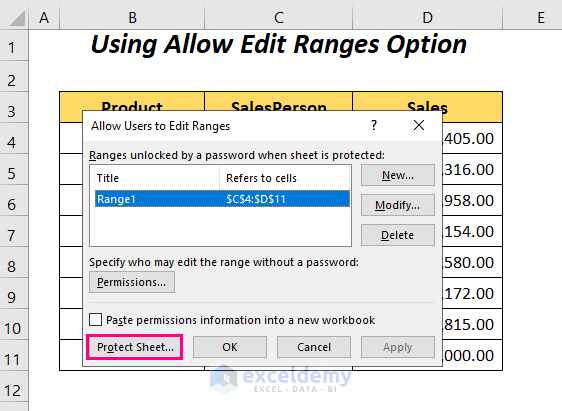
The Allow Users to Edit Ranges dialog box will appear again.
- Click on Apply.

- Select the Protect Sheet option again.
The Protect Sheet wizard will pop up.
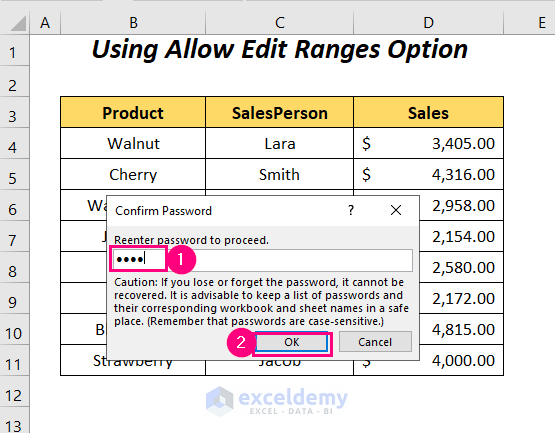
- Type in a password and press OK.
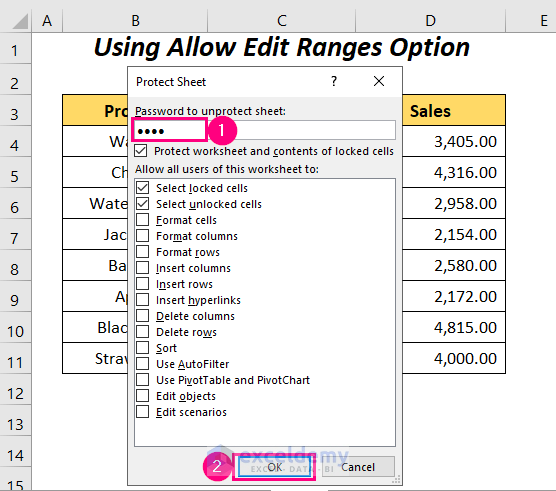
- Re-enter the password and press OK again.
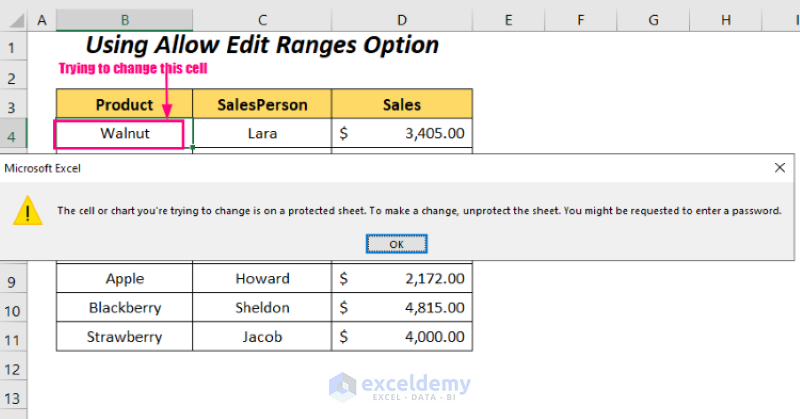
When changing any of the cell’s values of the Product column, you will get the following error message.
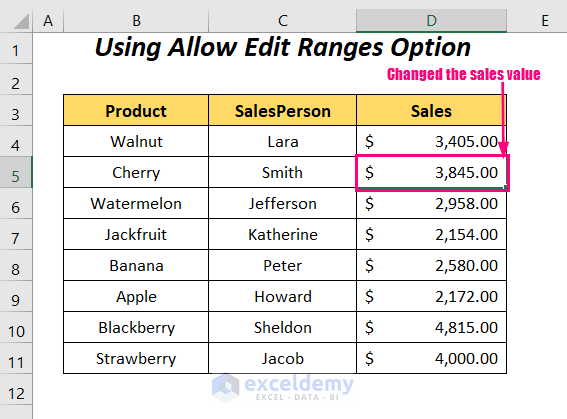
But, we have successfully changed the sales value for Cherry from $4,316.00 to $3,845.00.
Read More: Protect Excel Cells But Allow Data Entry
Method 3 – Applying VBA Code to Protect Cells Without Protecting the Sheet
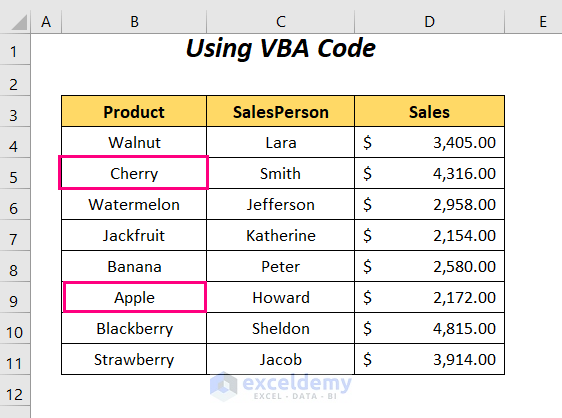
We will use VBA code to protect the specific cells for the products Cherry and Apple without protecting the whole sheet.
Steps:
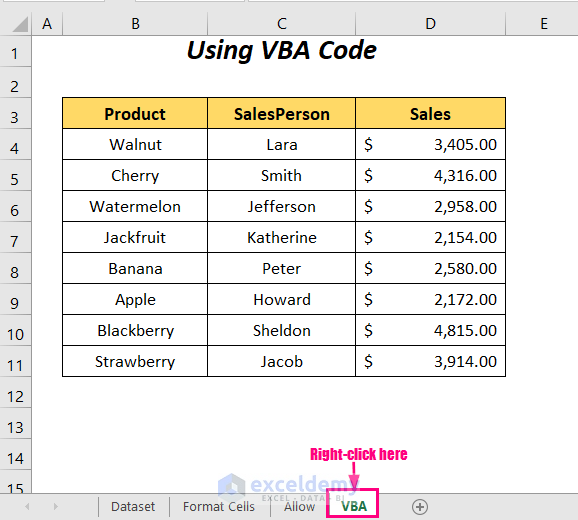
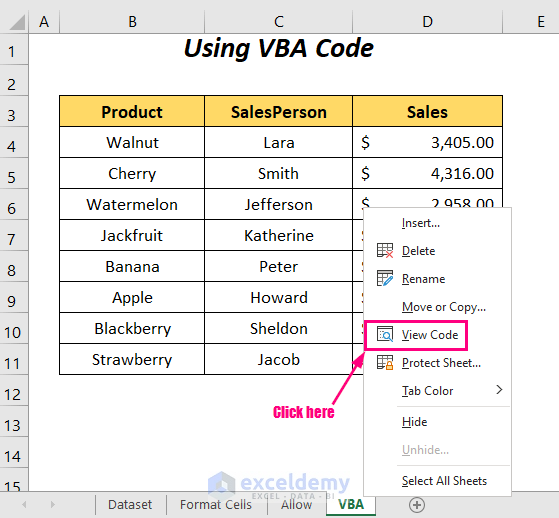
- Right-click on the name of the sheet.
- Select the View Code option.
- You will be taken to the Visual Basic Editor window.

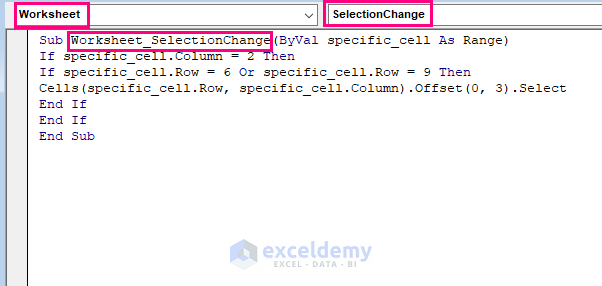
- Insert the following code in the code window.
Sub Worksheet_SelectionChange(ByVal specific_cell As Range)
If specific_cell.Column = 2 Then
If specific_cell.Row = 6 Or specific_cell.Row = 9 Then
Cells(specific_cell.Row, specific_cell.Column).Offset(0, 3).Select
End If
End If
End Sub
This code will execute only if we select any cell and so we have defined the procedure as Worksheet_SelectionChange, Worksheet is the Object and SelectionChange is the Procedure.
Two IF-THEN statements have been used here to define our specific cells with Column Number 2 and Row Number 6 or 9.
If these conditions are fulfilled then the selected cell will be 3 cells right to the cells B6 or B9.
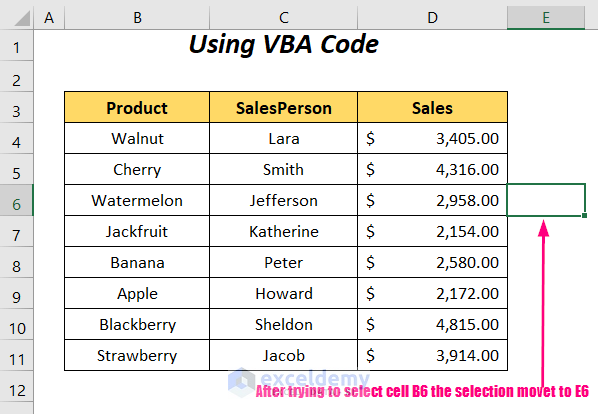
- Run the code with F5.
- Select the cell containing the product Watermelon, and the selection will be moved three cells to the right.
Practice Section
We have provided a Practice section like below in a sheet named Practice.
Read More: How to Lock Multiple Cells in Excel
Download the Practice Workbook
Related Articles
- How to Lock a Cell in Excel Formula
- How to Protect Excel Cells with Formulas
- How to Lock Cell Value Once Calculated in Excel
- How to Unlock Cells without Password in Excel
<< Go Back to Protect Excel Cells | Excel Protect | Learn Excel
Get FREE Advanced Excel Exercises with Solutions!
