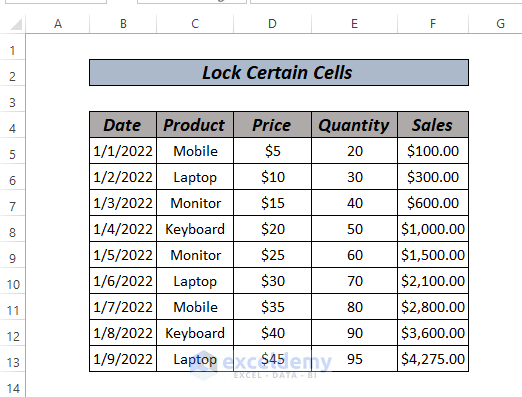
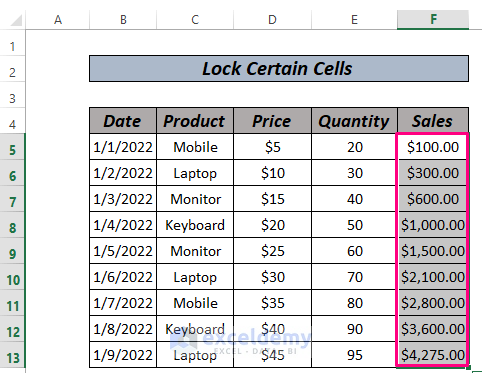
We will use a sample dataset containing Date, Product, Price, Quantity, and Sales. We’ll lock some cells so they can’t be edited.
How to Lock Certain Cells in Excel: 4 Simple Ways
Method 1- Lock Cells in Excel Using the Home Tab
By default, the worksheet is locked. We need to unlock the entire worksheet to lock certain cells as we want.
Steps:
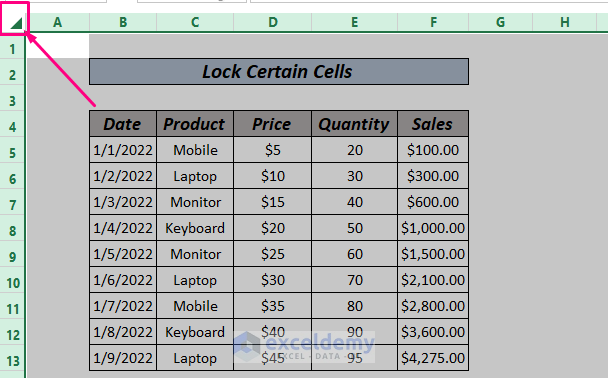
- Select the entire worksheet by clicking on the sign as shown in the image.
- Right-click on the selection and choose Format Cells.

All the cells are by default locked.
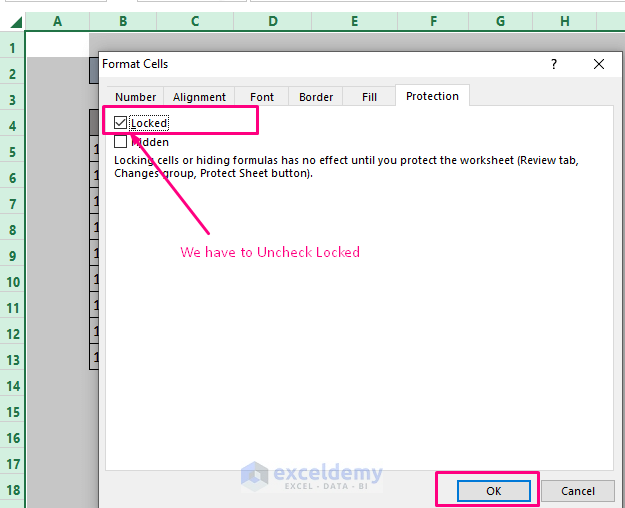
- Uncheck the Locked option and click OK.
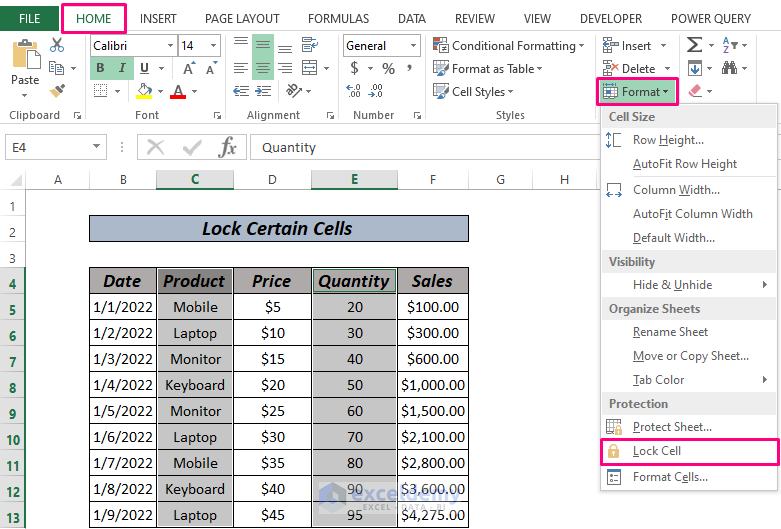
- Select the cells we want to lock (we want to lock the Product and Quantity columns).
- Go to Home, choose Format, and select Lock Cells.
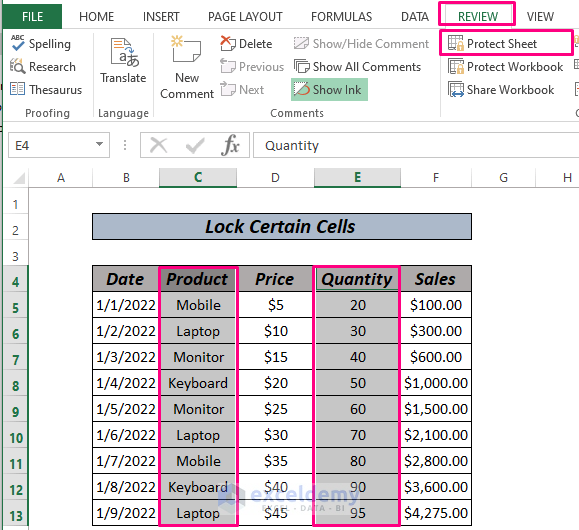
- Go to the Review tab and select Protect Worksheet.
- A dialog box will pop up. Enter a password.
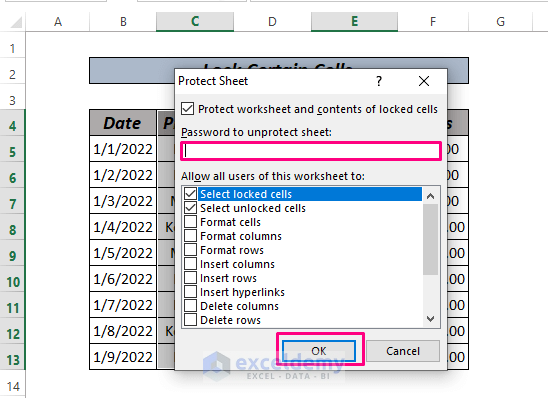
- Click OK and re-enter the password.
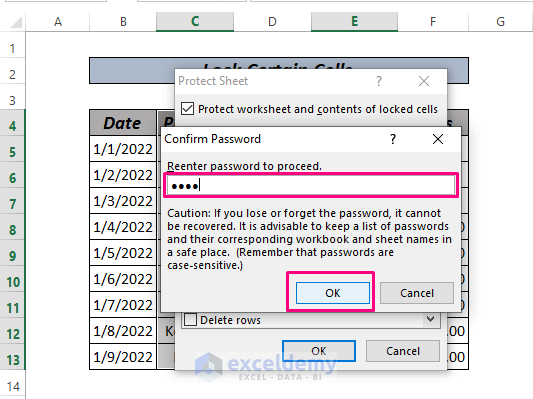
- Click OK and all the cells from the selected columns will be locked.
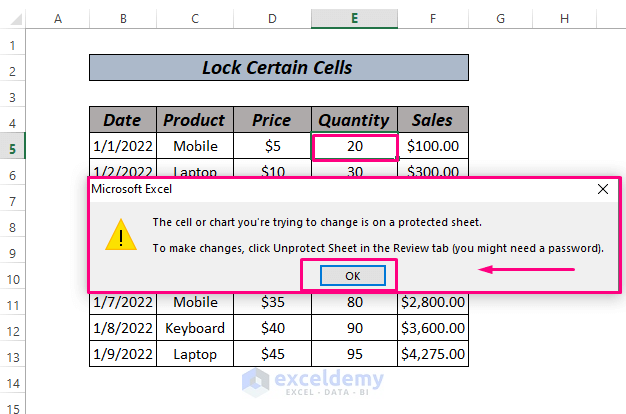
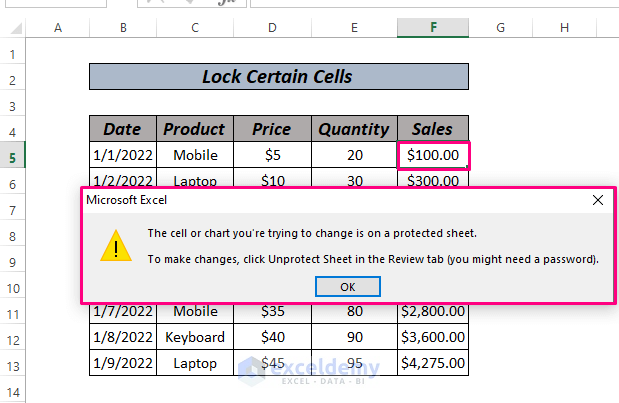
- Click on any of the cells in those selected columns and a message box will pop up.
Read More: How to Protect Excel Cells with Formulas
Method 2 – Using Format Cells to Lock Certain Cells
We want to lock all the cells in the Product column.
Steps:
- Select the entire worksheet by clicking on the top-left sign as shown in the image.
- Right-click and select Format Cells.
- All the cells are by default locked.
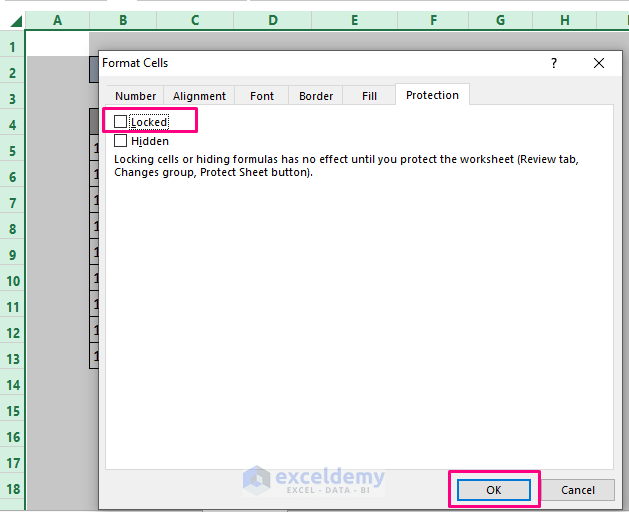
- Uncheck the Locked option and click OK.
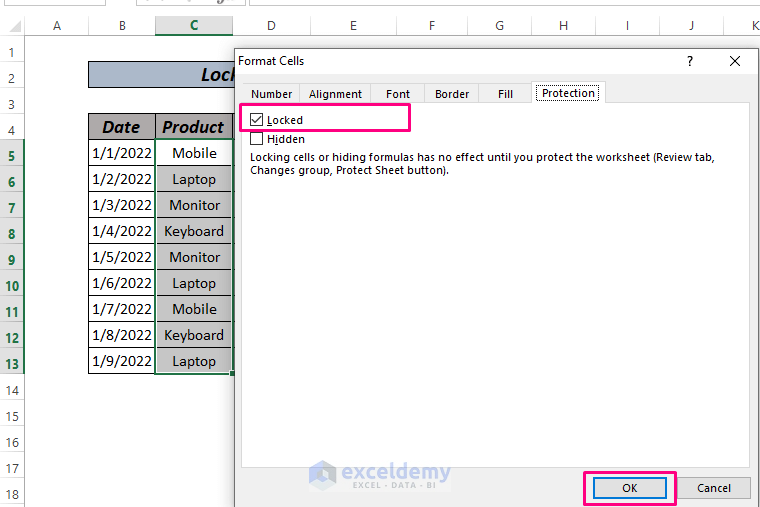
- Select the cells in Product column and press Ctrl + 1.
- Check the Locked box.
- Click OK.
- Go to the Review tab and follow the rest of the steps from Method 1.
Read More: How to Protect Excel Cells with Password
Method 3 – Lock Cells Containing Formulas
Steps:
- Select the entire worksheet by clicking on the top-left sign as shown in the image.
- Right-click and select Format Cells.
- You’ll get a Format Cells dialog.
- Uncheck the Locked option and click OK.
- Press Ctrl +G and a dialog box will pop up.
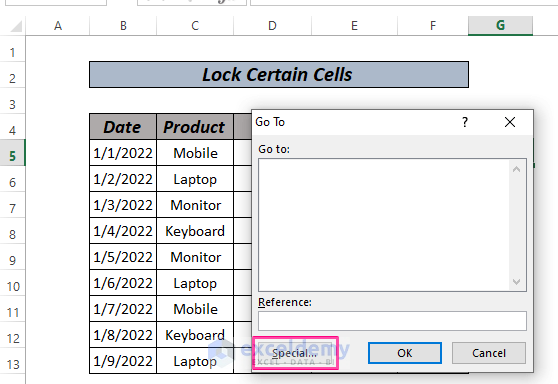
- Select Special to get another dialog.
- Select the Formulas option.
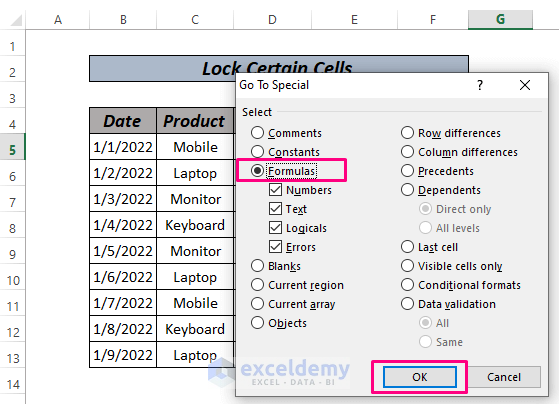
- Click OK and you’ll have all cells with formulas selected.
- Lock the cells by following Method 1 or 2.
Read More: How to Protect Cells Without Protecting Sheet in Excel
Method 4 – VBA to Lock Certain Cells
Steps:
- Right-click on the sheet name and go to View Code.
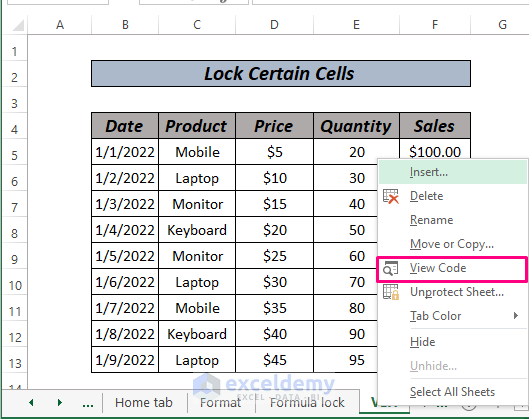
- Copy and paste the VBA code below.
VBA code:
Sub CertainCellLocker()
Cells.Select
Selection.Locked = False
Range("B5:B13,F5:F13").Select
Selection.Locked = True
ActiveSheet.Unprotect Password:="exceldemy"
ActiveSheet.Range("B5:B13,F5:F13").Cells.Locked = True
ActiveSheet.Protect Password:="exceldemy"
End Sub
We specified the cells by Range(“B5:B13,F5:F13”).Select and locked them through the code Selection.Locked = True.
- Press the F5 or play button to run the code.
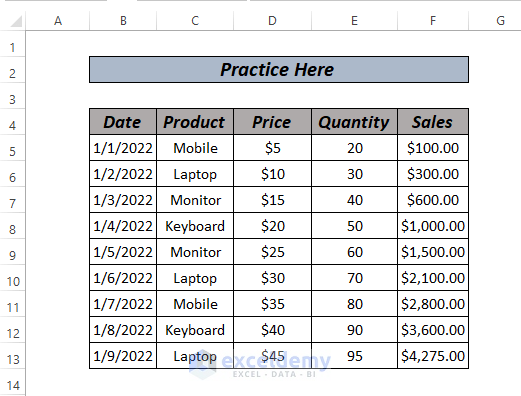
Practice Section
We’ve attached a practice section so you can test these methods.
Download the Practice Workbook
Related Articles
- How to Lock Multiple Cells in Excel
- How to Lock a Cell in Excel Formula
- How to Unlock Cells without Password in Excel
- How to Lock Cell Value Once Calculated in Excel
- Protect Excel Cells But Allow Data Entry
<< Go Back to Protect Excel Cells | Excel Protect | Learn Excel
Get FREE Advanced Excel Exercises with Solutions!

Mahbubur,
Thank you so much for a concise and detailed IFU. I had learned how to do this years ago, but not having done it in a few years left me lost! There are other ways to do it, but to me, this is the “old” way but I still prefer it.
Thanks again.
Hello Lynn,
You are most welcome.
Regards
ExcelDemy