The properties dialog box reveals the basic information about an Excel file. The file size, its location, the name of the author, and many other elementary information about a file can be found in this box.
How to View Properties Dialog Box in Excel: 2 Quick Ways
There are many ways to view the properties dialog box in Excel. This article will demonstrate two simple ways and guide you to the properties dialog box.
1. Finding Properties Dialog Box from Info Feature
You can find the Properties dialog box in just 2 steps.
Steps:
- Open your Excel workbook and click on the File ribbon.
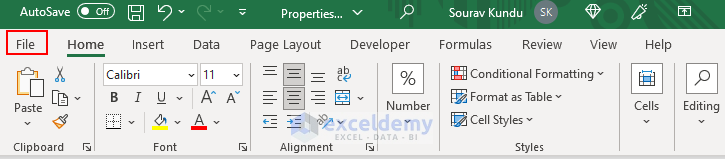
- Now, click on the Info option. And, the properties dialog box will appear on the right portion of the window.

- In this box, you can see basic properties like the Size of the file, the date when the file was first Created, and the date when the file was Last Modified, etc. Also, you can find the Author name.

- Now, let’s see the Advanced Properties options.
- Click on the Properties and thereby, select the Advanced Properties option.
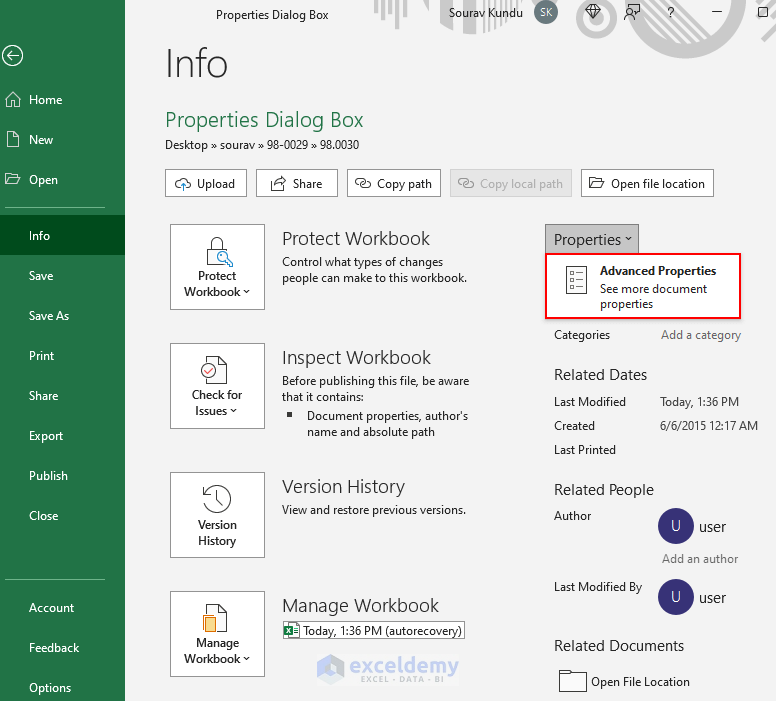
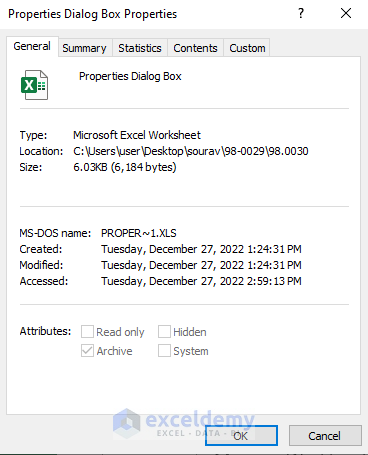
- Doing so, another Properties Dialog Box will open. This dialog box contains 5 tabs. You can look up different properties from these tabs.
Read More: How to Display Document Properties in Excel
2. Viewing Properties Dialog Box from Windows Explorer
Another way to find the Properties Dialog Box is to find it from the File location. Let’s see this process.
Steps:
- First, go to the File location.
- Then, place the mouse cursor on the file and click on the right button of the mouse.
- So, a window will open.
- Then scroll down the window and click on the Properties option.
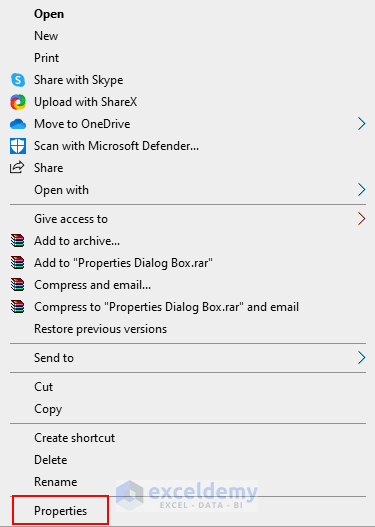
- And, thereby, the Properties Dialog Box will Open.
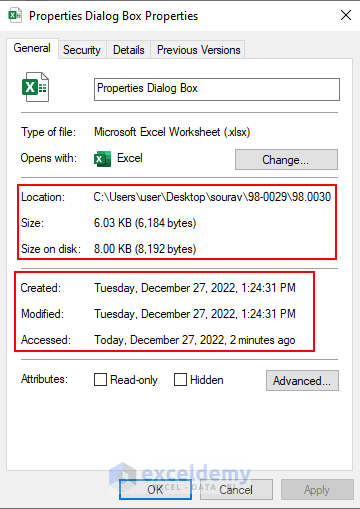
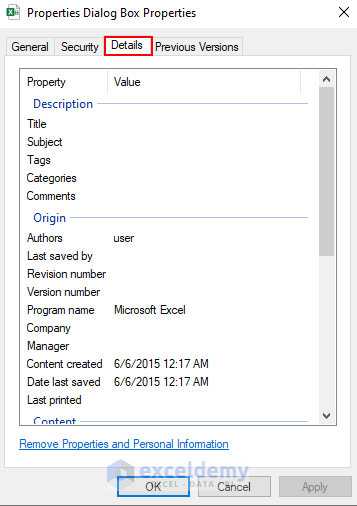
- You can see there are 4 tabs in this window where you can find various properties.
In the General tab, you will find the Location and size of the file.
Also, there is information about the history of this file.
In the Details tab, you can add different attributes to the file.
You can add a Title, give a Subject name, and make some Comments about the file.
Read More: How to Edit Document Properties in Excel
How to Remove Properties in Excel
Now, let’s see how we can remove properties in Excel.
Steps:
- First, open your Excel file.
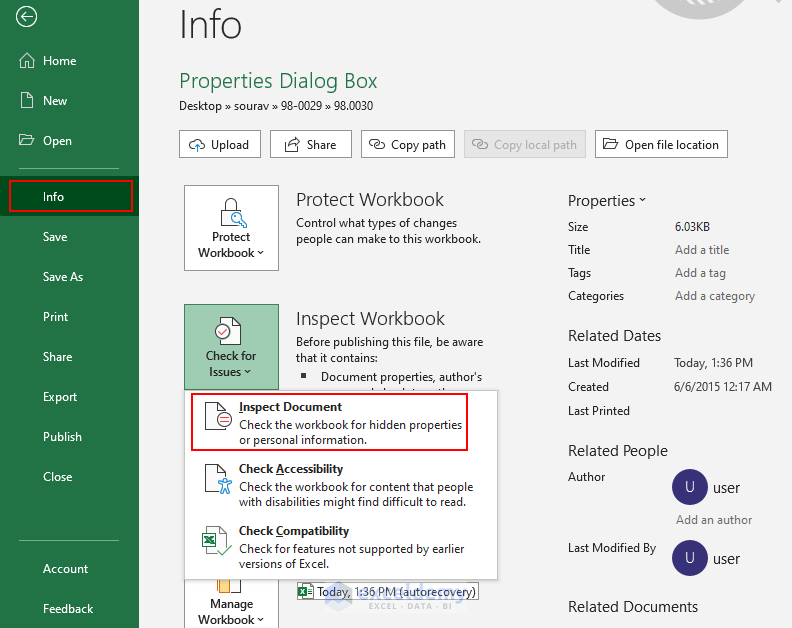
- Then, go to the File ribbon and select the Info option.
- After that, select the Inspect Document option from the Inspect Workbook section.
Then, click on Yes in this window.

- Doing so, another window will open. Make sure to tick all the options in this window and click on the Inspect button.

After that, another window will open. This window shows the result of your inspection.
- Now, you have to select the Remove All button.
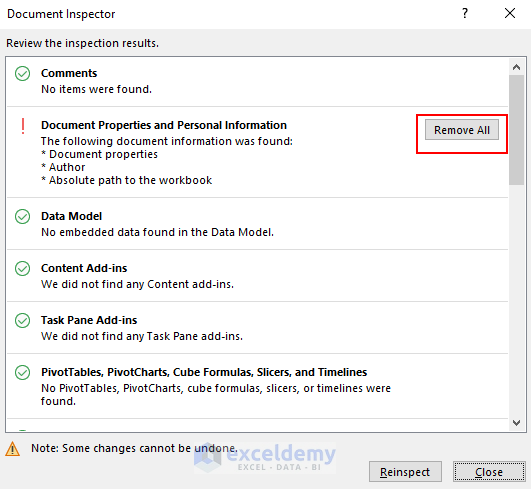
- Then, Close the window and go to the properties dialog box to see if there are any properties activated.

And, in the properties dialog box, we can see there are no properties attributed to this file.

Read More: How to Remove Metadata from Excel File
Conclusion
Thank you for making it this far. We have shown you how to view the properties dialog box in Excel. We hope you find the content of this article useful. If there are any questions or suggestions regarding the content of this article, make sure to leave them in the comment section.
Related Articles
- What Is Metadata in Excel
- How to Export File Metadata to Excel
- How to Create Metadata in Excel
- How to Remove Last Modified By in Excel
- How to Create Excel File from Metadata with CSV File
- How to Show Excel Metadata Viewer
- How to Make an Excel Metadata Extractor
- How to Export Image Metadata to Excel
<< Go Back to Excel Metadata | Workbook in Excel | Learn Excel
Get FREE Advanced Excel Exercises with Solutions!
