How to Add Metadata in Excel
Steps:
- Open a new workbook.
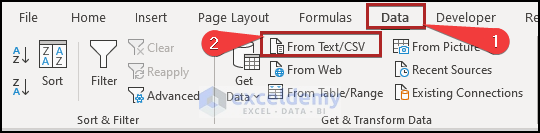
- Go to the Data tab.
- Click on From Text/CSV on the Get & transform Data group of commands.
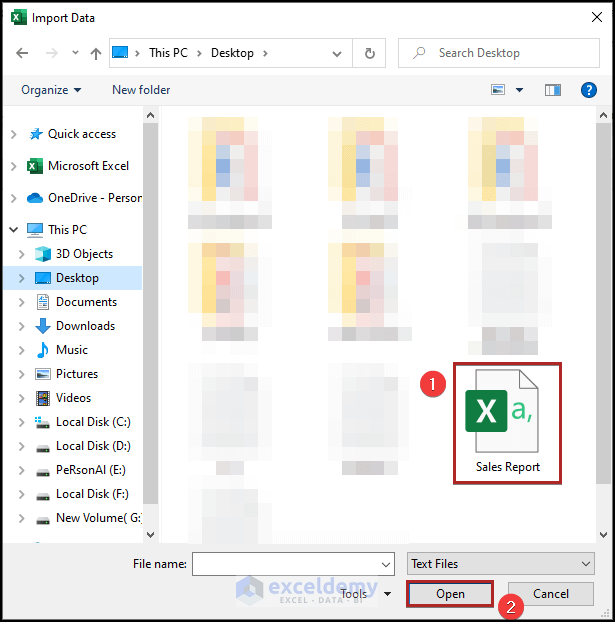
The Import Data window appears.
- Select the preferred CSV file you want to import to Excel.
- Click Open.
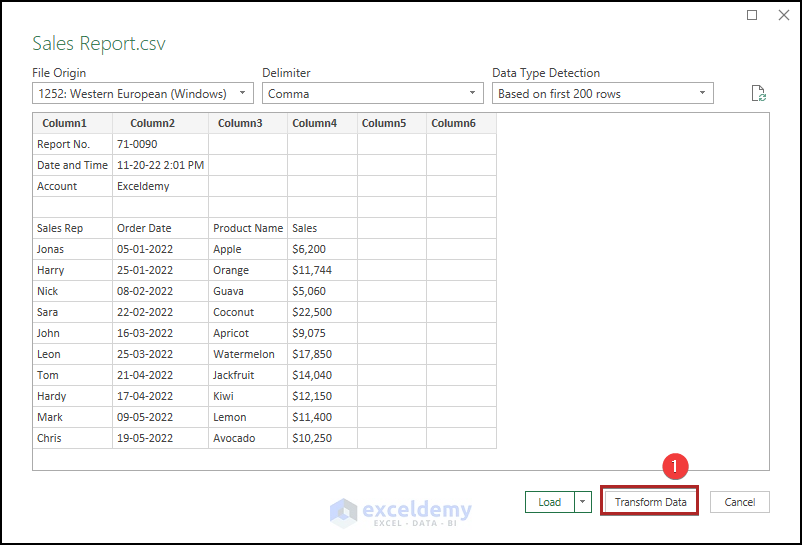
You can see a preview of our dataset.
- Click on the Transform Data button.
Add a new column in the data range.
- Navigate to the Add Column tab.
- Click Custom Column on the General group.
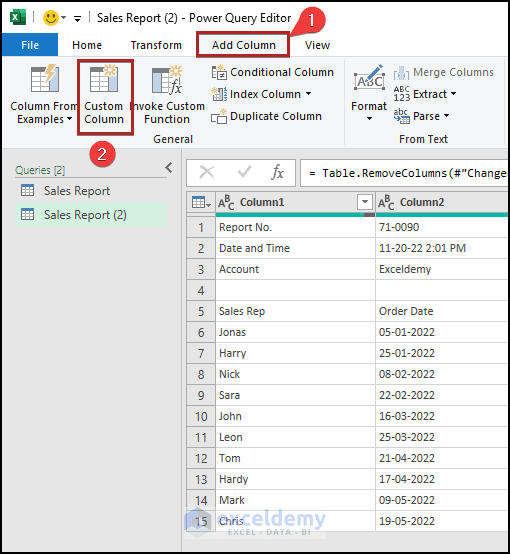
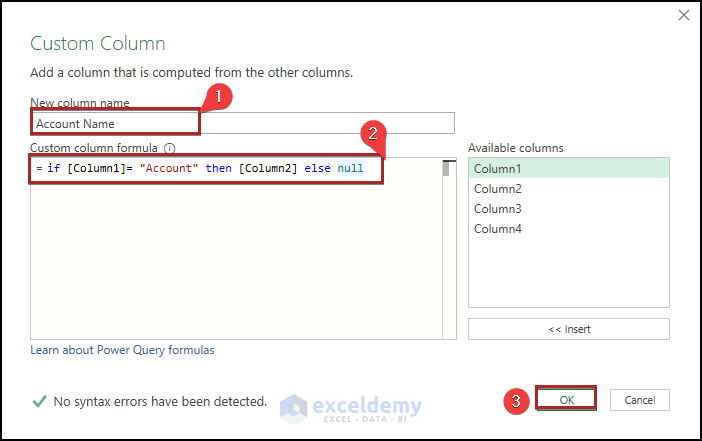
The Custom Column dialog box pops up.
- In the New column name box, write down Account Name.
- Insert the following formula in the Custom column formula box.
=if [Column1]= "Account" then [Column2] else null
- Click OK.
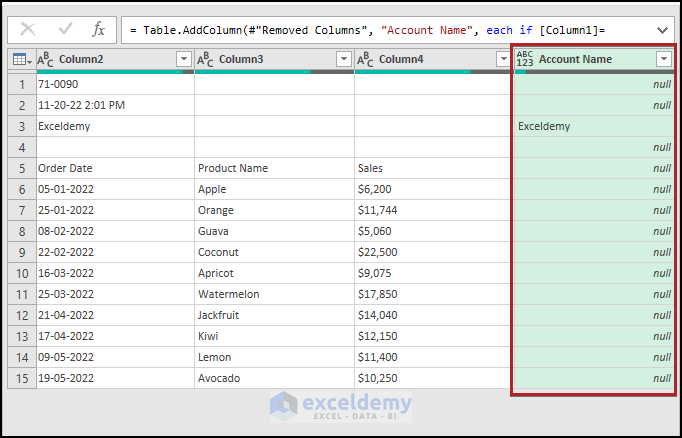
See the new column beside Column 4.
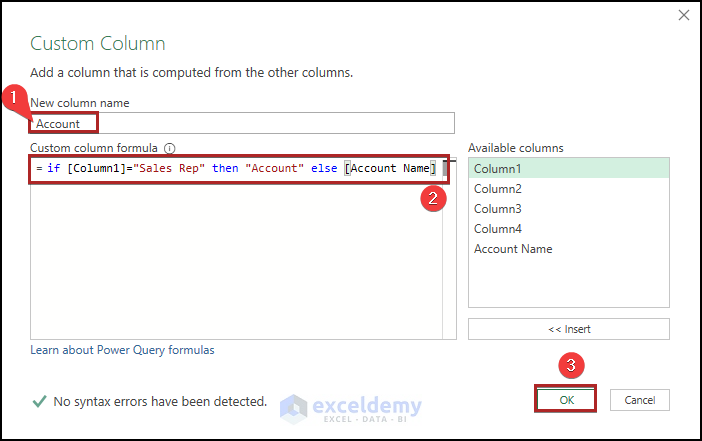
We need another column.
- Repeat the above steps to bring the Custom Column dialog box again.
- Write down Account in the New column name box.
- In the Custom column formula box, insert the following formula.
= if [Column1]= "Sales Rep" then "Account" else [Account Name]
- Click OK.
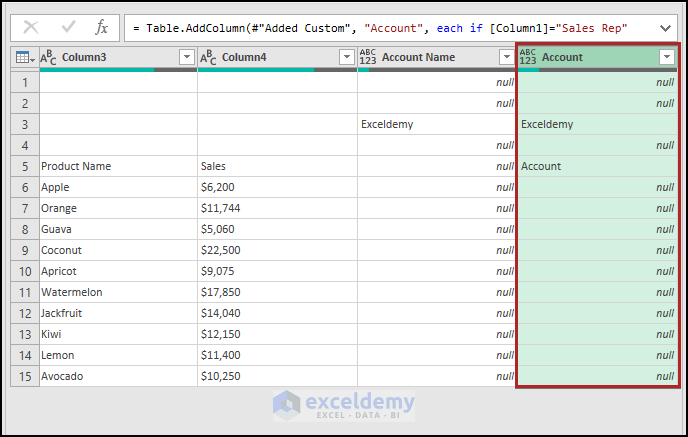
Another new column is visible in the editor. This is the central column for which we open the file in the editor.
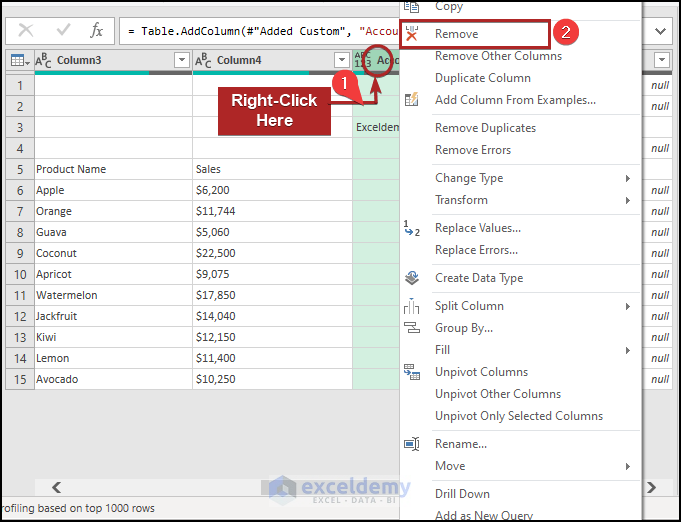
Delete the previously created helper column.
- Right-click on the column header Account Name.
- Select Remove from the context menu.
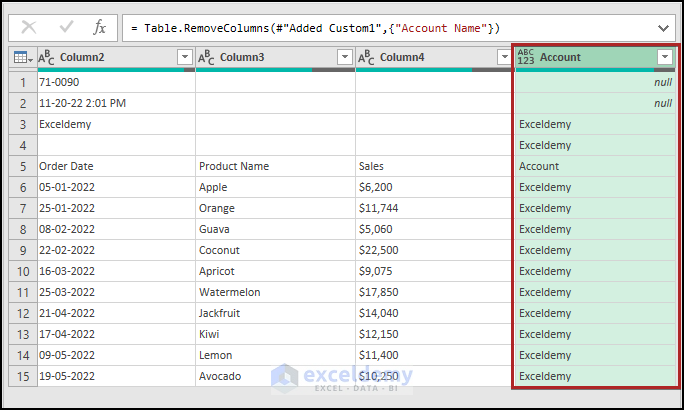
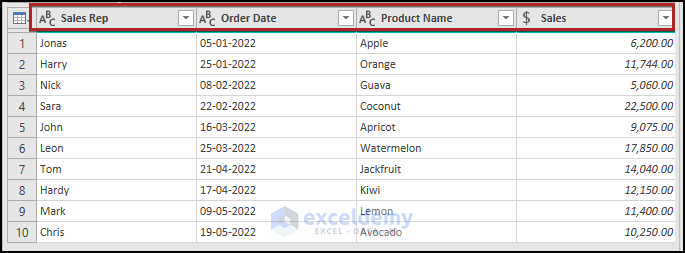
The data looks like the following.
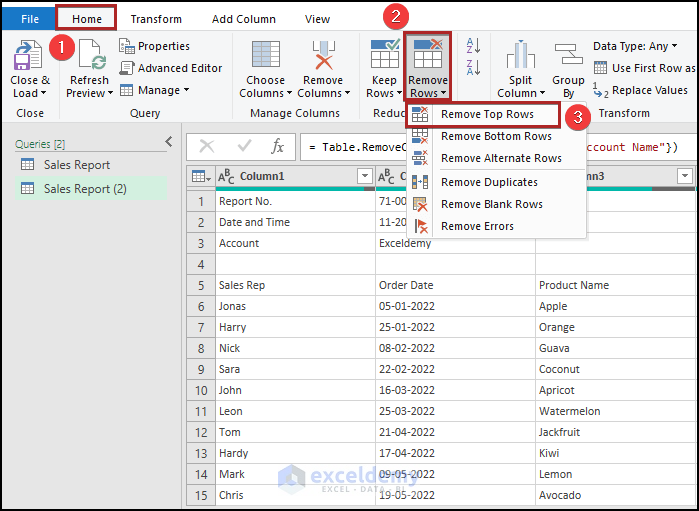
You need to delete the rows above Row 5.
- Move to the Home tab.
- Click Remove Rows.
- Select Remove Top Rows from the drop-down list.
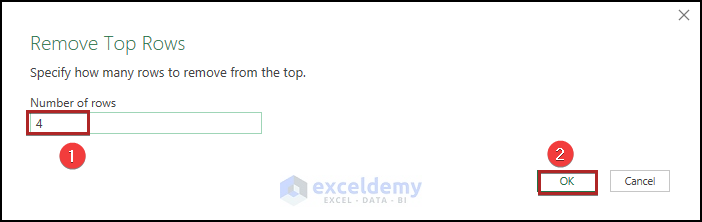
The Remove Top Rows input box opens up.
- Write 4 in the Number of rows box.
- Click OK.
You have to make Row 1 the header row.
- Click the drop-down icon beside Use First Row as Headers.
- Select Use First Rows as Headers.
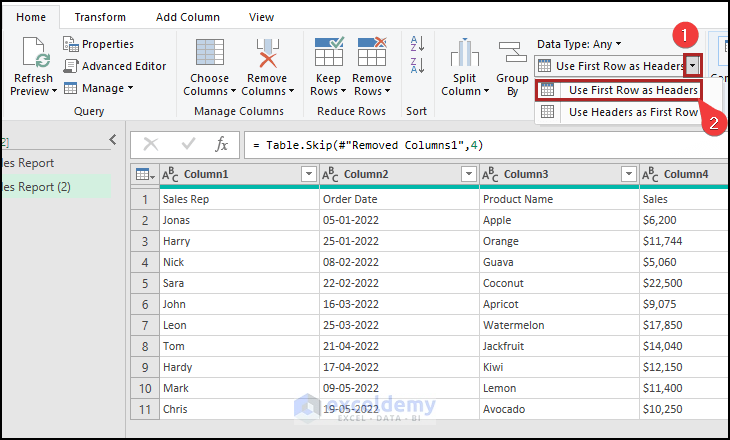
The final look in the Power Query editor is just like the following image.
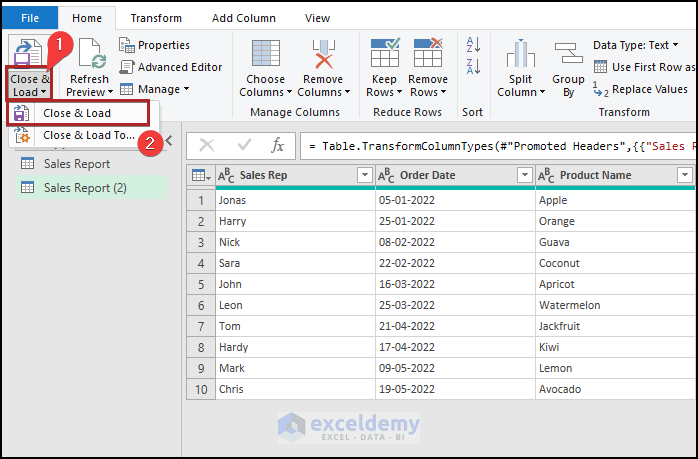
- Click Close & Load to export this to our worksheet.
After some formatting, here’s the result.
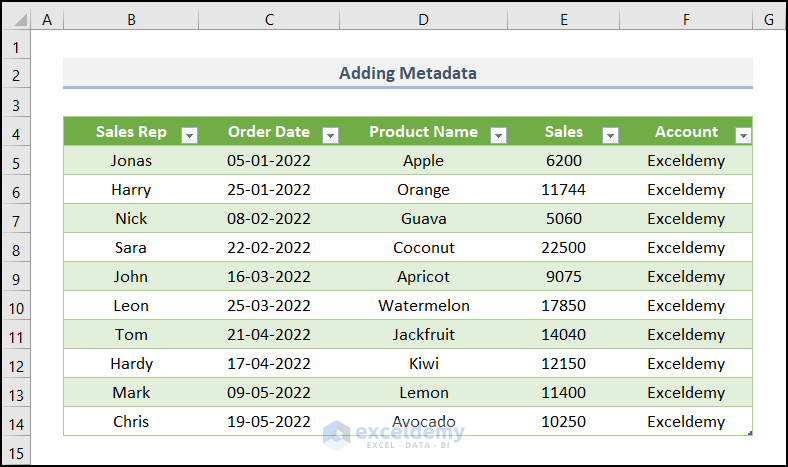
See the Account in Column F for every Sales Rep.
3 Methods to Explore Metadata (Metadata Viewer) in Excel
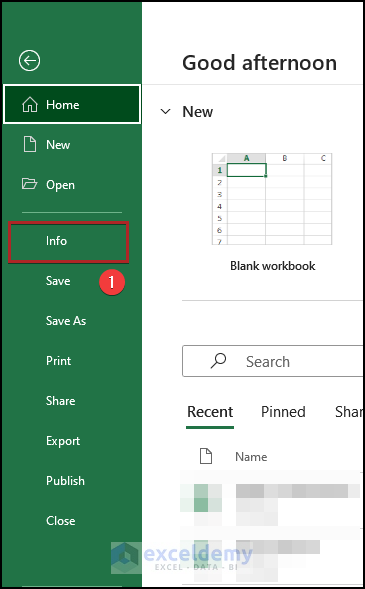
Method 1 – Going to the File Info Screen
Steps:
- Proceed to the File tab.

- Click on Info on the left side pane.
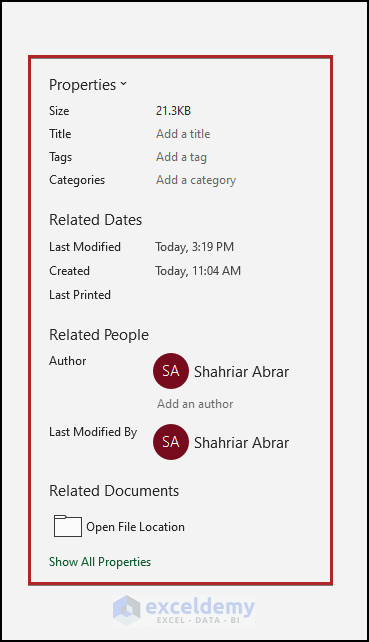
On the Info option screen, you can see the metadata of this document on the right side of the display.
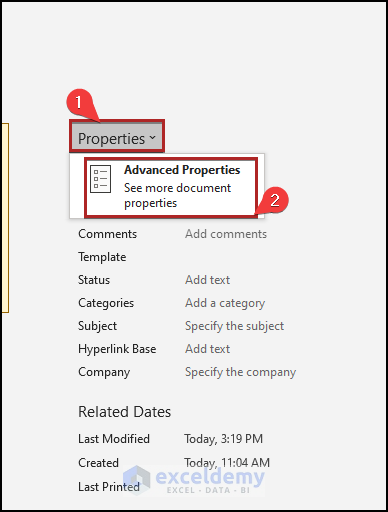
Method 2 – Utilizing Properties Wizard
Steps:
- Get to the Properties panel like the previous method.
- Click on the Properties drop-down.
- Select Advanced Properties from the one-item list.
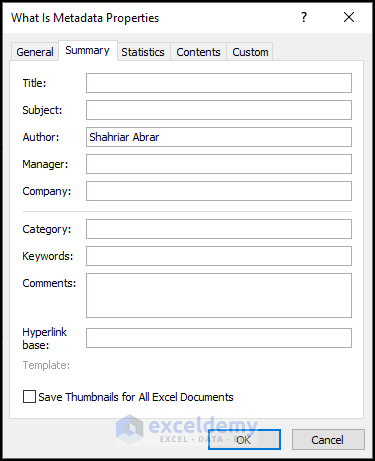
See the Properties dialog box for our Excel file. Find the details of the metadata.
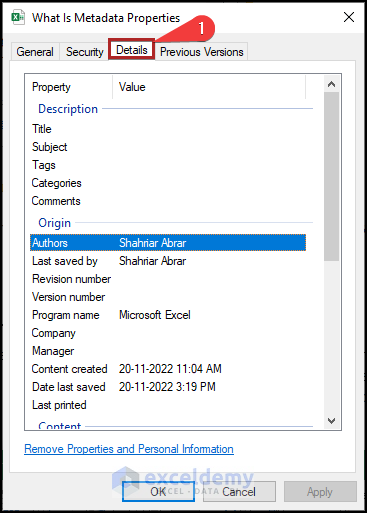
Method 3 – Using Windows Explorer
Steps:
- Navigate to your file location.
- Right-click on the file name.
- Select Properties on the context menu.

The Properties wizard appears before us.
- Click the Details tab. You will be able to see the detailed metadata of the Excel file.
How to Use the Metadata Editor in Excel
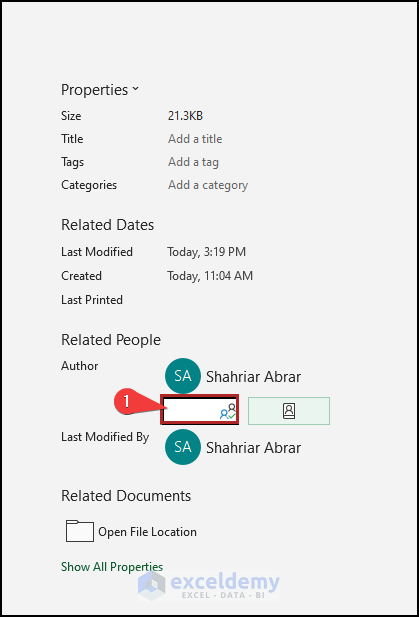
Add an Author
Steps:
- Navigate to the Properties panel.
- Click on the box Add an Author under the Related People section and write down the preferred author name that you want to add.
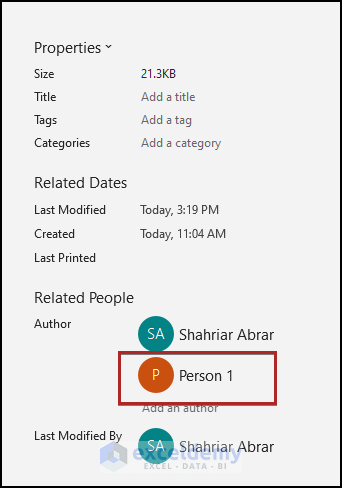
- Click anywhere on the display except this box.
You can see another author’s name under the default name.
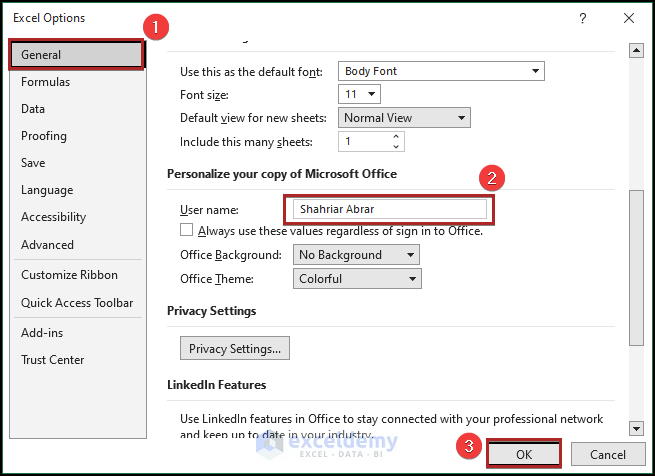
Modify the Default Author Name
Steps:
- Jump to the File tab.
- Click Options at the bottom of the display.

The Excel Options window emerges before us.
- Go to the General tab.
- You can change the User name under the Personalize your copy of Microsoft Office section.
- Click OK.
You’ll realize how simple the situation is.
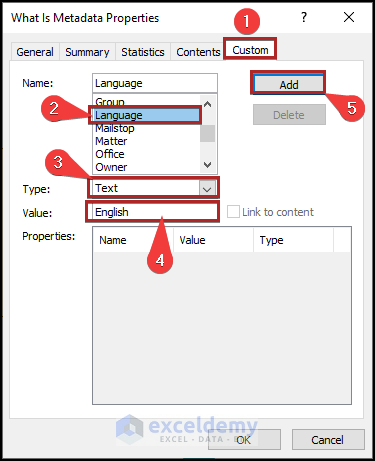
Create Custom Properties
Steps:
- Bring the Properties wizard of the Excel document.
- Go to the Custom tab.
- Choose a Name for the custom property. In this case, we chose Language.
- Select the Type of property. Here, we selected Text.
- In the Value box, we wrote down English. It’s the language of the document, and the value is in Text format. These Type and Value fields must match each other.
- Tap the Add button.
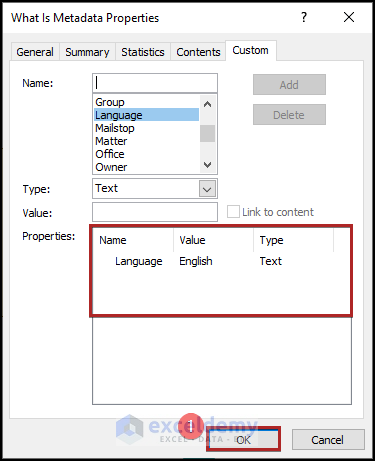
You can see the recently added properties in the preview section.
- Click OK.
How to Remove Metadata from an Excel File
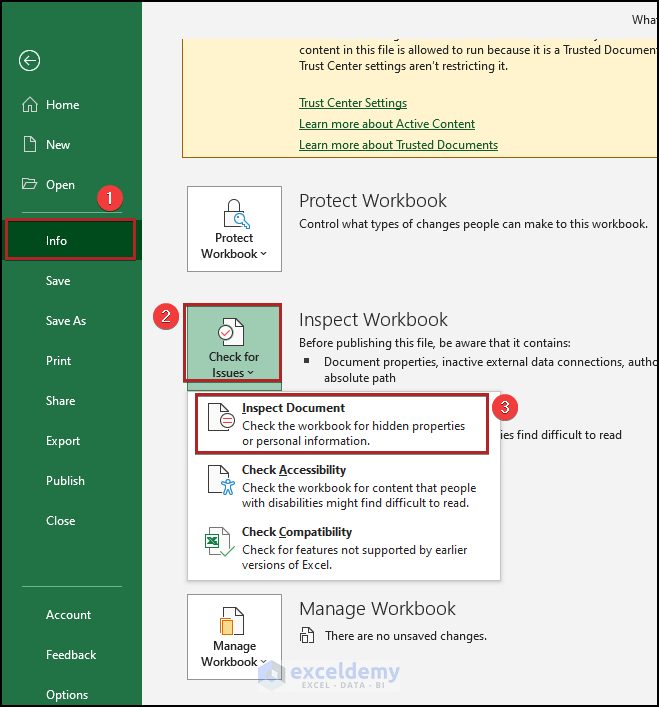
Steps:
- Go to the Info option like before.
- Click on the Check for Issues drop-down.
- Select Inspect Document.
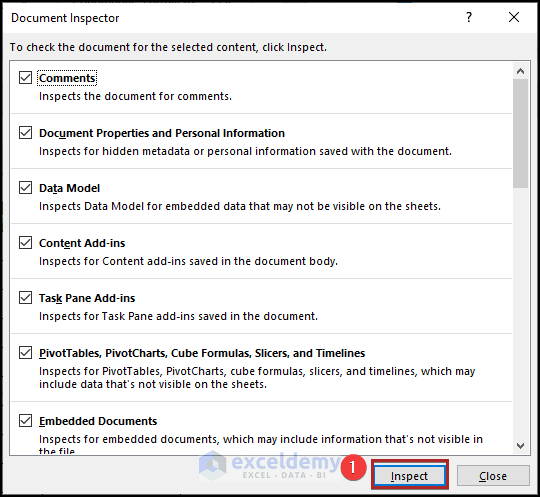
The Document Inspector opens.
- Click Inspect at the bottom.
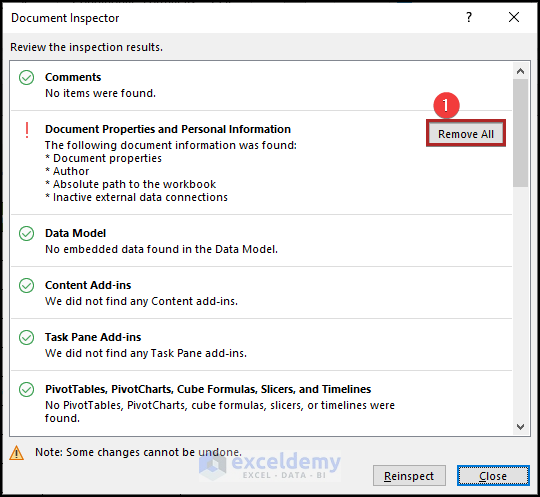
Find information in the Document Properties and Personal Information.
- Click Remove All.
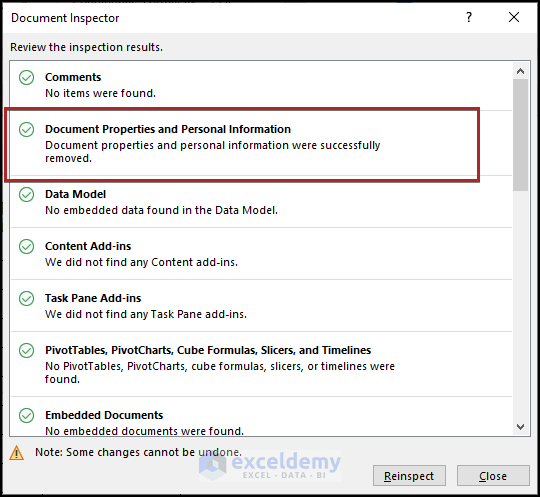
There is no metadata information in this file.
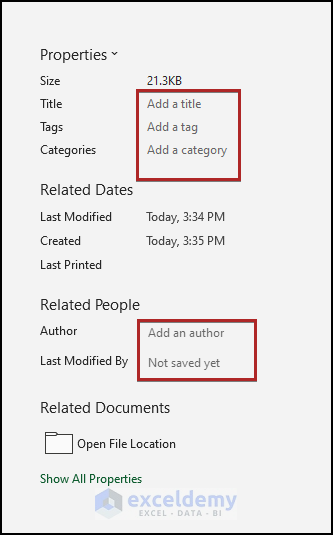
You can check these by going to the Properties panel.
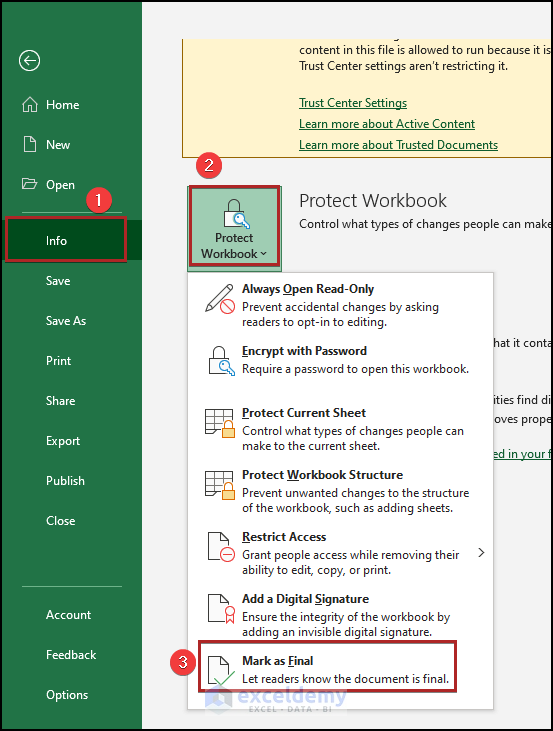
How to Protect Metadata in Excel?
Steps:
- Navigate to the Info options.
- Click on the Protect Workbook drop-down icon.
- From the drop-down list, choose Mark as Final option.
It will show a warning box “this workbook will be marked as final and then saved”.
- Click OK.

You can’t change or edit the metadata info of this workbook.
Download Practice Files
Related Articles
- Export File Metadata to Excel
- How to Export Image Metadata to Excel
- How to Display Document Properties in Excel
<< Go Back to Excel Metadata | Workbook in Excel | Learn Excel
Get FREE Advanced Excel Exercises with Solutions!
