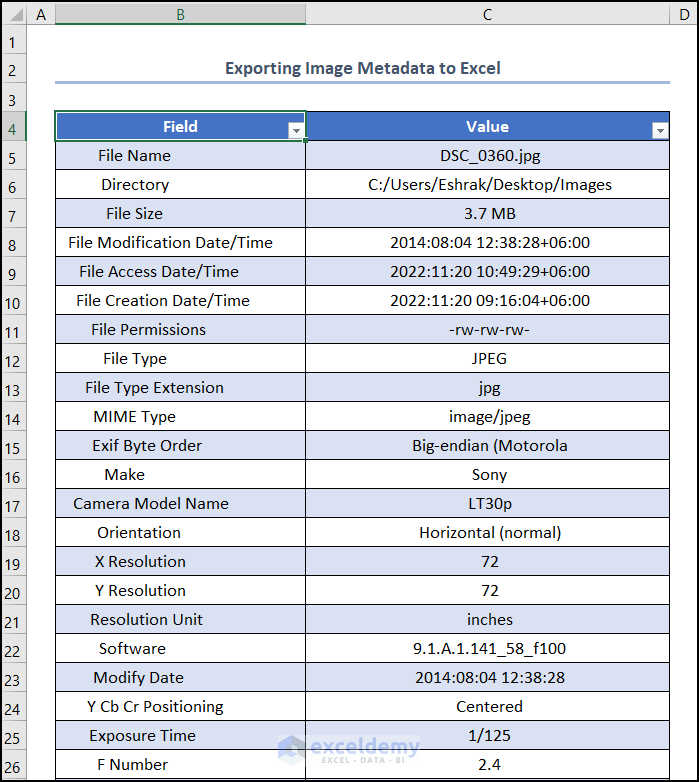
The screenshot below is an overview of exporting file or image metadata to Excel.

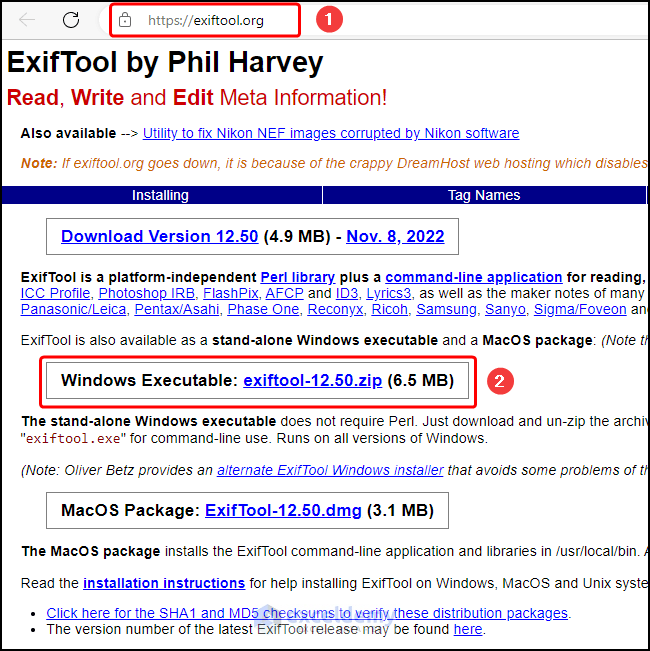
Step 1 – Download the ExifTool
- Open a browser.
- Go to this URL to download the ExifTool for Microsoft Windows.
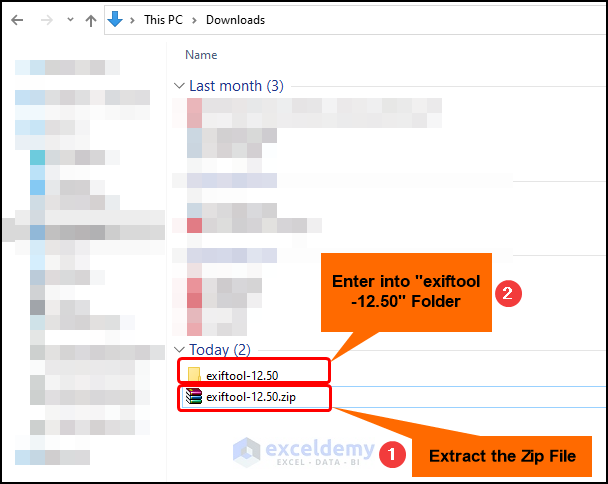
- Extract the zip file to the “ExifTool-12.50” folder and move to this folder.
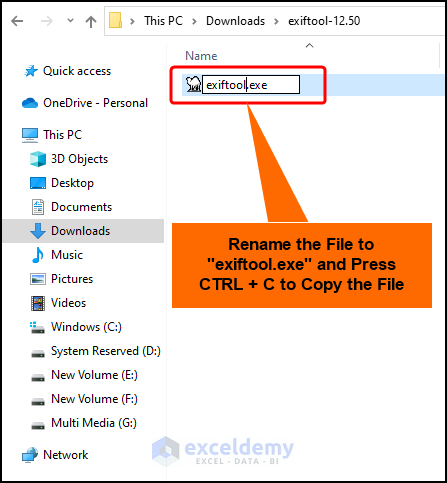
- Double-click or use the F2 key to rename the file name to “exiftool.exe”.
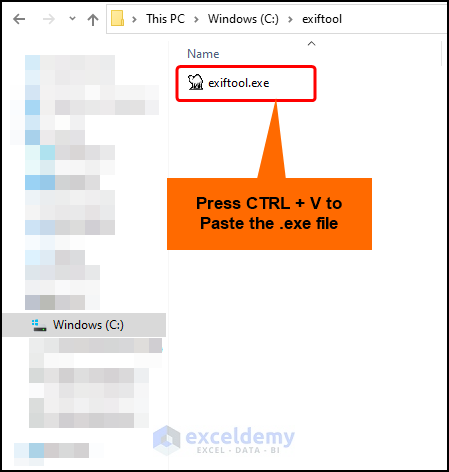
- Press the Ctrl + C keys to copy the “exiftool.exe” file.
- Navigate to the Windows C drive and make a directory named “ExifTool”.
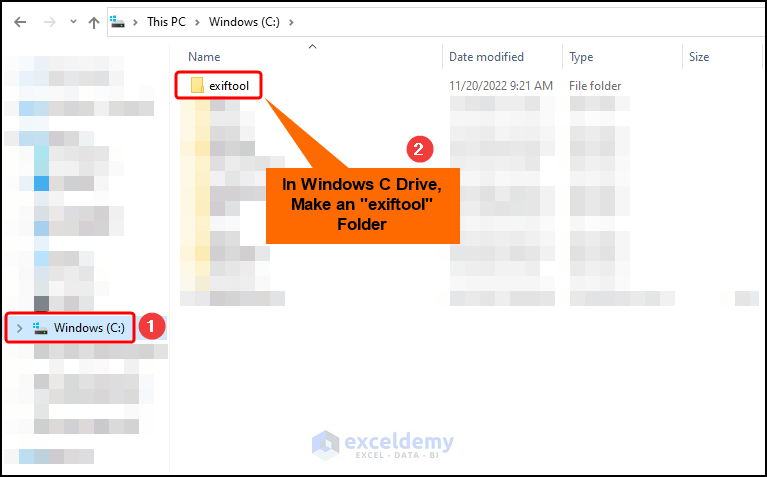
- Use the Ctrl + V keys to paste the “exiftool.exe” file into this folder.
Step 2 – Set the Environment Variable
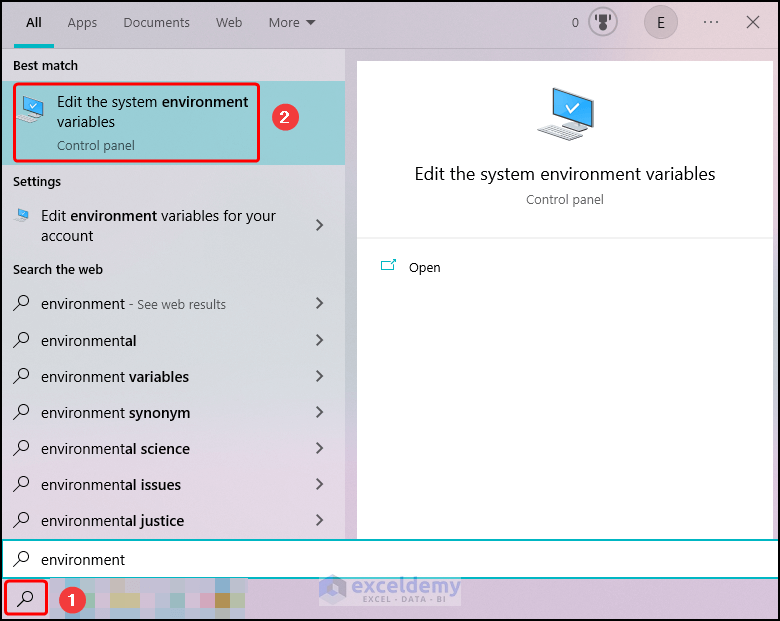
- Click the Search icon and go to the Edit the system environment variables option.
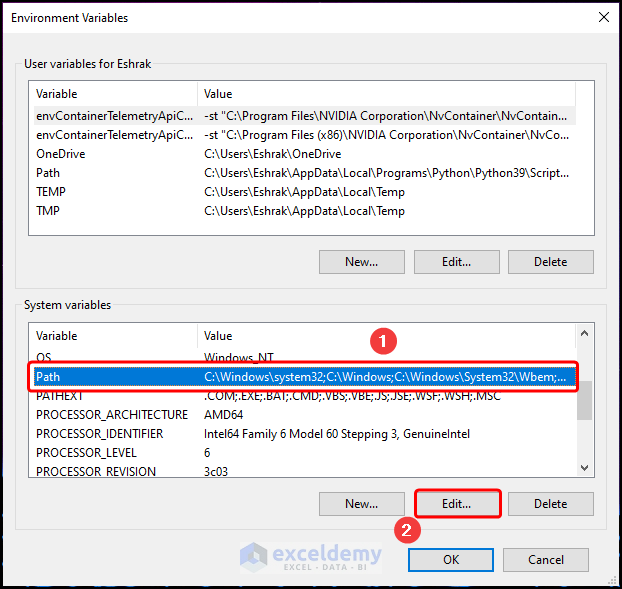
- Go to the Advanced tab and click on Environment Variables.

- Select the Path option and press the Edit button.
- Press the New button and enter the path of the “exiftool.exe”, (here, it is “C:\exiftool”)
- Hit OK.
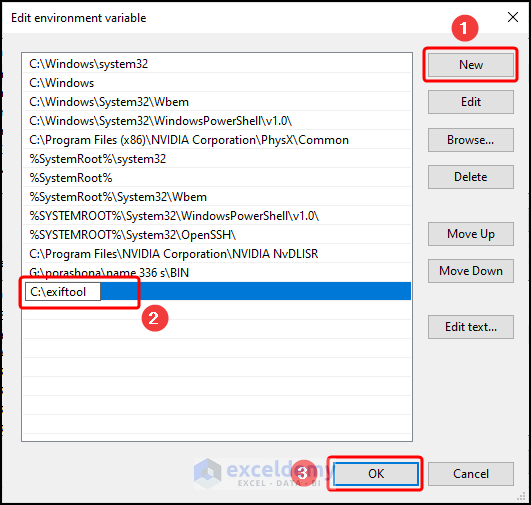
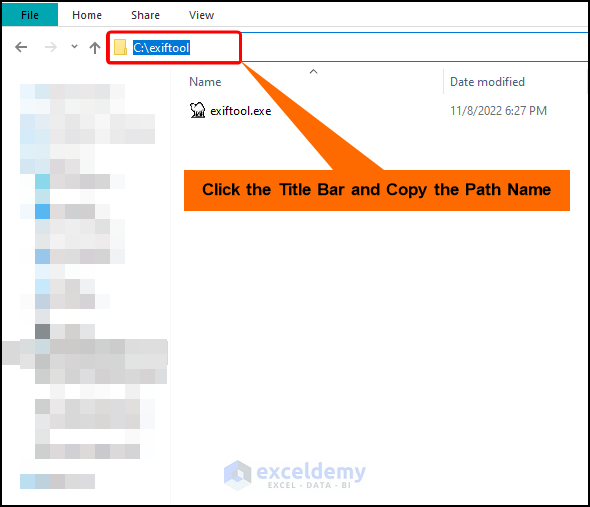
Note: You can provide the correct path name by copying it from the title bar.
Step 3 – Extract Metadata
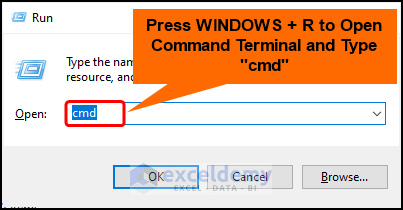
- Press the Win + R keys.
- Type in “cmd” and hit Enter to open the Command Terminal.
- Enter the following command and press Enter.
cd C:\exiftool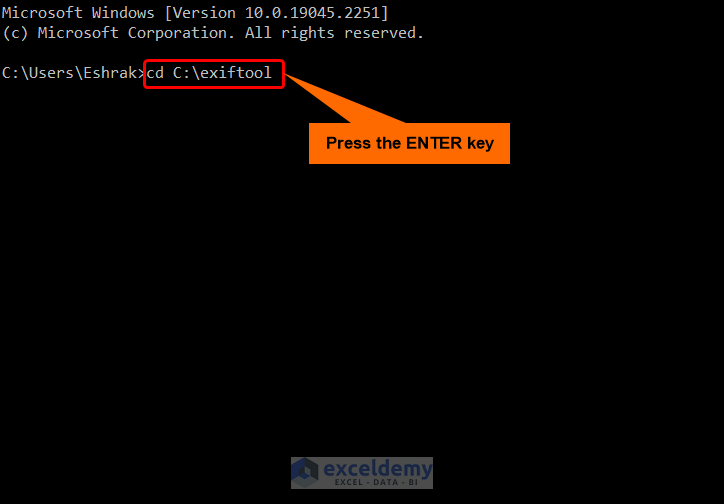
- Use the command below to navigate to the folder containing the images.
exiftool C:\Users\Eshrak\Desktop\Images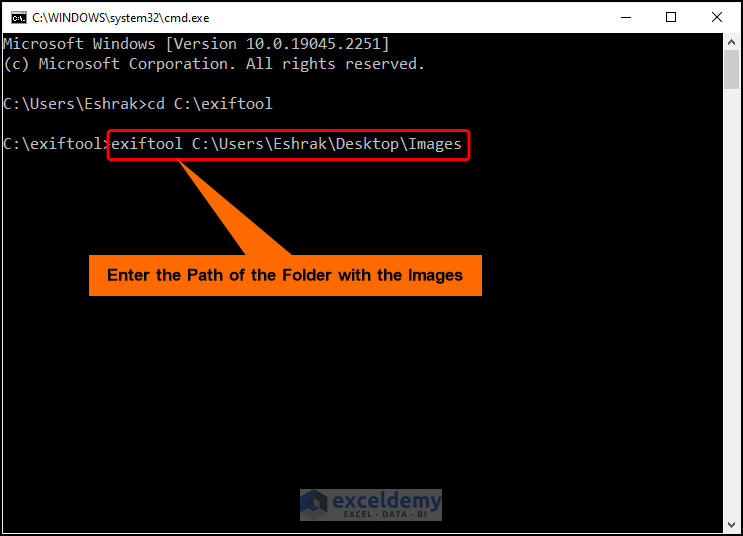
- The ExifTool extracts the metadata from the images.
- Enter in the following command to write the metadata into the “output.csv” file.
exiftool C:\Users\Eshrak\Desktop\Images > C:\Users\Eshrak\Desktop\Images\ouput.csv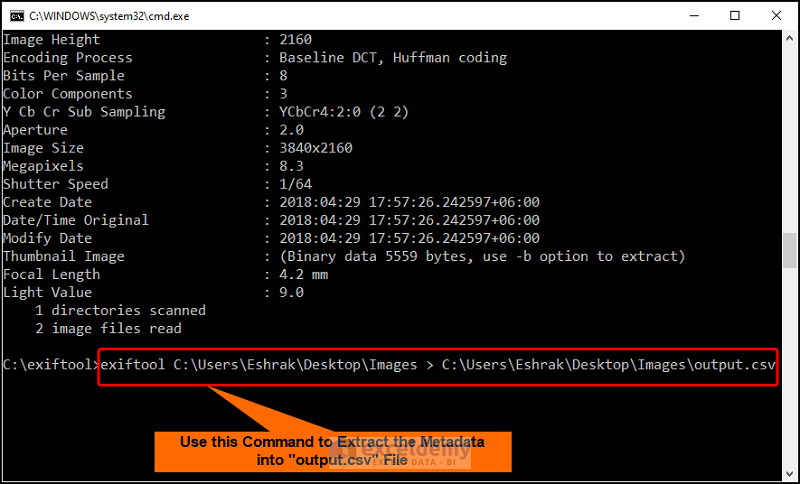
Step 4 – Transform and Export Metadata to Excel
- Launch Excel.
- Go to the Data tab and choose the From Text/CSV option.
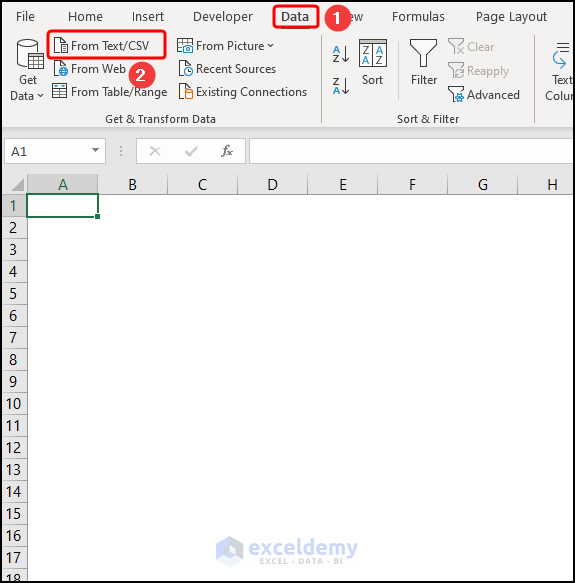
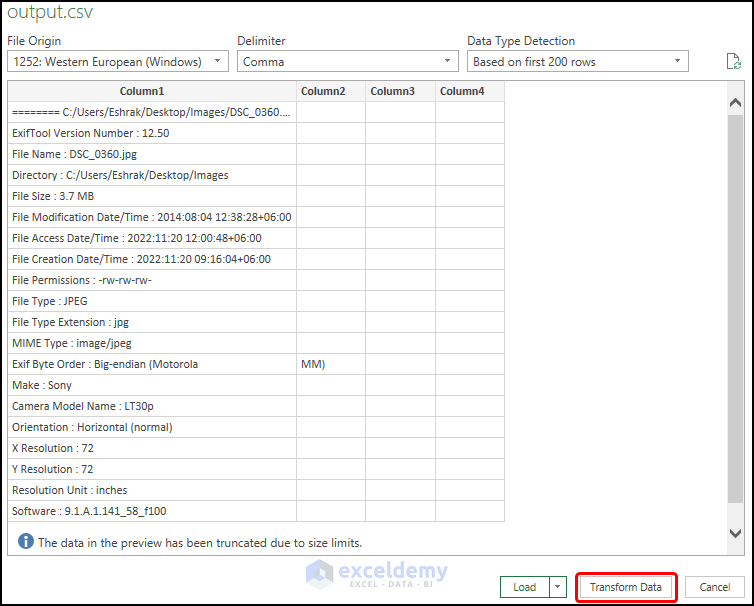
- Select the “output.csv” file and click Import.

- This displays a preview of the CSV file.
- Press Transform Data.
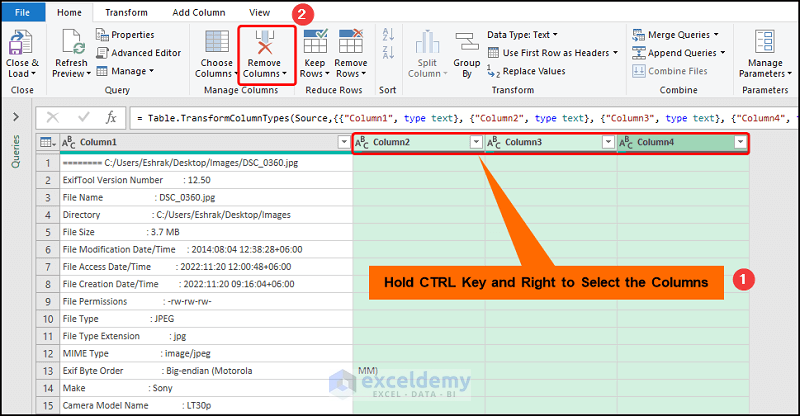
- Hold the Ctrl key and select columns 2, 3, and 4.
- Hit the Remove Columns button.
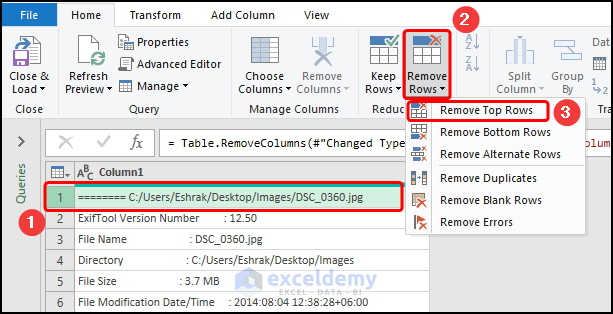
- Select the first row, move to the Remove Rows drop-down, and press Remove Top Rows.
- Go to the Split Column drop-down and choose the By Delimiter option.
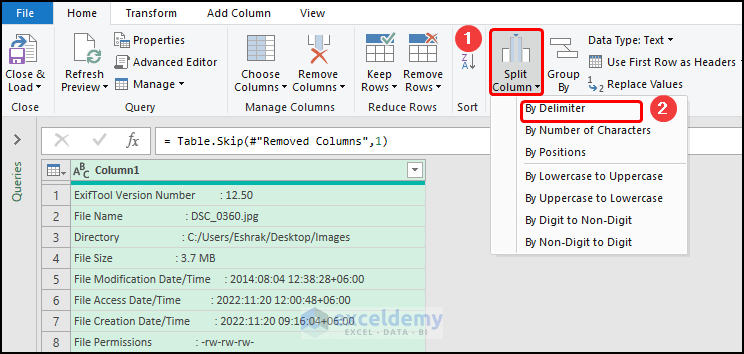
- Check the Left-most delimiter option and hit OK.

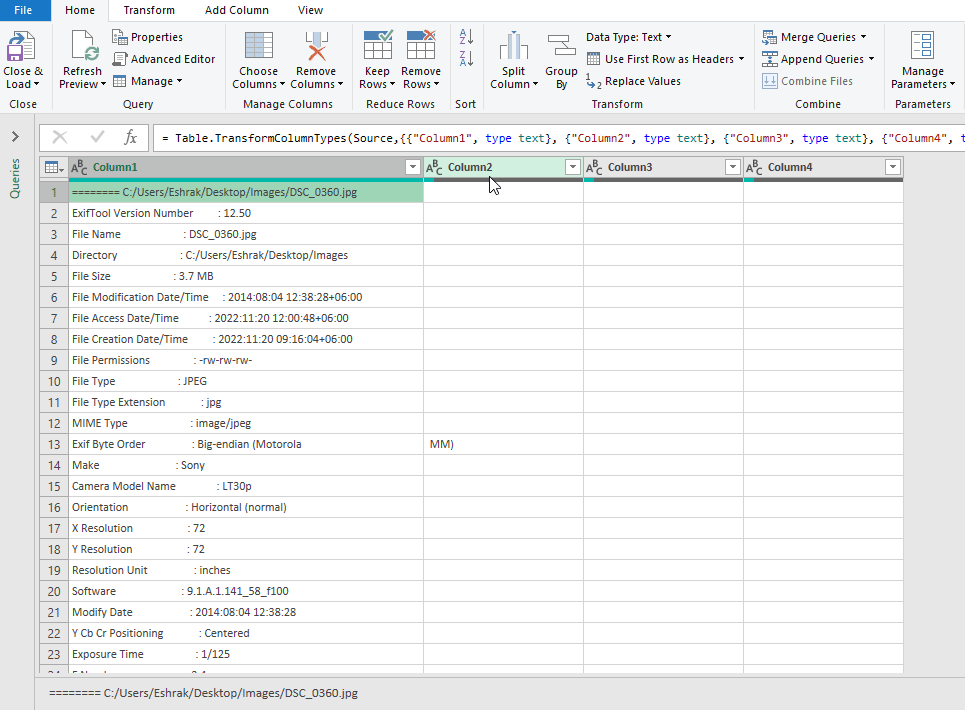
The animated GIF shows the steps in real time.
- Select the Close & Load drop-down and press the Close & Load option.
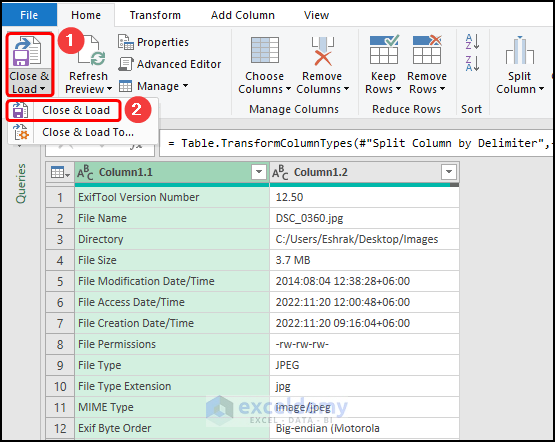
Here’s the exported metadata.
Read More: How to Create Excel File from Metadata with CSV File
How to Export File Metadata to Excel
Steps:
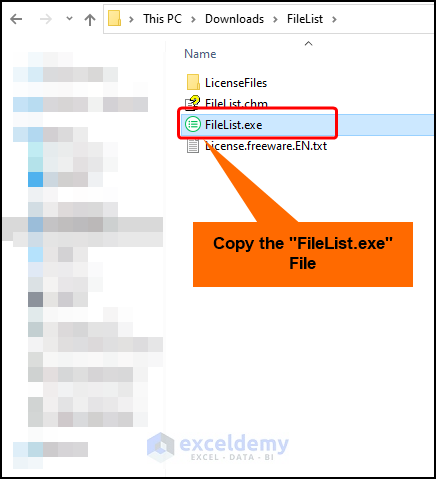
- Go to this website to download the Jam FileList software.

- Extract the zip file and copy and paste the “File List.exe” file to the folder containing the files.
- Click the Title Bar and type in “cmd” to jump to the Command Line Interface.
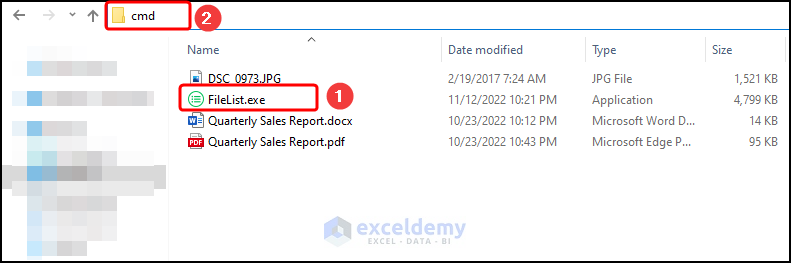
- Paste in the command given below and press Enter.
FileList.exe /USECOLUMNSNAME,FULLPATH,LASTCHANGE,EXTENSION,SIZE, AUTHORS,System.Photo.DateTaken > output.txt
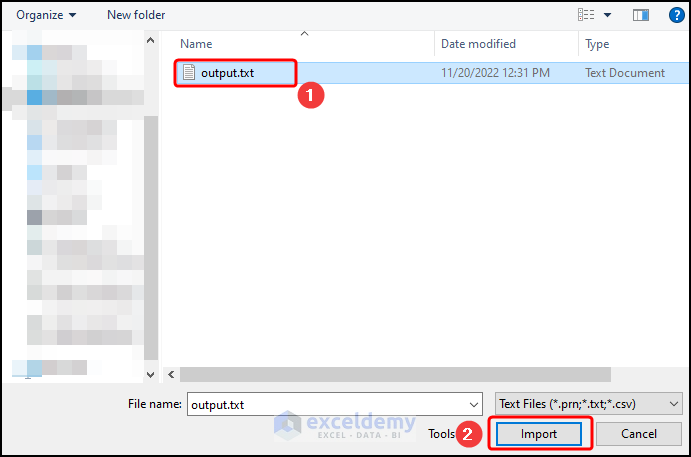
- Open Microsoft Excel, go to the Data tab, and select the From Text/CSV option.

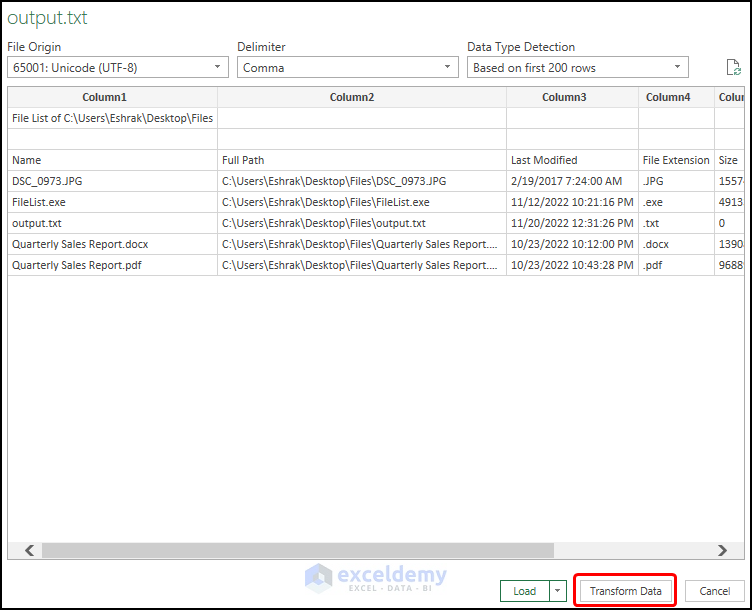
- Click on the “output.txt” file and hit Import.
- This shows a preview of the “output.txt” file.
- Select the Transform Data option.
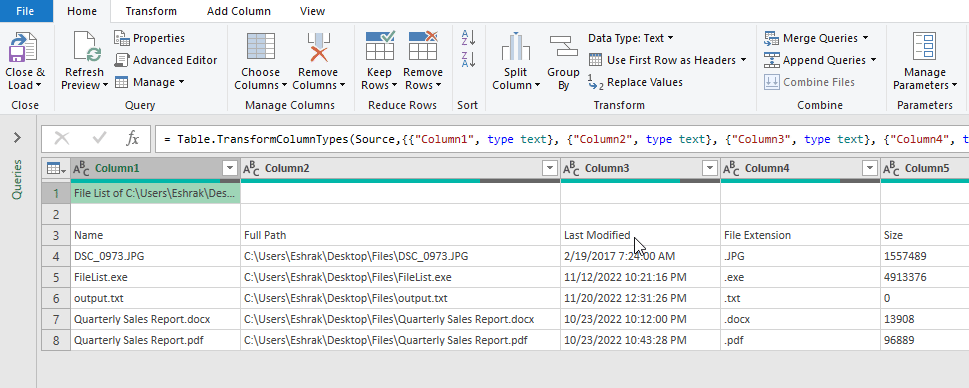
- Follow the steps shown in the GIF below.
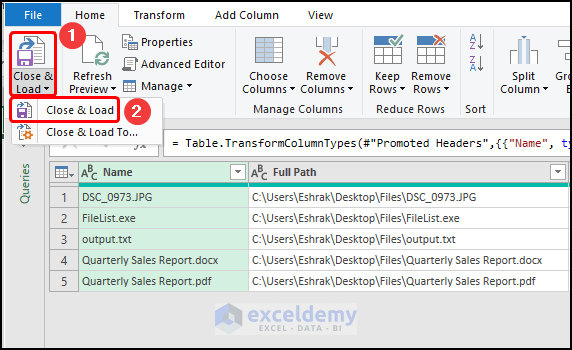
- Select the Close & Load option.
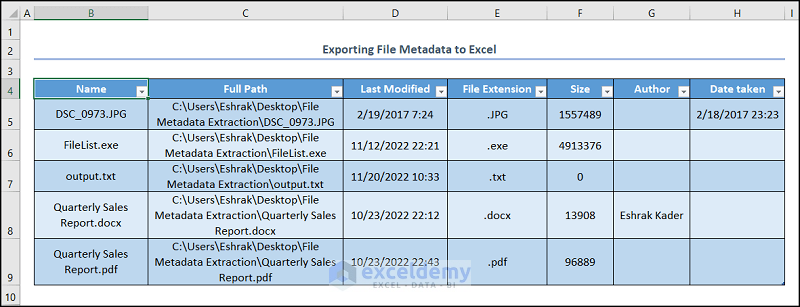
This exports the file metadata into Excel.
Download the Practice Workbook
Related Articles
- How to Remove Metadata from Excel File
- How to Display Document Properties in Excel
- How to View Properties Dialog Box in Excel
- How to Remove Excel Metadata
- How to Show Excel Metadata Viewer
- How to Remove Last Modified By in Excel
<< Go Back to Excel Metadata | Workbook in Excel | Learn Excel
Get FREE Advanced Excel Exercises with Solutions!

Clear and concise instructions. In step 3 for the exiftool how do I get it to run on all the subfolders of the specified source folder? I am just to lazy to write a new path for each folder so I wrote a small batch file for your process but can only get it to run on the specified directory…not any subfolders…
Hey ERIK NIELSEN,
Thanks for your comment. I am replying to you on behalf of ExcelDemy. If you want to get metadata from subfolders of the specified source folder then you can use the jamsoftware that is used in the “How to Export File Metadata to Excel” section of this article. Let’s see the steps.
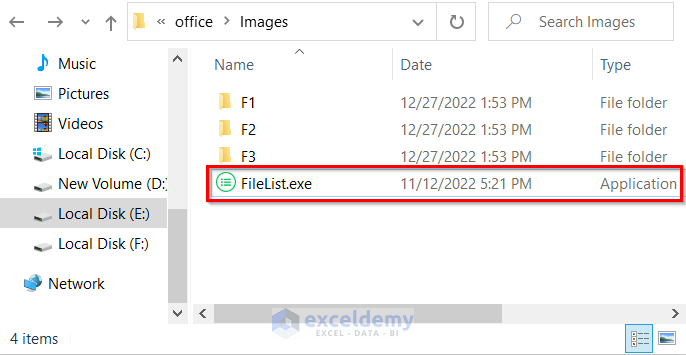
• Firstly, download and then copy and paste the FileList.exe file to the folder from where you want to get the metadata by following the steps from the “How to Export File Metadata to Excel” section of this article.
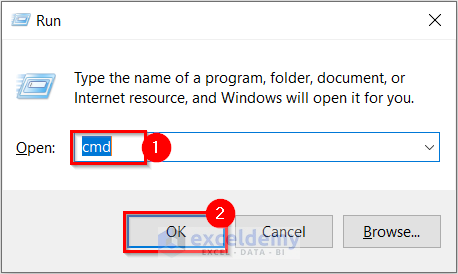
• Secondly, press Windows Key + R.
• Thirdly, write cmd in the Open section.
• Then, select OK.
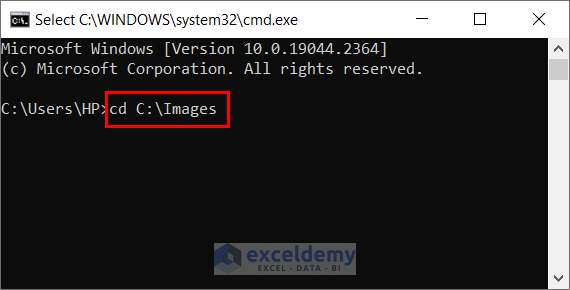
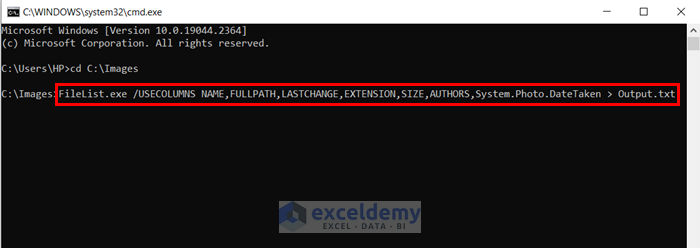
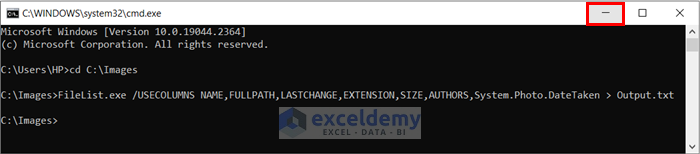
• After that, write
cd C:\Images. Here,C:\Imagesis the source folder path.• Then, press Enter.
• Next, write the command below.
FileList.exe /USECOLUMNSNAME,FULLPATH,LASTCHANGE,EXTENSION,SIZE, AUTHORS,System.Photo.DateTaken > output.txt• Then, press Enter.
• After that, minimize the window.
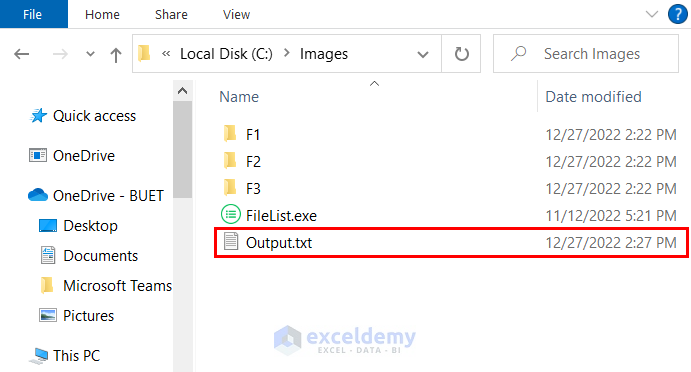
• Now, you will see a txt file is created in your selected location. It contains the metadata from all the subfolders.
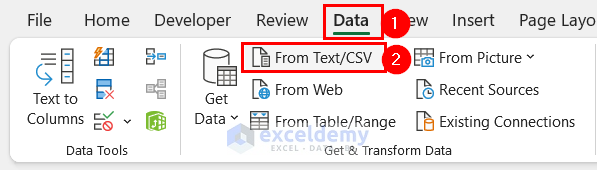
• Next, open an Excel file >> go to Data tab >> select From Text/CSV.
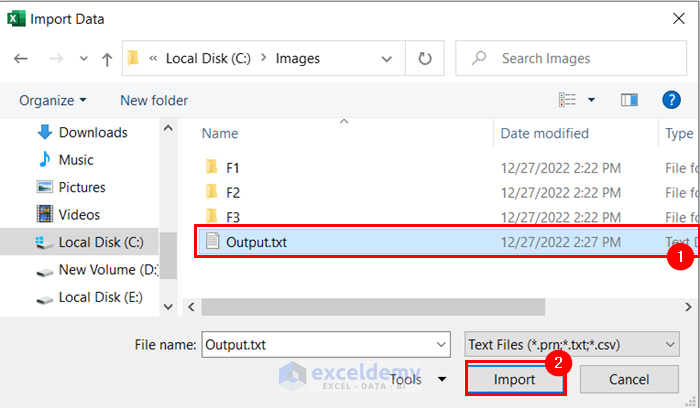
• Afterward, select the txt file >> select Import.
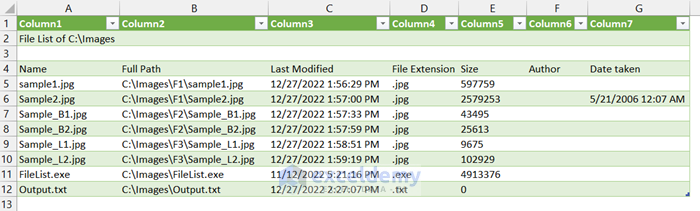
• Now, you will see the metadata are imported to a table.
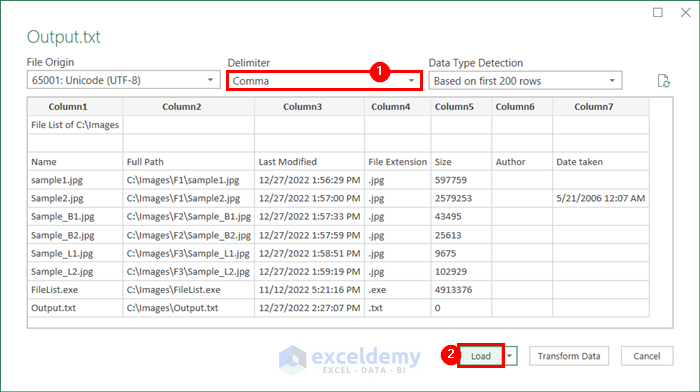
• Then, select Comma as Delimiter >> select Load.
• Finally, you will see all the metadata from the subfolders is loaded to an Excel sheet.
I hope this will help you to solve your problem. Please let me know if you have other queries.
Regards
Mashhura,
ExcelDemy.