If you are looking for some special tricks to promote a row to a column header in Excel, you’ve come to the right place. There are two ways to promote a row to a column header in Excel. This article will discuss two suitable ways of promoting a row to a column header. Let’s follow the complete guide to learn all of this.
How to Promote a Row to a Column Header in Excel: 2 Ways
In the following section, we will use two effective and tricky ways to promote a row to a column header in Excel. In the first method, a power query is used, and in the second method, an Excel table is used. Depending on your preference, you can use any of the methods. This section provides extensive details on these methods. You should learn and apply these to improve your thinking capability and Excel knowledge. We use the Microsoft Office 365 version here, but you can utilize any other version according to your preference. For demonstration purposes, we will use the following dataset, where you can see the different salesperson monthly sales. Then, we are going to promote a row to a column header.

1. Using Power Query
Here, we will demonstrate how to promote a row to a column header in Excel. Let us first introduce you to our Excel dataset so that you are able to understand what we are trying to accomplish with this article. In the following dataset, we can see the different salesperson monthly sales. Let’s walk through the following steps of promoting a row to a column header in Excel.

📌 Steps:
- First of all, select the range of cells, go to the Data tab, and select From Table/Range.
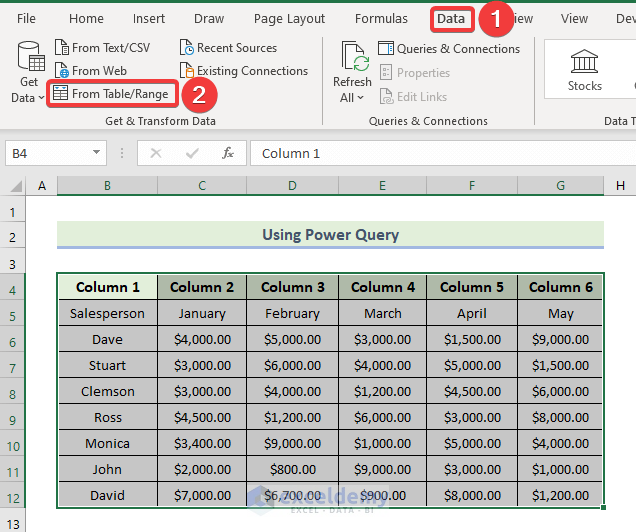
- When the Create Table window appears, select the range of the cells in the Where is the data for your table? box.
- Then, click on OK.

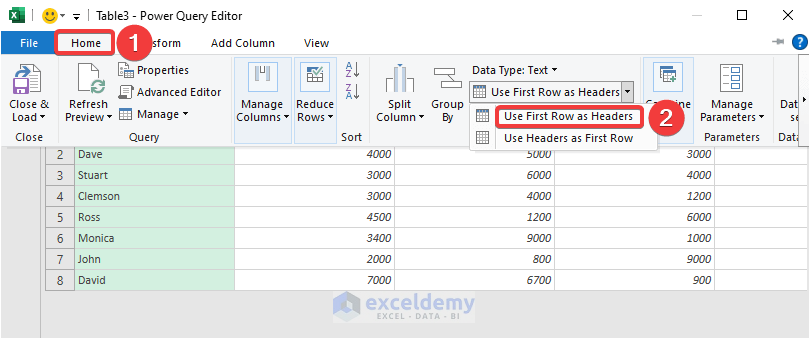
- As a result, the Power Query Editor window will appear and you can it will automatically pull the data into it.
- Now, we are going to promote a row to a column header. To do this go to the Home tab and select Use First Row as Headers.
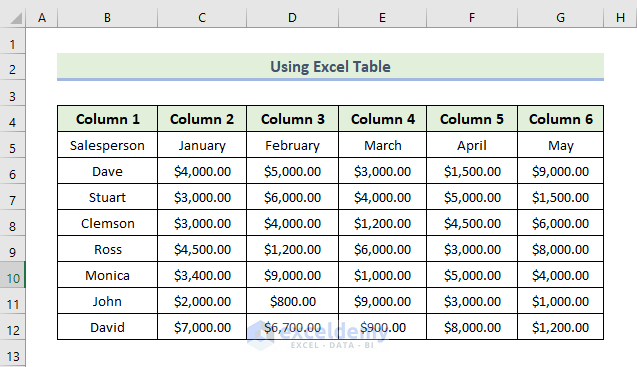
- Now, it’s time to close the Power Query Editor and transform the data into an Excel spreadsheet.
- To do this select the File tab and click on Close & Load.

- Therefore, the Power Query Editor will be closed off.
- You will get the transformed data in a new spreadsheet as shown below.
- Finally, you will be able to promote a row to a column header using the power query editor as shown below.

Read More: How to Make a Row Header in Excel
2. Utilizing Excel Table
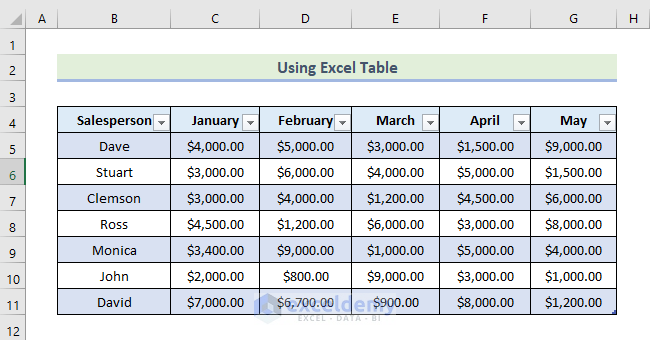
Here, we will use another method to promote a row to a column header in Excel. Here we will use an Excel table to do this. There are many ways to create an Excel table such as using the Table option, using the Format As Table option, and using VBA Code. You can use any of the methods based on your preference to create an Excel table. Here we will use the Format as Table option to create an Excel table. In the following dataset, we can see the different salesperson monthly sales. Let’s walk through the following steps to promote a row to a column header in Excel.
📌 Steps:
- Firstly, go to Home Tab, select the Format as Table option and then select any of the styles.

- When the Create Table window appears, select the range of the cells in the Where is the data for your table? box.
- Then, click on OK.

- As a consequence, you will get the following Excel table.
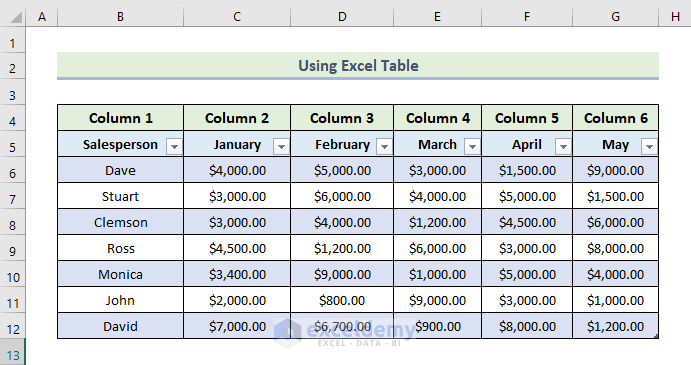
- Then, you have to delete the Column header.
- To do this, select the 4th row and right-click on it.
- Then, click on Delete.

- Finally, you will be able to promote a row to a column header using an Excel table as shown below.
Read More: How to Make First Row as Header in Excel
Download Practice Workbook
Download this practice workbook to exercise while you are reading this article. It contains all the datasets in different spreadsheets for a clear understanding. Try yourself while you go through the step-by-step process.
Conclusion
That’s the end of today’s session. I strongly believe that from now you may be able to promote a row to a column header in Excel. If you have any queries or recommendations, please share them in the comments section below. Keep learning new methods and keep growing!
Related Articles
- How to Create a Double Row Header in Excel
- How to Make Multiple Sortable Headings in Excel
- How to Keep Row Headings in Excel When Scrolling Without Freeze
- How to Keep Row Headings in Excel When Scrolling
- How to Hide Row and Column Heading in Excel
<< Go Back to Rows and Columns Headings | Rows and Columns in Excel | Learn Excel
Get FREE Advanced Excel Exercises with Solutions!
