Mail Merge is a powerful feature in Microsoft Word that allows you to personalize and send the same document (such as emails or letters) to multiple recipients. It’s particularly handy when you need a consistent message but with individual details tailored for each recipient.
⏷Mail Merge in Excel
⏷Purposes of Mail Merges in Excel?
⏷Benefits of Mail Merge
⏷Main Components for Doing Mail Merge
⏷Prepare Excel Worksheet for Mail Merge
⏷How to Do Mail Merge from Excel to Word
⏵1st Step: Composing Email Template in Word
⏵2nd Step: Connecting with Data Source & Editing Mailing List
⏵3rd Step: Inserting Address and Greeting Line on Each Message
⏵4th Step: Checking Preview & Finishing Mail Merge
⏵5th Step: Formatting Mail Merge Fields (Optional)
⏵6th Step: Mail Merge from Excel to Outlook with Attachment
⏵7th Step: Saving Mail Merge for Next Bulk Mailing
⏷“Step-by-Step Mail Merge Wizard”
⏷Mail Merge Labels from Excel
⏷Useful Keyboard Shortcuts
⏷Limitations of Excel Mail Merge
⏷Alternatives to Excel Mail Merge
⏷Solve Possible Issues with Mail Merge
Here’s what you’ll explore in this tutorial:
- Mail Merge Basics: Understand what Mail Merge is and how it works.
- Purposes of Mail Merge: Discover the various ways you can use Mail Merge.
- Main Components: Learn about the essential components involved in Mail Merge.
- Preparing Excel Worksheet: Set up your Excel data for Mail Merge.
- Step-by-Step Mail Merge Wizard: A guided approach to creating merged documents.
- Making Labels: Create address labels using Mail Merge.
- Useful Keyboard Shortcuts: Handy shortcuts for efficient Mail Merge.
- Limitations and Solutions: Address common issues and limitations.
What Is Mail Merge in Excel?
Mail Merge allows you to personalize and send documents (like emails or letters) to multiple recipients. Imagine you’re a shop owner offering a special discount. Instead of manually crafting each offer, Mail Merge lets you send personalized emails to each customer with their name included.
Supported software for Mail Merge:
- Microsoft Word
- Microsoft Excel
- Google Docs
- OpenOffice Writer
- LibreOffice Writer
Purposes of Mail Merges in Excel
Mail Merge serves several useful purposes. You can use it to:
- Send personalized emails to clients for product updates.
- Create customized promotional letters.
- Generate personalized invoices by merging Excel data.
- Compile individual sales reports.
- Send personalized event invitations and RSVPs.
- Distribute internal memos or updates.
- Gather feedback through personalized survey links.
- Create address labels for holiday card mailings.
- Generate customized progress reports for students.
Benefits of Mail Merge
Consider using Mail Merge because it:
- Automates creating and sending personalized messages, saving time.
- Helps create professional-looking documents.
- Reduces errors by inserting correct information automatically.
- Allows tracking marketing campaign results.
- Increases the likelihood of responses with personalized messages.
Main Components for Doing Mail Merge from Excel to Word
The Mail Merge process involves four basic components:
| Components | Description |
|---|---|
| Data Source | Your Excel file containing the data to merge. |
| Word Document | The template for your merged document. |
| Merge Fields | These placeholders in Word will be replaced with data from your Excel spreadsheet. |
| Mail Merge Wizard | A Word tool to set up and run your mail merge. |
How to Prepare Excel Worksheet for Mail Merge?
- Column Matching:
- Ensure that each column in your Excel worksheet corresponds to the field names intended for the mail merge (e.g., first name, last name).
- Confirm there are no blank rows or columns, and avoid unnecessary formatting (such as special characters).
- Properly format percentages, currencies, and postal codes for accurate reading in Word. Consistent formatting prevents errors during the mail merge process.
- Data Organization:
- Keep all data for merging on the first sheet of your spreadsheet.
- Store the Excel file locally (on your PC or laptop).
- Save the file as .xlsx or .csv for compatibility with mail merge tools.
- Additional Tips:
- Use a consistent naming convention for your columns and rows.
- Utilize conditional formatting to highlight important information or errors.
- Add a column to identify duplicate records.
- Regularly back up your data.
How to Perform Mail Merge from Excel to Word?
Suppose you’re a shop owner who wants to send customized discount emails to customers. Instead of doing it manually, let’s use Mail Merge:
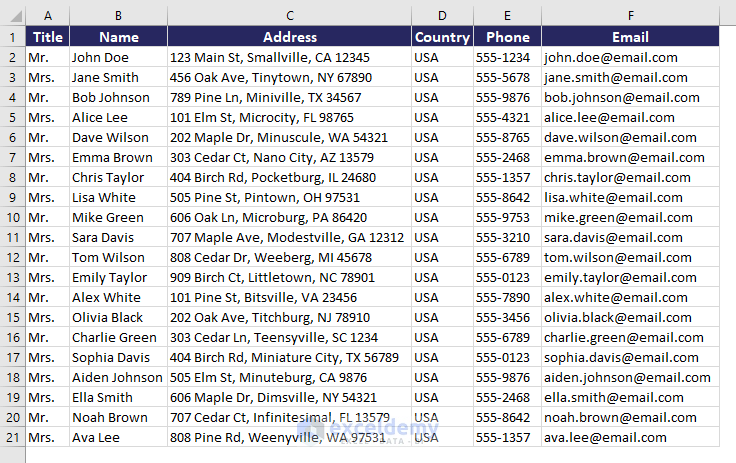
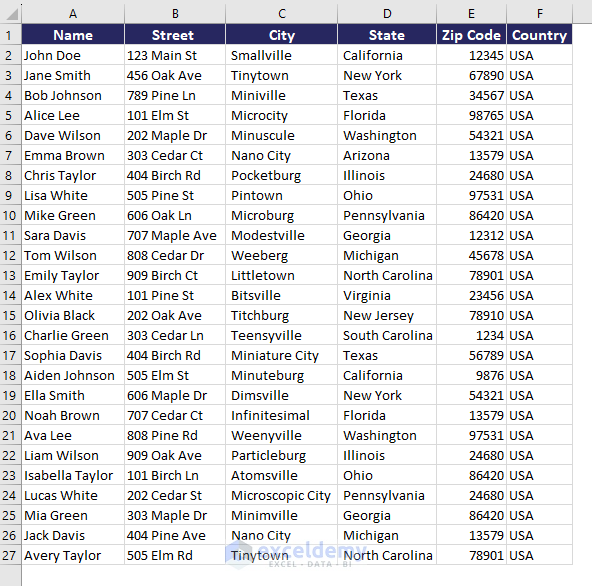
You have an Excel worksheet with details (i.e., Name, Address, Country, Phone, Email, etc.) of your shop’s customers as shown in the figure below.
Step 1 – Compose Email Template in Word
- Open Microsoft Word and create a blank document.
- Save it in the same folder as your Excel file containing customer details.
- Click on Mailings in the Mailings > Start Mail Merge> E-mail Messages.
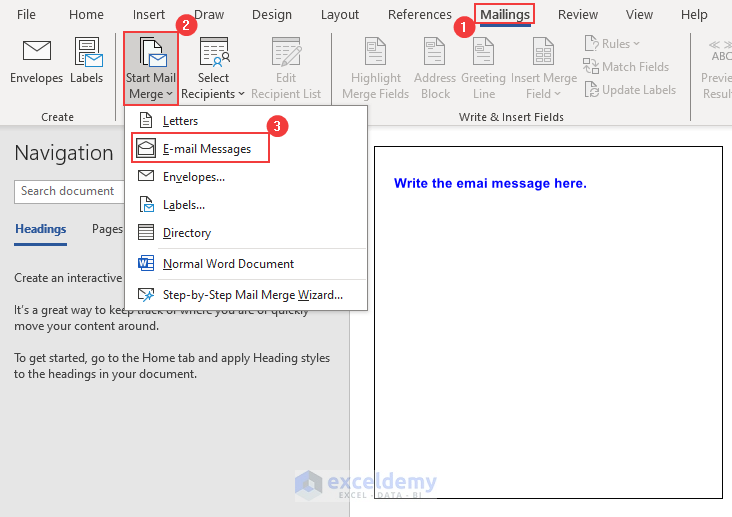
- Write your email message (e.g., offering discounts) and save the file.
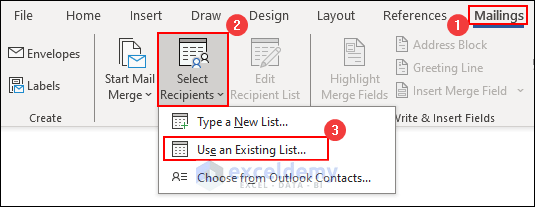
Step 2 – Connect with Data Source & Edit Mailing List
- Click on Mailings> Select Recipients> “Use an Existing List”
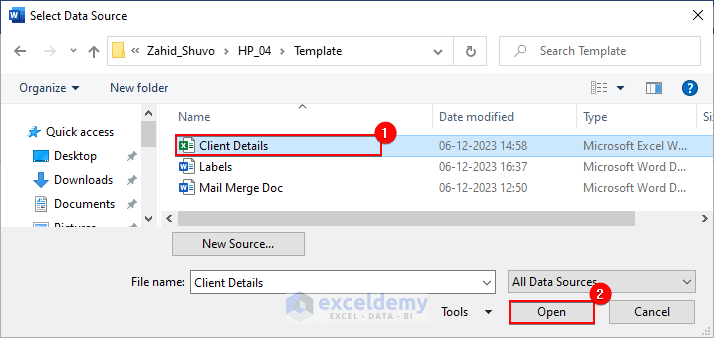
- Locate and select your Excel file (e.g., Client Details) in the Select Data Source dialog.
- Click on Open.
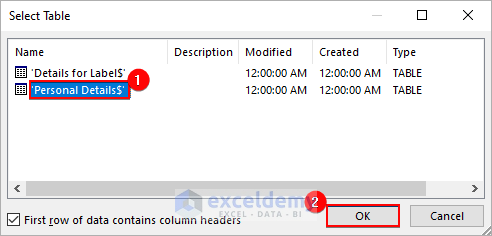
- Choose the worksheet (e.g., Personal Details) where customer data is stored.
- Click on OK.
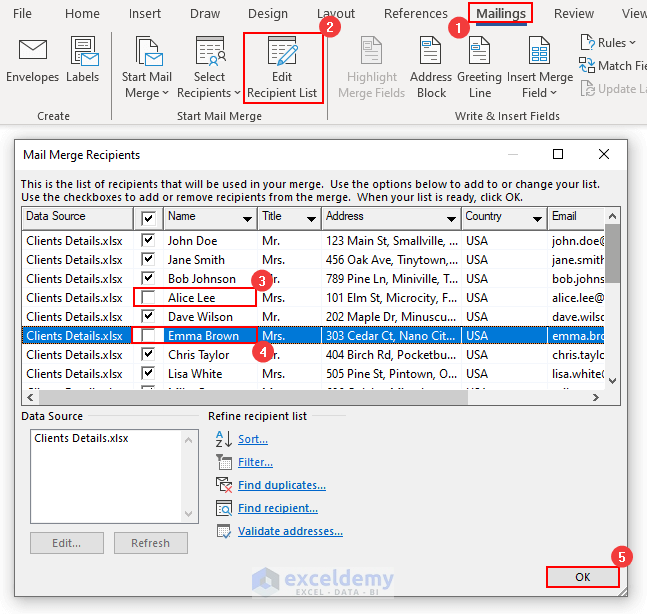
If you decide not to send a message to “Alice Lee”, and “Emma Brown”, follow these steps:
- Click on Mailings> Edit Recipients List.> Uncheck the names “Alice Lee”, and “Emma Brown” in the “Mail Merge Recipients” dialogue box.
If you want to send the message to everyone, you can skip this step.
Step 3 – Insert Address and Greeting Line
- Use either Insert Merge Field or Address Block and Greeting Line.
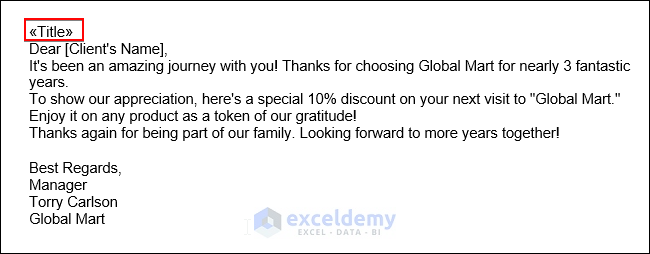
- For example, to add the Title field from Excel:
- Click on Mailings > Insert Merge Field > Title.

This will add the Title field in the Word document.
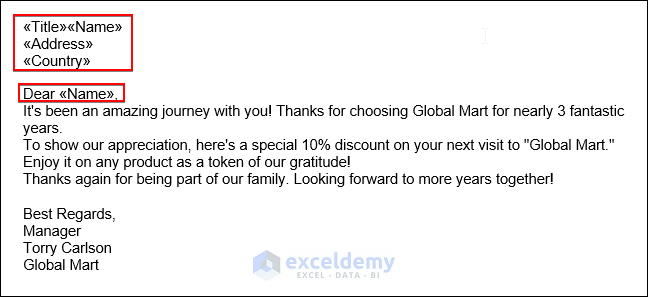
- Repeat for other fields like Name, Address, and Country.

- Adding the Address Block:
- Place your cursor where you want to add the address.
- Click on Mailings > Address Block in the Write & Insert Fields options.
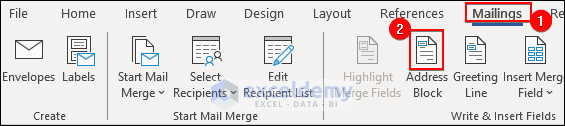
-
- A dialogue box will appear, showing how the address will look.
- Check the preview on the right side of the dialogue box and click OK.
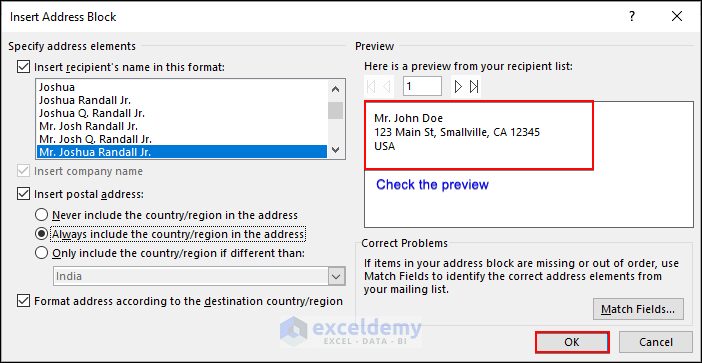
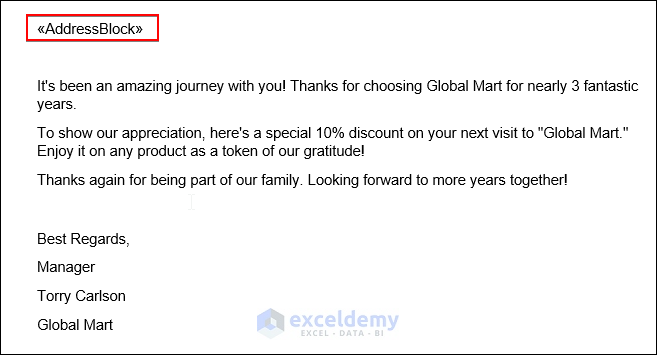
- This will add the address block to your document.
- Adding the Greeting Line:
- Click on Mailings and select Greeting Line.
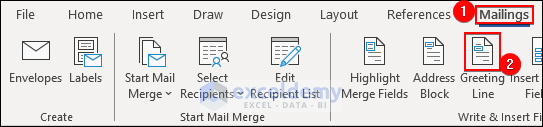
-
- By default, it uses Dear as the greeting line, but you can customize it.
- Preview the greeting line and click OK.
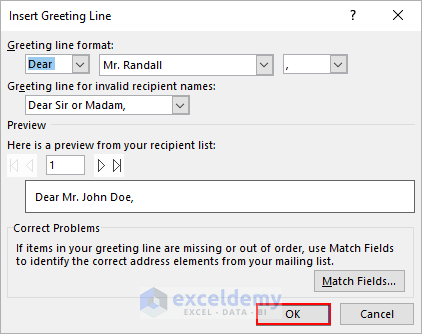
- The greeting line will be added to your message.

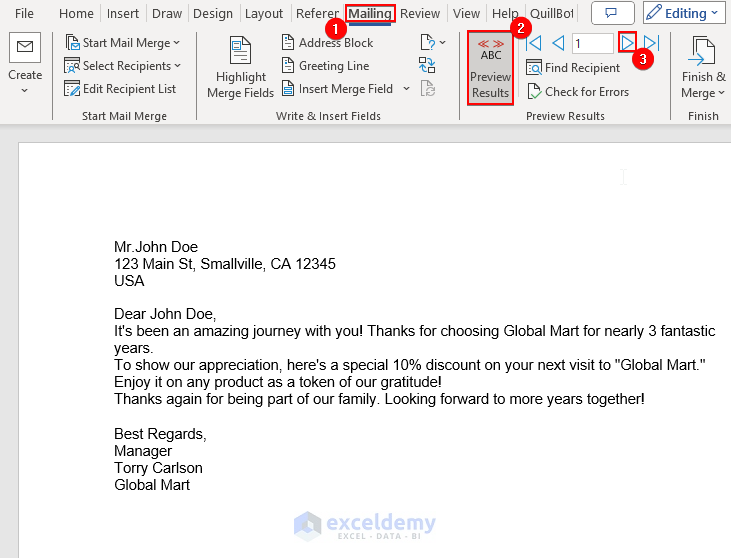
Step 4 – Checking Preview & Finishing Mail Merge
- Click on Mailings > Preview Result.
- Use the icon to see the next message (e.g., for John Doe, the greeting line will be Dear John Doe).
- Continue previewing messages for other recipients.
You can see the next message for Jane Smith by clicking on the icon.

Step 5 – Formatting Mail Merge Fields (Optional)
If any field contains time, date, number, or percentage, follow these steps:
a) Display the Field Code:
- Select the merge field (e.g., Name, Date).
- Press Shift + F9 to show the Mail Merge Field Item code.
b) Modify the Field Code:
- Remove “*MERGEFORMAT Date” from the displayed field code.
- Enter your desired switch (e.g., {MERGEFIELD Date @ “d MMMM yyyy”}).
c) Apply the Update:
- Press F9 to apply the changes.
- This ensures proper formatting (e.g., 07 April 2003).
By following these steps, you can precisely format your Merge Fields, ensuring the desired appearance in your final document.
Below is a Field Code table that you can use for your Mail Merge.
| Date/Time Format Code | Description | Field Code Example | Output Example |
|---|---|---|---|
| d | Displays the day of the week or month as a number. | {MERGEFIELD Date \@ “M/d/yyyy”} | 4/7/2003 |
| dd | Displays the day of the week or month as a number. | {MERGEFIELD Date \@ “d MMMM yyyy”} | 07 April 2003 |
| ddd | Displays a three-letter abbreviation for the day of the week. | {MERGEFIELD Date \@ “ddd, d-MMM-yy”} | Mon, 7-Apr-03 |
| dddd | Displays the full name of the day of the week. | {MERGEFIELD Date \@ “dddd, MMMM d, yyyy”} | Monday, April 7, 2003 |
| M | Displays the month as a number. | {MERGEFIELD Date \@ “M/d/yy”} | 4/7/03 |
| MM | Displays the month as a number. | {MERGEFIELD Date \@ “yyyy-MM-dd”} | 2003-04-07 |
| MMM | Displays a three-letter month abbreviation. | {MERGEFIELD Date \@ “MMM-yy”} | Apr-03 |
| MMMM | Displays the full month name. | {MERGEFIELD Date \@ “MMMM d, yyyy”} | April 7, 2003 |
| yy | Displays a two-digit year number. | {MERGEFIELD Date \@ “MMM-yy”} | Apr-03 |
| yyyy | Displays a four-digit year number. | {MERGEFIELD Date \@ “MMMM d, yyyy”} | April 7, 2003 |
| h | Use lowercase h to display times based on the 12-hour clock. | {MERGEFIELD Time \@ “h:mm”} | 6:05 |
| hh | Use lowercase hh to display times based on the 12-hour clock. | {MERGEFIELD Time \@ “hh:mm am/pm”} | 06:05 am |
| H | Use uppercase H to display times based on the 24-hour clock (military clock). | {MERGEFIELD Time \@ “H:mm”} | 7:05 |
| HH | Use uppercase HH to display times based on the 24-hour clock (military clock). | {MERGEFIELD Time \@ “HH:mm”} | 18:30 |
| m | Displays single-digit minutes without a leading zero. | {MERGEFIELD Time \@ “m ‘minutes'”} | 2 minutes |
| mm | Displays single-digit minutes with a leading zero. | {MERGEFIELD Time \@ “hh:mm am/pm”} | 06:05 am |
| AM/PM | Displays uppercase AM or PM. | {MERGEFIELD Time \@ “hh:mm AM/PM”} | 08:30 PM |
| am/pm | Displays lowercase am or pm. | {MERGEFIELD Time \@ “hh:mm am/pm”} | 07:55 am |
| ‘text’ | To display text within a date or time, enclose the text in single quotation marks. | {MERGEFIELD Date \@ “hh:mm ‘EST'”} | 06:15 EST |
| character | To include a character, such as – (hyphen), in a date or time, do not enclose in quotation marks. | {MERGEFIELD Date \@ “MMM-yy”} | Apr-03 |
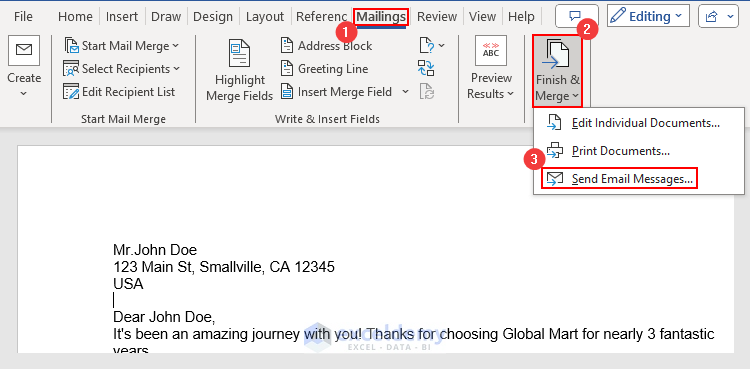
Step 6 – Mail Merge from Excel to Outlook with Attachment
- Mail Merge sends messages via Outlook:
- Ensure you have an Outlook email account.
- Keep Outlook running while sending messages.
- Click on Mailings > Finish & Merge > Send Email Messages.
- Enter the subject line (e.g., A Token of Gratitude: 10% Discount) and click OK.
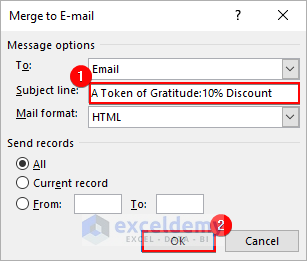
- Messages will be uploaded to your Outlook app’s Outbox folder and sent automatically.
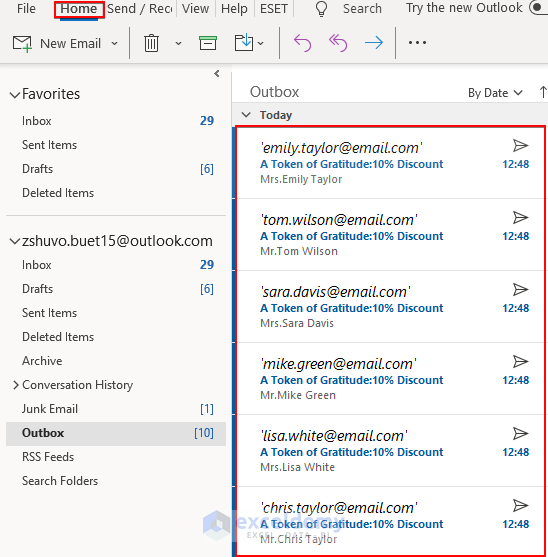
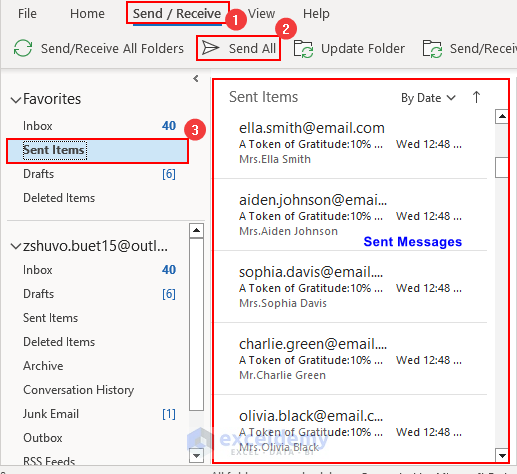
- If not, manually send them from Outlook’s Send/Receive option
Step 7 – Saving Mail Merge for Next Bulk Mailing
- Save the Mail Merge Word document on your PC.
- Use it for bulk mailings in the future by following the same steps.
How to Use the “Step-by-Step Mail Merge Wizard”?
- Enabling the Wizard:
- Click on Mailings, select Start Mail Merge and click on Step-by-Step Mail Merge Wizard.
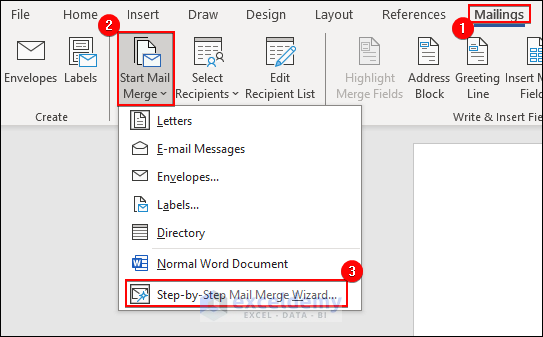
-
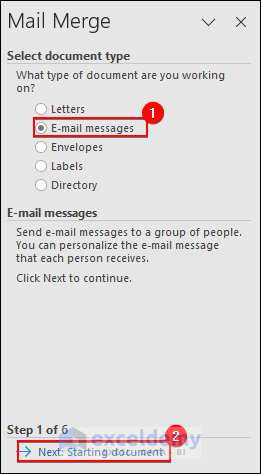
- The wizard will appear on the right side of the document.
- Choose E-mail messages and proceed to the next step.
- Performing Mail Merge:
- The wizard allows you to perform the same tasks as the previous methods.
- Follow the steps to avoid redundancy and achieve your desired mail merge.
How to Mail Merge Labels from Excel?
Imagine a scenario where a shop owner needs to send ordered items to customers via courier service. After packaging the items, the owner requires an address label for each customer. Let’s create these labels using Mail Merge:
- Setting Up the Document:
- Open Microsoft Word and create a blank document.
- Save it in the same folder as your Excel file containing customer details.
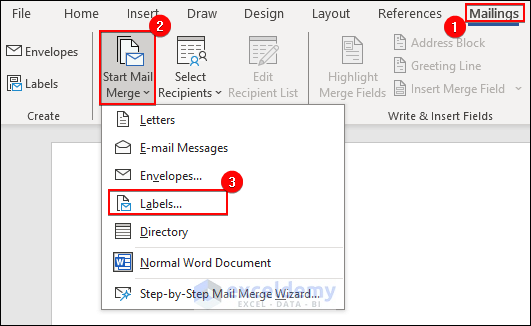
- Click on Mailings, select Start Mail Merge and click on Labels.
- Selecting Label Type:
- Choose Avery US Letter as the label vendor.
- Specify 5160 Address Labels as the product number.
Note:
The product number corresponds to the label type you’re using (e.g., Avery 5160).
Here is a table for Avery Product Numbers and their uses:
| Product Number | Label Use | Label Size |
|---|---|---|
| 5160 | Standard Address Labels | 1″ x 2-5/8″ |
| 5162 | Larger Address Labels | 1-1/3″ x 4″ |
| 5163 | Shipping Labels (larger size) | 2″ x 4″ |
| 5164 | Shipping Labels | 3-1/3″ x 4″ |
| 5167 | Return Address Labels | 1/2″ x 1-3/4″ |
| 5260 | Address Labels (similar to 5160) | 1″ x 2-5/8″ |
| 5263 | Shipping Labels (larger size) | 2″ x 4″ |
| 5960 | Address Labels (similar to 5160) | 1″ x 2-5/8″ |
| 5963 | Shipping Labels (larger size) | 2″ x 4″ |
| 8160 | Address Labels (similar to 5160) | 1″ x 2-5/8″ |
| 8162 | Address Labels (larger size) | 1-1/3″ x 4″ |
| 8163 | Shipping Labels (larger size) | 2″ x 4″ |
| 8164 | Shipping Labels | 3-1/3″ x 4″ |
| 8167 | Return Address Labels | 1/2″ x 1-3/4″ |
| 8168 | Return Address Labels (larger size) | 1-3/4″ x 2-1/2″ |
| 18160 | Clear Address Labels | 1″ x 2-5/8″ |
| 18163 | Clear Shipping Labels (larger size) | 2″ x 4″ |
| 18164 | Clear Shipping Labels | 3-1/3″ x 4″ |
| 18167 | Clear Return Address Labels | 1/2″ x 1-3/4″ |
| 18168 | Clear Return Address Labels (larger size) | 1-3/4″ x 2-1/2″ |
| 18195 | Clear Multipurpose Labels | 1-1/3″ x 4″ |
| 22805 | Round Labels | 2″ Diameter |
| 22806 | Round Labels | 2-1/2″ Diameter |
| 22807 | Round Labels | 2″ Diameter |
| 22817 | Round Labels | 2-1/2″ Diameter |
| 22822 | Square Labels | 2″ x 2″ |
| 22825 | Square Labels | 2″ x 2″ |
| 22846 | Oval Labels | 2″ x 3-1/3″ |
| 22849 | Arched Labels | 3-1/2″ x 4-3/4″ |
| 5294 | High Visibility Labels | 2″ Diameter |

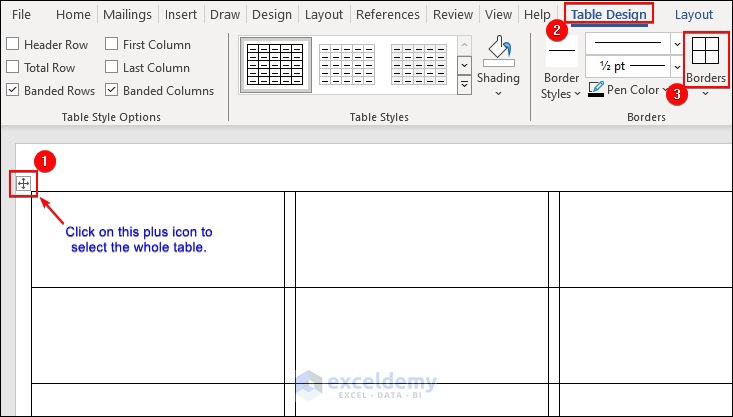
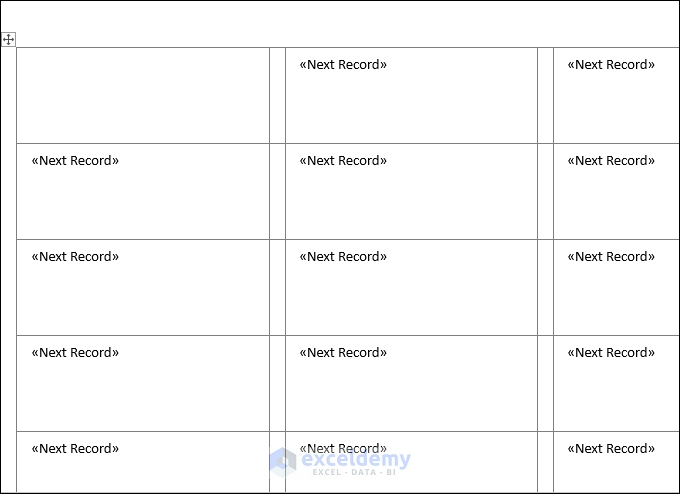
- Creating the Label Table:
- Click the plus icon at the top left corner.
- Go to Table Design and select Borders to create a borderless table.
- Connecting to Excel Data:
- Click on Mailings, choose Select Recipients and click on Use an Existing List.
- Locate and select your Excel file (e.g., Client Details).
- Click on Open.
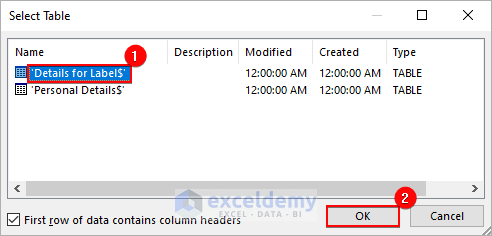
- Choose the worksheet (e.g., Details for Label) containing customer data.
- Click on OK.
If you see <<Next Record>> in each cell after the above step, it means it successfully imported the data field.
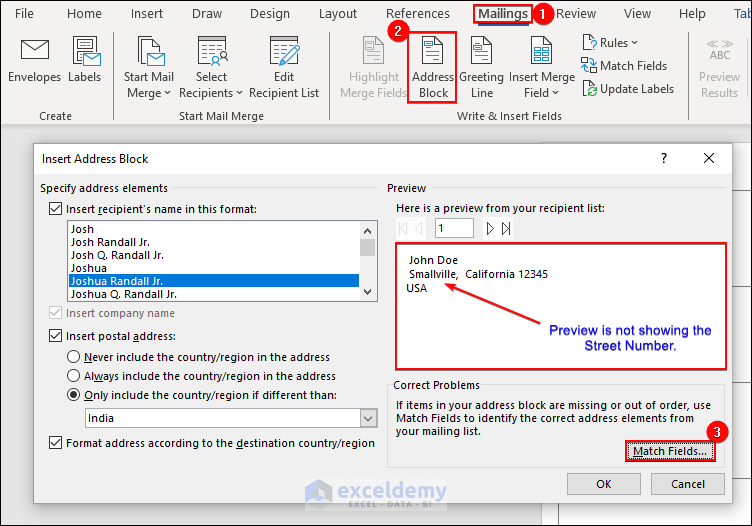
- Adding the Address Block:
- Click on Mailings and select Address Block.
- In the preview, if the street number is missing, click Match Fields.
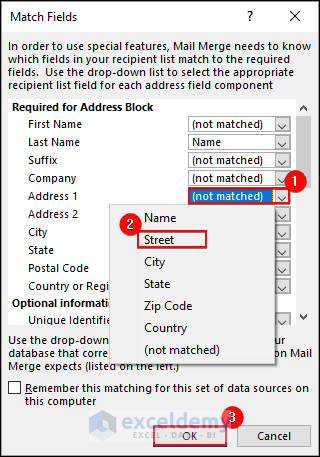
- Map the Address 1 field to the appropriate data source.
-
- Click on the box of Address 1 and press OK.
-
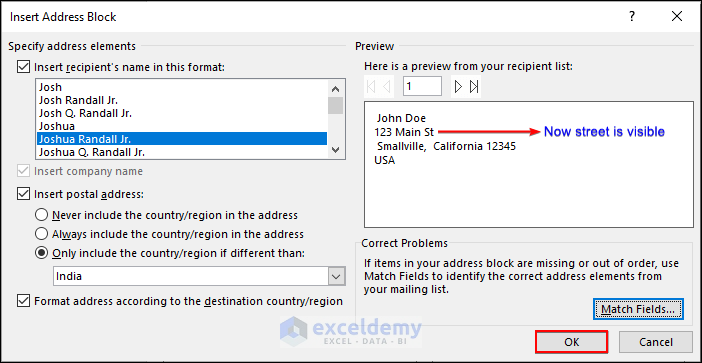
- Confirm the preview shows the complete address.
-
- Click on OK to continue.
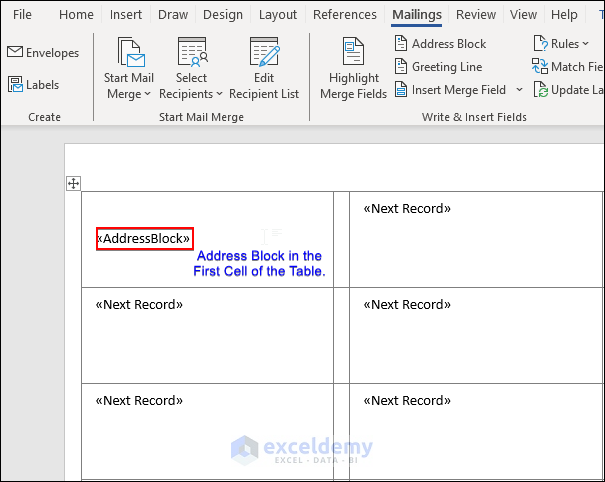
This will add the Address Block in the first cell of the table.
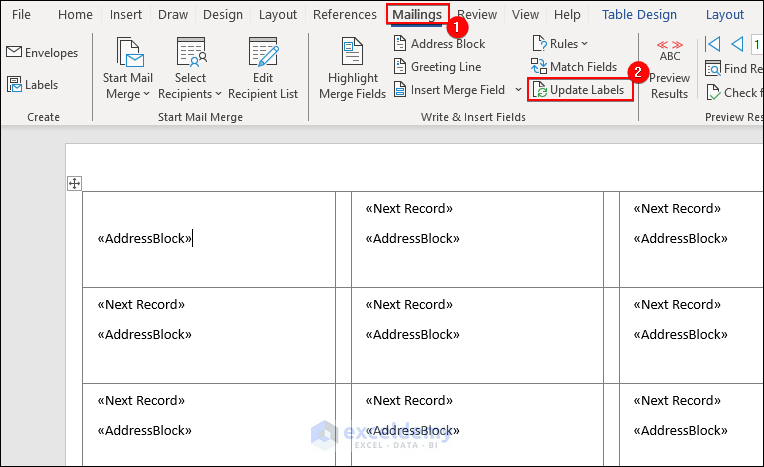
- Applying Address Block to All Cells:
- Click on Mailings and choose Update Labels.
- This will add the address block to each cell in the table.
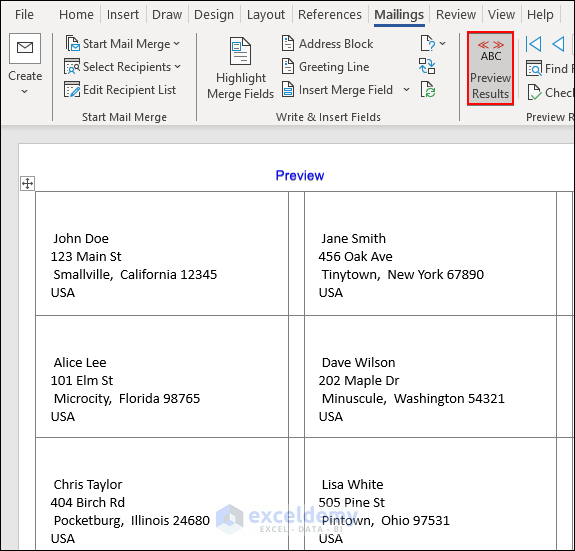
- Previewing and Printing:
- Click on Preview Results to see the real preview of each label.
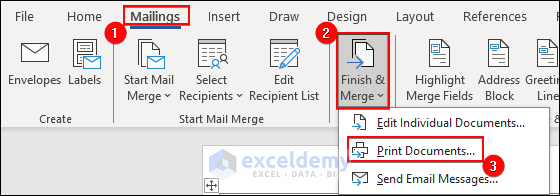
-
- To print the labels, go to Mailings, select Finish & Merge and click on Print Documents.
-
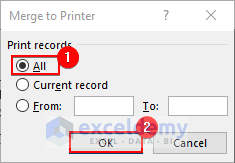
- Select all records and click OK in the Merge to Printer dialog.
- Set up the Printing set-up and environment to print the documents.

Useful Keyboard Shortcuts for Mail Merge Procedures
Here are some keyboard shortcuts you can use while doing Mail Merge.
| Procedure | Shortcut | Description |
|---|---|---|
| Open Mail Merge Wizard | Alt + Shift + M | Quickly open the mail merge wizard. |
| Insert Merge Field | Alt + Shift + F | Easily insert merge fields while composing your document. |
| Preview Results | Alt + Shift + P | Preview the merged results before finalizing. |
| Complete Mail Merge | Alt + Shift + C | Finish and complete the mail merge process. |
| Toggle Field Codes | Alt + F9 | Toggle between displaying field codes and results. |
| Navigate Through Fields | Alt + Shift + N | Move between merge fields efficiently. |
| Refresh Data Source | Alt + Shift + R | Refresh the data source linked to your mail merge. |
| Insert Date | Alt + Shift + D | Quickly insert the current date. |
Limitations of Excel Mail Merge
- Limited Tracking:
- You cannot track who opened or clicked your emails directly within Excel Mail Merge.
- Lack of detailed analytics makes it challenging to assess the effectiveness of your communication.
- File Attachments:
- Excel Mail Merge does not support attaching files (such as PDFs or videos) to your emails.
- If you need to send attachments, you’ll need to explore other methods.
- Unsubscribe Management:
- Properly managing unsubscribe requests can be difficult with Excel Mail Merge.
- Failing to handle unsubscribes effectively increases the risk of being marked as spam.
Alternatives to Excel Mail Merge
Here are some efficient alternatives to Excel Mail Merge:
- Mail Merge for Gmail:
- An easy Gmail add-on that allows you to send up to 1,500 personalized emails.
- Offers a free plan, but branding is included in the free version.
- Yet Another Mail Merge (YAMM):
- A simple Gmail tool suitable for surveys and personalized emails.
- May be tricky for beginners but provides a free plan with limited analytics.
- Right Inbox:
- A Gmail tool with features like reminders and recurring emails.
- Starts at $7.95/month, and a free plan allows up to 5 emails monthly.
- MailShake:
- Ideal for marketing campaigns and integrates with various platforms.
- Starts at $58/month.
- Mailmeteor:
- A Gmail tool with templates and an easy-to-use interface.
- Starts at $9.99/month, with a free plan allowing 50 emails per day.
Solving Possible Issues with Mail Merge
If you encounter issues during Mail Merge, consider the following solutions:
- Data Source Issues:
- If you see the error message “Word cannot find the data source,” try the following:
- Ensure the data source file is in the same folder as your Word document.
- Verify the correct file path in the Mailings tab.
- Check if the data source file is open elsewhere; close it and retry.
- If using Excel, save it as .xlsx or .csv.
- Confirm permission to access the data source file.
- If you see the error message “Word cannot find the data source,” try the following:
- Merge Field Issues:
- If merged fields are missing or displaying incorrect data:
- Verify that the merge fields are correctly inserted in your document.
- Check if the merge field names match the column headers in your data source.
- Ensure you are using the correct merge field type (e.g., text, number, date).
- If using nested merge fields, check for errors in the nested merge field code.
- If merged fields are missing or displaying incorrect data:
- Email Sending Issues:
- If emails are not being sent or have errors:
- Ensure you are connected to the internet.
- Check your email settings in Word and configure the correct email account.
- Verify that your email server is not experiencing outages.
- If using an add-on, check for updates or contact the developer for assistance.
- If emails are not being sent or have errors:
Download Practice Workbooks
You can download the practice workbook and documents from here:
Mail Merge Excel: Knowledge Hub
- How to Format Address Labels in Excel
- How to Mail Merge from Excel to Outlook with Attachments
- How to Copy and Paste Excel Table into Outlook Email
- Creating a Mailing List in Excel
- Mail Merge from Excel to Excel
- How to Mail Merge from Excel to Powerpoint
- How to Mail Merge from Excel to Word Envelopes
- How to Mail Merge Pictures from Excel to Word
- Mail Merge in Excel without Word
- How to Insert Merge Fields in Word from Excel
- [Solved]: Word Mail Merge Not Working with Excel
- Macro to Populate a Mail Merge Document from Excel
<< Go Back To Learn Excel
Get FREE Advanced Excel Exercises with Solutions!
