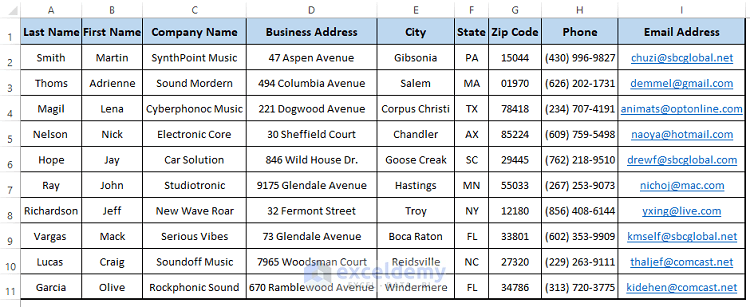
Let’s say our company name is Marigold Sales, and the address has changed from 7 Oak Valley St., Lakeland, Florida 33801 to Marigold Sales, 71 Glendale Ave. Boca Raton, Florida 33428. We want to inform our customers about this change using a mailing list.
Method 1 – Creating a Mailing List in Excel Using Microsoft Word Mail Merge
Steps:
- Open Microsoft Word,
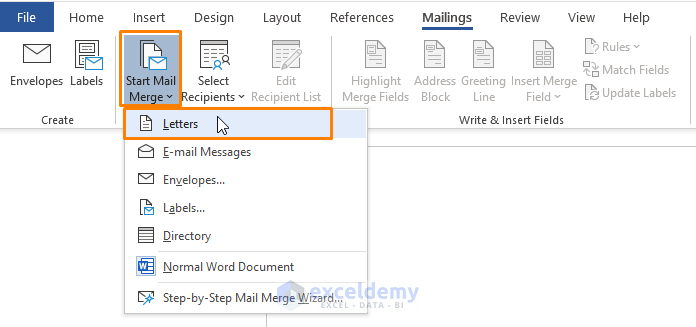
- Go to the Mailings tab.
- Select Letters (from the Start Mail Merge section).
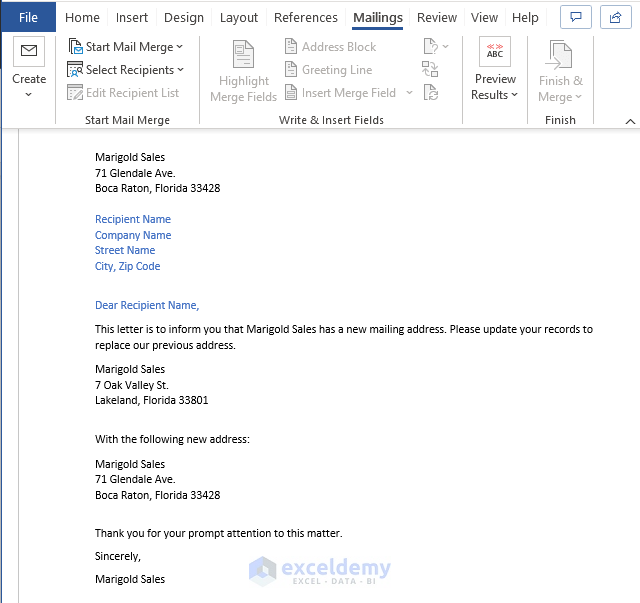
- Write down the message. The Blue-colored writing will be used with the mailing list you are about to create.
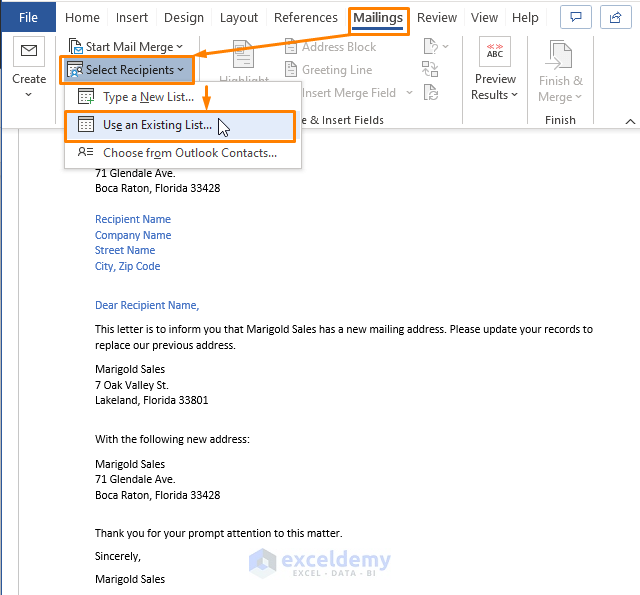
- Go to Select Recipients (from the Start Mail Merge section).
- Choose Use an Existing List (from the options).
- Select the required file (i.e., Creating a Mailing List in Excel).
- Click on Open.
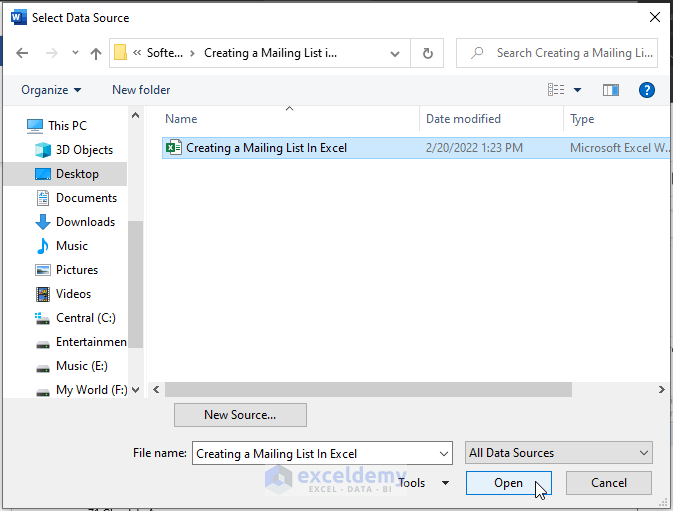
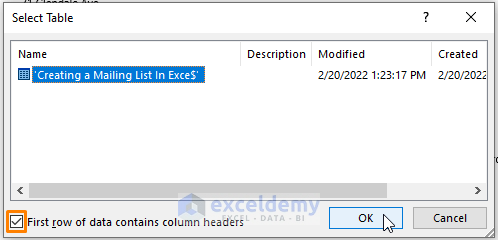
- The Select Table window opens. Check the First row of data contains column headers toggle.
- Click on OK.
- Microsoft Word will load the data.
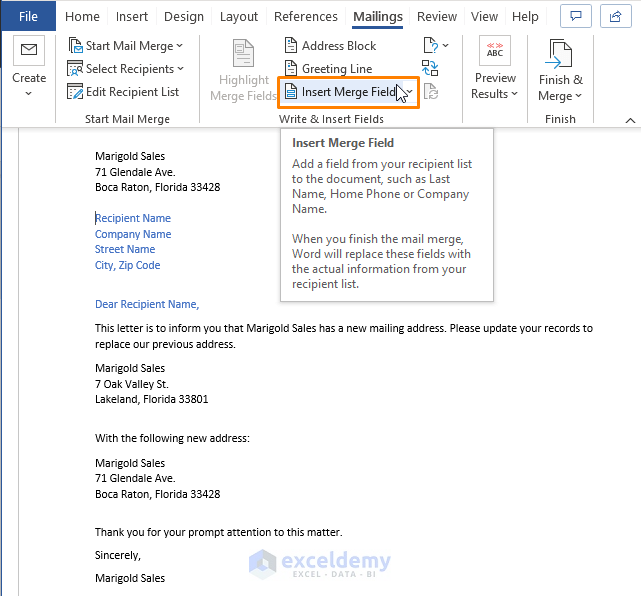
- Place the cursor in front of Recipient Name and go to Insert Merge Field (in the Write & Insert Fields under the Mailings tab).
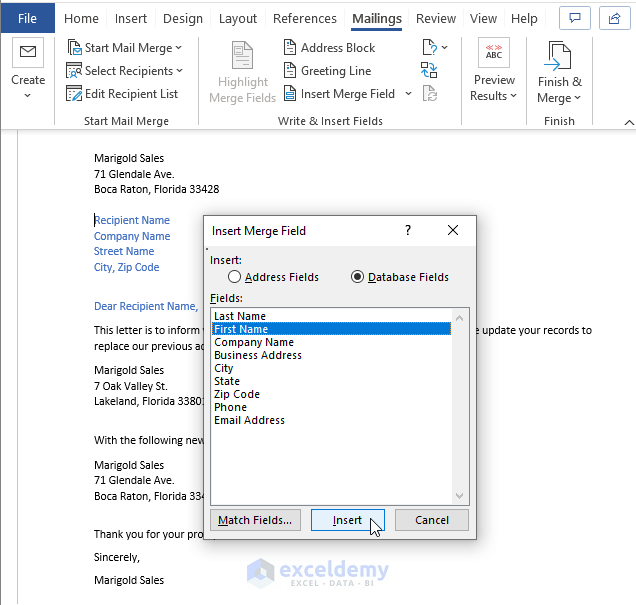
- The Insert Merge Field dialog box appears.
- Select Database Fields under the Insert section.
- Select the respective field (i.e., First Name).
- Click on Insert as shown in the image below.
- Repeat the previous sequence to insert First Name, Last Name, Company Name, City, State, and Zip Code.
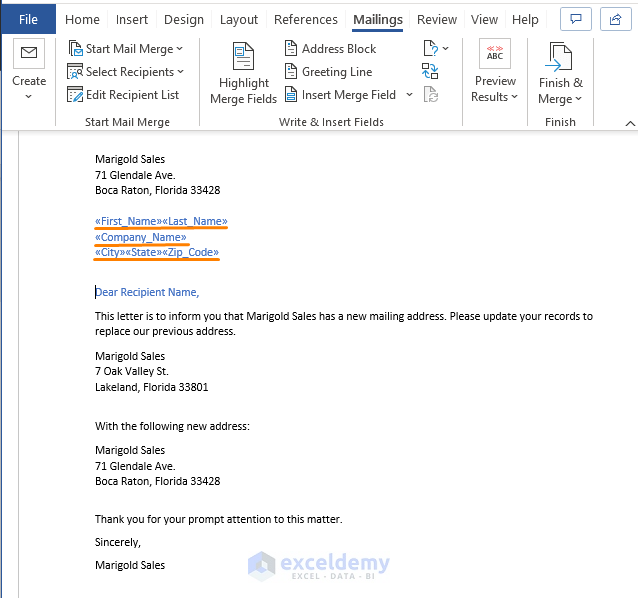
- Place the cursor in front of the greeting line (i.e., Dear Recipient Name).
- Go to the Write & Insert Fields section and select Greeting Line.
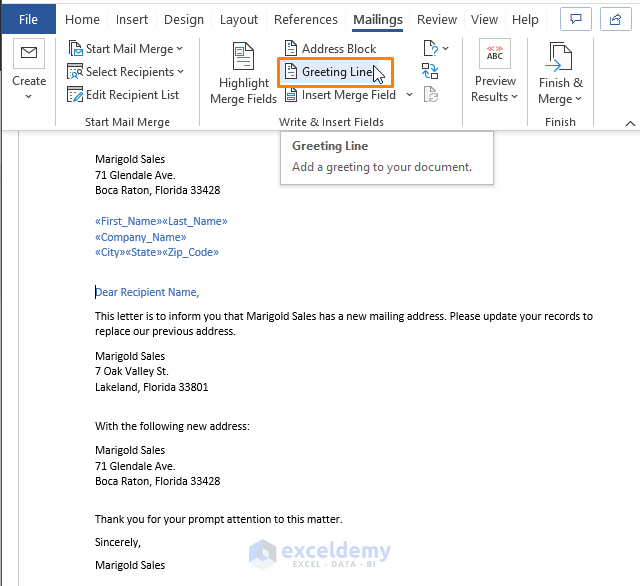
- The Insert greeting Line dialog box pops up.
- Select any format for Customer’s Name. You can put Comma (,) or other delimiters after the Recipient Name. The preview is displayed under the Preview section in the dialog box.
- Click on OK.

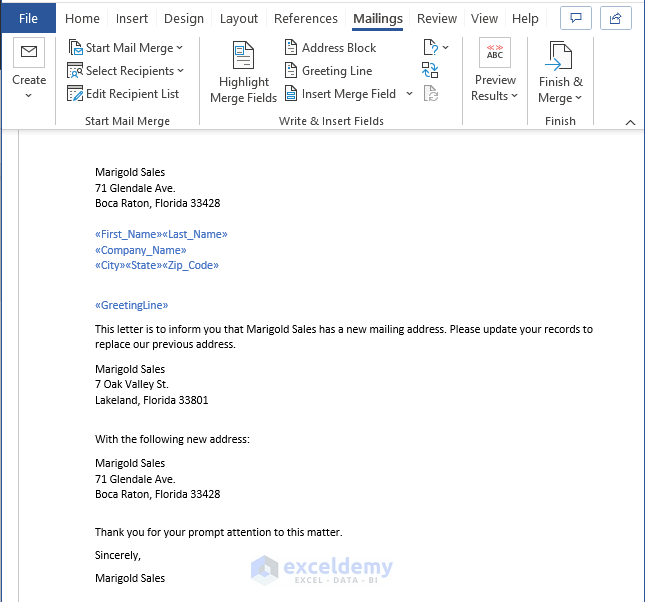
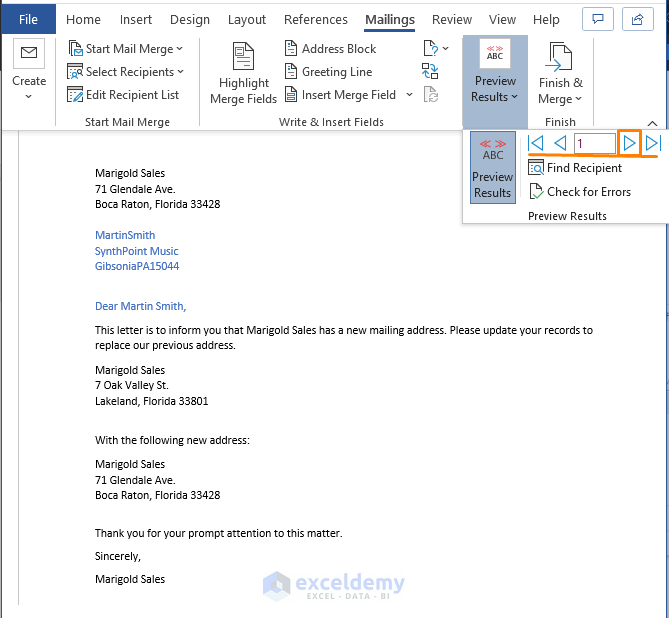
- You’ll get a template of the mail list for each customer in the data file. The template will be similar to the picture below.
- If you want to see the preview for any customer, select the Preview Results option (from the Preview Results section).
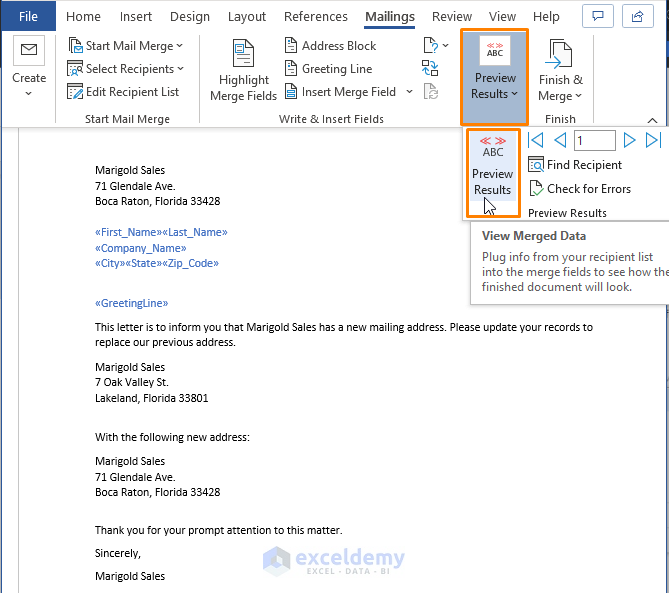
- The template transforms into a mailing letter as shown in the following picture.
- Put a Space after the First Name.
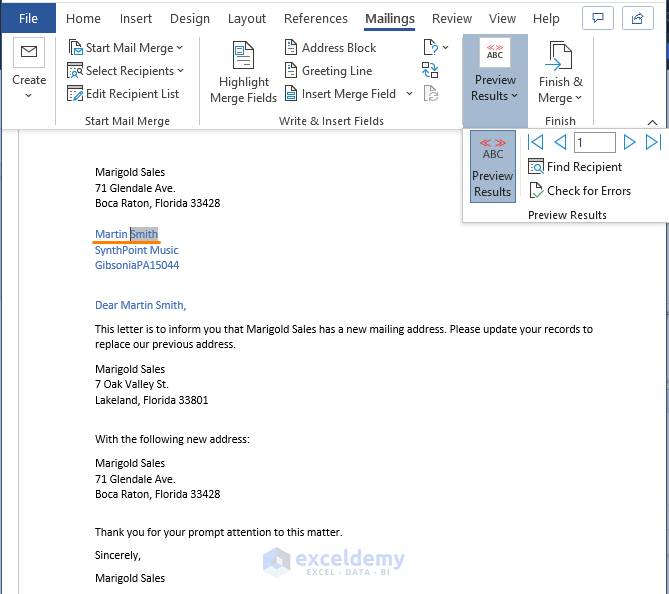
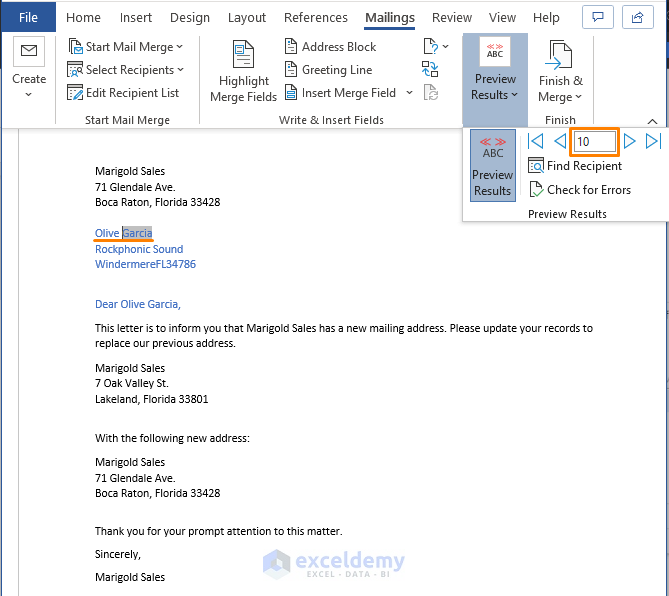
- Click on the direction arrows to move forward and backward among data.
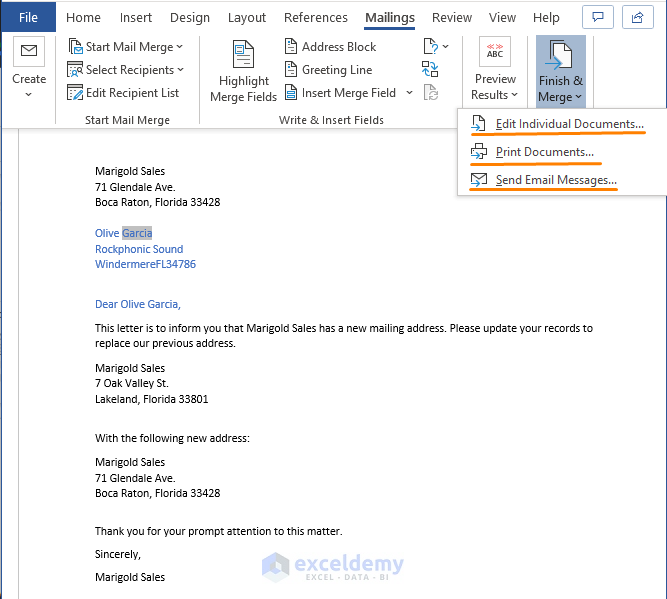
- You can Edit, Print, or even Email the letter by clicking on the specific options (i.e., Send Email Message).
- The Merge to E-mail dialog box appears.
- Select Email Address in the To command box.
- Type an appropriate subject (i.e., Address Change) in the Subject Line command box.
- Click OK.
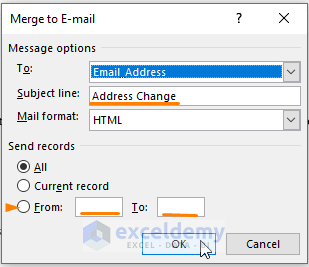
- You can pick a range of customer numbers to send the Email to.
Read More: How to Send Email from Excel List
Method 2 – Creating a Mailing List Using the Microsoft Outlook Import Feature
We have a dataset of customer contact information in Excel.
- Go to File and Save As.
- Select CSV from the offered formats.
- Click Save.

- Open Microsoft Outlook.
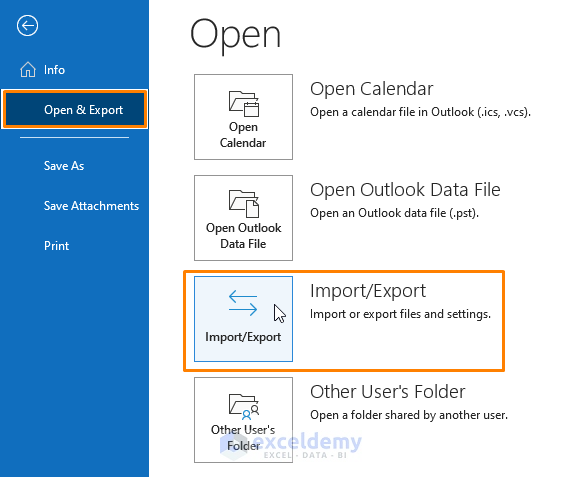
- Select File.
- From the File ribbon options, choose Open & Export and click on Import/Export.
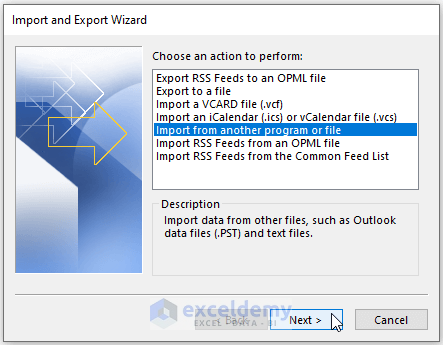
- The Import and Export Wizard appears.
- Choose Import from another program or file option.
- Hit Next.
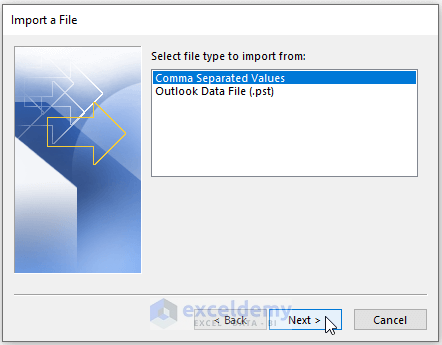
- The Import a File command box opens. Select Comma Separated Values (CSV) for Select the file type to import from.
- Click Next.
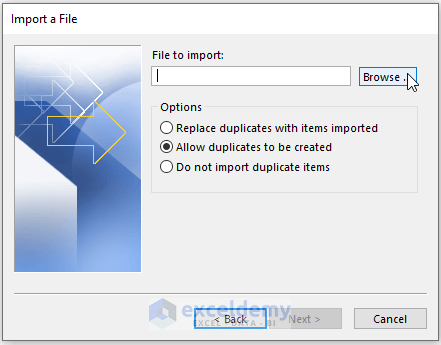
- Click on Browse to import the previously saved CSV file.
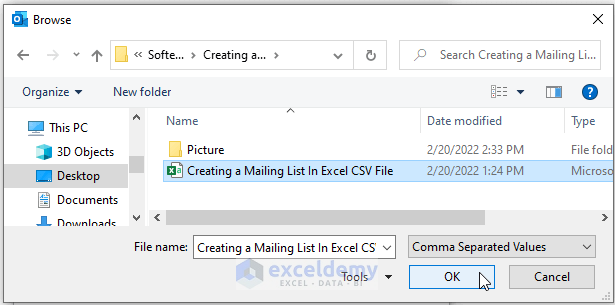
- Choose the previously saved CSV file from the computer directory and click OK.
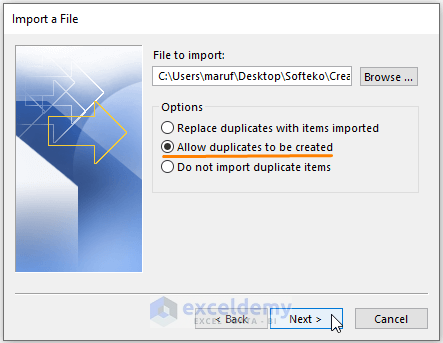
- Check the Allow duplicate to be created option and then go Next.
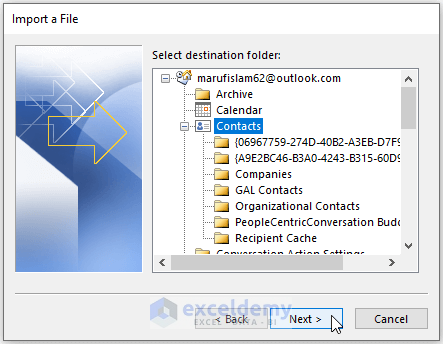
- Select the location (i.e., Contacts) where the imported file has to be extracted, then click on Next.
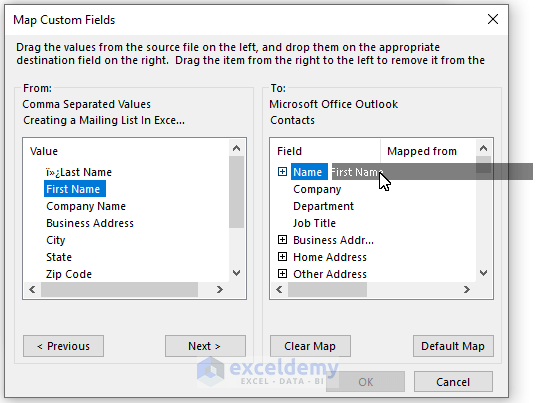
- Click on Map custom fields.
- Drag the values from From (Left side) to To (Right side) to assign them.
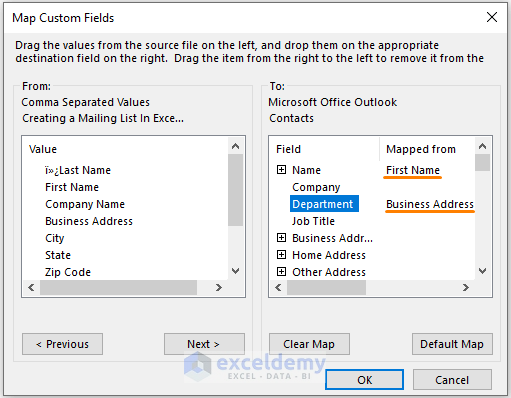
- Import First Name, Company Name, and Email Address.
- Click OK similar to the image below.
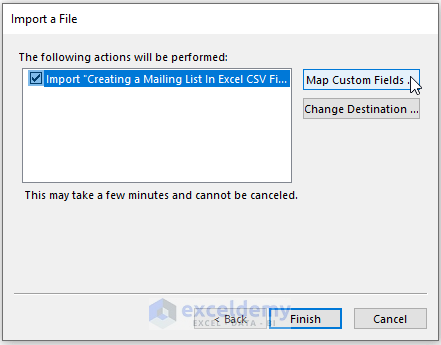
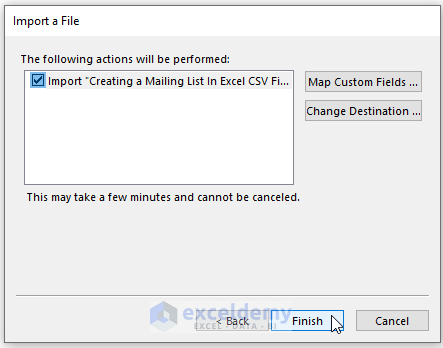
- You can also change the file destination. Otherwise, click on Finish.
- Outlook will load all the contacts. If you want to check the imported contacts, go to Contacts and all the imported contacts will appear.
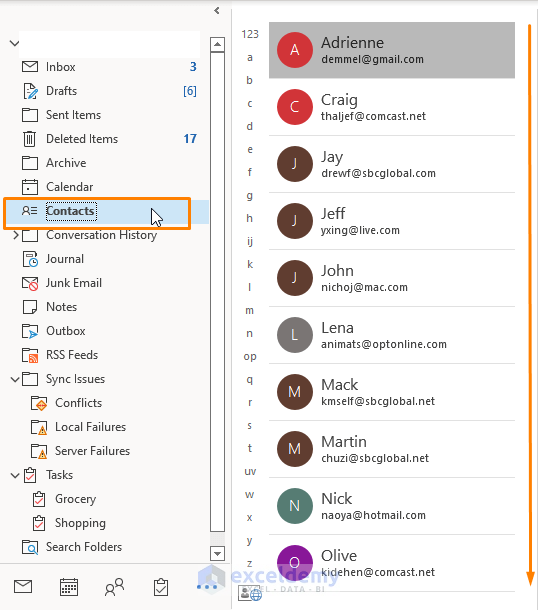
- You can count or cross-check the First Names with the source data.
- Outlook created a mailing list from which you can easily mail each of them instantly.
Read More: How to Mail Merge from Excel to Outlook
Download the Excel Workbook
Related Articles
- How to Mail Merge from Excel to Outlook with Attachments
- How to Copy and Paste Excel Table into Outlook Email
- Mail Merge from Excel to Excel
- How to Mail Merge from Excel to Powerpoint
- How to Change Date Format in Excel Mail Merge
- How to Format Address Labels in Excel
<< Go Back To Mail Merge Excel | Learn Excel
Get FREE Advanced Excel Exercises with Solutions!
