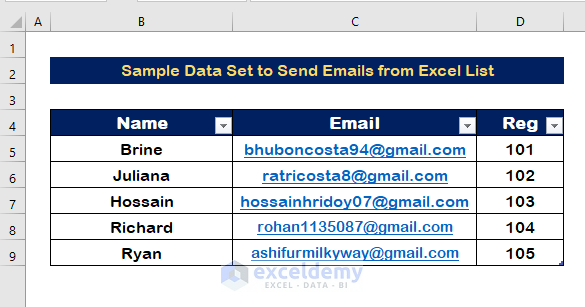
For this tutorial, we’ve used a data set with some people’s names, as well as their emails and registration numbers, as you can see in the image below. From the Excel list, we must send emails to each individual. To accomplish this, we’ll use Microsoft Word’s Mail Merge function, followed by a VBA code to send emails to preferred individuals from the existing list.
Method 1 – Apply the Mail Merge Function to Send Multiple Emails from an Excel List
⇒ Step 1: Open a New Word File
- Open a blank Word document.
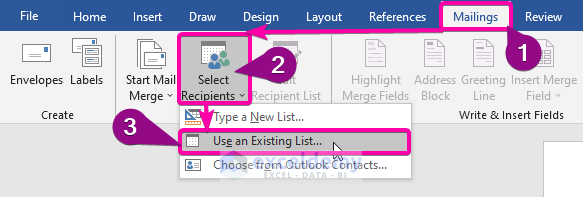
- Click on the Mailings tab.
- From the Select Recipients option, choose the Use an Existing List option.
⇒ Step 2: Link the Excel List to the Word File
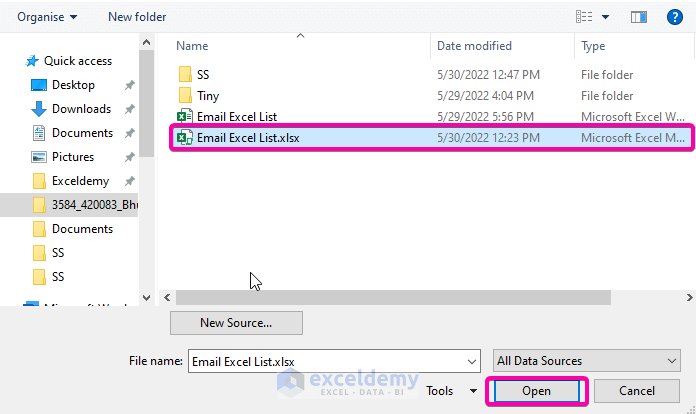
- Select the Excel file where you have created the list and click on Open to open the file.
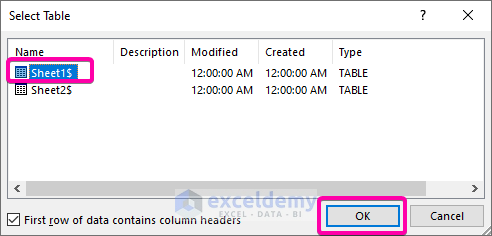
- Select the sheet number where you have written the list.
- Click OK.
⇒ Step 3: Insert Fields
- From the Mailings option, click on the Insert Merge Field option to enter the fields you want to insert.
- Insert the Name field by clicking on it and in the preferred position of the general mail.
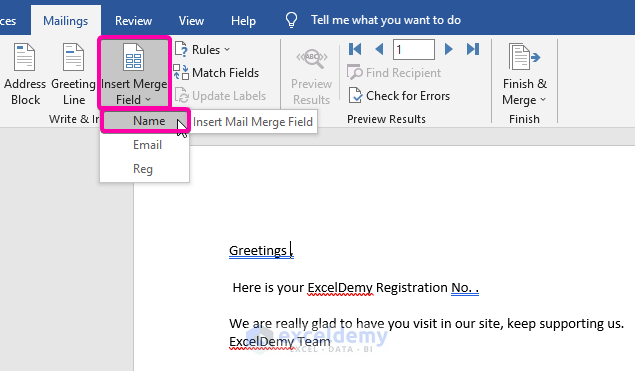
- After adding the Name field, it will show as the variable of every person’s name.

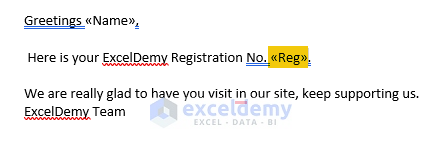
- Place the Reg field wherever you want in the text message.
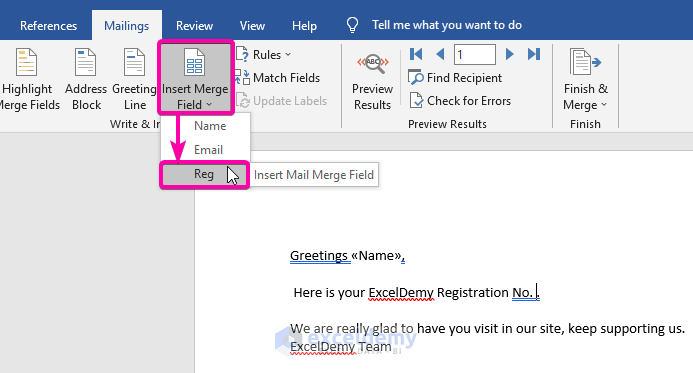
- It will appear as in the image shown below.
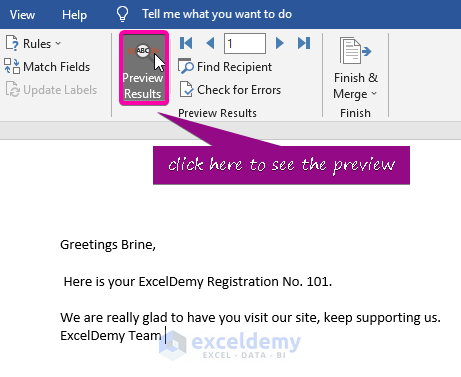
⇒ Step 4: Check the Preview Results
- Click on the Preview Results to see the final preview before sending the email.
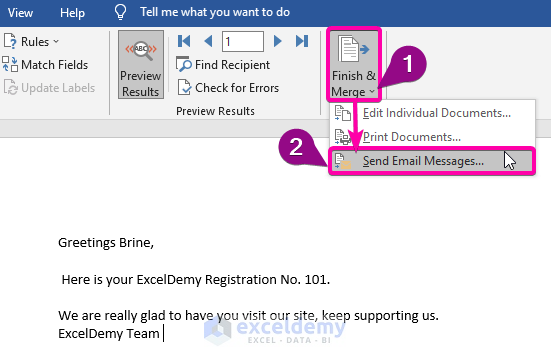
- The screenshot below shows how a sample email will look.
⇒ Step 5: Merge Emails
- To merge the emails, click on the Finish & Merge option.
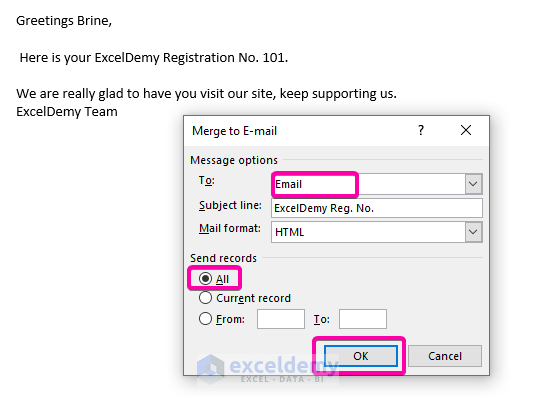
- To open the Merge to E-mail box, select the Send Email Messages option.
- In the To box, select the Email option.
- Type a subject line into the Subject line box.
- The mail format will be HTML by default, so you don’t need to change it.
- In the Send Records option, click on All.
- Click on OK to send the emails to multiple recipients at the same time.
- All the emails will be sent through your associated Outlook. Check your Outlook sent folder to confirm that emails have been sent.
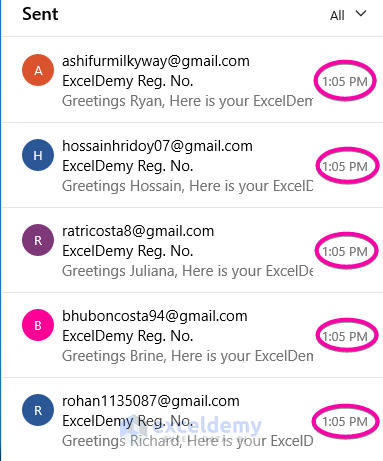
- When you open a sent email, you’ll notice that each field is filled with the information of a specific person.

Read More: How to Mail Merge from Excel to Outlook
Method 2 – Apply Excel VBA Code to Send Emails from Selection of a Range
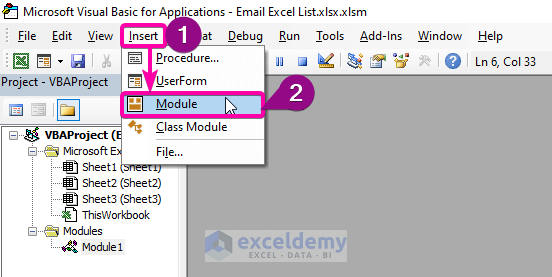
⇒ Step 1: Create a Module
- To open the VBA Macro, press Alt + F11 .
- Click on the Insert tab.
- Select the Module option to create the Module.
⇒ Step 2: Paste VBA Codes
- In the new Module, paste the following VBA code.
#If VBA7 And Win64 Then
'Ptr is used to change for operating 32 bit to 64 bit
    Private Declare PtrSafe Function ShellExecute Lib "shell32.dll" Alias "ShellExecuteA" ( _
                         ByVal wnd As LongPtr, ByVal lpDirect As String, _
                         ByVal Parameters As String, ByVal File As String, ByVal Operation As String, _
                         ByVal nCmd As Long) As LongPtr
#Else

#End If
Sub SendExcelListEMail()
'Declare the variables
    Dim xMailAdd As String
    Dim xRegCode As String
    Dim xBody As String
    Dim xURLink As String
    Dim xRngCell As Range
    Dim xIntRg As Range
    Dim xSelectTxt As String
    Dim k As Integer
    Dim p As Double
    On Error Resume Next
'Select range select adddress
    xSelectTxt = ActiveWindow.RangeSelection.Address
'Create a Input box for the range selection
    Set xIntRg = Application.InputBox("Please Input Excel data range:", "ExcelDemy", xSelectTxt, , , , , 8)
'Apply If condition to specify column numbers for the operation
    If xIntRg Is Nothing Then Exit Sub
    If xIntRg.Columns.Count <> 3 Then
'Show the result in a msg box for not meeting the condition
        MsgBox "Error with Region Selection, please confirm", , "ExcelDemy"
        Exit Sub
    End If
'Apply For loop to run operation in each row individually
    For k = 1 To xIntRg.Rows.Count
'       Collect the email address and set to the variable
        xMailAdd = xIntRg.Cells(k, 2)
'       Give a subject for the Email
        xRegCode = "ExcelDemy Registration No."
'       Type the body of the email
        xBody = ""
'       Insert Names with the variable xIntRg
        xBody = xBody & "Greetings " & xIntRg.Cells(k, 1) & "," & vbCrLf & vbCrLf
        xBody = xBody & " Here is your ExcelDemy Registration No. "
'       Insert Registration No. with the variable xIntRg
        xBody = xBody & xIntRg.Cells(k, 3).Text & "." & vbCrLf & vbCrLf
        xBody = xBody & "We are really glad to have you visit in our site, keep supporting us." & vbCrLf
        xBody = xBody & "ExcelDemy Team"
'       Define spaces with (hex)
        xRegCode = Application.WorksheetFunction.Substitute(xRegCode, " ", "%20")
        xBody = Application.WorksheetFunction.Substitute(xBody, " ", "%20")
'       Specify to replace carriage returns with(hex)
        xBody = Application.WorksheetFunction.Substitute(xBody, vbCrLf, "%0D%0A")
'       Generate the URL Link
        xURLink = "mailto:" & xMailAdd & "?subject=" & xRegCode & "&body=" & xBody
'       Use the Link to start emailing
        ShellExecute 0&, vbNullString, xURLink, vbNullString, vbNullString, vbNormalFocus
'       three seconds interval for sending keystrokes
        Application.Wait (Now + TimeValue("0:00:03"))
        Application.SendKeys "%s"
    Next
End Sub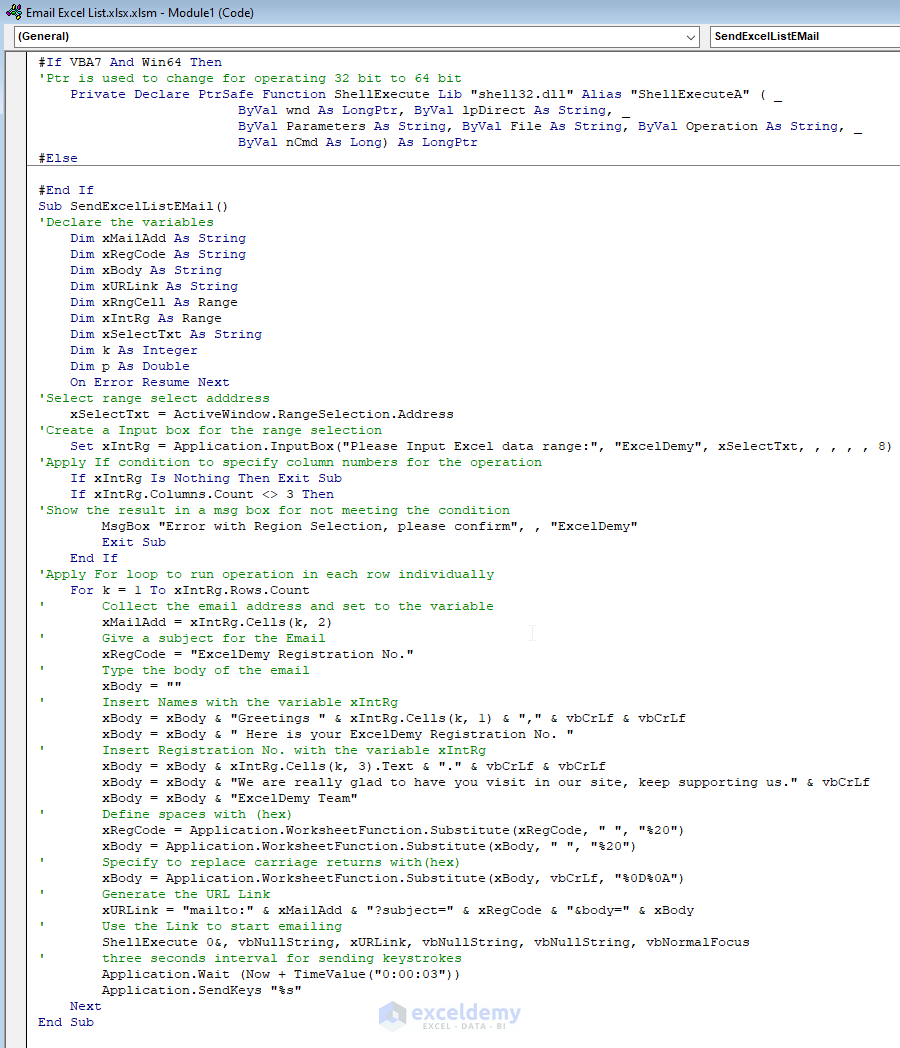
⇒ Step 3: Run the Program
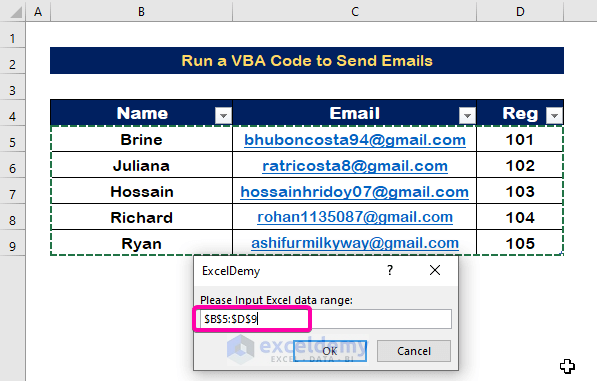
- Press F5 to run the program.
- Select the range in the input box.
- Click OK to send the emails.
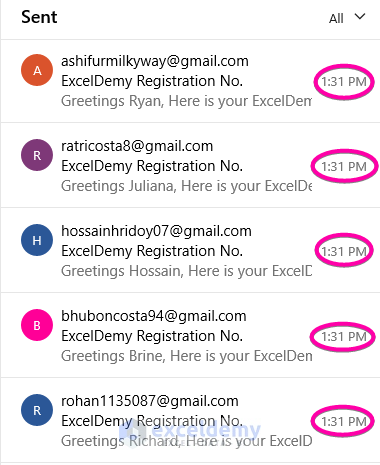
- Previews of the emails you’ll send will appear, as shown in the image below.

- Check the sent emails in your outbox for confirmation.
Read More: Creating a Mailing List in Excel
Download Practice Workbook
Download this practice workbook to exercise while you are reading this article.
Related Articles
- How to Format Address Labels in Excel
- How to Change Date Format in Excel Mail Merge
- How to Mail Merge from Excel to Outlook with Attachments
- How to Copy and Paste Excel Table into Outlook Email
- Mail Merge from Excel to Excel
- How to Mail Merge from Excel to Powerpoint
<< Go Back To Mail Merge Excel | Learn Excel
Get FREE Advanced Excel Exercises with Solutions!
