Looking for ways to mail merge in Excel without Word? Then this is the right place for you. If Microsoft Word is not available for some reason, doing a mail merge will be tricky. However, it’s not impossible, as Word is not mandatory for performing mail merge operations. In this article, we will show you 2 VBA Macros to mail merge in Excel without Word.
Mail Merge
When someone or some company wants to send a large number of emails with a slight modification (such as name, recipient’s email address, or recipient’s address). Then, the concerned party can create a template and editable fields to fulfill the needs. We know this kind of template as a mail merge.
This is a total time saver. It is common to do this task via a Word processor (such as Microsoft Word, Google Docs, etc.). The WordStar first introduced this feature in the early 80s. After that, others have adopted this super useful feature.
Generally, one needs to follow 5 main steps of the mail merge operation:
- Firstly, the original document.
- Secondly, data source.
- Thirdly, the fields to input.
- Then, merging with the original document.
- Lastly, Save or Send the emails.
Mail Merge in Excel without Word: 2 Suitable Ways
As Microsoft Word is the most prominent Word processor out there, most of us associate Word when we hear the text “mail merge”. However, we will do it differently, using only Microsoft Excel to perform mail merge. So read through this article to know about it more in-depth.
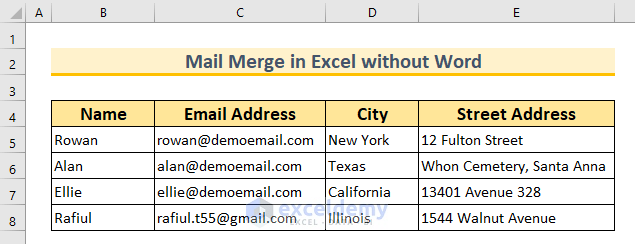
Moreover, we will use two datasets to demonstrate our Macros, from those the first dataset has the following columns: “Name”, “Email Address”, “City”, and “Street Address”. We will see the latter dataset in the second method of this article. Additionally, for privacy reasons, we have made up 3 email addresses for our dataset and the last one belongs to this article writer, which we will use to verify that we can send an email without any issues.
1. Mail Merge to Send Email Automatically in Excel
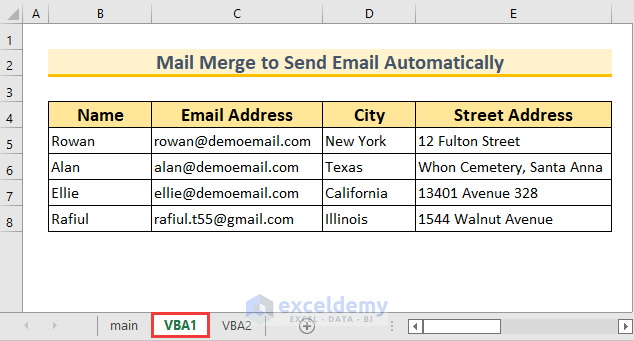
For the first method, our Worksheet name is “VBA1”. We will insert a VBA code with two Sub procedures using a single Module to mail merge in Excel without Word. Then, we will run this code, which will send the emails automatically to the listed customers using our predefined template. Before doing all that, let us show you how to bring up the Module window and type a VBA code.
- Firstly, from the Developer tab >>> select Visual Basic.
- Alternatively, you can press ALT + F11 to display the VBA window.

- Secondly, from Insert >>> select Module.
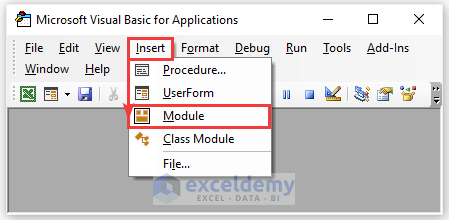
- So, this will bring up the Module window, where we type our VBA code.
- Next, type the following code inside the Module window.
Option Explicit
Sub Mail_Merge_Only_Excel()
Dim xSheet As Worksheet
Dim mAddress As String, mSubject As String, eName As String, _
eLocation As String, eCity As String
Dim eRow As Long, x As Long
Set xSheet = ThisWorkbook.Sheets("VBA1") 'WorkSheet Name
With xSheet
eRow = .Cells(.Rows.Count, 5).End(xlUp).Row
For x = 5 To eRow 'Specific Row to Row to Last Row
mAddress = .Cells(x, 3)
mSubject = "Thank You for Your Loyalty"
eName = .Cells(x, 2)
eCity = .Cells(x, 4)
eLocation = .Cells(x, 5)
Call Mail_Merge_Only_Excel_Send_Mail(mAddress, mSubject, _
eName, eLocation, eCity)
Next x
End With
End Sub
Sub Mail_Merge_Only_Excel_Send_Mail(mAddress As String, mSubject As String, _
eName As String, eLocation As String, eCity As String)
Dim pApp As Object
Dim pMail As Object
Set pApp = CreateObject("Outlook.Application")
Set pMail = pApp.CreateItem(0)
With pMail
.To = mAddress
.CC = ""
.BCC = ""
.Subject = mSubject
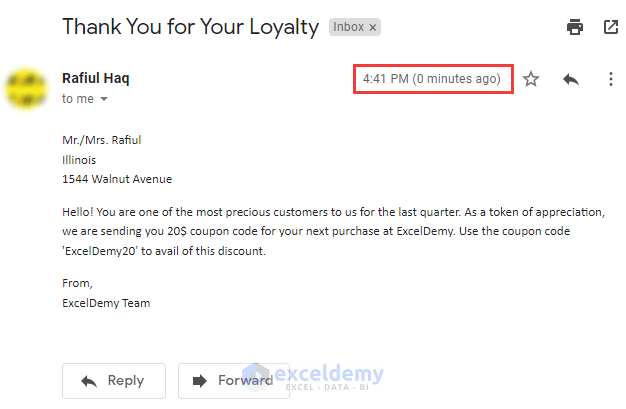
.Body = "Mr./Mrs. " & eName & vbNewLine & eCity & vbNewLine & eLocation & _
vbNewLine & vbNewLine & "Hello! " _
& "You are one of the most precious customers to us for the last quarter. " _
& "As a token of appreciation, we are sending you 20$ coupon code for your " _
& "next purchase at ExcelDemy. " _
& "Use the coupon code 'ExcelDemy20' to avail of this discount." _
& vbNewLine & "From," & vbNewLine & "ExcelDemy Team"
.Send
End With
Set pMail = Nothing
Set pApp = Nothing
End Sub
VBA Code Breakdown
- Firstly, we’re calling our first Sub procedure “Mail_Merge_Only_Excel”.
- Secondly, we’re declaring the variable types and setting “VBA1” as our Worksheet.
- Then, the last row number is found. Moreover, our value starts from row 5, hence we’ve put row 5 to the last row in our code.
- Then, call our second Sub procedure “Mail_Merge_Only_Excel_Send_Mail”.
- After that, we’re selecting Outlook as our Mail Application.
- Then, the email content is set in our code. Additionally, we use vbNewLine to insert blank lines into the email body.
- After that, “.Send” is used here to send our email. Therefore, we do not need to press Send manually to send the emails. Moreover, we can use “.Display” to display email without sending it.
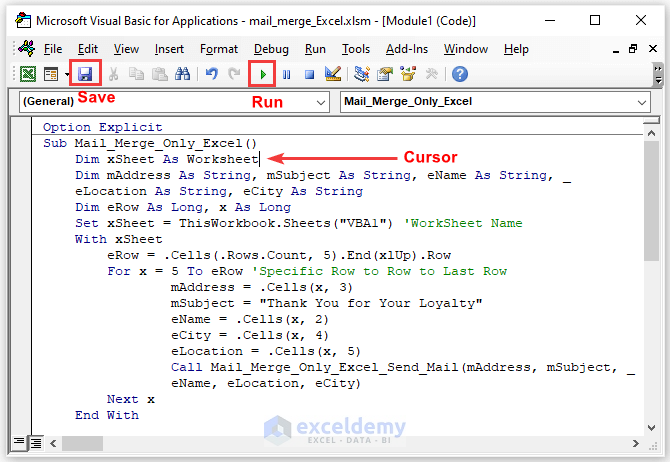
- Afterward, Save the Module.
- Then, put the cursor inside the first Sub procedure and press Run.
- Now, if you did not log on to your Outlook mail app, then you will be asked to enter your login credentials. We have already logged in, hence our mail will be sent without the additional steps.
- Lastly, this snapshot shows the mail merge works as intended and it can work using Excel without Word.
Read More: How to Make Address Labels in Word from Excel
2. Mail Merge from Selection in Excel without Word
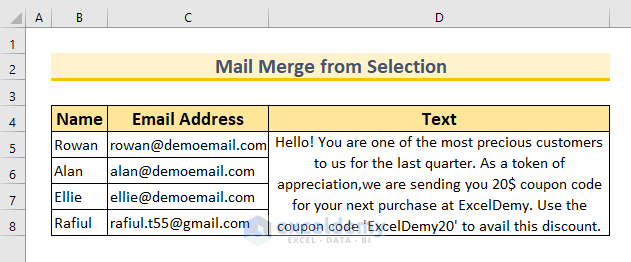
For the last method, we have changed our datasets a little bit. There are three columns consisting of “Name”, “Email Address”, and “Text”. We will use another VBA code to perform mail merge in Excel only. This time, we will use the InputBox method to select the email address and the text to send. Further, we will just display the mail merge operation Outlook Application and send it manually by clicking on a button. Our email body is the same for all the customers. Without further ado, let us jump into the steps.
Steps:
- Firstly, as shown in the first method, bring up the Module window and type this code.
Public Sub Mail_Merge_Without_Word_Input_Box()
'Declare the variables
    Dim XRcptsEmail As Range
    Dim xMailContent As Range
    Dim xRngDn As Range
    Dim xCrtOut As Object
    Dim xValSendRng As String
    Dim k As Long
    Dim xMailSections As Object
    Dim xFinalRw As Long
    Dim CrVbLf As String
    Dim xMsg As String
    On Error Resume Next
    'Insert a input box for selecting the recipients
    Set XRcptsEmail = Application.InputBox("Choose the column for the email" _
    & "addresses of the recipients:", "ExcelDemy", , , , , , 8)
    If XRcptsEmail Is Nothing Then Exit Sub
    'To enter the text mail, insert a input box
    Set xMailContent = Application.InputBox("In your email," _
    & "choose the column with the text:", "ExcelDemy", , , , , , 8)
    If xMailContent Is Nothing Then Exit Sub
    'Count rows for the recipient email
    xFinalRw = XRcptsEmail.Rows.Count
    Set XRcptsEmail = XRcptsEmail(1)
    Set xMailContent = xMailContent(1)
    'Set command to open MS Outlook Application
    Set xCrtOut = CreateObject("Outlook.Application")
    'Apply For loop to conduct the operation in each row one by one
    For k = 1 To xFinalRw
            xValSendRng = Cells(XRcptsEmail.Offset(k - 1).Row, _
            XRcptsEmail.Offset(k - 1).Column - 1)
            'Create the subject, body and text contents with the required variables
            CrVbLf = "<br><br>"
            xMsg = "<HTML><BODY>"
            xMsg = xMsg & "Dear " & xValSendRng & CrVbLf
            xMsg = xMsg & "" & xMailContent.Value & CrVbLf
            xMsg = xMsg & "</BODY></HTML>"
            'Create the email
            Set xMailSections = xCrtOut.CreateItem(0)
            'Define the position to place the Subject, Body and Recipients Address
            With xMailSections
                .Subject = "Congratulations!!!"
                xValSendRng = Cells(XRcptsEmail.Offset(k - 1).Row, _
                XRcptsEmail.Offset(k - 1).Column)
                .To = xValSendRng
                .HTMLBody = xMsg
                .Display
            End With
            Set xMailSections = Nothing
    Next
    Set xCrtOut = Nothing
End Sub
VBA Code Breakdown
- To begin with, We are calling the Sub procedure Mail_Merge_Without_Word_Input_Box.
- Secondly, we’re declaring the variable types.
- After that, we use two InputBox to obtain email addresses and email body contents.
- Then, we count the row number.
- Next, we use a For Next Loop to go through all the rows sequentially and using the VBA Offset property we extract the customer names from the 1 column left.
- Lastly, we use the Display method to preview the emails. Alternatively, we can use the Send method to send the emails too.
- Afterward, Save the Module.
- Then, put the cursor inside the first Sub procedure and press Run.

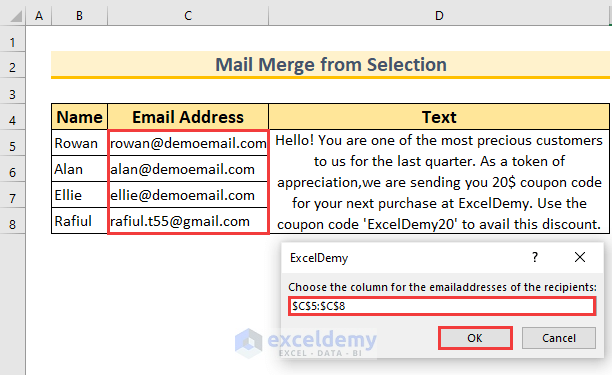
- So, our code will execute and it will ask us to select the email addresses and content of the email.
- Next, select the cell range C5:C8 as the email addresses and press OK.
- Afterward, select the email content which is on cell D5 and press OK.

- After that, it will show us 4 windows of the Outlook Application.
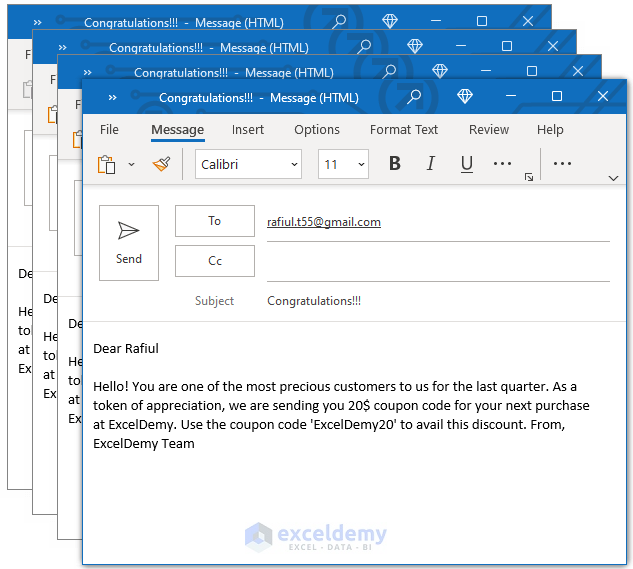
- Lastly, we can press Send to forward this email.

- This is what the successful mail merge output using this VBA code will look like.

Read More: How to Mail Merge from Excel to Word Envelopes
Practice Section
We have added a practice dataset for each method in the Excel file. Therefore, you can follow along with our methods easily.

Download Practice Workbook
Conclusion
We have shown you 2 VBA Macros to mail merge in Excel without Word. If you face any problems regarding these methods or have any feedback for me, feel free to comment below. Thanks for reading, keep excelling!
Related Articles
- How to Mail Merge Pictures from Excel to Word
- How to Insert Merge Fields in Word from Excel
- [Solved]: Word Mail Merge Not Working with Excel
- Macro to Populate a Mail Merge Document from Excel
<< Go Back To Mail Merge Excel | Learn Excel
Get FREE Advanced Excel Exercises with Solutions!

can you please explain how to mailmerge excel to excel (without word document)
Thank you AHAMED for your query.
For the explanation on how to mail merge Excel to Excel, you can check the following link:
https://www.exceldemy.com/mail-merge-from-excel-to-excel/
I hope it will fulfill your need.