In this article, we’ll show you 4 handy approaches to importing CSV data into Excel.
The above image shows the process of importing CSV data into Excel through the Text Import Wizard.
What Is CSV Data?
CSV stands for “Comma-Separated Values”. It is a type of text file commonly used for storing and exchanging data between different software programs, as this format is simple, lightweight, and easy to read and write. Although the name of the format is “comma-separated values”, you can separate the data by other delimiters such as tabs, semicolons, or other punctuation. CSV files can be opened with Notepad and other Text editors along with Excel..
Importing CSV Data into Excel
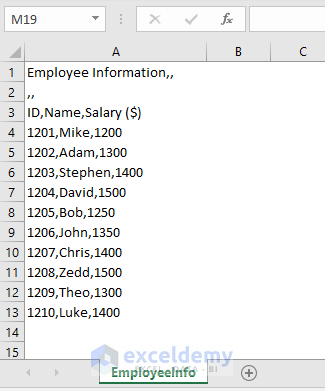
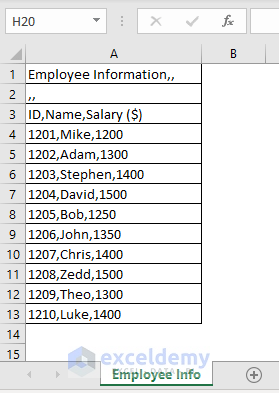
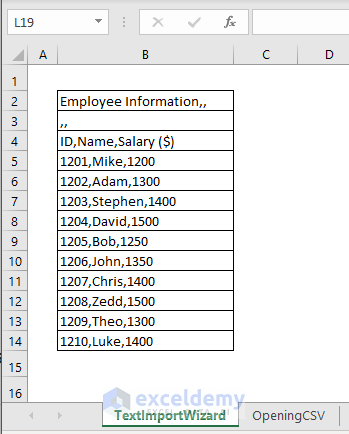
In the above image, CSV data has been opened in an Excel worksheet. The data contains information on some employees stored in individual lines, with the data on each line separated by commas.
Method 1 – Open a CSV file in Excel
The easiest way to import CSV data into Excel is by opening it in Excel.
STEPS:
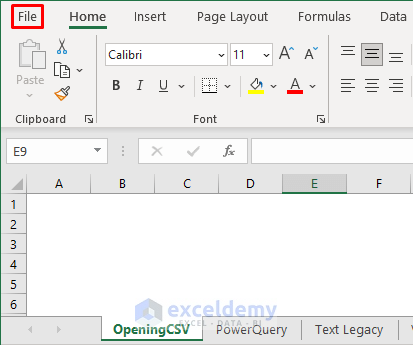
- Go to the File tab.
- Click Open > Browse.
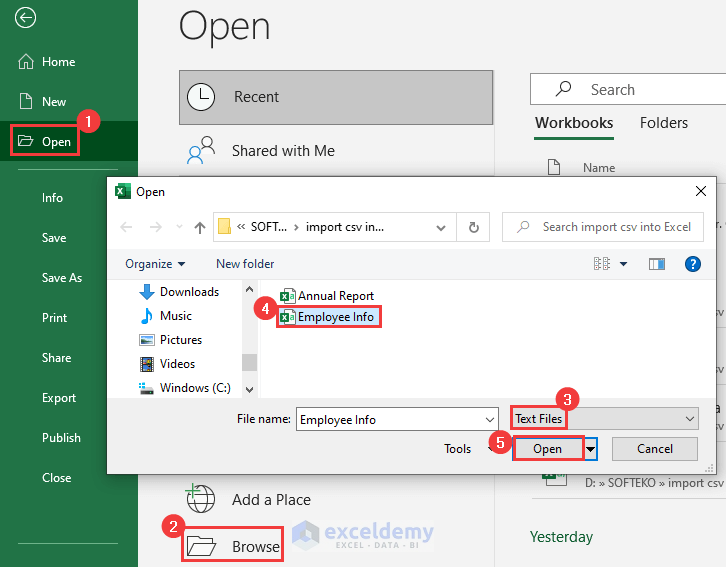
A dialog box will pop out.
- Select Text Files > Employee Info (your desired CSV file) > Open.
The CSV data will appear in a new Excel workbook.
NOTES:
- The data will appear in the default Excel data format settings.
- The CSV file will remain in the original .csv format even after opening it in Excel. It won’t get changed to .xlsx or .xls.
- The limit for the files is 1,048,576 rows and 16,384 columns.
- You can also double-click the desired CSV file in Windows Explorer to open it in Excel. In this case, Microsoft Excel needs to be set as the default application for CSV files. Otherwise, you must choose Excel as another app for opening the file via the Context Menu.
Read More: Difference Between CSV and Excel Files
Method 2 – Use Excel Power Query Editor
STEPS:
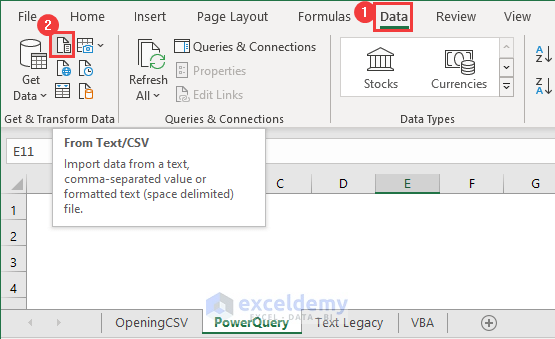
- To import CSV files as an external data connection, go to Data > From Text/CSV.
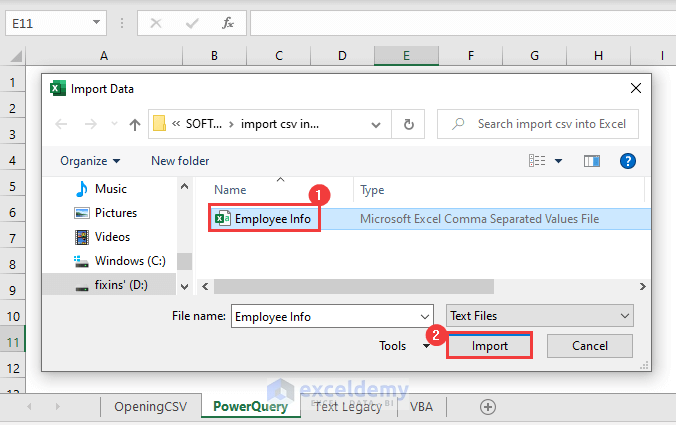
- In the Import Data dialog box that opens, browse to the desired CSV file location, select the file, and press Import.
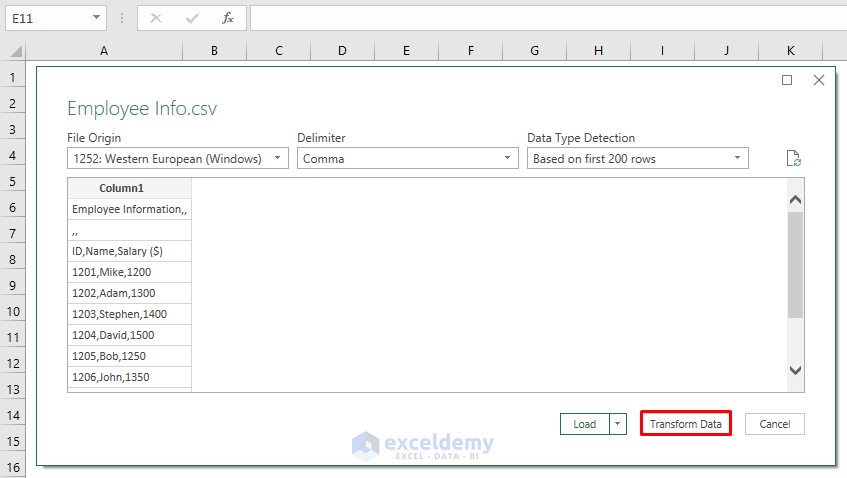
- We can simply press Load if we don’t want to change anything. However, click Transform Data to make some changes here.
The Power Query Editor will appear.
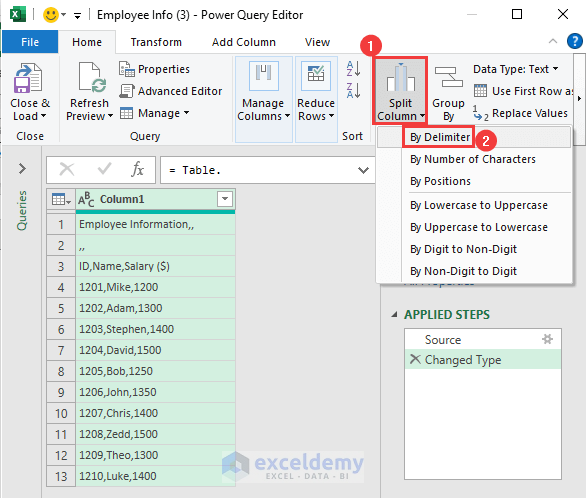
- In the Home tab, click Split Column > By Delimiter.
A new dialog box will pop out.
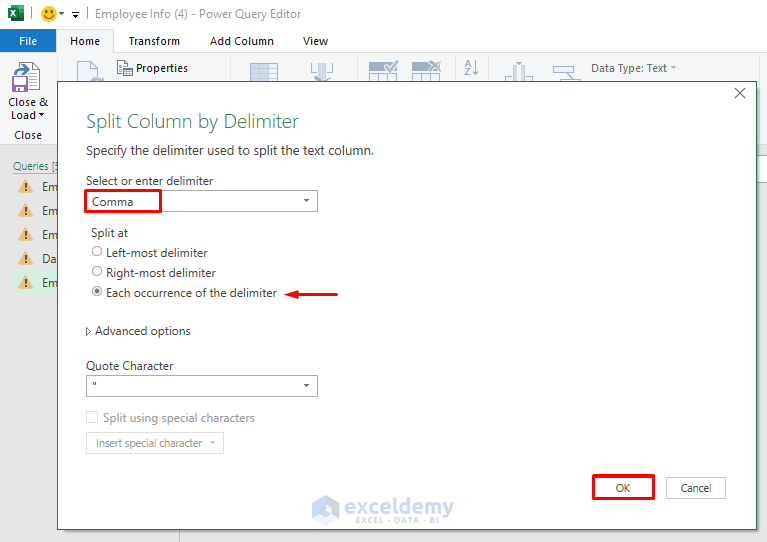
- Select Comma as the delimiter from the dropdown list.
- Select Each occurrence of the delimiter.
- Press OK.

- Select Use First Row as Headers.
- Click Close & Load.
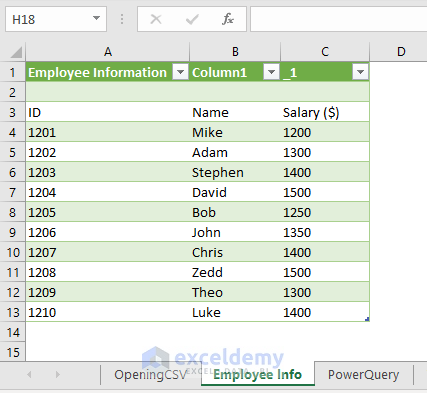
The imported CSV data is imported as in the above image.
NOTES:
- The imported CSV data in Excel is linked to the original CSV file. So refresh the Excel worksheet to update values after making any changes in the original file.
- You can permanently disconnect the link by converting the table into a normal range. To do that, right-click on any cell in the table and the Context Menu will appear. Choose Table > Convert to Range.
Read More: How to Convert CSV to XLSX
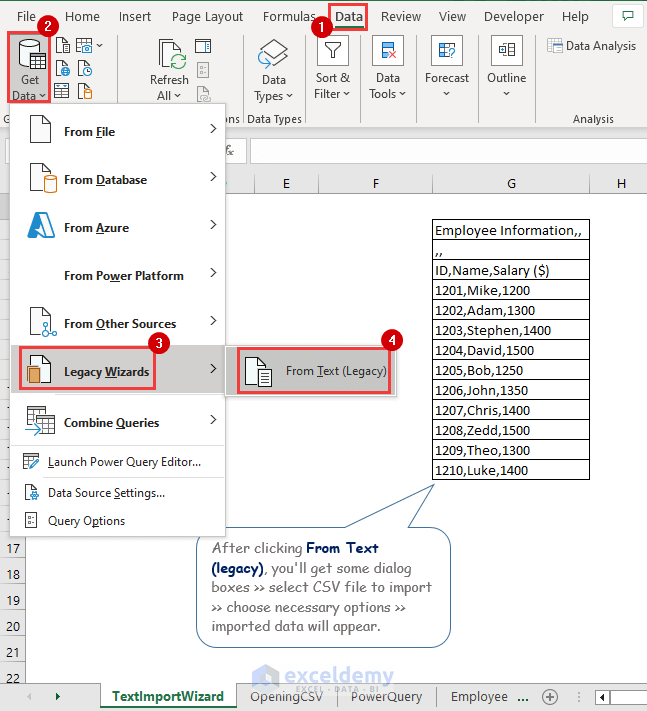
Method 3 – Use the Text Import Wizard
STEPS:
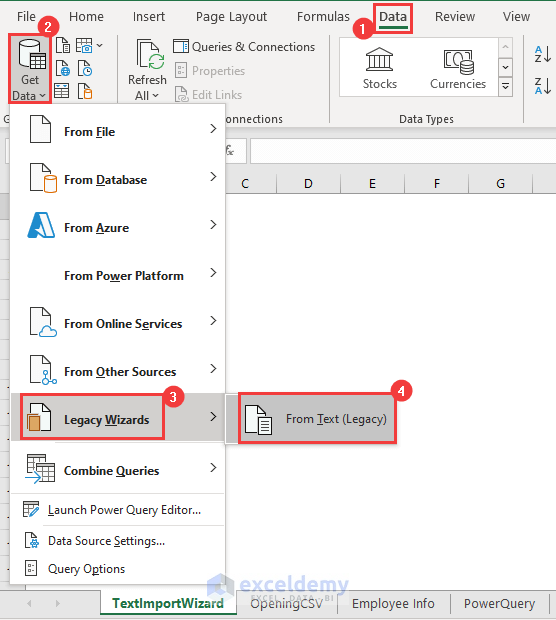
- Go to Data > Get Data > Legacy Wizards > From Text (Legacy).
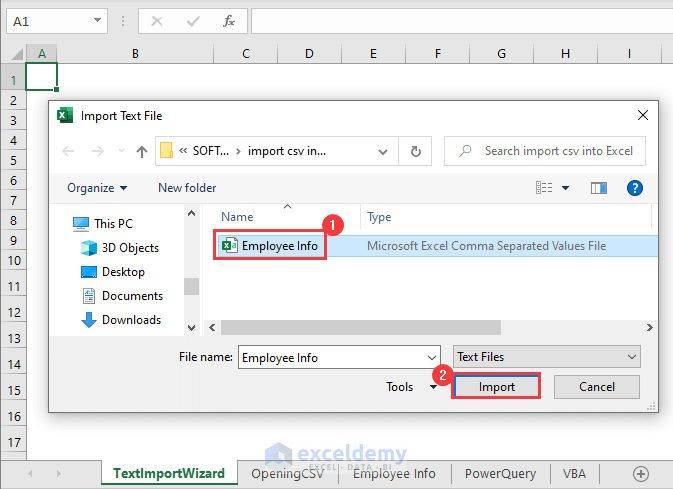
The Import Text File dialog box appears.
- Select the desired CSV file.
- Press Import.
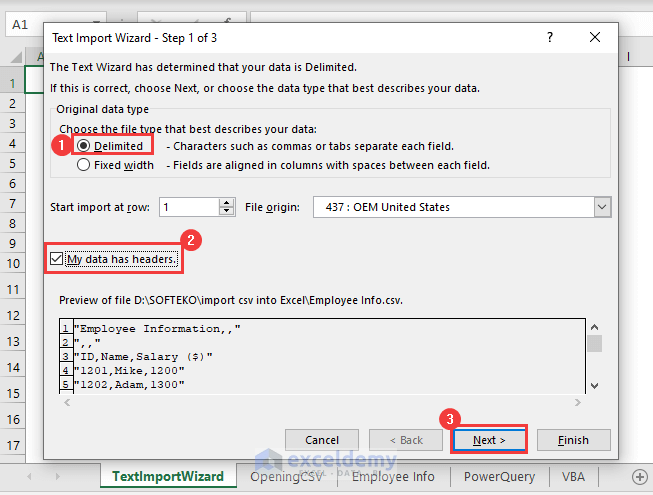
The Text Import Wizard dialog box will pop out.
- Choose Delimited.
- Check the My data has headers box.
- Press Next.
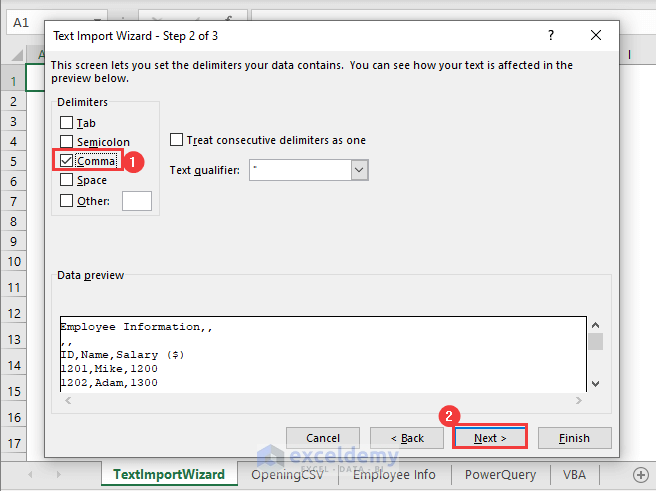
- Click the Comma as the delimiter.
- Press Next.
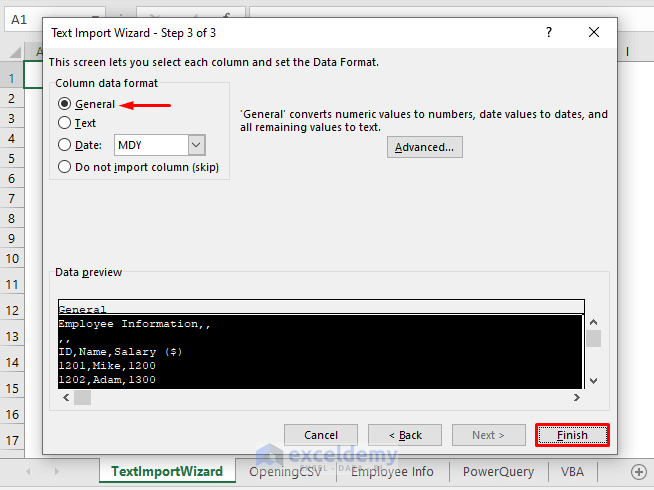
- Select General data format.
- Click Finish.
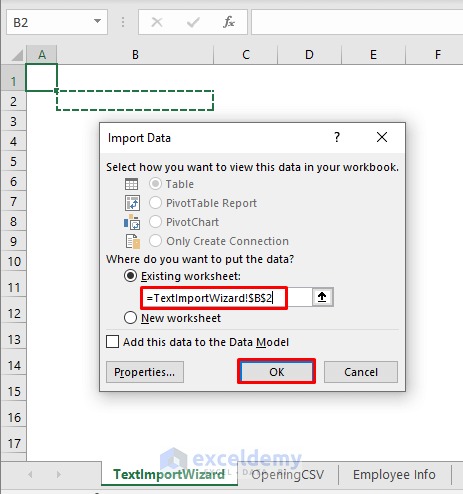
Another dialog box appears.
- Choose the location where you want to place the imported data.
- Click OK.
The imported data appears.
NOTES:
- If don’t see the Legacy Wizards in the Get Data drop-down, go to Excel Options through the File tab > select Options. There, select Data and enable From Text (Legacy).
- The limit for importing is 1,048,576 rows and 16,384 columns.
- Select Treat consecutive delimiters as one in step 2 of the Text Import Wizard to avoid getting empty cells when consecutive delimiters are present in the data.
Read More: Convert CSV to Excel Automatically
Method 4 – Use Excel VBA
STEPS:
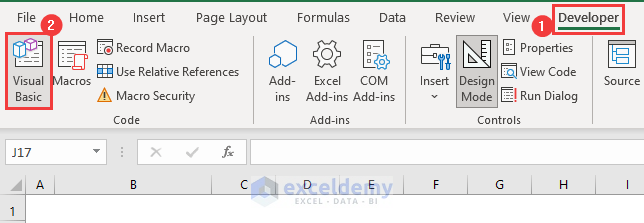
- Go to Developer > Visual Basic.

- In the pop-out VBA window that opens, select Insert > Module.
The Module box will appear.
- Copy and paste the following code in the box, then click Run:
Sub ImportingCSVFile()
Dim wkSheet As Worksheet, rfFile As String
Set wkSheet = ActiveWorkbook.Sheets("VBA")
rfFile = Application.GetOpenFilename("Text Files (*.csv),*.csv", , "Provide Text or CSV File:")
With wkSheet.QueryTables.Add(Connection:="TEXT;" & rfFile, Destination:=wkSheet.Range("B2"))
.TextFileParseType = xlDelimited
.TextFileCommaDelimiter = True
.Refresh
End With
End Sub

Another dialog box appears.
- Choose the desired CSV file and click Open.
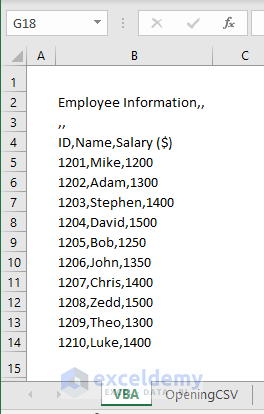
The CSV data is imported into Excel.
Read More: How to Convert CSV to Excel with Columns
How to Save CSV Files in Excel
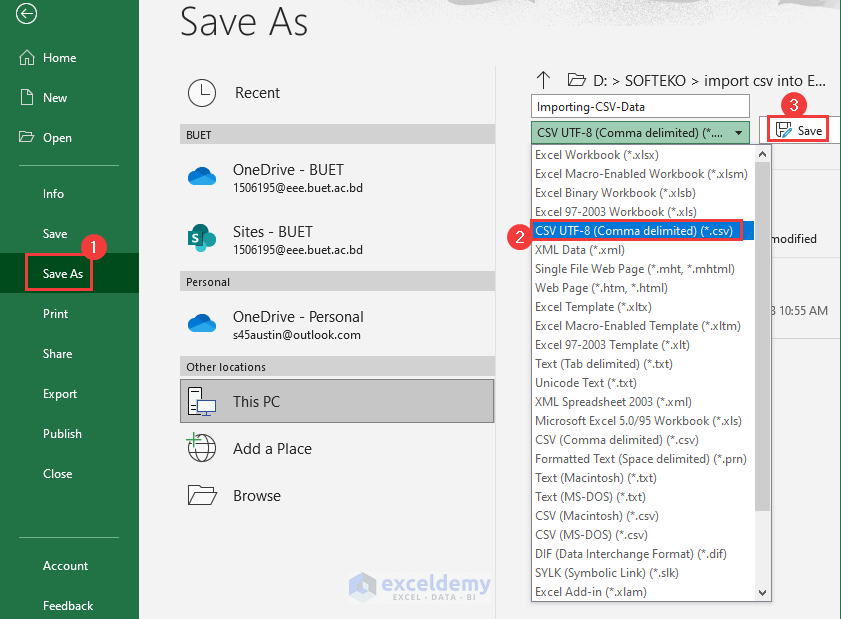
STEPS:
- Go to the File tab and click Save As.
On the right side, you’ll find different file options in the drop-down list.
- Choose CSV UTF-8 or just CSV (Comma delimited) and Save it.
How to Open CSV Files in Excel
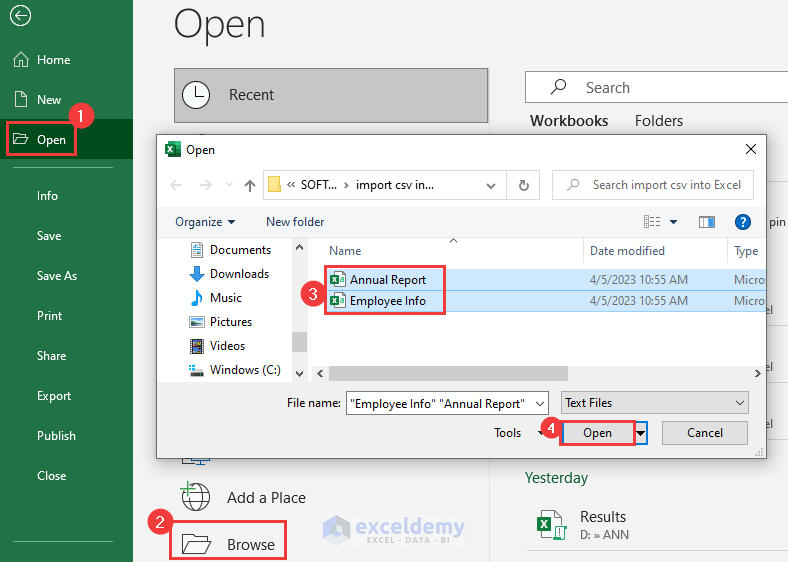
STEPS:
- Go to the File tab.
- Click Open > Browse.
- In the pop-out Open dialog box choose the CSV files to open.
- Press Open.
Read More: How to Open Notepad or Text File in Excel with Columns
How to Import Data into Excel from Another Excel File
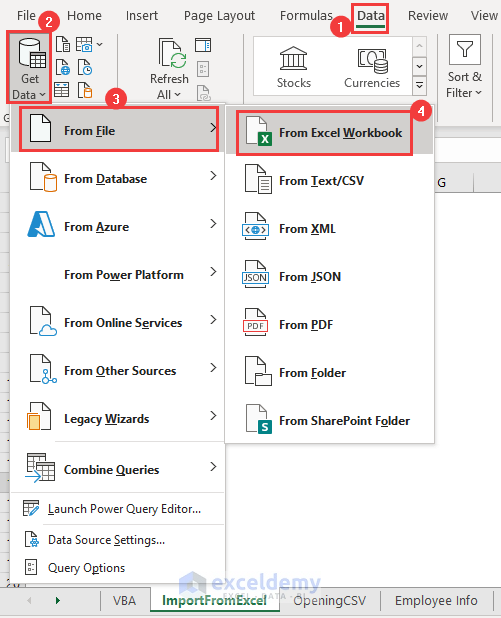
STEPS:
- Go to the Data tab > Get Data > From File > From Excel Workbook.

The Import Data dialog box will appear.
- Choose the desired Excel file and press Import.
The Excel file data appears in the active workbook.
Read More: How to Convert CSV to XLSX without Opening
Download Practice Workbook
Import CSV to Excel: Knowledge Hub
- Open CSV File in Excel
- View CSV File in Excel
- Read CSV File in Excel
- Keep Leading Zeros in Excel CSV Programmatically
- Convert CSV to XLSX Command Line
- Compare 2 CSV Files in Excel
- Import Text File to Excel Automatically
- Import CSV into Existing Sheet in Excel
- Stop Excel from Auto Formatting Dates in CSV
- Convert CSV to Excel
<< Go Back to Importing Data in Excel | Learn Excel
Get FREE Advanced Excel Exercises with Solutions!
