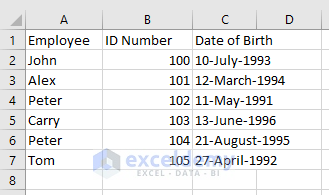
Method 1 – Save the CSV File as Text Document to Stop Excel from Auto Formatting Dates
STEPS:
- Open the CSV file.
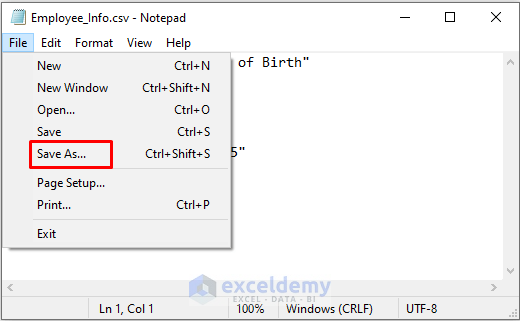
- Click on the File tab. A drop-down menu will occur.
- Select Save As from the drop-down menu. The Save As window will appear.
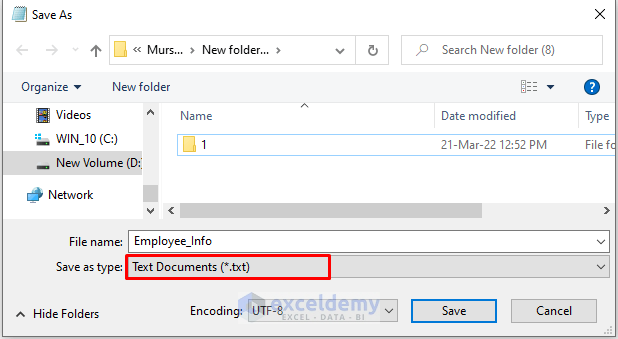
- Change the Save as type to Text Documents(*.txt).
- Click Save to proceed.
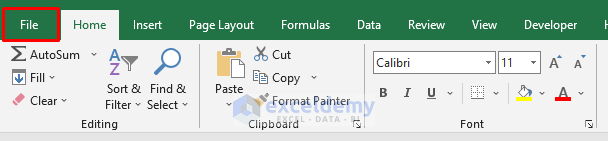
- The CSV file as a Text Document file, open Excel.
- Go to the File tab.
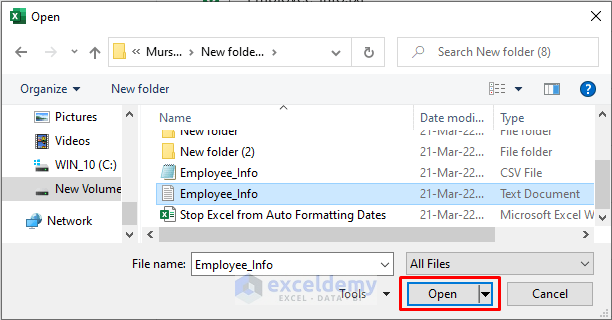
- Open and Browse like the picture below.
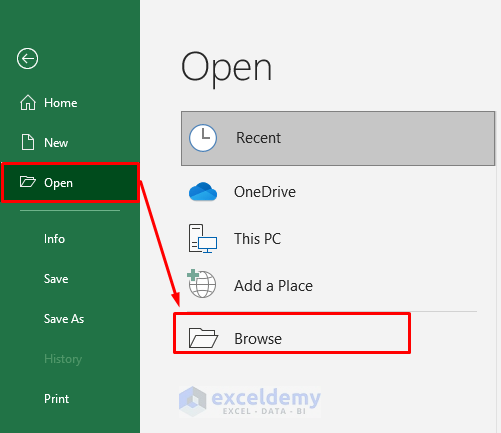
- Select the Text Document file and click Open. Select All Files in the file type field.
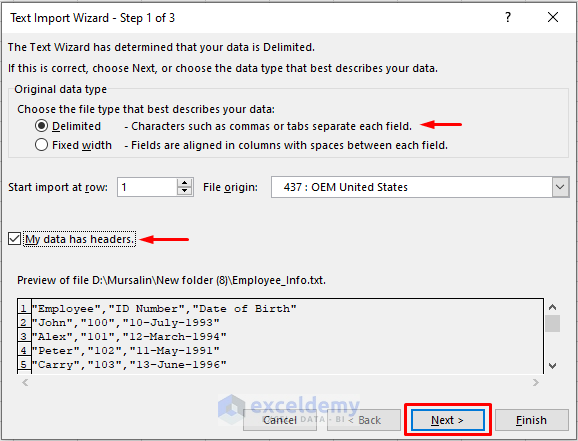
- After clicking Open, you will see a Text Import Wizard on the screen. It is the first step of the Text Import Wizard.
- Select Delimited in the Original data type field and check the My data has headers option. Select Next.
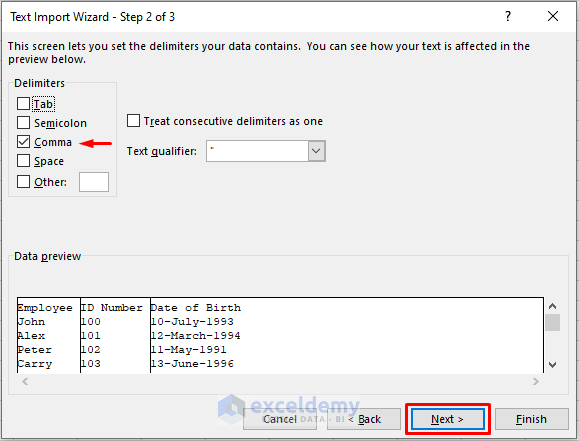
- After clicking Next, the second step of the Text Import Wizard will occur.
- Check Comma and uncheck Tab in the Delimiters field.
- Click Next.
- The third step of the Text Import Wizard will appear.
- Select the desired column from the Data Preview field. We selected the Date of Birth column.
- Select Text in the Column data format field.
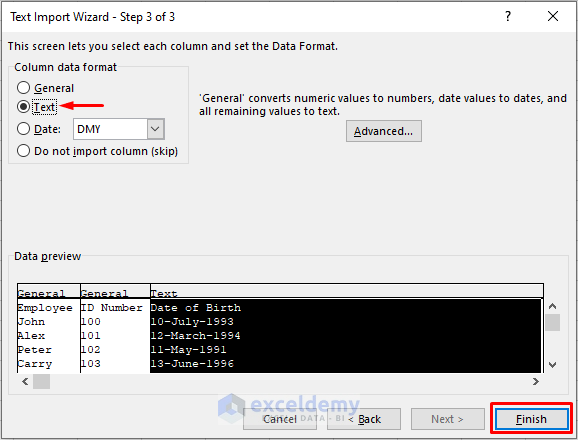
- Click Finish to see the results below.
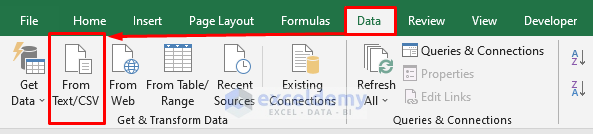
Method 2 – Stop Excel from Auto Formatting Dates by Importing the CSV File
STEPS:
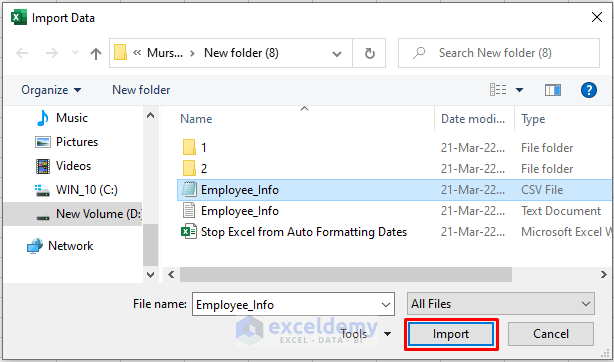
- Go to the Data tab and select From Text/CSV. It will open the Import Data window.
- Select the CSV file and click Import. Select All Files in the file type field.
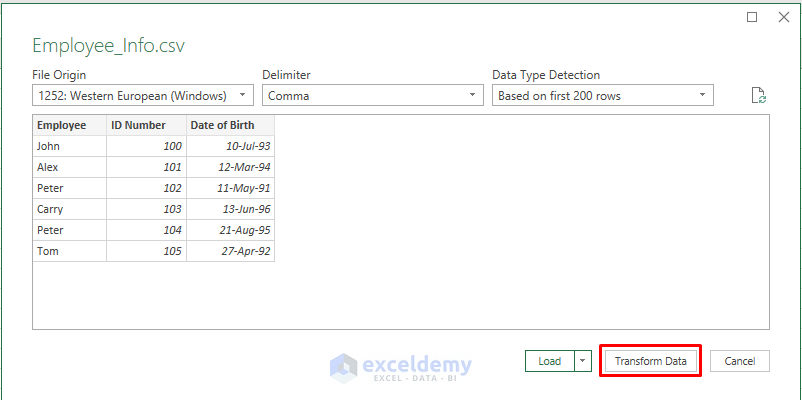
- A window containing the dataset will occur. Select Transform Data from there.
- After clicking Transform Data, the Power Query Editor will open.

- Select the Date of Birth column in the Power Query Editor window.
- Go to the Transform tab and select Data Type. A drop-down menu will occur.
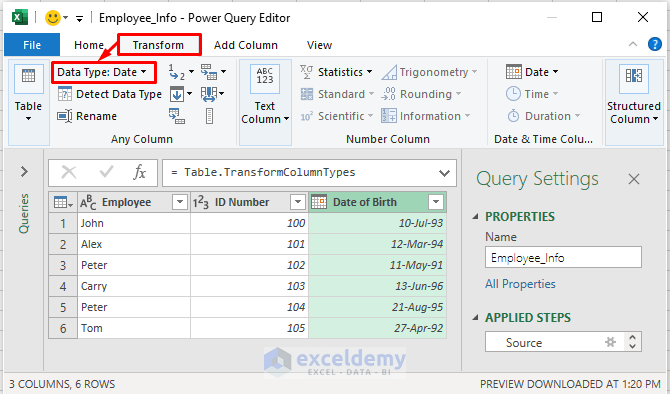
- Select Text from the drop-down menu.

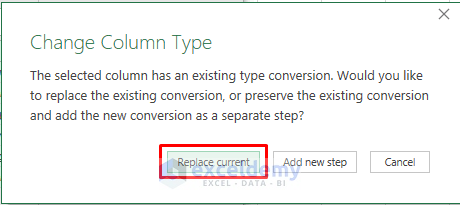
- IA Change Column Type dialog box will pop up. Select Replace current from there.
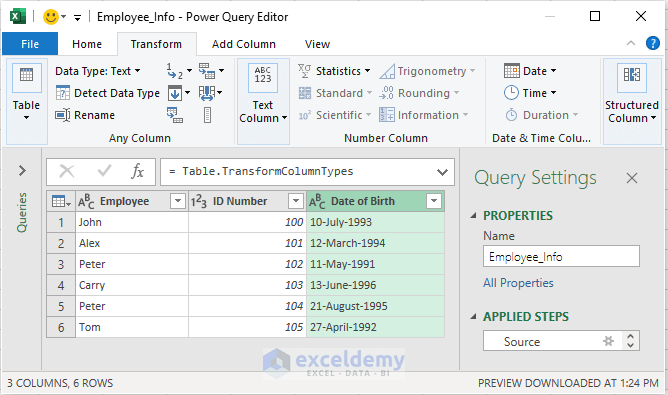
- Find results below in the Power Query Editor.
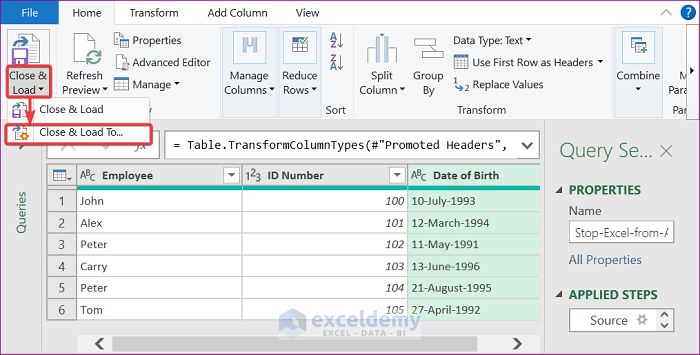
- Go to the Home tab and select Close & Load.
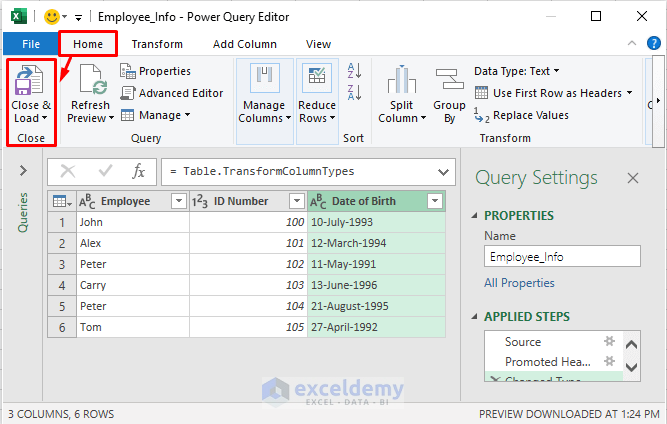
- Results like the below in the Excel worksheet.
Method 3 – Format the CSV File to Stop Excel from Auto Formatting Dates
STEPS:
- Open the CSV file.
- Write:
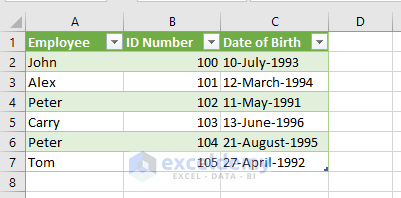
"John","100","=""10-July-1993"""Instead of:
"John","100","10-July-1993"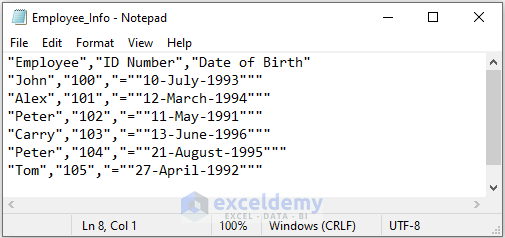
We added “=” as prefix and “” as a suffix in the Date of Birth column.
- Follow this format for all data entries.
- Save it by pressing Ctrl + S and close the Notepad.
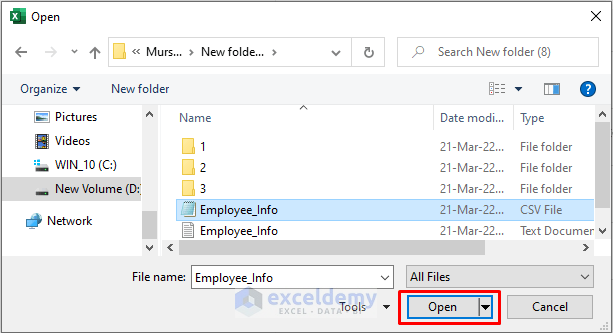
- Open Excel and select the File tab.

- Open and click Browse.

- Select the CSV file and click Open. Select All Files in the file type field.
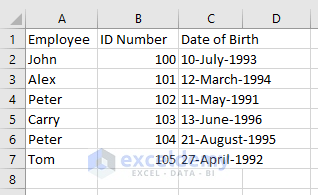
- You will see results like below.
Things to Remember
There are certain things you need to remember to stop excel from auto formatting dates.
- While opening or importing the CSV file from excel, if you don’t find the file in the desired folder, select All Files instead of All Excel Files.
- You need to enable the Power Query if you are using Excel 2013 or earlier versions.
- If you have a large dataset, use Method-1 or Method-2. Method-3 is not appreciated for large datasets.
Download Practice Book
Download the practice book.
Related Articles
- How to Edit CSV File in Excel
- How to Sort CSV File in Excel
- How to Merge CSV Files in Excel
- Merge CSV Files into Multiple Sheets in Excel
- Formatting CSV File in Excel
<< Go Back to Import CSV to Excel | Importing Data in Excel | Learn Excel
Get FREE Advanced Excel Exercises with Solutions!


I used method 2. Looked beautiful. I saved it and reopened it and it’s gone. Why and how do I fix it?
Hello DEBB WOLFE
We appreciate your comment. I understand your difficulty, and you can avoid the issue by importing the CVS file into the existing worksheet.
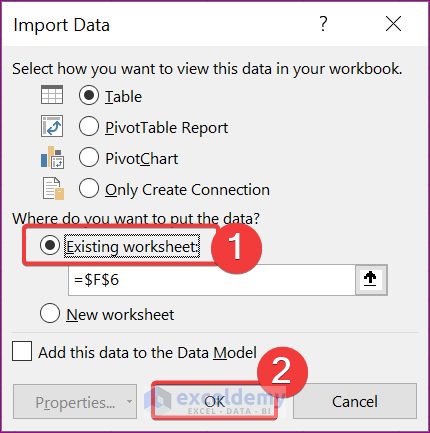
Change the column type in the Power Query window to text, as this article mentions. Next, select the Home tab. Select Close & Load and then Close & Load To at a later time.
As a result, the Import Data window will display. Check the Existing Worksheet and then press OK.
Thus, you will be able to solve the problem.
Regards
Lutfor Rahman Shimanto