Method 1 – Paste Comma Separated Values into Excel from a CSV File Directly
Steps:
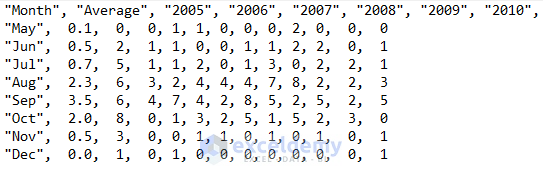
- We have data in a CSV file like the image below:
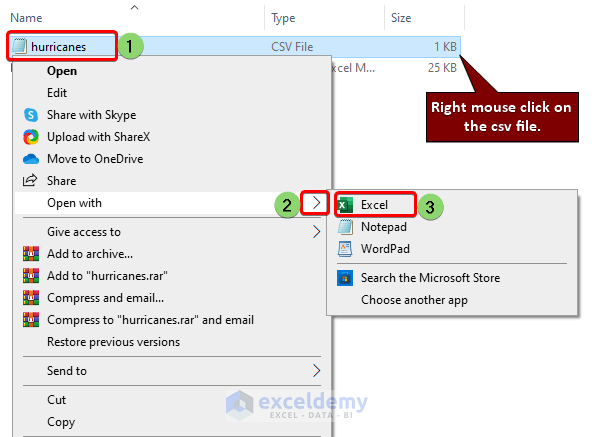
- To open a comma-separated CSV file with Excel: Right-mouse click on the CSV file >> Open with >> Excel.
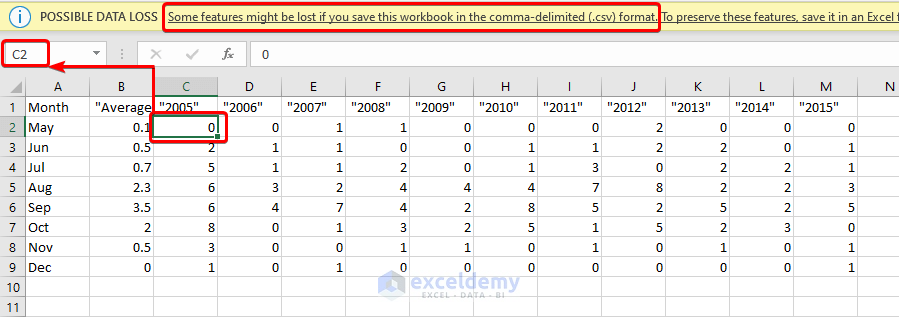
- The comma-delimited data in CSV format after opening with Excel will be separated into multiple columns automatically.
- Cell C2 in the red box denotes that the data has been separated into multiple columns.
- As we want data in xlsx format, copy the data.
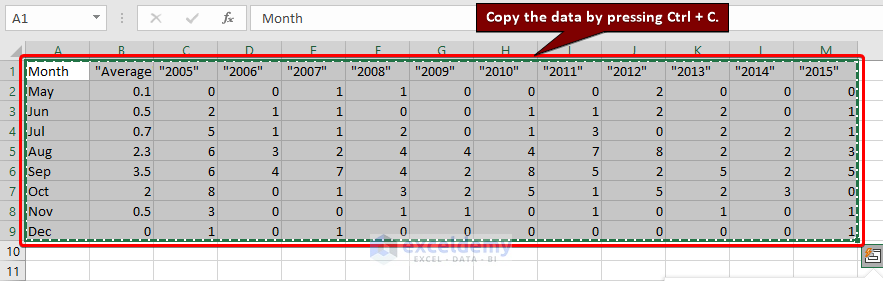
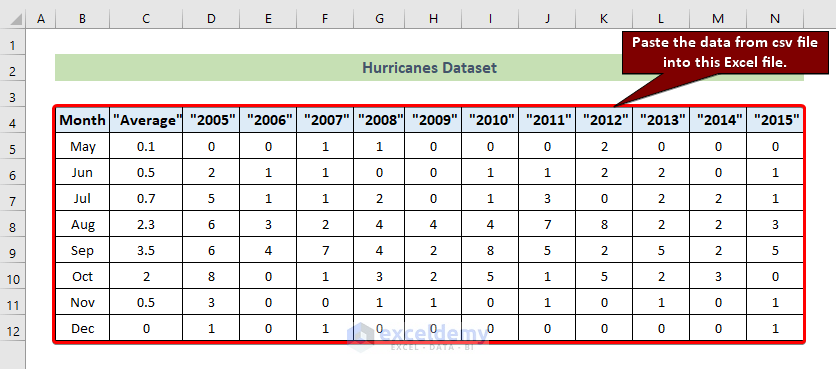
- Paste it into a blank Excel file and the data will look like the below image:
Read More: How to Keep Leading Zeros in Excel CSV Programmatically
Method 2 – Open CSV File in Text Editor, Copy Data, and Paste It into Excel
Steps:
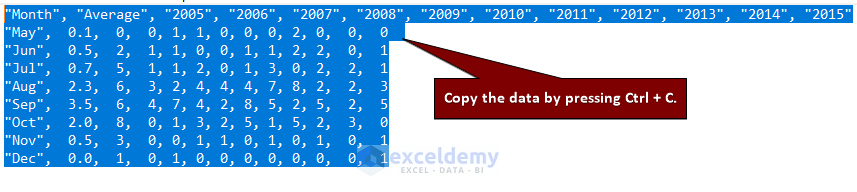
- Copy the data from CSV file format by pressing Ctrl + C.
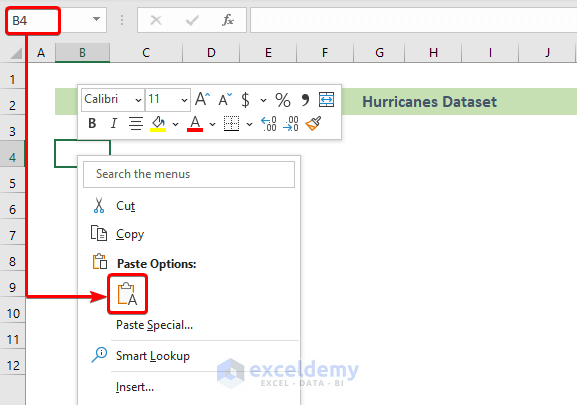
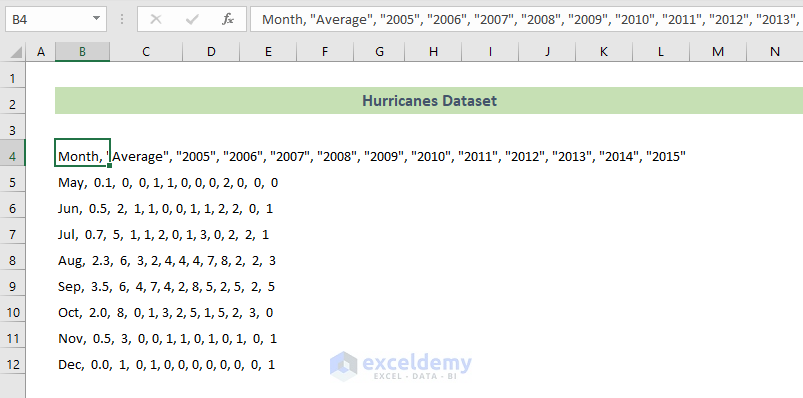
- Paste the data in cell B4.
- All the data will be stored in a single column.
We have to convert the data into a table.
- Select your data, B4:B12 >> Data >> Data Tools >> Text to Columns.
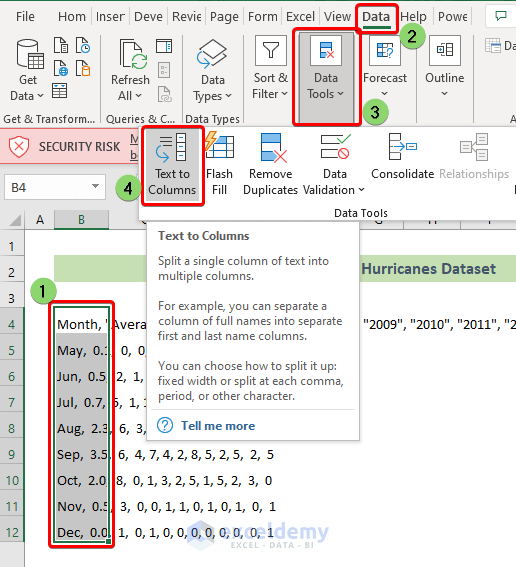
- Convert Text to Columns Wizard- Step 1 of 3 pop-ups will appear.Mark Delimited and click on Next.

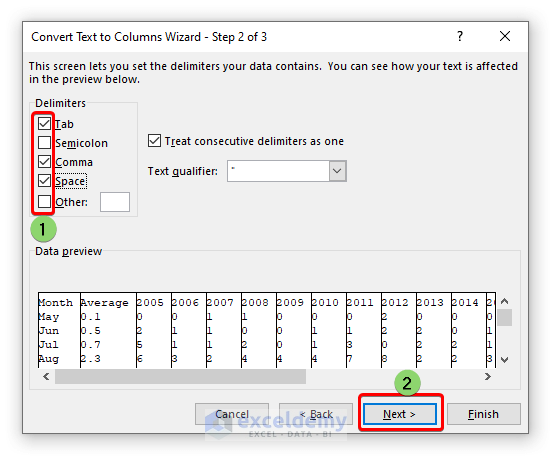
- Convert Text to Columns Wizard- Step 2 of 3 will appear . Mark the following: Tab, Comma and Space and click on Next.
- In Convert Text to Columns Wizard- Step 3 of 3, select General and click Finish.

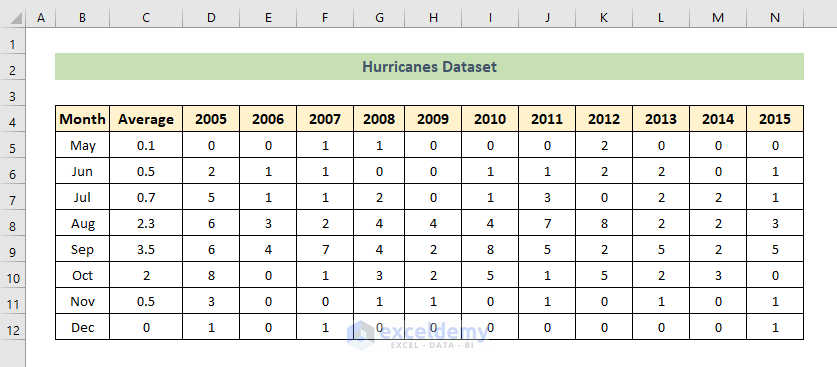
- The final data in a separate column will look like this.
Read More: How to Fix CSV File in Excel
How to Convert Comma Separated String to List in Excel
Steps:
- Press Alt + F11 to open the Microsoft Visual Basic for Applications window.

- Insert the following code:
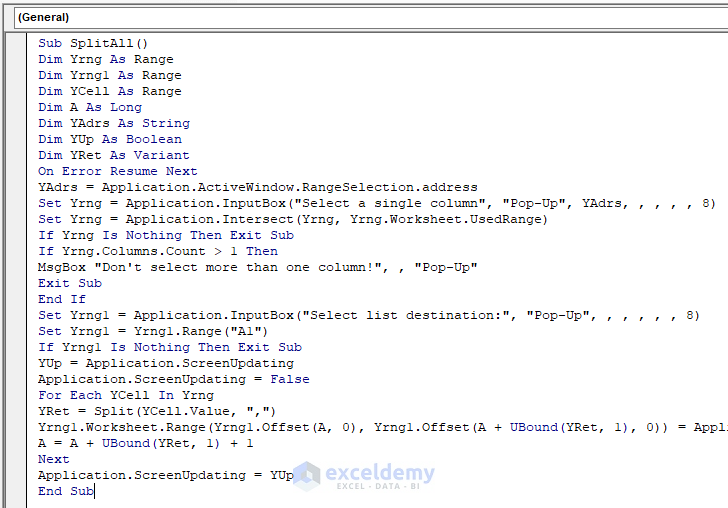
Sub SplitAll()
Dim Yrng As Range
Dim Yrng1 As Range
Dim YCell As Range
Dim A As Long
Dim YAdrs As String
Dim YUp As Boolean
Dim YRet As Variant
On Error Resume Next
YAdrs = Application.ActiveWindow.RangeSelection.address
Set Yrng = Application.InputBox("Select a single column", "Pop-Up", YAdrs, , , , , 8)
Set Yrng = Application.Intersect(Yrng, Yrng.Worksheet.UsedRange)
If Yrng Is Nothing Then Exit Sub
If Yrng.Columns.Count > 1 Then
MsgBox "Don't select more than one column!", , "Pop-Up"
Exit Sub
End If
Set Yrng1 = Application.InputBox("Select list destination:", "Pop-Up", , , , , , 8)
Set Yrng1 = Yrng1.Range("A1")
If Yrng1 Is Nothing Then Exit Sub
YUp = Application.ScreenUpdating
Application.ScreenUpdating = False
For Each YCell In Yrng
YRet = Split(YCell.Value, ",")
Yrng1.Worksheet.Range(Yrng1.Offset(A, 0), Yrng1.Offset(A + UBound(YRet, 1), 0)) = Application.WorksheetFunction.Transpose(YRet)
A = A + UBound(YRet, 1) + 1
Next
Application.ScreenUpdating = YUp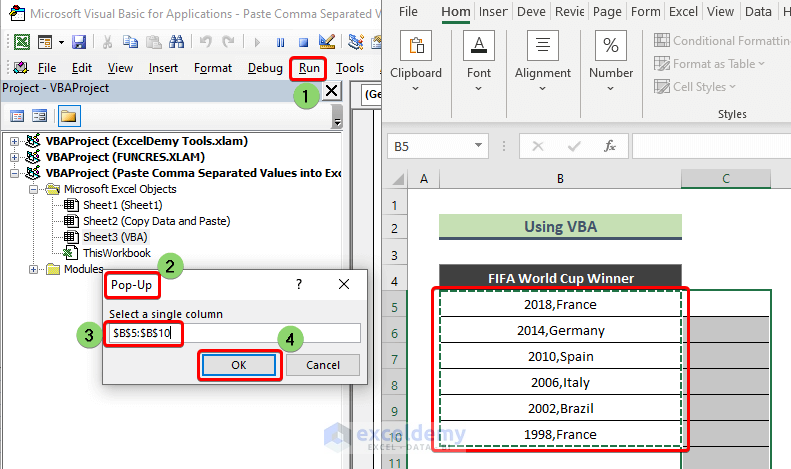
End Sub- Press A Pop-Up will appear. In Select a single column insert $B$5: $B$10 and click OK.
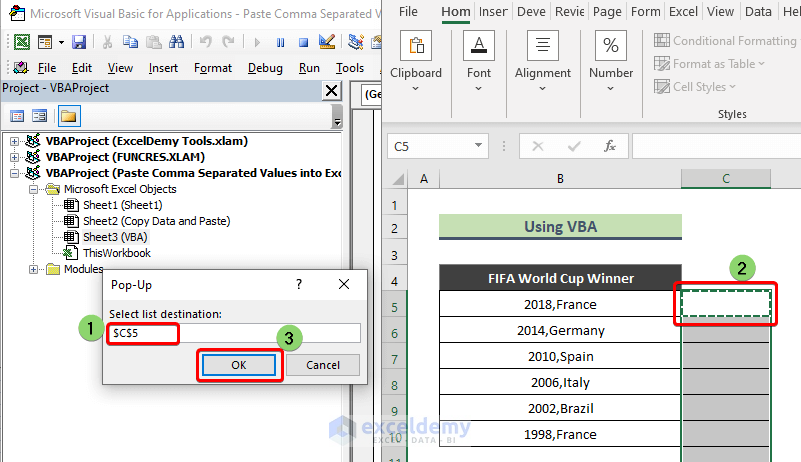
- A new pop-up will appear. Insert a cell for the destination, in this case C5.
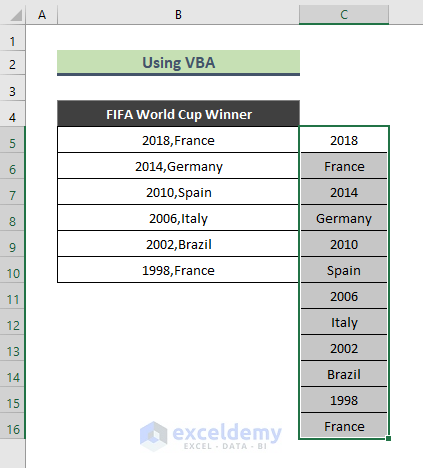
- Result is as shown in the image below.
Read More: How to Edit CSV File in Excel
Download Practice Workbook
Related Articles
- How to Sort CSV File in Excel
- How to Merge CSV Files in Excel
- Merge CSV Files into Multiple Sheets in Excel
- Formatting CSV File in Excel
- How to Stop Excel from Auto Formatting Dates in CSV
<< Go Back to Import CSV to Excel | Importing Data in Excel | Learn Excel
Get FREE Advanced Excel Exercises with Solutions!
