Problem 1 – All Data from CSV File Appearing in a Single Column in Excel
The file opens in one column when a CSV file uses a delimiter other than the default separator.
Fix 1.1 – Changing Delimiter in CSV File
Steps:
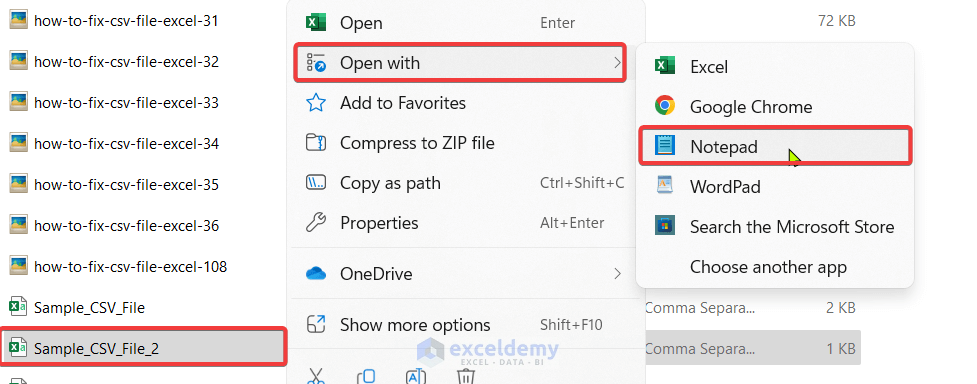
- Open the CSV file in any text editor app. We’re using Notepad.
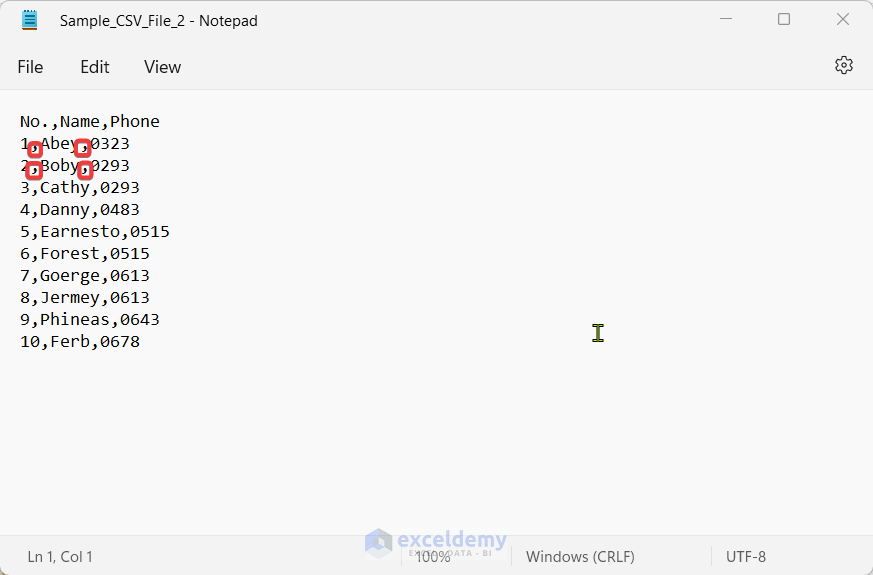
- Look at the data in the text editor app. See whether they are separated by a comma (,) or semicolon (;). In our case, the data is separated by a comma.
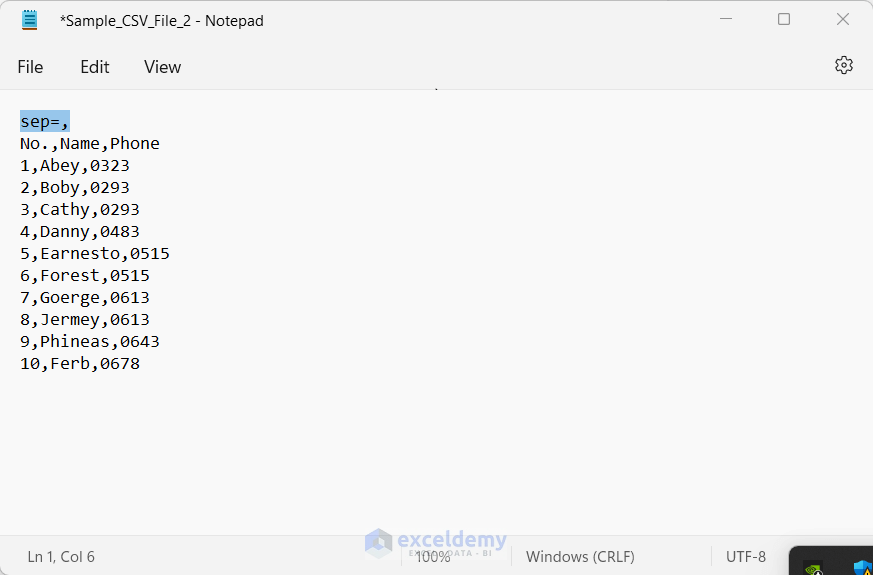
- Copy the following line and insert it at the top of the file (see the figure below):
sep=,
- If your file is separated by a semicolon, you need to write sep=;
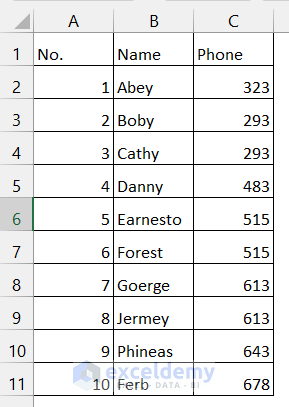
- Excel will show the table properly.
Fix 1.2 – Delimiter Specifications for Importing CSV Files into Excel
Steps:
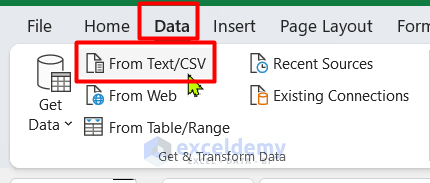
- Open Excel
- Go to the Data tab.
- In the Get & Transform Data group, click on From Text/CSV.
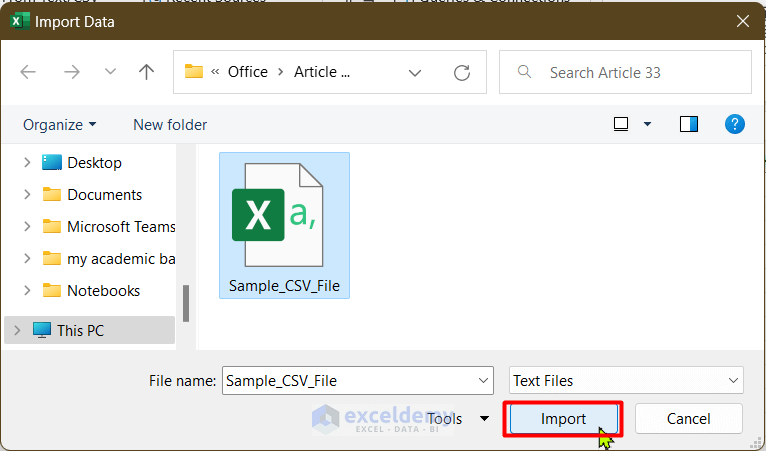
- An Import Data Dialogue Box should pop up. Select your CSV file and click on Import.
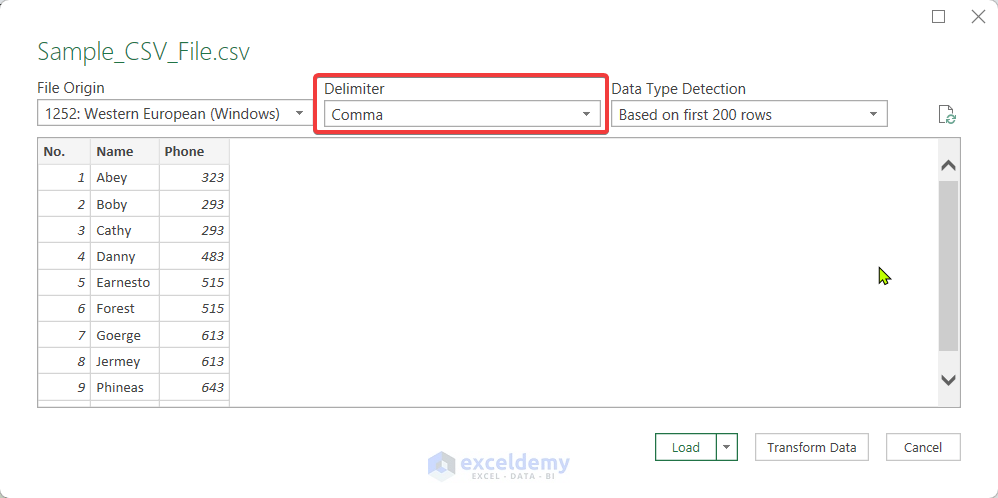
- A Preview Dialogue Box should appear like the figure below. In that dialogue box, there is an option to choose a Delimiter and see how it would look in the preview. By looking at the preview, you can pick the correct delimiter.
- Click on Load and you will see that data from the CSV file are being displayed in a separate sheet as a table.
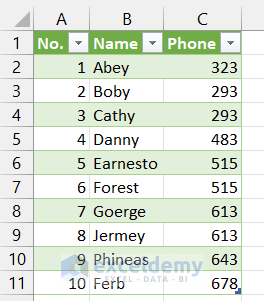
- This imported table is linked to the original document. It will always show the updated data.
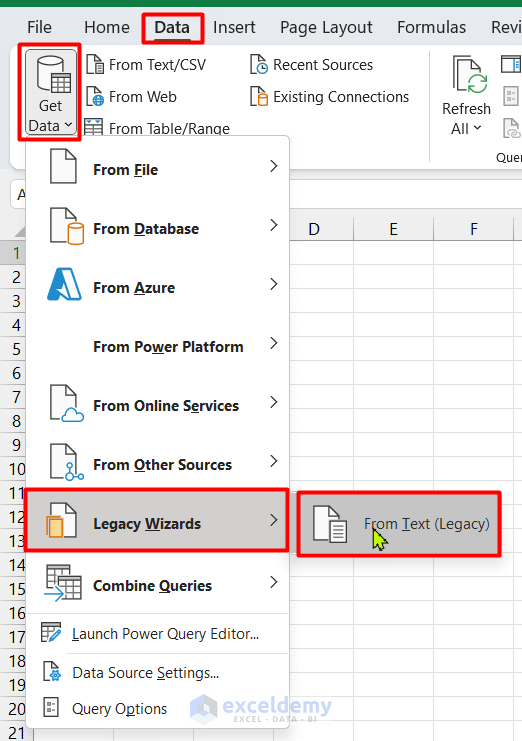
The Text Import Wizard is a legacy feature of Excel. From the Excel 2016 version, it has moved from ribbon to Excel Options. After enabling it, follow the steps below to import data from the CSV file.
Steps:
- In the Data tab, click on Get Data, choose Legacy Wizards, and select From Text.
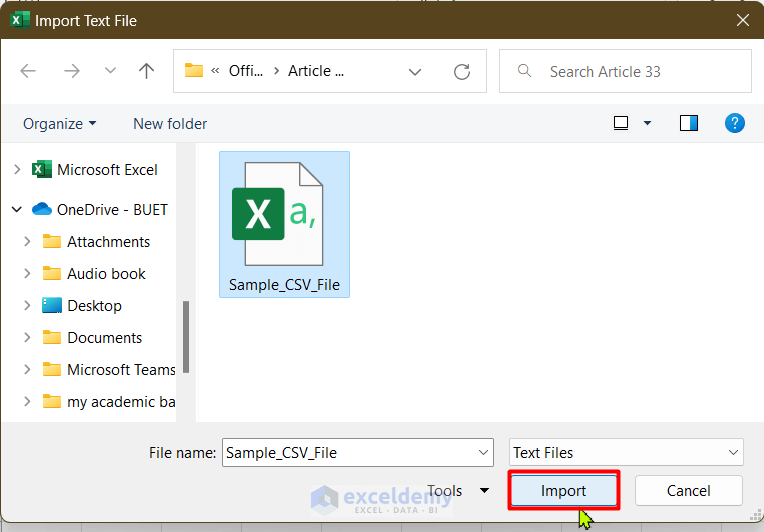
- An Import Text File window will open. Select the CSV file and click on Import.
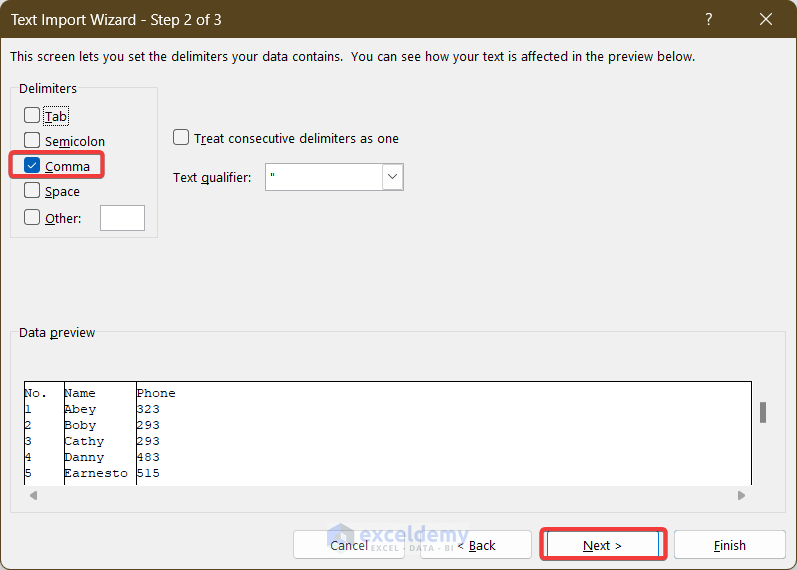
- In the first step, check the Delimited option and if you have a header in the data, check the My data has headers.
- Click on Next.

- Choose the delimiter and click Next. Here we have chosen Comma.
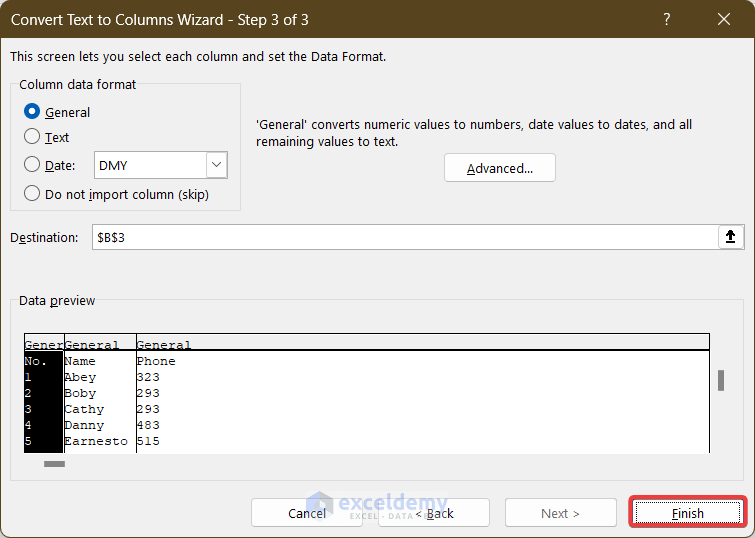
- Choose the General column data format and click on Finish.
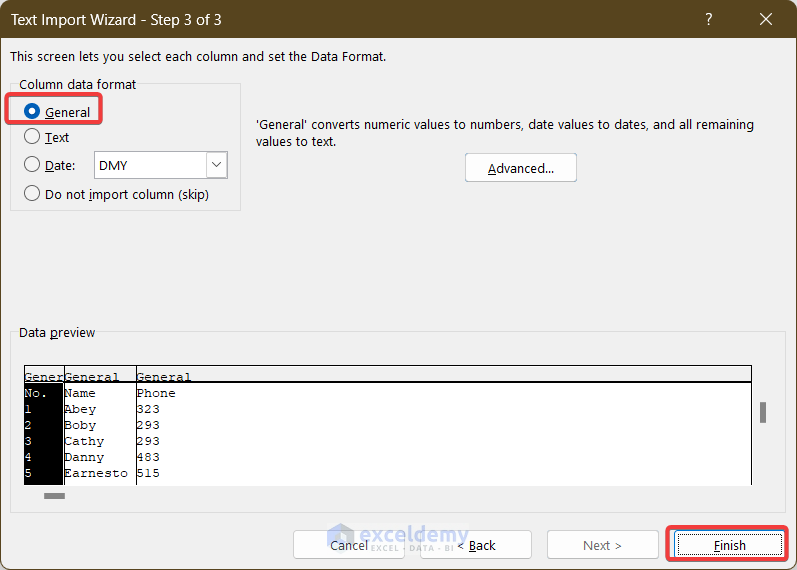
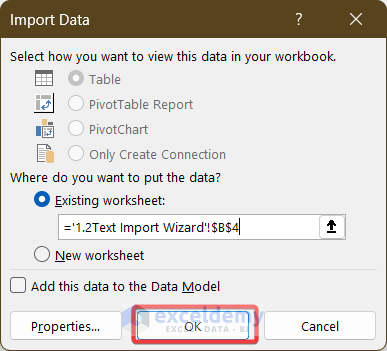
- In the Import Data dialog box, choose where you want to put the data and click OK.
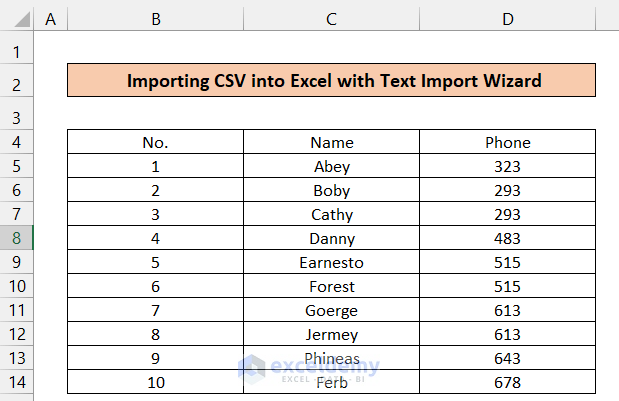
- You should get the final result.
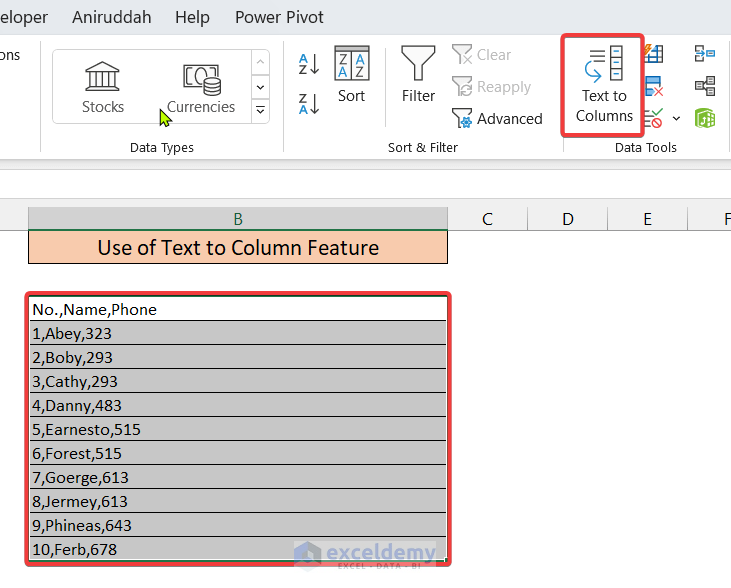
Fix 1.3 – Use the Text to Columns Feature to Split Cells
Steps:
- Select the data and go to the Data tab.
- Choose Text to Columns from the Data tools group.
- In the Convert Text to Column Wizard, choose Delimited and click Next.
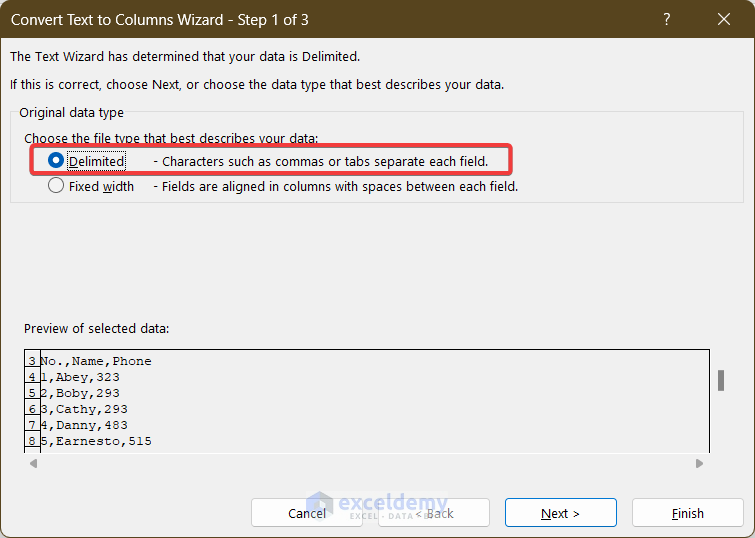
- Choose comma as the delimiter and click Next.

- Set the destination and click Finish.
- You will have your data organized in columns as expected.

Read More: How to Keep Leading Zeros in Excel CSV Programmatically
Problem 2 – Not Keeping Leading Zeroes in Excel from CSV
When a file is opened in Excel, it is converted into the General format that strips off leading zeros.
Fix 2.1 – Using the Text Import Wizard
Steps:
- Enter the Text Import Wizard and repeat the steps from Fix 1.3. up until Step 3 dialog box.
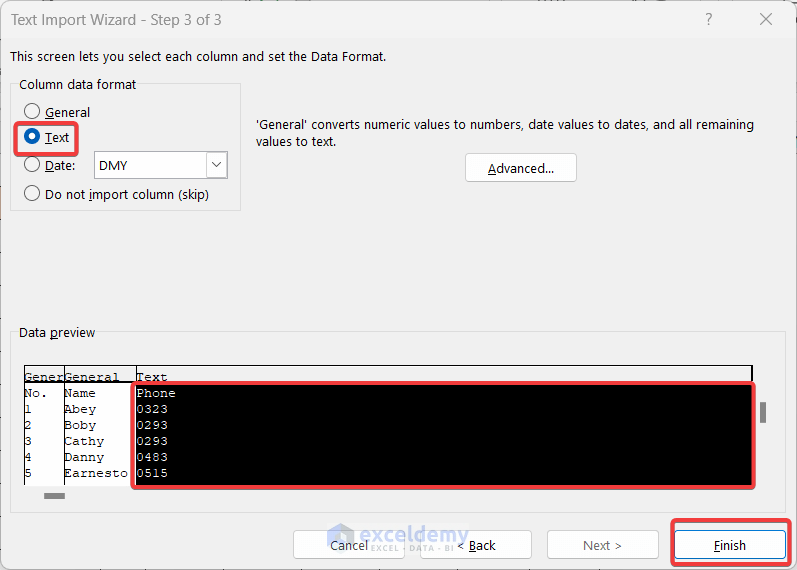
- In step 3 of the Text Import Wizard, select the column which contains leading zeros.
- Select Text in the Column data format.
- Click on Finish.
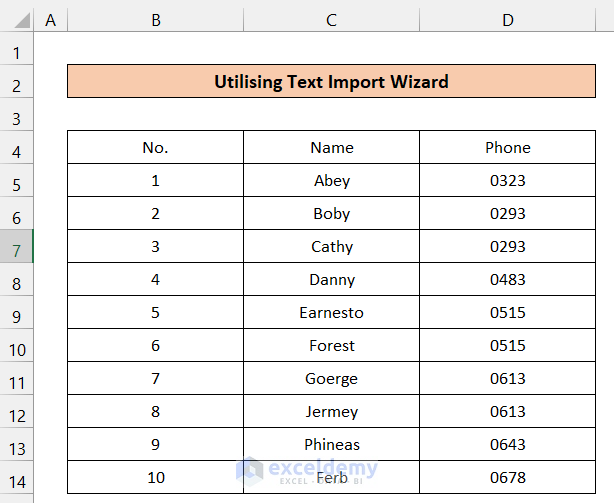
- You will get the desired leading zeros in excel.
Fix 2.2 – Applying Power Query
Case 2.2.1 – Importing Data in Text Format
- When loading the data through Power Query, select Do no detect data types from the Data Type Detection box.

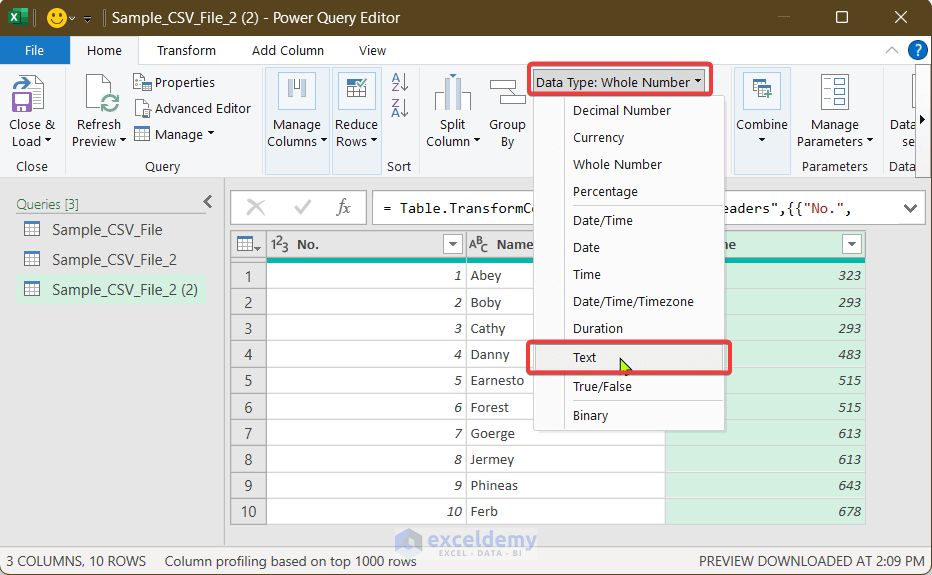
Case 2.2.2 – Setting Formats for Individual Column
Steps:
- Instead of clicking on Load below the data preview window, click on Transform Data. A window should pop up like this.
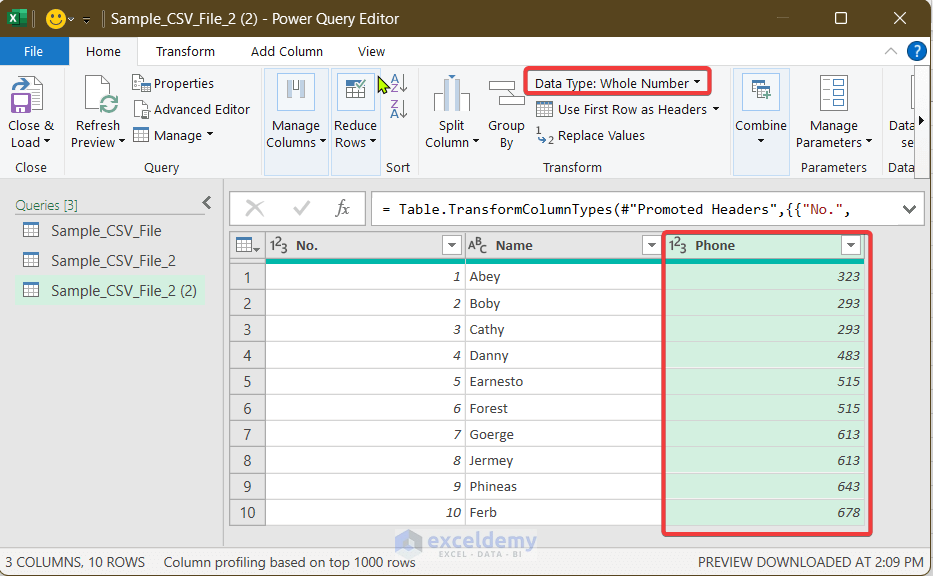
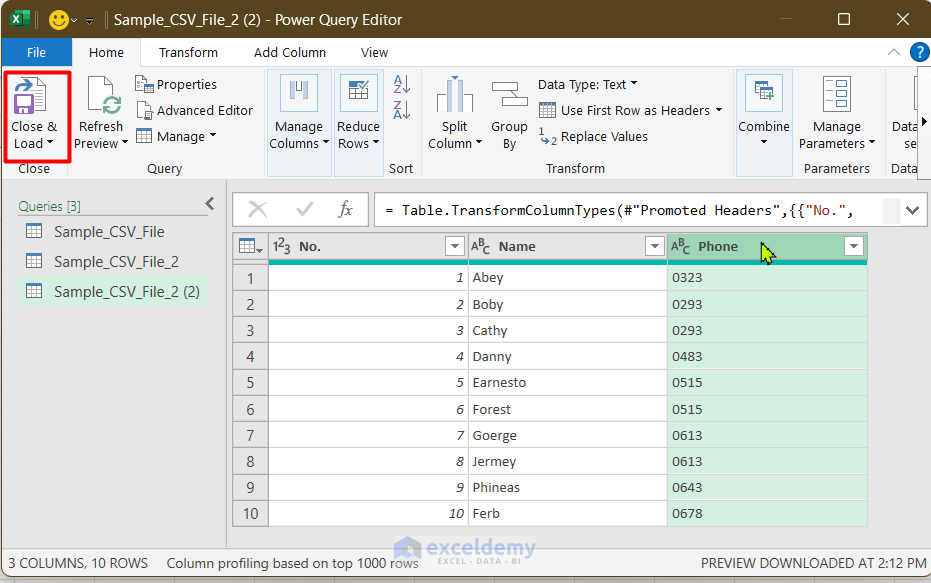
- Select the column which contains numbers, and from the Data Type drop-down menu, choose Text.
- When you load the imported data, the leading zeros will be intact.
Read More: Paste Comma Separated Values into Excel
Problem 3 – Issues with CSV Date Format
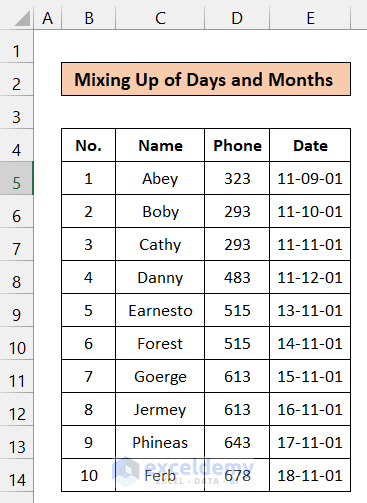
Fix 3.1 – Mixing Up Days and Months
Steps:
- During the third step in the Text Import Wizard, select the column which contains dates.
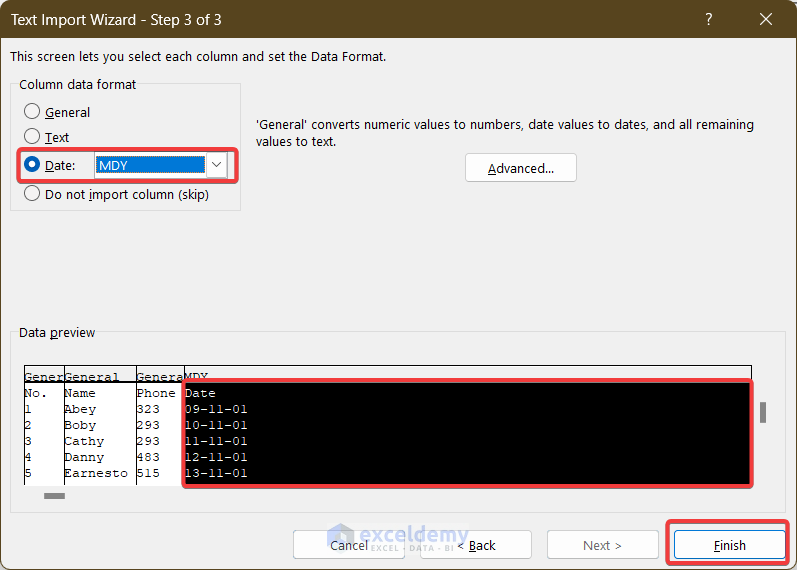
- In the Column date format, select Date and choose the appropriate date format.
- Click on Finish. The dates should be correctly formatted.
Fix 3.2 – Converting Some Values to Dates
If you have a text like jun2 in your data, Excel will think of it as June 2. This may result in unnecessary transformations from general format to date format.
Steps:
- During the third step of Text Import Wizard, select the column which contains date-like texts.
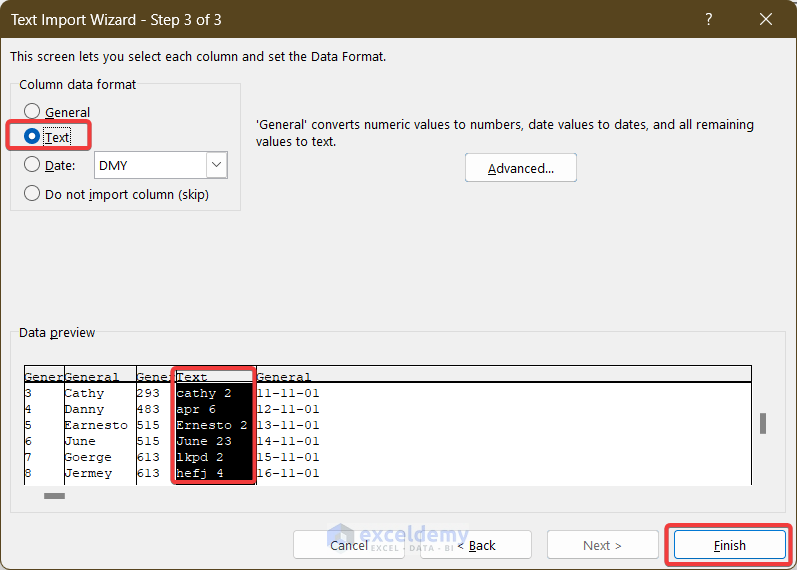
- Select Text as Column Data Format. The selected column is displaying as text rather than date.
Fix 3.3 – Incorrectly Formatting Dates
Steps:
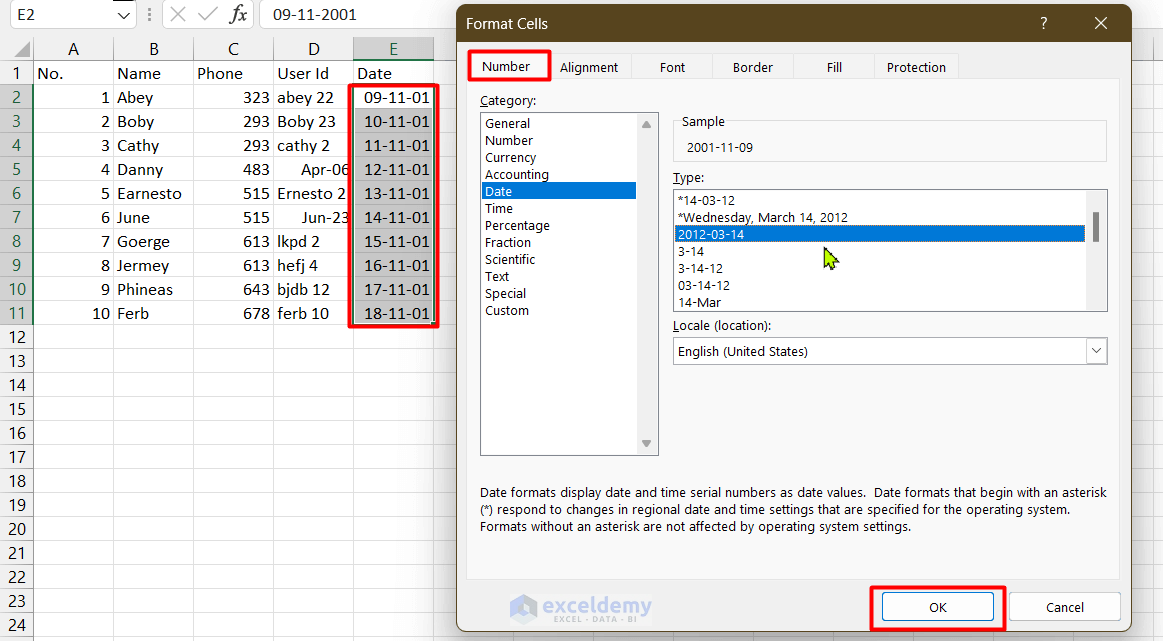
- Select the column which contains dates.
- Press Ctrl + 1 to open the Format Cells dialog box.
- Go to the Number tab and select Date from Category.
- From Type, choose your desired formatting.
- Click OK.
Read More: How to Edit CSV File in Excel
Problem 4 – Displaying Numbers in a Scientific Notation
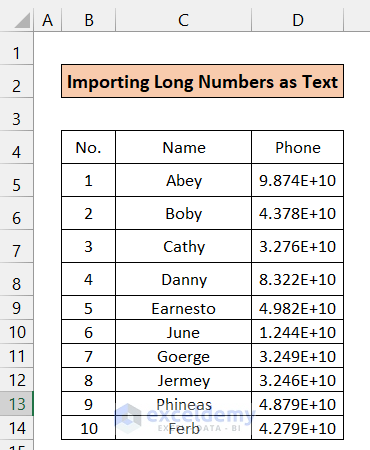
Whenever the numbers in CSV files are larger, after importing them into excel, they are normally displayed in a scientific notation. For example, if we have the number 12345678 in a CSV file, it will be shown as 1.2×10^7.
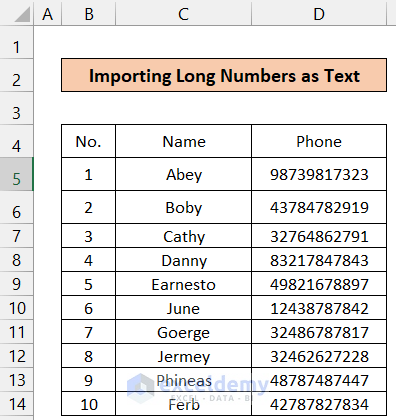
Fix 4.1 – Importing Long Numbers as Text
- While importing via the Text Import Wizard, you can make the column format as Text (shown in the figure below)
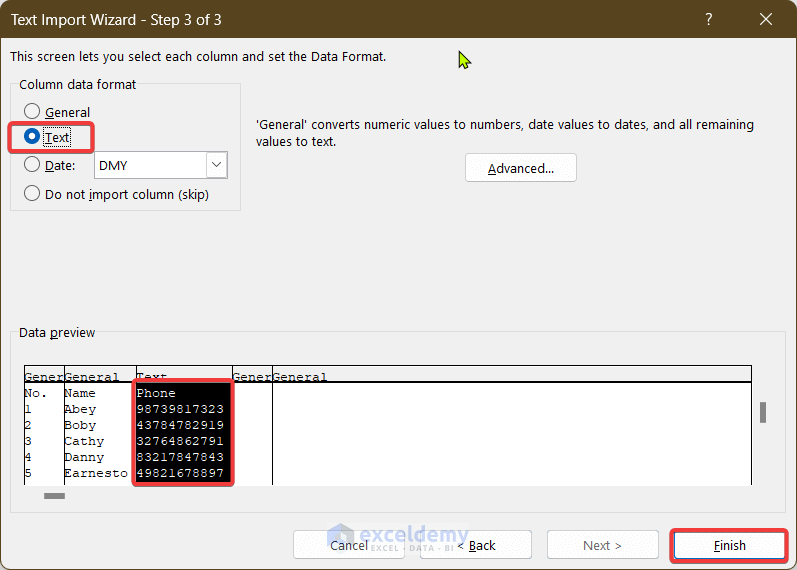
- You will get the numbers in full form.
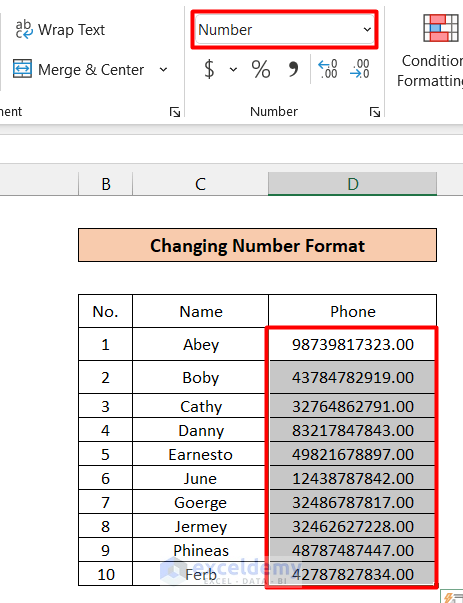
Fix 4.2 – Changing the Formatting of Numbers in Excel
- Change the number format to Number from General.
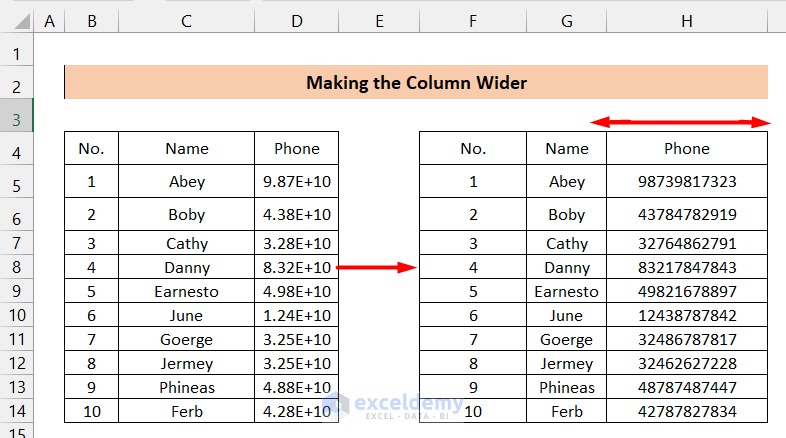
Fix 4.3 – Making the Column Wider
- Widen the column size. This might display the numbers in their full form.
Read More: Formatting CSV File in Excel
Problem 5 – CSV Files Not Saving in Excel
Fix 5.1 – Choosing the CSV UTF-8 Format to Save a CSV File in Excel
Steps:
- Open the CSV file in Excel and execute desired changes.
- Go to File tab and select Save As.
- Choose the location where the file will be stored.
- From the drop-down menu, choose CSV UTF-8.
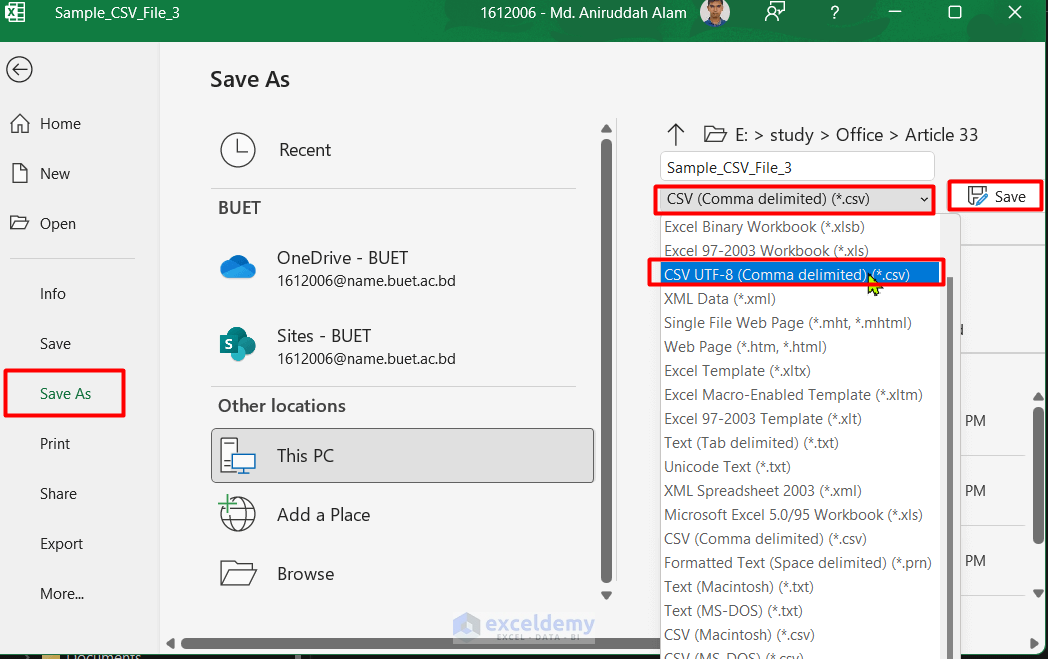
- Name your file and click on the Save option.
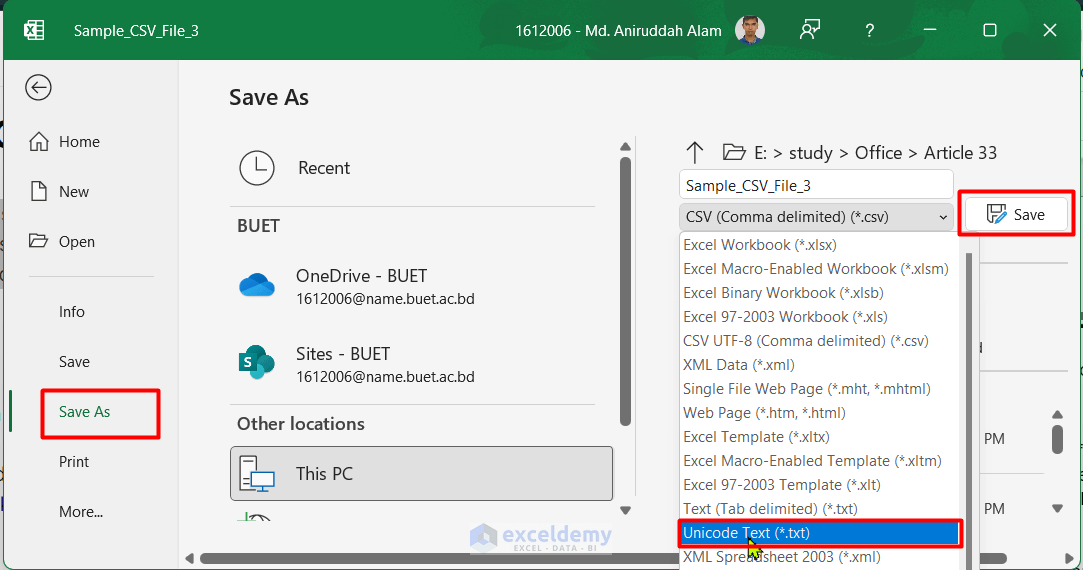
Fix 5.2 – Saving Changes by Saving as Unicode File
Steps:
- Go to save the file.
- From the dropdown menu, select Unicode Text and then click on Save.
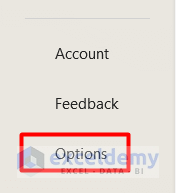
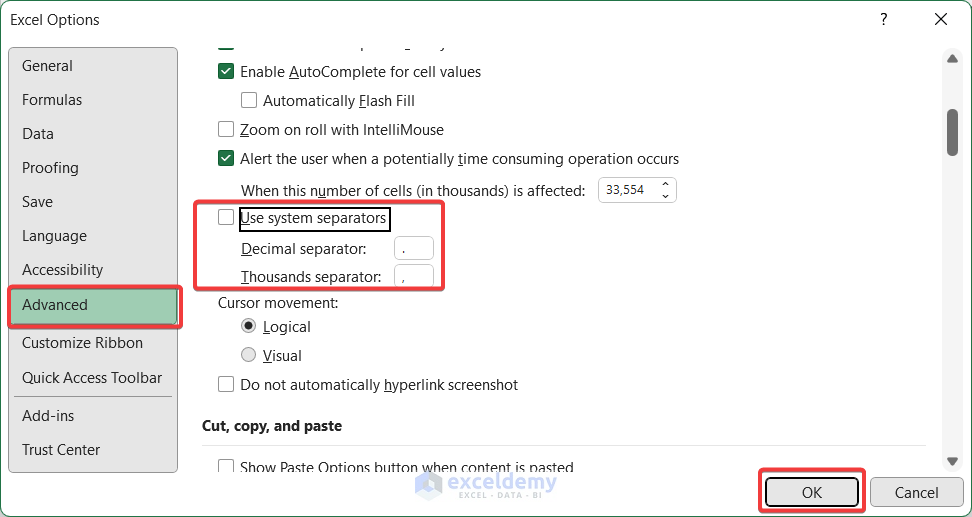
Fix 5.3 – Changing the Excel Settings.
Steps:
- Select File and go to Options.
- Select the Advanced option.
- Unmark the Use System Separators option.
- Put the Decimal Separator to Dot (.) and Thousands Separator to Comma (,).
- Click OK.
- Save your file in CSV format and see if the problem is solved.
Fix 5.4 – Updating Microsoft Excel
Steps:
- Go to File, select Account, and choose Update Options.
- From the drop-down menu, click on Update Now/Enable Updates.
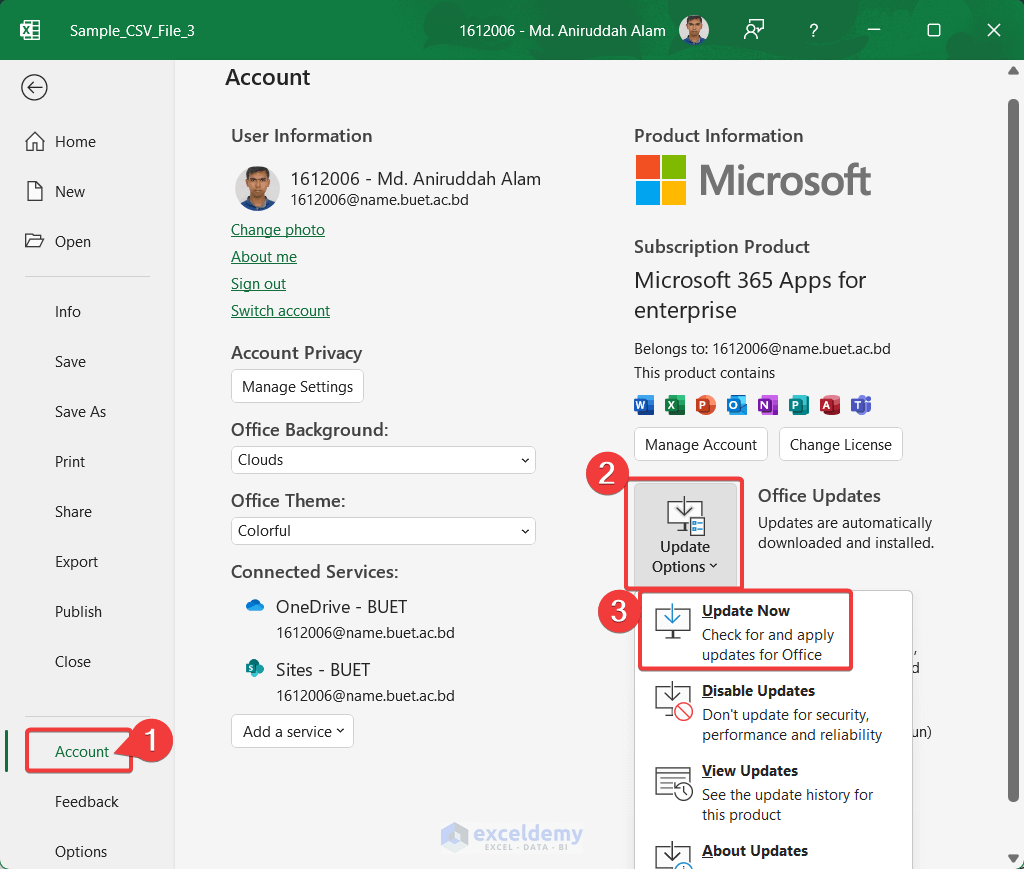
- Relaunch Excel and see if the problem is solved.
Fix 5.5 – Reinstalling Microsoft Excel
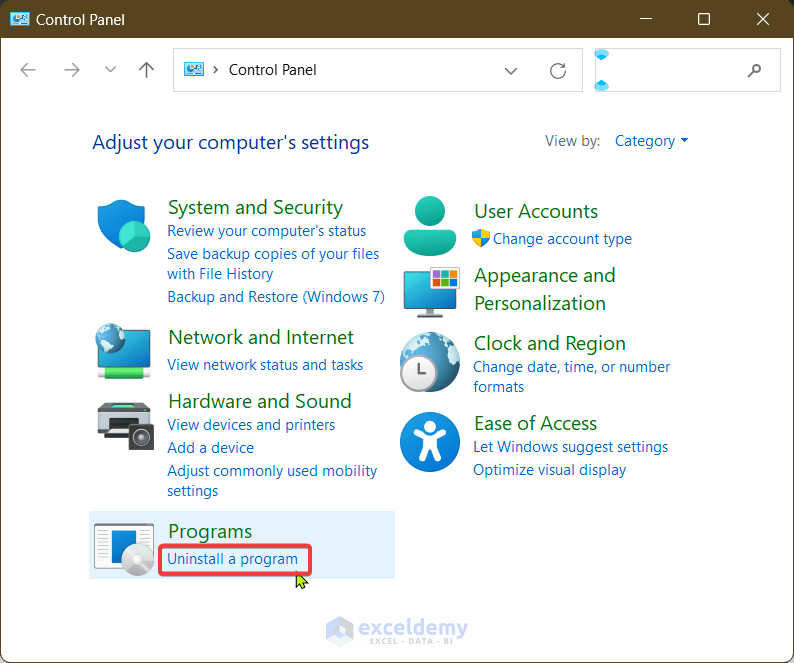
Steps:
- Go to the Control Panel and click on Uninstall a Program under Programs.
- Search for Microsoft 365/Microsoft Excel, then right-click on it.
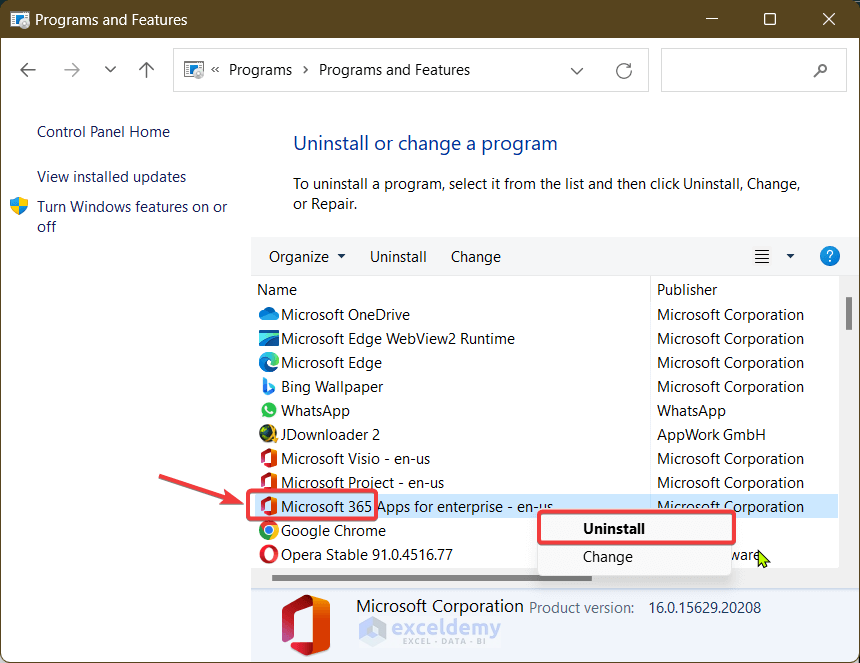
- Click on Uninstall and then follow the instruction on the prompt.
- Reinstall Excel.
Read More: How to Sort CSV File in Excel
Things to Remember
- Use a text editor like Notepad to view CSV files if Excel can’t open them properly.
Download the Practice Workbook
Download this practice workbook to exercise while you are reading this article.
Related Articles
- Merge CSV Files into Multiple Sheets in Excel
- How to Merge CSV Files in Excel
- How to Stop Excel from Auto Formatting Dates in CSV
<< Go Back to Import CSV to Excel | Importing Data in Excel | Learn Excel
Get FREE Advanced Excel Exercises with Solutions!
