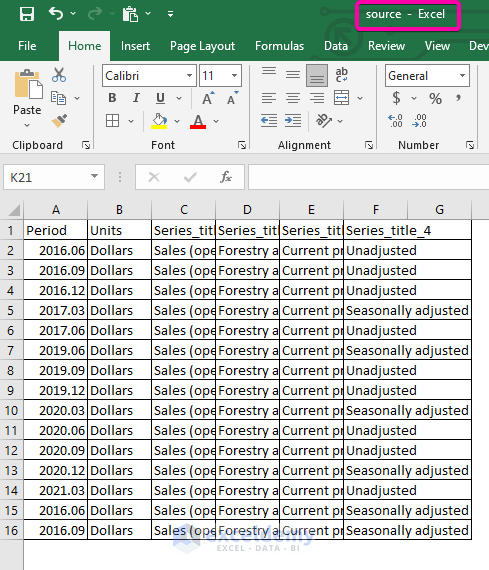
In the following image, there is a CSV file. To convert it into an Excel file (.xlsx)
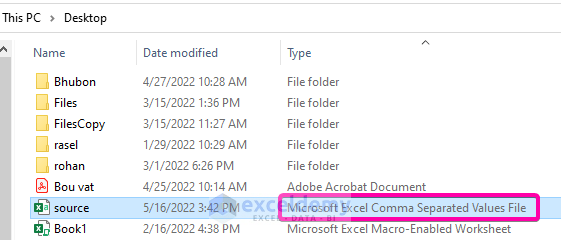
Step 1 – Save the CSV File
- Save your CSV file (source) in a specific folder.
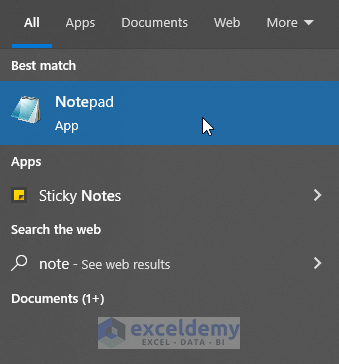
Step 2 – Open the Windows Notepad
- In the search menu, open the Notepad application.
Step 3 – Enter a VBS Code from the Command Line to Convert CSV to XLSX
- Paste the following (Visual Basic Script) VBS code in Notepad. (There are options to alter column width, freeze pane, apply Filter, add color to Headers, among other in VBS codes)
'======================================
' Convert CSV to xlsx Command Line
'======================================

srccsvfile = Wscript.Arguments(0)
tgtxlsfile = Wscript.Arguments(1)

'Create an Excel worksheet where you want to place the file

On Error Resume Next
'Set a variable and define
Set ObjectiveFileExcel = GetObject(,"Excel.Application")

'If condition for creating new instance if the find is not found
If Err.Number = 429 Then '> 0

'Set a command to create new instance
Set ObjectiveFileExcel = CreateObject("Excel.Application")
End If

ObjectiveFileExcel.Visible = false
ObjectiveFileExcel.displayalerts=false

'Give a command to import CSV into Excel
Set ImportWbk = ObjectiveFileExcel.Workbooks.open(srccsvfile)
Set ImportWbk1 = ImportWbk.Worksheets(1)

'Set a command to adjust column widths
Set ObjectiveRng = ImportWbk1.UsedRange
ObjectiveRng.EntireColumn.Autofit()
' ObjectiveFileExcel.Columns(intColumns).AutoFit()
'Next

'Give TRUE statement to set the column Headings Bold
ObjectiveFileExcel.Rows(1).Font.Bold = TRUE

'Give TRUE statement to freeze panes for the Header Row
With ObjectiveFileExcel.ActiveWindow
.SplitColumn = 0
.SplitRow = 1
End With
ObjectiveFileExcel.ActiveWindow.FreezePanes = True

'Apply AutoFilter to Heading Row
ObjectiveFileExcel.Rows(1).AutoFilter

'Make Header row Interior Cyanide
ObjectiveFileExcel.Rows(1).Interior.ColorIndex = 31


'Save the worksheet
ImportWbk1.SaveAs tgtxlsfile, 51

'Make free the Lock on worksheetsheet
ObjectiveFileExcel.Quit()
Set ImportWbk1 = Nothing
Set ImportWbk = Nothing
Set ObjectiveFileExcel = Nothing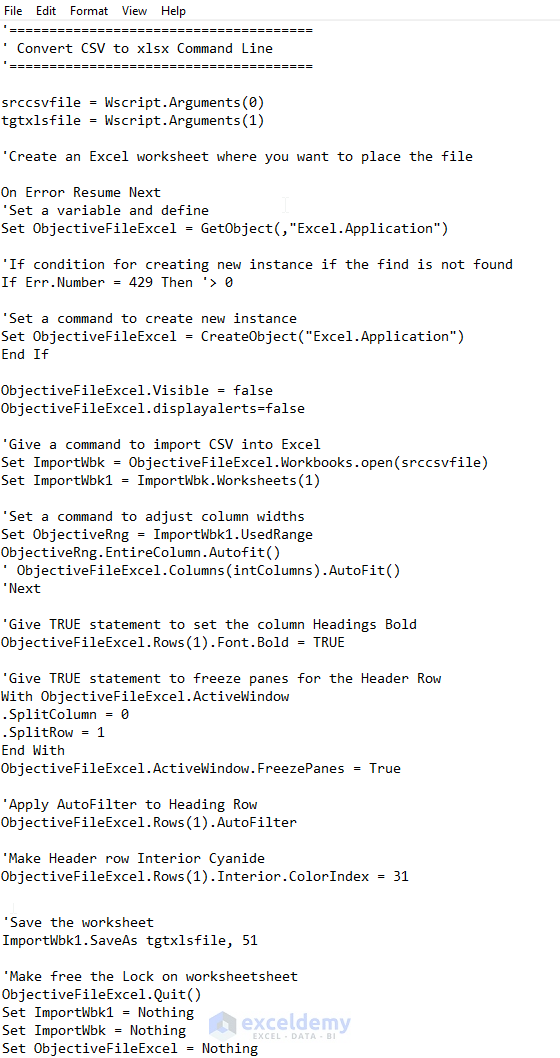
Step 4 – Save the VBS File
- Enter .vbs with the file name.
- Select All Files in Save as type.
- Click Save.

Step 5 – Add a Destination Excel File
- Place your destination Excel file (converted) in the same folder.

Step 6 – Open Windows Command Line Box to Convert CSV to XLSX
- Press Shift + right-click .
- Select Open PowerShell window here to open the Windows command line.
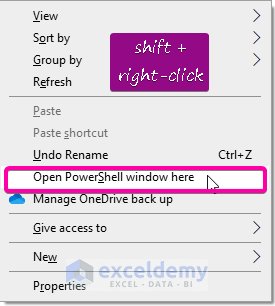
Notes: The windows command line is located in Open PowerShell window here option in Windows 10.
Step 7 – Enter a Command Line to Convert the CSV file to XLSX
- Enter the following command.
.\convert-csv-to-excel C:\Users\Admin\Desktop\source.csv C:\Users\Admin\Desktop\converted.xlsx- Press Enter to run the command.

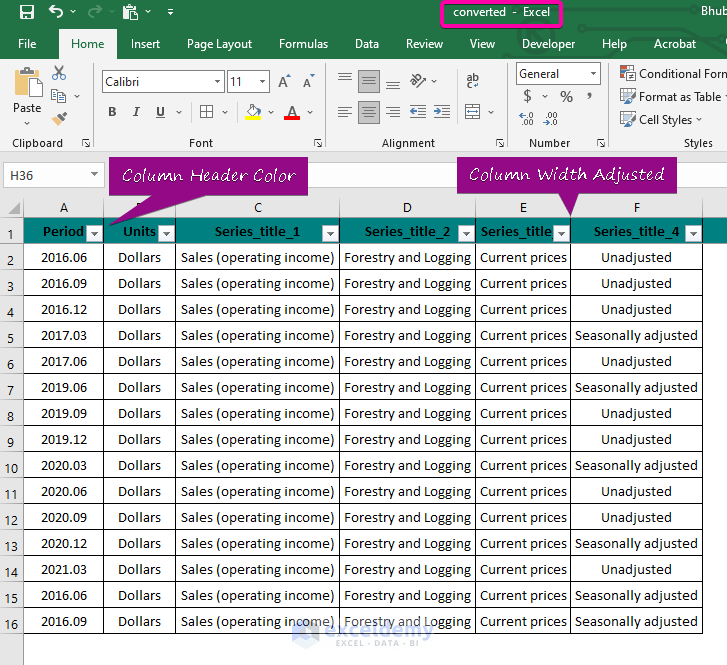
Step 8 – Final Result
- Open the Excel file (converted). You will see that the data in the CSV (source) file is converted to Excel (.xlsx).
Read More: How to Convert CSV to XLSX
Download Practice Workbook
Download the practice workbook.
Related Articles
- How to Convert CSV to Excel with Columns
- How to Import CSV into Existing Sheet in Excel
- How to Convert CSV to XLSX without Opening
- Difference Between CSV and Excel Files
- Convert CSV to Excel Automatically
- How to Open Notepad or Text File in Excel with Columns
- How to Compare 2 CSV Files in Excel
- How to Import Text File to Excel Automatically
- How to Import CSV Data into Excel
<< Go Back to How to Convert CSV to Excel | Import CSV to Excel | Importing Data in Excel | Learn Excel
Get FREE Advanced Excel Exercises with Solutions!

Hi,
I used your vbs script, thanks for your work!
Ho can I set delimiter of csv?
I use pipe | as csv delimiter and all values are wrongly in one column